Hard cookies are one of life’s tiny betrayals. One day, they are soft, chewy, buttery little circles of joy. The next day, they have the texture of decorative landscaping rocks. Before you declare them a lost cause or start using them as edible coasters, take heart: most dry, stale, or over-firm cookies can be improved with a few simple kitchen tricks.
This guide explains how to soften hard cookies using eight practical steps, from the classic bread-slice method to quick microwave fixes, warm-oven refreshes, smart storage, and cookie-saving prevention tips. Whether you are rescuing chocolate chip cookies, sugar cookies, oatmeal cookies, gingerbread, peanut butter cookies, or bakery leftovers that went crunchy overnight, the goal is the same: restore moisture without turning your cookies into sad, floppy pancakes.
The secret is controlled moisture. Cookies become hard when they lose water, are overbaked, are exposed to too much air, or are stored in the wrong container. Some cookies are meant to be crisp, of course, but soft cookies need protection. Give them the right environment, and they often bounce back beautifully. Give them too much moisture, and they become weirdly soggy. We are aiming for “fresh bakery case,” not “fell into a puddle.”
Why Do Cookies Get Hard?
Before fixing hard cookies, it helps to understand what happened. Cookies dry out because moisture moves out of the cookie and into the surrounding air. Exposure to air speeds up staleness, especially when cookies are stored in loose-lidded jars, open boxes, paper bags, or containers that look airtight but are secretly lying to you.
Another common culprit is overbaking. Cookies continue to firm up after they leave the oven, especially while sitting on a hot baking sheet. If they looked perfectly done in the oven, they may cool into something much firmer than intended. Brown sugar, butter, eggs, flour ratio, baking time, and cooling method all affect softness, but once the cookies are already baked, storage and rehydration matter most.
How to Soften Hard Cookies: 8 Steps
Step 1: Sort the Cookies by Type
Start by separating soft-style cookies from crisp-style cookies. Chocolate chip, oatmeal raisin, snickerdoodles, sugar cookies, molasses cookies, and peanut butter cookies usually respond well to softening methods. Biscotti, shortbread, lace cookies, wafer cookies, and very thin butter cookies are often designed to stay crisp, so adding moisture may ruin their texture.
Also separate strong flavors from mild ones. Peppermint cookies, peanut butter cookies, gingerbread, and spiced molasses cookies can share their personality with everything nearby. That sounds charming until your vanilla sugar cookies taste like they attended a gingerbread conference.
Step 2: Use the Bread Slice Method
The most reliable way to soften hard cookies is to place them in an airtight container with a slice of fresh white bread. The bread releases moisture into the closed environment, and the cookies absorb some of that moisture over several hours. It is simple, cheap, and oddly satisfying.
Place the hard cookies in a single layer or loose stack inside an airtight container. Add one slice of plain white sandwich bread, making sure it does not sit directly on frosted or decorated cookies. Seal the container and let it sit for 4 to 12 hours. Check the cookies. If they are softer but not quite there, replace the bread if it has dried out and wait a little longer.
Plain white bread works best because it has moisture without a strong flavor. Whole wheat, sourdough, cinnamon raisin, or garlic bread should stay far away unless you enjoy cookies with identity issues. The bread may become hard as the cookies soften, which is normal. The bread is taking one for the team.
Step 3: Try an Apple Slice for Extra Moisture
An apple slice can also soften cookies, but use it carefully. Apples release more moisture and aroma than bread, so they can work quickly, especially for sturdy cookies like gingerbread or molasses cookies. Place one small apple slice in the container with the cookies, but keep it on a piece of parchment or in a small open cup so it does not touch the cookies directly.
Check the cookies after 2 to 4 hours. Remove the apple once the cookies soften. Do not leave fruit in the container for days, because too much moisture can lead to sogginess or spoilage. The apple method is a quick rescue trick, not a long-term storage plan.
Step 4: Microwave Cookies with a Damp Paper Towel
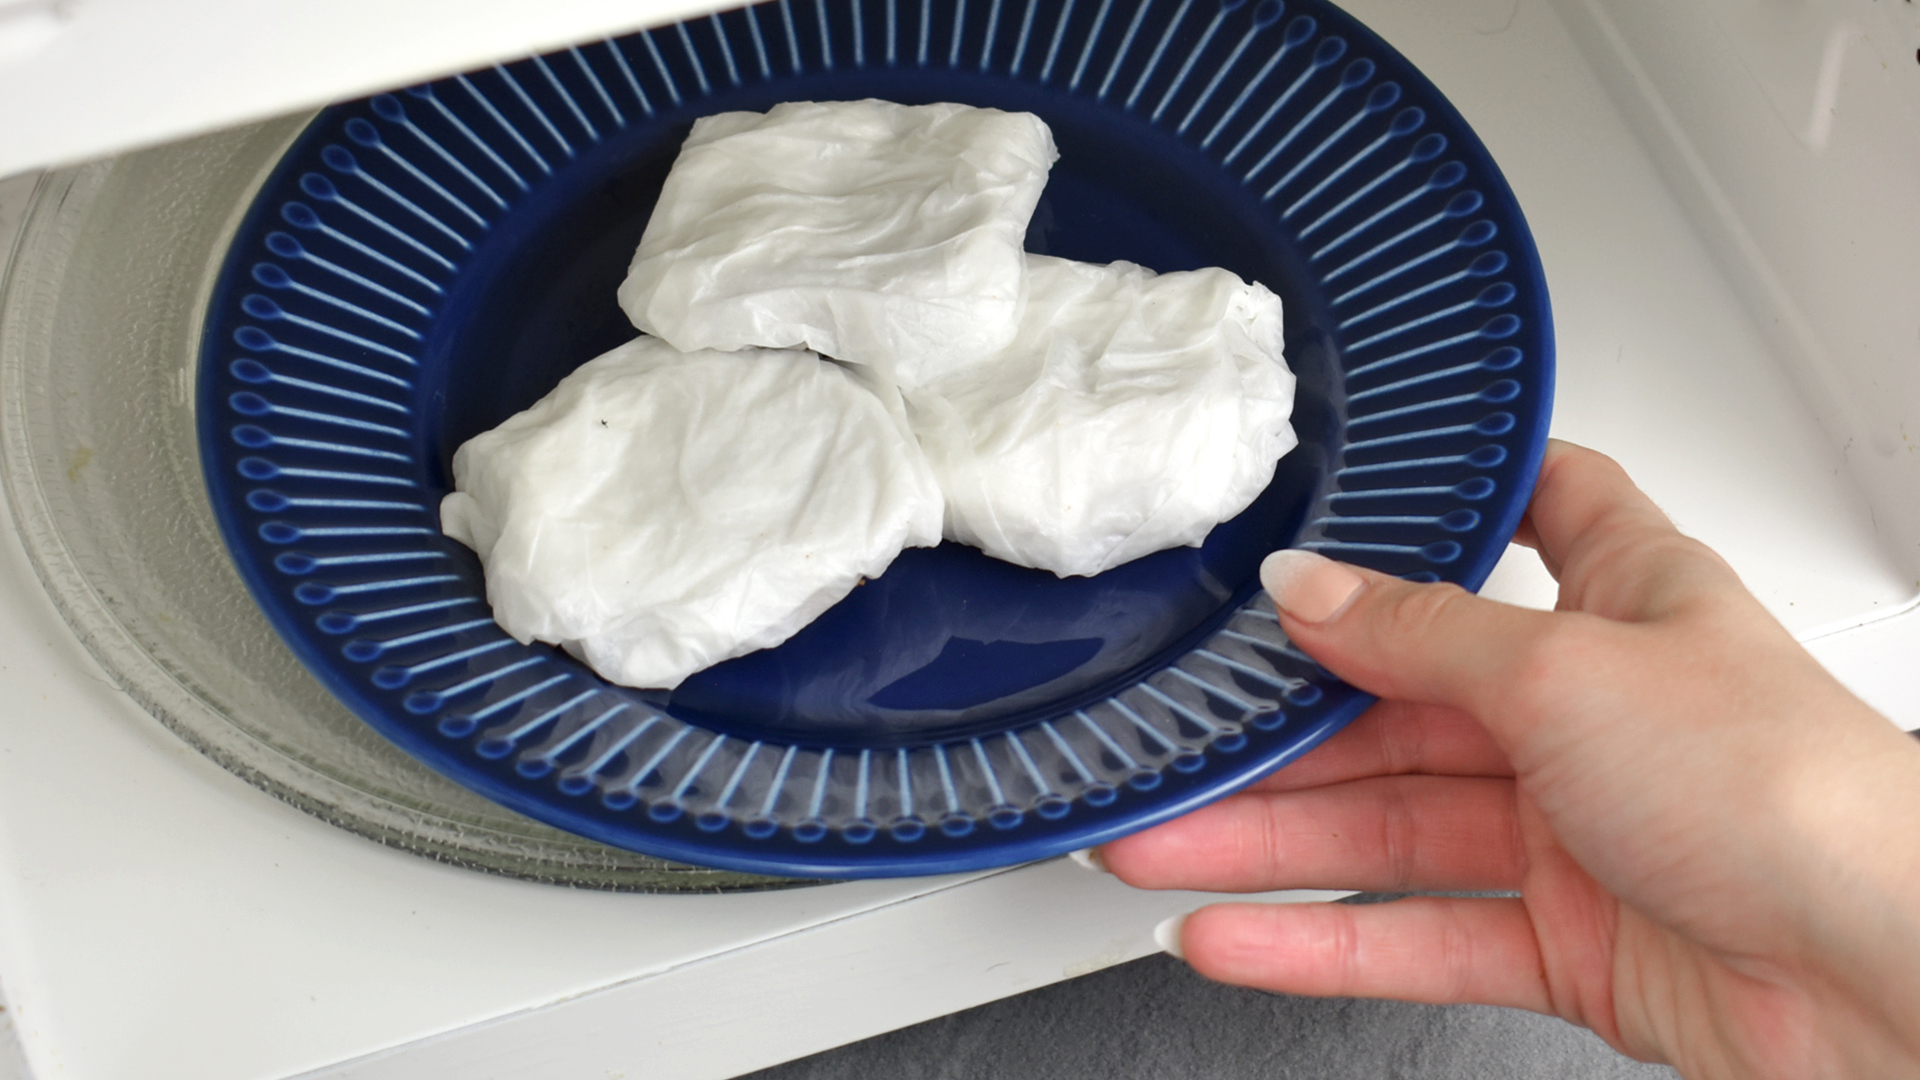
Need a soft cookie right now? The microwave can help. Place one or two cookies on a microwave-safe plate. Cover them with a lightly damp paper towel, then microwave in short bursts of 5 to 10 seconds. Check after each burst. Most cookies need only a few seconds to become warmer and softer.
The key word is “lightly” damp. A dripping paper towel can make cookies gummy. A dry paper towel does nothing except look involved. The microwave method is best for cookies you plan to eat immediately because the softness may fade as they cool. Think of it as a cookie spa treatment with a very short appointment window.
Step 5: Refresh Cookies in a Low Oven
For cookies that taste stale but are not extremely dry, a low oven can revive aroma and texture. Preheat the oven to about 300°F. Place cookies on a baking sheet and warm them for 3 to 5 minutes. Remove them before they brown further. Let them cool for a minute, then enjoy while warm.
This method works especially well for chocolate chip cookies because the chocolate softens and the butter aroma returns. However, it does not add much moisture by itself. If the cookies are truly rock-hard, use the bread method first, then warm them briefly before serving.
Step 6: Store Soft Cookies in an Airtight Container
Once cookies are soft again, protect them. Store soft cookies in a container with a tight-fitting lid or in a zip-top bag with excess air pressed out. Loose cookie jars look adorable on countertops, but many do not seal well. They are better for wrapped snacks, biscotti, or visual charm than for soft cookie survival.
Make sure cookies are completely cool before sealing them. Warm cookies release steam, and trapped steam can make them too soft, sticky, or mushy. Cool cookies first, then store them. If stacking cookies, place parchment or wax paper between layers to prevent sticking and broken edges.
Step 7: Avoid the Refrigerator for Most Cookies
Unless cookies contain a perishable filling or topping, the refrigerator is usually not the best place for them. Cold refrigerator air can dry baked goods and change their texture. Most plain cookies do better at room temperature in an airtight container for short-term storage.
That said, food safety still matters. Cookies with cream cheese frosting, custard filling, whipped cream, fresh fruit toppings, or other perishable ingredients should be refrigerated according to safe food-storage practices. If you are unsure whether a cookie needs refrigeration, consider the most perishable ingredient. A plain chocolate chip cookie is not the same storage situation as a cream-filled cookie sandwich.
Step 8: Freeze Cookies for Long-Term Freshness
If you want cookies to taste fresh beyond a few days, freeze them. Freezing slows staleness and preserves flavor better than letting cookies linger on the counter. Cool the cookies completely, arrange them in a single layer to freeze until firm, then transfer them to a freezer-safe bag or container. Place parchment between layers and press out extra air before sealing.
Label the container with the cookie name and date. To serve, thaw cookies at room temperature. For a fresh-baked effect, warm thawed cookies briefly in a low oven or microwave. Freezing works especially well for drop cookies, bar cookies, and sturdy unfrosted cookies. Delicate decorations and sticky toppings require more careful packing.
Best Methods for Different Cookie Types
Chocolate Chip Cookies
Use the bread slice method for several hours, then warm the cookies for a few seconds in the microwave. This brings back chewiness and softens the chocolate. If the cookies were overbaked, they may not become bakery-soft again, but they can still improve enough to save dessert.
Sugar Cookies
Plain sugar cookies soften well with bread. Decorated sugar cookies need gentler handling. If they have royal icing, use parchment between layers and avoid direct contact with bread or fruit. Too much moisture can blur designs or make icing tacky.
Oatmeal Cookies
Oatmeal cookies often respond beautifully to airtight storage with bread because oats absorb moisture. Add one bread slice overnight, then check the texture. Raisins may also plump slightly, which is a bonus unless you are in the “raisins do not belong in cookies” camp.
Gingerbread and Molasses Cookies
These cookies can handle the bread method or a brief apple-slice method. Spiced cookies often taste better after a day of storage because flavors deepen, but they still need airtight protection to stay chewy.
Peanut Butter Cookies
Peanut butter cookies can dry quickly because of their dense texture. Store them airtight and soften with bread for several hours. Warm them briefly before serving for the best aroma.
Common Mistakes When Softening Cookies
Using Too Much Moisture
More moisture is not always better. A soaking wet paper towel, too many apple slices, or a container full of steam can turn hard cookies into damp cookies. Damp is not soft. Damp is a cookie asking for privacy.
Mixing Crisp and Soft Cookies
Soft cookies need airtight storage. Crisp cookies need a drier environment. Store them together and nobody wins. The crisp cookies soften, the soft cookies may dry out, and the whole container becomes a texture negotiation.
Leaving Bread or Fruit Too Long
Bread should be replaced when it becomes hard. Fruit should be removed once cookies soften. Never ignore moisture sources for days. If anything smells odd, looks moldy, or feels suspiciously wet, discard it.
Trying to Rescue Burnt Cookies
Softening can fix dryness, but it cannot fix burnt flavor. If cookies are scorched, warming them may actually intensify the bitter taste. In that case, crumble the edible parts over ice cream and call it “rustic dessert topping.” Very fancy. Very strategic.
How to Keep Cookies Soft from the Start
The best rescue is prevention. Remove soft cookies from the oven when the centers look just set and the edges are lightly golden. Let them rest on the baking sheet for a few minutes, then transfer them to a cooling rack. This prevents overbaking while allowing the cookies to finish setting.
Measure flour carefully. Scooping flour directly from the bag can pack too much into the measuring cup, creating dry dough and hard cookies. Spoon flour into the cup and level it off, or use a kitchen scale for better accuracy. Brown sugar can help create a softer, chewier cookie because it brings moisture and acidity to the dough. Extra egg yolk, melted butter, or slightly underbaking can also encourage chewiness, depending on the recipe.
After baking, cool completely and store properly. For soft cookies, use airtight containers. For crisp cookies, use tins or containers with a looser seal. For long-term storage, freeze cookies or dough. A freezer is often the closest thing home bakers have to a pause button.
Can You Soften Store-Bought Cookies?
Yes, many store-bought cookies can be softened, especially soft-style cookies that dried out after opening. Place them in an airtight container with bread for several hours. For a quick single serving, microwave one cookie under a lightly damp paper towel for a few seconds.
However, some packaged cookies are designed to be crisp and may not improve with softening. Sandwich cookies, wafers, and crunchy cookies can become unpleasantly chewy if exposed to moisture. If the cookie was born crisp, let it live its truth.
Can You Make Hard Cookies Useful Without Softening Them?
Absolutely. Hard cookies are excellent in cookie crusts, trifles, ice cream toppings, milkshakes, parfaits, and dessert bars. Crush them and mix with melted butter for a pie crust. Layer pieces with pudding and whipped cream. Sprinkle crumbs over yogurt, sundaes, or baked fruit. Dip them in coffee, cocoa, or milk if they are sturdy enough.
In other words, a hard cookie is not always a failure. Sometimes it is just an ingredient wearing a disguise.
Personal Experience: What Actually Works in a Real Kitchen
After years of baking, gifting, overbaking, forgetting, freezing, and occasionally hiding cookies from people who “just want one,” I have learned that cookie texture is less mysterious than it seems. The biggest difference is not usually a fancy tool or secret ingredient. It is timing, moisture, and storage.
The bread trick is the one I trust most. I have used it on chocolate chip cookies that went firm overnight, oatmeal cookies that became too crumbly, and molasses cookies that were baked a minute too long. The results are not instant, but they are dependable. By the next morning, the cookies usually feel softer and taste closer to fresh. The slice of bread becomes dry and stiff, which is strangely satisfying proof that the method worked. It looks like the bread bravely walked into battle so the cookies could live.
The microwave method is my emergency option. It is perfect when someone wants dessert immediately, which in my house means “within the next seven seconds.” A cookie under a barely damp paper towel for 8 seconds can taste warm and soft again, especially if it contains chocolate. But the microwave is not forgiving. Ten seconds can be lovely; thirty seconds can create a cookie with a molten center and edges that harden again as soon as they cool. Short bursts are everything.
I have also learned not to store every cookie together. Years ago, I packed soft chocolate chip cookies in the same tin as crisp shortbread. I thought I was being efficient. Instead, I created a cookie identity crisis. The shortbread lost its snap, the chocolate chip cookies did not stay as soft as expected, and everything tasted faintly like vanilla-peanut-butter-cinnamon confusion. Now I separate cookies by texture and flavor. Soft with soft. Crisp with crisp. Strong flavors in their own container. Peace was restored.
Freezing has been the biggest upgrade for holiday baking. Instead of baking five dozen cookies and watching them slowly decline on the counter, I freeze most of them once they cool. When guests come over, I thaw a few and warm them briefly. They taste much fresher than cookies that have been sitting out for a week. Freezing cookie dough balls is even better because fresh-baked cookies make people believe you have your life together. No one needs to know the dough was made last month while you were wearing pajama pants and questioning your measuring spoons.
My final experience-based rule is simple: decide whether the cookie is worth saving. A slightly hard cookie can be softened. A stale cookie can become crumbs for a crust. But a burnt, moldy, or strange-smelling cookie should not be given a redemption arc. Dessert should bring joy, not suspense. When cookies are still safe and simply dry, these eight steps can bring them back. When they are beyond help, crumble what you can, learn what happened, and bake again. Every baker has produced at least one batch of accidental doorstops. The important thing is not to let the cookies win.
Conclusion
Learning how to soften hard cookies is mostly about restoring moisture carefully and storing cookies correctly afterward. For the best all-purpose method, place hard cookies in an airtight container with a slice of fresh white bread and let time do the work. For a fast fix, use a lightly damp paper towel and short microwave bursts. For serving, a low oven can refresh flavor and aroma. To prevent the problem next time, avoid overbaking, cool cookies completely, store soft cookies airtight, separate cookie types, and freeze extras before they go stale.
Hard cookies may feel like a dessert disaster, but most are only a few smart steps away from being snack-worthy again. And if they refuse to soften? Crush them over ice cream. That is not failure. That is dessert management.