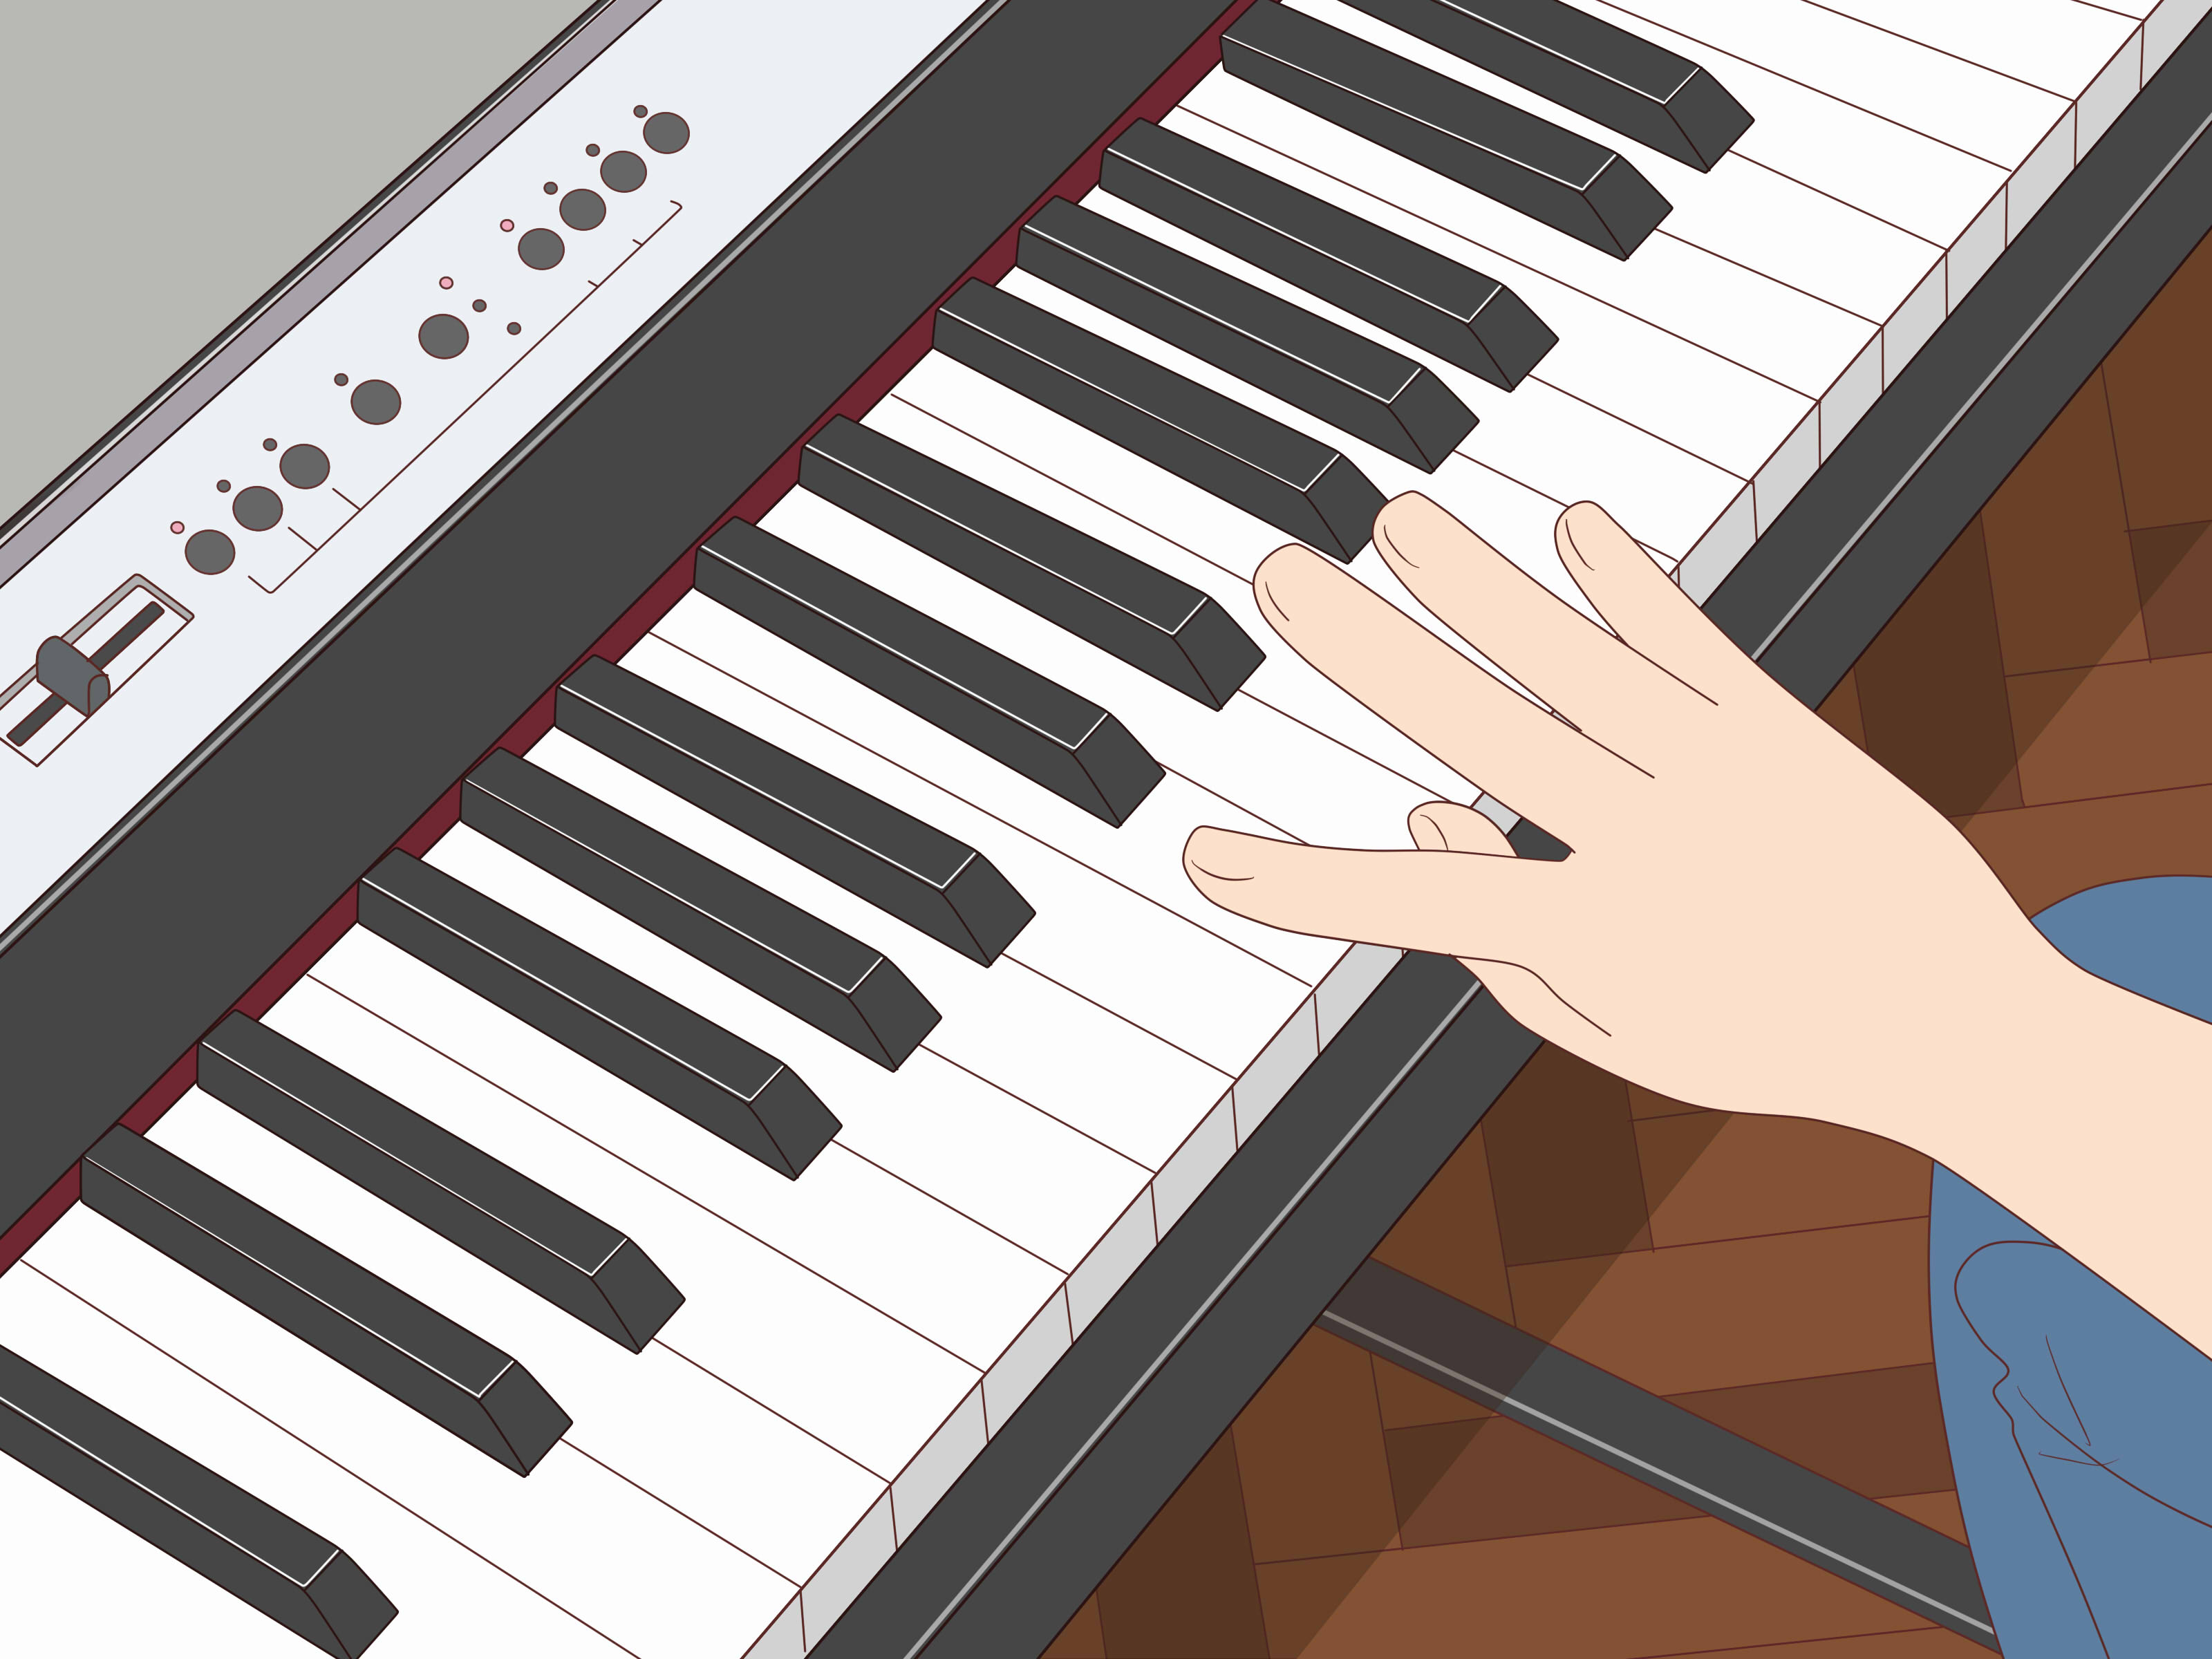
Piano finger placement is a lot like parking a car: you can do it with your eyes closed, but everyone nearby will feel emotionally unsafe.
The good news is that “proper fingers on keys” isn’t a mysterious talent reserved for people who were born wearing concert black. It’s a set of
simple physical habitsbench setup, relaxed hand shape, finger numbering, and smart fingering patternsthat make playing feel smoother, faster,
and way less “why do my hands hate me?”
This guide breaks down exactly where your fingers should land, what “curved fingers” really means (and what it doesn’t), how to handle the
thumb-under move without turning into a tense pretzel, and the beginner-friendly fingerings that keep your brain from buffering mid-scale.
Start With Your Seat (Because Fingers Are Attached to a Whole Human)
Before we talk about fingers, we need to talk about your setup. If your bench is too low or too high, your wrists and hands will spend the entire
practice session compensatinglike playing piano while doing a tiny, sad push-up.
Quick posture checklist
- Sit on the front half of the bench so your hips can move naturally and your upper body stays free.
- Feet flat on the floor (heel to toe), shoulders relaxed, back longnot stiff, just “tall.”
- Bench centered with the keyboard so you’re not twisting to reach notes.
- Bench height: aim for elbows almost level with the keyboard and wrists not dipping far below the keys.
- Distance: close enough that your elbows aren’t locked straight, but not so close that your knees are jammed into the keybed.
Why this matters for finger placement: when your body is balanced, your hands can stay relaxed and controlled. When your body is awkwardly positioned,
your hands tighten up and start doing weird stuffcollapsed knuckles, stiff wrists, “flying pinky,” and other greatest hits.
Know Your Finger Numbers (The Keyboard’s GPS Coordinates)
Piano uses a simple numbering system that shows which finger should play a note. Once you memorize it, reading and learning music gets faster
because you’re not constantly thinking, “Wait… which one is ring finger again?”
Finger numbers on both hands
- 1 = thumb
- 2 = index
- 3 = middle
- 4 = ring
- 5 = pinky
A helpful beginner trick is to practice away from the keys first: touch fingertips together (like you’re making a polite little finger tent) and tap
matching fingers when you call out the number. It’s basic, but it trains the “finger map” in your brain so your hands stop guessing.
The “Round Hand” Rule: Not a Claw, Not a Pancake
Teachers often say “curve your fingers,” and beginners immediately form either:
(1) a tense claw like they’re guarding treasure, or (2) a flat hand like they’re smoothing frosting.
Let’s fix that.
What a good hand shape actually is
- Rounded and relaxed: imagine your hand holding a small egg or bubblesupported, not squeezed.
- Knuckle bridge stays lifted: the big knuckles (where fingers meet the hand) shouldn’t collapse inward.
- Fingertips firm: you’re not stabbing the keys, but the tip joints shouldn’t buckle.
- Wrist neutral and flexible: not frozen high, not sagging lowable to move and return to neutral.
A playful way to self-check: pretend there’s a tiny toy or grape under your palm. Your hand should be rounded enough not to crush it,
but relaxed enough that you’re not “holding” it with tension. If your palm is flat on the keys, the grape is toast.
Where Your Fingers Should Touch the Keys
The goal is clean, controlled contact. For most playing, you’ll use the pads near the tips of your fingersbasically the part that would
tap your phone screen, if your phone were a giant instrument that demands emotional commitment.
Placement rules that make everything easier
- Use fingertip pads, not flat finger segments. Flat fingers reduce control and can encourage collapsed joints.
- Land and release with minimum drama. Keys are pressed with controlled weight, not a punch.
- Stay “home base” on the key tops. Don’t creep too far toward the fallboard; don’t perch on the very edges either.
- Black keys: allow your hand to come slightly forward so longer fingers reach black keys comfortably.
Think of each finger as a small piston with a spring: it goes down, it comes up, and it doesn’t need to fly three inches into the air between notes.
Extra motion = extra tension = less speed and less accuracy.
Align the Finger, Hand, and Arm (Your Secret Support System)
Fingers shouldn’t do all the heavy lifting alone. Efficient piano technique uses coordinated support from the hand, forearm, and overall alignment.
When the bigger structures support the motion, fingers can stay nimble instead of overworking.
Try this “effort test”
- Rest your hand on the keys with your normal curved shape.
- Press a key slowly and softly with finger 3 (middle finger).
- Ask: Do you feel strain in the fingertip joint, or does it feel supported by the hand and arm?
If it feels like the fingertip joint is collapsing or taking all the load, rebuild your “bridge” (the knuckle line) and keep your wrist neutral.
Your fingers should feel active, but not like they’re doing a deadlift.
Thumb Placement: The One Finger That Refuses to Follow the Rules
Your thumb is built differently from the other fingers, so its “proper placement” is different too. If you try to use it like a tiny index finger,
it’ll complainloudlythrough tension.
How to use the thumb correctly
- Play with the side pad of the thumb, not the tip nail area.
- Keep it relaxed and roundedno locking straight, no folding under the palm.
- Let the forearm help when the thumb needs to pass under in scales and arpeggios (more on that next).
A lot of beginner frustration comes from “thumb panic”the moment you reach finger 3 and your thumb suddenly forgets it has a job.
The fix is not to force it. The fix is to coordinate it.
Thumb-Under Technique (Without the Wrist-Twist Plot Twist)
In scales, your thumb often passes under the hand so you can continue smoothly. Many beginners solve this by squeezing the thumb under like it’s
trying to sneak past security. That can create tension and even irritation over time. A better approach is a small, coordinated motion
that uses forearm rotation and a flexible hand.
A cleaner thumb-under recipe
- Play slowly. Speed hides problems; slow practice reveals them (and yes, it’s annoying).
- Prepare early. As finger 3 plays, let the thumb move closer to its next keynot at the last second.
- Use a tiny forearm rotation. Think “turning a doorknob” amount, not “wringing out a towel.”
- Keep the wrist flexible. It can move slightly, but it returns to neutralnot locked high or dropped low.
- Land the thumb gently. It should arrive ready, not crash in late like a sitcom character.
If you feel your hand squeezing or your thumb getting trapped under the palm, slow down and try again with a smaller motion and a more relaxed wrist.
Smoothness is the goal. Speed is the side effect.
Beginner Fingerings That Keep You from Getting Stuck
Proper finger placement isn’t just about shapeit’s also about which finger goes where. Good fingering choices help your hand move
efficiently and set up future notes. Bad fingering makes you “run out of fingers” like you’re playing a video game with limited lives.
The C major scale (classic starter example)
Right hand (ascending): 1-2-3-1-2-3-4-5
Right hand (descending): 5-4-3-2-1-3-2-1
Left hand (ascending): 5-4-3-2-1-3-2-1
Left hand (descending): 1-2-3-1-2-3-4-5
Notice the pattern: thumbs (1) and sometimes finger 3 cross to reposition the hand smoothly. That’s the whole pointfingering is choreography,
not random finger chaos.
Five-finger patterns (the “pentachord gym”)
Many beginner programs build technique with five-finger patterns (like C–D–E–F–G) because they teach control without shifting hand position.
They’re also great for checking your basic finger placement: curved fingers, neutral wrist, and even tone across 1–5.
Chords and Finger Placement: Build a Stable “Hand Frame”
Chords reveal finger placement issues fastbecause you’re pressing multiple keys at once. If your knuckles collapse or your wrist droops,
chords will feel clumsy and inconsistent.
Simple triad fingerings
- Right hand root-position triad: 1-3-5 (example: C–E–G)
- Left hand root-position triad: 5-3-1 (example: C–E–G)
For inversions and different styles, fingerings change (and that’s normal). The bigger lesson is this:
keep a stable, rounded hand frame and let your arm and wrist stay flexible so the chord doesn’t feel like a forced stretch.
Quick chord comfort tip
If a chord includes black keys, allow your hand to move slightly forward. Many beginners stay too far back on the white keys, then have to reach
awkwardly for black keyslike trying to press elevator buttons with oven mitts.
Common Finger Placement Mistakes (and How to Fix Them Fast)
1) Collapsed knuckles (the “bridge falls down” problem)
If the big knuckles sink, fingers lose support and tone gets weak or uneven.
Fix: imagine holding an egg/bubble; practice making small “O” shapes with thumb and each finger to strengthen joint awareness.
2) Locked wrists (either high or droopy)
A stiff wrist limits speed and can create tension.
Fix: practice tiny wrist circles away from the keys, then return to a neutral, floating position.
3) “Flying fingers”
Fingers lifting way above the keys wastes motion and slows you down.
Fix: play slow five-finger patterns while keeping fingertips close to the surfacelike you’re typing quietly in a library.
4) Thumb tuck (thumb hiding under the palm)
This makes scales and chords feel cramped.
Fix: keep the thumb’s side pad available; practice thumb-under slowly with a small forearm rotation.
5) Tension migrating into shoulders and jaw
Yes, your jaw can ruin your piano technique. Wild, but true.
Fix: do a quick body scan: shoulders down, neck long, breathe, unclench. (Congratsyou just improved your tone.)
A 10-Minute Daily Practice Plan for Better Finger Placement
You don’t need a two-hour practice marathon. You need consistent, focused repslike brushing your teeth, but for your hands.
Here’s a simple routine:
Minute 1–2: Setup and shape
- Check bench height and distance.
- Hands rounded and relaxed. Wrists neutral.
- Tap finger numbers 1–5 lightly on a closed lid or your lap.
Minute 3–5: Five-finger pattern
- Choose C–D–E–F–G (or any five-note pattern).
- Play slowly, even tone, close to the keys.
- Listen for “weak fingers” (often 4 and 5) and keep the knuckle bridge supported.
Minute 6–8: Scale fragment with thumb-under
- Right hand: C–D–E–(thumb under)–F–G.
- Make it smooth and quiet first. Then gradually increase tempo.
Minute 9–10: Chord frame
- Play C–E–G with RH 1-3-5 and LH 5-3-1.
- Release tension after every chorddon’t “hold” your hand in a frozen grip.
Small Hands, Big Goals: Adjustments That Keep You Comfortable
Hand size changes what feels comfortable, especially in chords and wide intervals. “Proper finger placement” should never mean forcing a painful stretch.
Good technique is adaptable.
Helpful strategies
- Keep the hand compact when possible; return to a natural shape after stretches.
- Roll or break big chords slightly if the music allows (common in many styles).
- Use smart fingering choices that reduce leaps and awkward reaches.
- Stop if you feel pain and reset your posture, wrist, and tension level before continuing.
If discomfort shows up regularly, a teacher can spot the cause quickly (often bench height, wrist angle, or a squeezing thumb-under).
Your hands are here to make music, not file complaints.
of “Experience”: What It Feels Like When Finger Placement Finally Clicks
Beginners often describe the first few weeks of piano as a strange mix of excitement and betrayal. You sit down feeling inspired, play three notes,
and immediately discover that your fingers have their own opinions. Finger placement is usually the first big “aha” momentbecause once your hands
start cooperating, everything else (reading notes, playing rhythm, even confidence) suddenly gets easier.
One super common experience: the “pancake hand” phase. You put your fingers on the keys, they go flat, and the sound comes out unevenlike some notes
are whispering and others are yelling. The moment people try a gentle rounded shapeimagining an egg in the palmthe tone often improves instantly.
Not because magic lives inside eggs, but because a supported knuckle bridge gives each finger a clearer path down into the key. Suddenly, finger 4
doesn’t feel like a sleepy roommate who refuses to help.
Another classic: bench height revelations. A lot of learners don’t realize their bench is too low until they notice their wrists dipping and their
forearms getting tired fast. The “click” happens when they raise the bench slightly and their elbows come closer to keyboard level. The hands feel
lighter. The wrist stops sagging. And it becomes possible to play a scale without looking like you’re trying to start a lawnmower.
Then there’s thumb-under panic. Many people can play C–D–E confidently and then freeze at the crossing like a deer seeing headlights in slow motion.
The breakthrough often comes from two small changes: slowing way down and letting the forearm rotate just a bit so the thumb can travel smoothly.
When the thumb stops “squeezing under” and starts gliding into position early, the scale feels continuousmore like a line and less like a set of
disconnected stepping stones.
Learners also report a funny mental shift: at first, they think fingering is a rulebook meant to ruin their fun. Later, they realize good fingering
is more like planning a route on a map. With the right route, you stop getting stuck, you stop making random finger swaps mid-measure, and you start
focusing on music instead of survival. The hands begin to remember patternsfive-finger shapes, scale fragments, chord framesso you’re not reinventing
the wheel every time you see three notes in a row.
Probably the most satisfying “experience” is the moment playing feels quiet in your body. Not quiet in volumequiet in effort.
Shoulders relaxed. Wrists flexible. Fingers close to the keys. You play a short passage and realize you’re not fighting the instrument.
That’s when finger placement stops being a technical chore and starts feeling like what it really is: the physical foundation for musical freedom.
(Also, it’s the moment you realize your jaw has been clenched for absolutely no reason. Congratulationswelcome to the club.)
Conclusion: Proper Finger Placement Is a Habit, Not a Mystery
Proper piano finger placement comes down to four repeatable habits: (1) set up your bench and posture for freedom, (2) keep a relaxed, rounded hand
with a supported knuckle bridge, (3) use fingertip pads with a neutral, flexible wrist, and (4) choose smart fingeringsespecially for scales and
thumb-under crossings. Practice slowly, reset tension often, and let coordination (not force) be your strategy. Your hands will learn the pattern.
And once they do, the keyboard stops feeling like 88 tiny arguments.