Building a speaker box looks simple until you realize that a speaker enclosure is not just a wooden cube with a hole in it. It is part acoustics lab, part woodworking project, and part test of whether you can measure the same panel twice without suddenly doubting your own handwriting. The good news is that learning how to build a speaker box is completely doable for a careful beginner.
A well-built box helps your speaker sound tighter, cleaner, and more controlled. A sloppy box does the opposite. It leaks air, vibrates at the wrong moments, and turns promising bass into something that sounds like a laundry basket arguing with a leaf blower. This guide walks you through a beginner-friendly, rectangular speaker enclosure in 12 practical steps, with special focus on the simple sealed box design that gives first-time builders the best chance of success.
Why the Enclosure Matters So Much
The driver gets the glory, but the box does a huge amount of invisible work. Your enclosure affects bass response, efficiency, cabinet vibration, and overall sound character. That is why experienced builders spend so much time on internal volume, material thickness, bracing, sealing, and damping. In other words, your speaker box is not packaging. It is part of the instrument.
For most first builds, a sealed speaker box is the smartest route. It is easier to design, easier to cut, and more forgiving than a ported enclosure. A ported speaker box can play louder and dig deeper when tuned correctly, but it demands more precision. For a beginner, “more precision” is usually code for “more chances to ruin a Saturday.”
Basic Tools and Materials
You do not need a professional cabinet shop, but you do need the right basics. A successful DIY speaker enclosure usually starts with MDF, wood glue, clamps, a drill, pilot bits, screws, a saw, sandpaper, speaker gasket tape, a terminal cup or binding posts, wire, and your chosen driver. A router or jigsaw helps with speaker cutouts. Eye protection and dust protection are also smart, especially when cutting MDF, which creates a fine dust that gets everywhere and acts like it pays rent.
How to Build a Speaker Box in 12 Steps
Step 1: Choose the speaker driver first
Do not start with random box dimensions and hope a speaker will somehow be emotionally compatible later. Start with the driver. Read the manufacturer’s recommendations for enclosure type and internal volume. Some drivers work best in sealed boxes, some in ported boxes, and some can do either depending on your goals.
If you are building for music quality and a simpler project, choose a sealed design. If you are chasing higher output and deeper bass, ported may be better, but only if you are ready to build to exact specs.
Step 2: Decide on your target sound
Before you cut a single panel, decide what success sounds like. Do you want tight, accurate bass for music? A sealed enclosure often fits that goal. Do you want more low-end output for movies or car audio? A ported design may be the right move. This step matters because the best speaker box design depends on how you plan to use it.
Think about placement too. A home speaker in a living room does not face the same space limits as a car trunk box. A compact enclosure may fit better, but shrinking the box too much can hurt performance. Sound quality and available space usually need a little negotiation.
Step 3: Pick the right material
For most builders, MDF speaker box construction is the standard choice. MDF is dense, stable, easy to machine, and widely used because it helps reduce unwanted cabinet resonance. In plain English, it is less likely to sing along with your woofer, which is exactly what you want. For many builds, 3/4-inch MDF is the safe, common choice.
Plywood can also work, especially high-quality birch plywood, but cheap plywood is more likely to have voids, flex, or inconsistent density. Solid wood looks pretty, but it moves with humidity and can create more headaches than a first-time builder needs. Save the hardwood heroics for your second or third project.
Step 4: Calculate the internal volume
This is the step where many DIY projects go from “carefully engineered” to “well, it looked right in the garage.” Your driver needs a certain internal air space, so calculate the enclosure around that target. Measure the external dimensions, then subtract the thickness of the material from all sides to get internal dimensions.
For example, a box with external dimensions of 14 by 12 by 12 inches built from 3/4-inch MDF will have internal dimensions of 12.5 by 10.5 by 10.5 inches. Multiply those internal dimensions together and divide by 1,728 to convert cubic inches to cubic feet. That gives you about 0.80 cubic feet. That math matters. Speakers are not impressed by guesswork.
Also remember that braces, ports, and the driver itself can take up space inside the box. When the manufacturer gives you a net internal volume target, you need to account for those parts so the final air space stays on target.
Step 5: Sketch the box and plan every panel
Once your volume is set, sketch the enclosure. Keep it simple: front baffle, back, two sides, top, bottom, and any internal braces. Mark thickness, cutout locations, and where the terminal cup will go. If you are building a rectangular sealed box, this is refreshingly straightforward. If you are planning angles and ports on your first attempt, that is a bold choice. Respectfully, maybe do not.
A cut list saves time and prevents waste. Label each panel before cutting so the project does not become a confusing pile of identical brown rectangles.
Step 6: Cut the panels accurately
Clean cuts help you get tight joints, and tight joints help you get an airtight enclosure. Use a table saw, circular saw with a guide, or another cutting setup that gives you straight, repeatable results. Accuracy here pays off later when you are clamping everything together and not trying to explain mysterious gaps with positive thinking.
After cutting, lightly sand rough edges. If you are working with MDF, keep in mind that the edges are more fragile and absorb finish differently than the faces. Treat them gently and plan to seal them well later.
Step 7: Cut the speaker hole and terminal opening
The front baffle needs a clean cutout for the speaker driver. A router with a circle jig gives the best result, but a jigsaw can work if you move carefully. The back panel usually gets a hole for the terminal cup, binding posts, or another connector. Make these cuts before final assembly whenever possible, because drilling and routing a loose panel is easier than wrestling a half-built box on a workbench.
Mark carefully, drill pilot holes where needed, and dry-fit the hardware before moving on. The goal is boring precision. In speaker building, boring precision sounds amazing later.
Step 8: Dry-fit the whole enclosure
Before glue touches wood, assemble everything without adhesive. This dry fit confirms that your panels sit flush, your braces fit, and your cutouts line up. It is much better to discover a mistake now than after you have applied glue like an enthusiastic kindergarten art teacher.
Check squareness, inspect edges, and verify that your baffle sits flat. This is also the time to confirm that screws, clamps, and braces will not interfere with the speaker opening, wiring path, or terminal location.
Step 9: Glue, clamp, and build the shell
Use a good wood glue on all mating surfaces. Assemble the enclosure methodically, usually starting with the bottom and sides, then back, top, and front baffle. Clamp the box so pressure is even and the joints stay aligned. Wipe excess glue from the outside before it dries. Glue squeeze-out inside the box is less of a cosmetic issue and can actually help reinforce the joint.
Screws can help hold panels while the glue cures, but they should support the joint, not replace proper glue coverage. Always drill pilot holes in MDF before driving screws, especially near edges. That small step reduces splitting, wandering screws, and the kind of regret that starts with, “I thought I could skip it.”
Step 10: Add internal bracing and seal the joints
Large unsupported panels flex. Flexing panels create unwanted resonance. Unwanted resonance colors the sound. Translation: bracing matters. Add internal braces between wider panels to stiffen the cabinet. A basic window brace, cross brace, or triangular corner brace can make a big difference in how solid the enclosure feels and sounds.
After bracing, seal internal seams if your design calls for it. An airtight box is especially important for a sealed enclosure, and it is also critical in ported builds because leaks can throw off performance. The classic goal is simple: air should move through the speaker or the port, not through accidental cracks in your joinery.
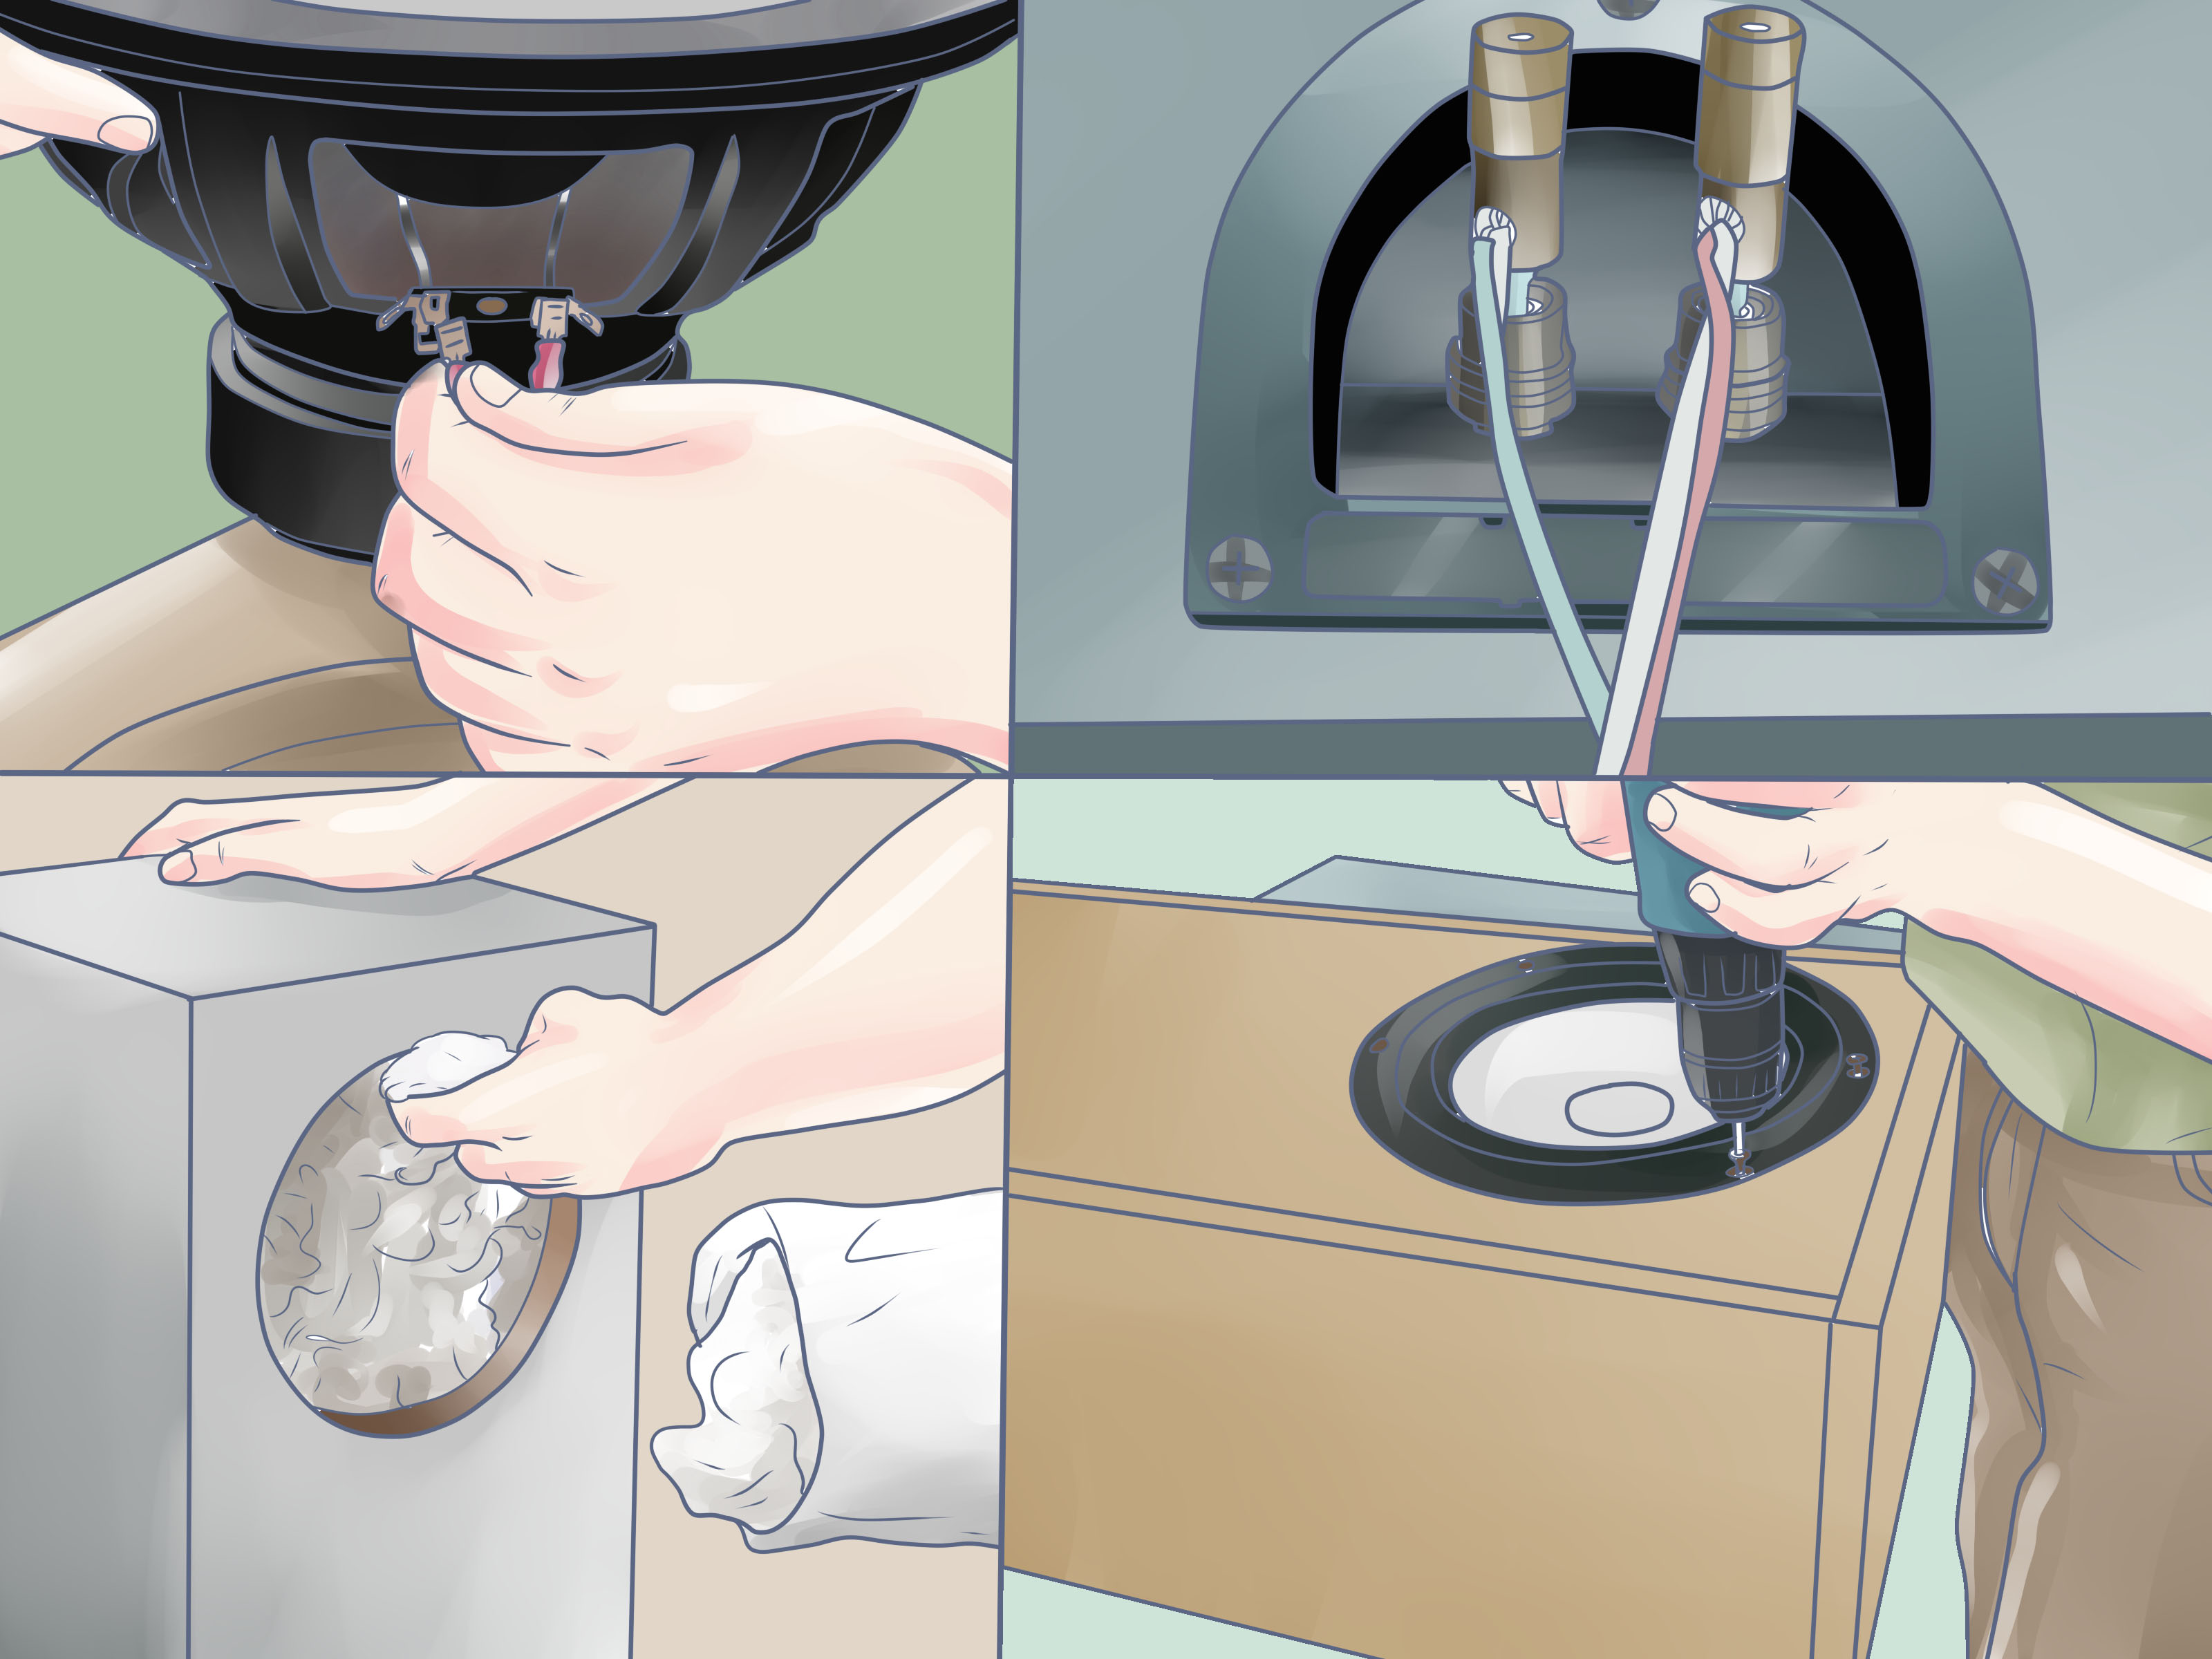
Step 11: Install wiring, terminal cup, and damping material
Run your internal speaker wire neatly from the terminal cup to the driver location. Keep connections secure and observe polarity. Loose wiring inside a cabinet is annoying, and reversed polarity is one of those mistakes that can make you question the laws of physics for an hour.
This is also when you install damping material. Depending on the design, builders often use polyfill or acoustic damping to reduce internal reflections. In a simple sealed box, a modest amount can help smooth the response. Just do not cram the enclosure so tightly that it interferes with the back of the driver or blocks a port in a vented design.
Step 12: Finish the cabinet and mount the driver
Once the glue is cured, sand the cabinet, fill screw holes if needed, and finish it however you like. Paint, veneer, laminate, carpet, or a textured coating can all work. MDF edges should be sealed carefully because they absorb moisture and finish more aggressively than flat surfaces.
Before mounting the driver, add gasket tape or another proper seal around the cutout if needed. Then wire the driver, place it carefully, and tighten screws evenly without overdoing it. Finally, test the enclosure at low volume first. Listen for rattles, air leaks, or buzzing. If it passes the quiet test, turn it up and enjoy the fact that your speaker box is now doing exactly what you built it to do.
Common Mistakes to Avoid
The most common speaker box mistakes are surprisingly ordinary: using the wrong internal volume, skipping bracing, forgetting to pre-drill MDF, building sloppy joints, installing too much or too little damping, and treating a ported box like it is just a sealed box with an extra hole. It is not. Port dimensions and tuning are part of the design, not decorative plumbing.
Another mistake is focusing too much on the outside finish before the cabinet is structurally right. A glossy speaker box that leaks air is still a bad speaker box. Pretty mistakes are still mistakes.
Real-World Build Experience: What Actually Happens in the Garage
Here is the part most guides skip: building a speaker box in real life is rarely a perfectly cinematic process where sawdust floats beautifully through a shaft of sunlight and every panel drops into place like a luxury kitchen commercial. Real-world speaker building is a little messier, a little louder, and somehow always involves at least one moment where you stare at a panel and wonder why you measured it three times and still cut it wrong.
One of the first things builders learn is that accuracy matters more than speed. The temptation is to rush through the cut list because cutting wood feels like progress. But the real progress is in planning. The people who end a weekend with a great-sounding speaker cabinet are usually the same people who spent extra time checking dimensions, labeling parts, and thinking through the assembly order before the glue bottle came out.
Another real-world lesson is that the box becomes much more convincing once bracing goes in. Before bracing, the enclosure can feel like a simple project box. After bracing, it starts to feel like a real acoustic structure. Knock on an unbraced panel and it may sound hollow and lively. Knock on a properly braced one and it feels more serious, more inert, more like it means business. That change is not just psychological. You hear it later when bass lines sound tighter and cabinet buzz is reduced.
Finishing is also where expectations meet reality. Raw MDF looks harmless until you try to paint it like regular wood and discover the edges absorb finish with the hunger of a black hole. Experienced builders learn to seal edges well, sand patiently, and stop pretending the first coat will look impressive. It usually does not. The second and third coats are where confidence returns.
Then comes the first test listen, which is either glorious or educational. Sometimes you power everything on and the box sounds focused, clean, and satisfying right away. Other times you hear a faint buzz and begin the detective phase. Is it a loose wire, a terminal cup, a driver screw, a brace, or that one clamp you forgot to move off the workbench and now suspect out of pure stress? This stage is normal. Even a good build may need a small tweak after first playback.
And yet, despite the sawdust, the math, the clamp gymnastics, and the mild emotional turbulence of routing a perfect circle into your front baffle, building your own speaker box is deeply satisfying. You end up with more than a box. You end up with a system that reflects your decisions, your effort, and your taste. It is one of those rare DIY projects where better planning genuinely becomes better sound. That is a pretty great trade.
Final Thoughts
Learning how to build a speaker box is really about learning to respect the details. Good materials, correct internal volume, clean cuts, proper bracing, airtight joints, and thoughtful damping all add up. The driver may be the star, but the enclosure is the stage, the room, and half the performance.
For a first build, keep it simple and build a sealed rectangular box well. Once you have nailed the basics, you can explore ported designs, advanced bracing, layered baffles, veneers, and more ambitious shapes. Start with solid fundamentals, and your first speaker box will not just look good in the room. It will sound like it belongs there.