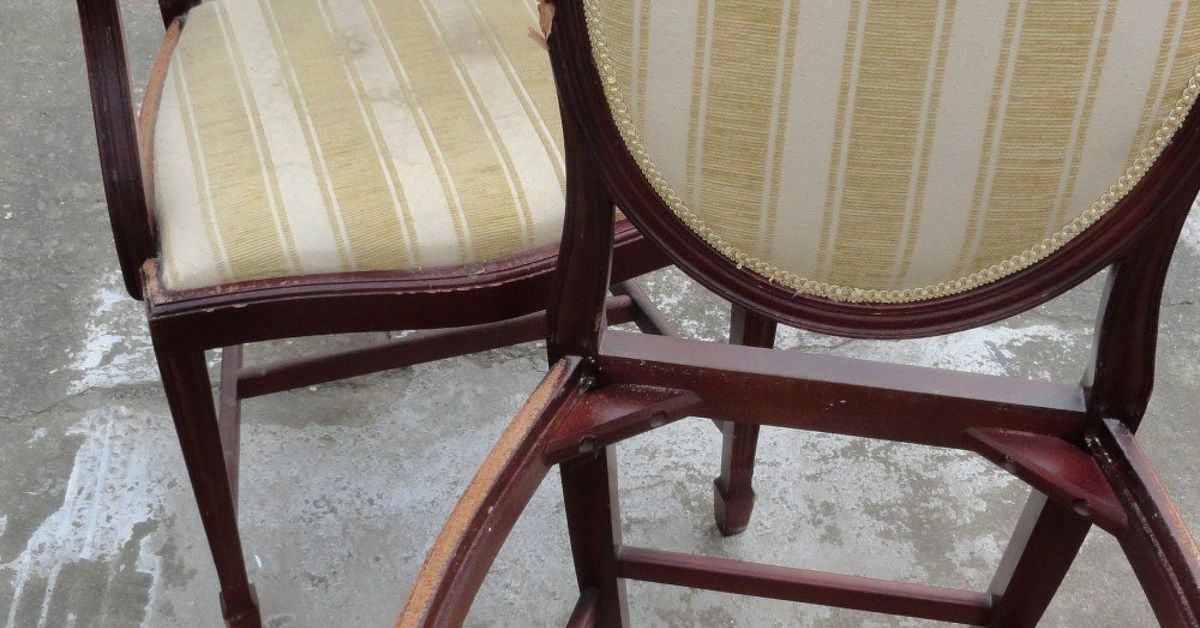
Old chairs have a way of looking at you from the corner of the garage like they still have unfinished business. Maybe one has a cracked seat. Maybe the other wobbles like it has just heard bad news. Separately, they may seem destined for the curb. Together, however, they can become something surprisingly elegant: a DIY French style seat made from two old chairs.
This project is part furniture rescue, part woodworking, part upholstery, and part “I cannot believe I almost threw that away.” By combining two sturdy chair backs or chair frames with a custom bench seat, you can create a charming French-inspired settee for an entryway, bedroom, covered porch, dining nook, or reading corner. The finished piece can look rustic, romantic, vintage, and expensiveeven if your starting materials came from a thrift store, a yard sale, or Aunt Linda’s basement of mysterious furniture.
In this guide, you will learn how to choose the right chairs, build a secure bench frame, add a comfortable upholstered seat, and finish the whole piece with soft French country character. The goal is not perfection. French style loves graceful curves, aged finishes, natural textures, and a little lived-in personality. In other words, if your project has a tiny dent or two, congratulations: you are halfway to charm.
What Is a French Style Seat?
A French style seat usually blends elegance with comfort. Think carved wood, curved backs, cabriole legs, linen-like upholstery, creamy paint, muted colors, cane details, soft distressing, and a finish that feels collected rather than freshly unboxed. It is refined, but not stiff. It is pretty, but not precious. It can sit beside a farmhouse table or under a crystal chandelier without needing to explain itself.
For this DIY version, two old chairs become the left and right ends of a small bench or settee. The chairs provide the legs, back detail, and vintage personality. A new wooden seat frame connects them and creates a longer sitting area. From there, you can add plywood, foam, batting, fabric, trim, paint, glaze, or wax to create a custom French country bench that fits your space.
Why Use Two Old Chairs?
Two-chair bench projects are popular because they make use of furniture that may no longer function well on its own. A single dining chair with a broken cane seat might not be useful, but its carved back and legs may still be beautiful. Pair it with a matching or similar chair, and suddenly you have the bones of a boutique-style accent bench.
This project is also budget-friendly. Buying a new French style bench can be pricey, especially if it includes carved wood, upholstery, or an antiqued finish. Making one allows you to control the size, fabric, paint color, and level of distressing. It is also more sustainable because you are giving existing furniture a second life instead of sending it to a landfill. Your wallet gets a break, and the planet gives a polite little nod of approval.
Tools and Materials You Will Need
Before you begin, gather everything you need so the project does not turn into a three-week scavenger hunt for one missing screw. The exact supplies may vary depending on your chairs, but most DIY French style seat projects require the following:
- Two sturdy old wooden chairs, preferably similar in height and style
- Measuring tape and pencil
- Screwdriver or drill
- Jigsaw, circular saw, or miter saw
- Clamps
- Wood glue
- Pocket-hole jig or angle brackets
- Wood screws
- 1×3 or 1×4 boards for the bench frame
- Plywood for the seat base
- Sandpaper in medium and fine grits
- Wood filler
- Primer and furniture paint
- Clear wax, dark wax, glaze, or polyurethane topcoat
- Upholstery foam, usually 1 to 3 inches thick
- Quilt batting or upholstery batting
- Fabric such as linen, cotton blend, ticking stripe, toile, or grain-sack style material
- Staple gun and staples
- Optional trim, nailhead accents, gimp braid, or decorative tacks
Step 1: Choose the Right Chairs
The best chairs for this project are strong, wooden, and structurally sound. Look for chairs with attractive backs, solid legs, and frames that do not crumble when you apply pressure. Dining chairs, cane-back chairs, ladder-back chairs, and French provincial chairs are excellent candidates.
Matching chairs make the process easier, but they do not have to be identical. Two chairs with similar seat heights, leg shapes, or back styles can still work beautifully. French country design often feels collected over time, so a slight mismatch can look intentional when unified with paint and fabric.
Check the Chair Height
Place both chairs on a flat surface and measure from the floor to the seat rail. If one chair is slightly shorter, you may be able to adjust with leveling feet, added pads, or small wood shims during assembly. If the height difference is dramatic, choose another chair. A bench that tilts like a carnival ride is not the cozy French look we are chasing.
Inspect the Joints
Wiggle the chair backs, legs, and side rails. If the joints are loose but the wood is solid, you can often repair them with wood glue and clamps. If the wood is split, rotten, or heavily damaged, save that chair for decorative use rather than a sitting bench.
Step 2: Remove the Old Seats and Unwanted Parts
Turn each chair upside down and remove the seat cushion, cane insert, or original wooden seat. Most dining chair seats are attached with screws from underneath. Save any useful screws, but do not rely on rusty hardware for the final bench. Old screws love to snap at exactly the wrong moment, usually while you are feeling confident.
Depending on your design, you may remove inner arms, side rails, or damaged pieces. Keep the outer structure that will serve as the left and right ends of the bench. The two chairs will usually face forward, sitting side by side, with a new seat frame spanning across both chair bases.
Step 3: Plan the Bench Width and Seat Depth
Set the chairs in their future bench position. Measure the total outside width from the far left side of one chair to the far right side of the other. Then measure the depth from the front rail to the back support area. These measurements determine the size of the new wooden frame and upholstered cushion.
A comfortable small bench often ranges from 36 to 48 inches wide, depending on the chair size. The seat depth may be around 16 to 20 inches. If your chairs are petite, keep the proportions modest. A giant seat on delicate little chair legs can look odd and may not be structurally safe.
Step 4: Build the Seat Frame
The seat frame is the backbone of the project. It connects the two chairs and supports the new bench seat. Use straight boards, such as 1×3 or 1×4 lumber, to create a rectangular frame that fits between or over the chair bases. Dry-fit everything before adding glue or screws.
For a strong frame, attach the front and back boards to the side boards with pocket-hole screws and wood glue. If you do not have a pocket-hole jig, sturdy metal corner brackets can also work. Add at least one or two center support boards across the frame, especially if the bench is wide. A seat should support people, not merely their hopes and decorative pillows.
Attach the Frame to the Chairs
Once the frame is square, clamp it in place on the chair bases. Predrill holes to prevent splitting, then secure the frame to the chair rails or legs with screws and wood glue. Make sure the screws are long enough to hold firmly but not so long that they poke through visible surfaces.
Sit the piece upright and test for wobble. If it rocks, check whether the chairs are aligned evenly. Add support blocks under the seat frame if needed. This is the moment to fix structural problems, not after the upholstery is attached and you have already declared yourself a furniture genius.
Step 5: Add a Plywood Seat Base
Cut a piece of plywood to fit the top of the frame. Plywood between 1/2 inch and 3/4 inch thick is commonly used for bench seats because it provides stable support. Sand the edges smooth so they do not cut into the fabric later.
Place the plywood on the frame and check the fit. You can leave a small overhang at the front if you want a fuller upholstered look, but keep it balanced. Screw the plywood to the wooden frame from the top or underneath, depending on your design. If you plan to upholster the seat separately and attach it later, mark the screw locations before covering the board with foam and fabric.
Step 6: Repair, Fill, and Sand the Wood
Fill old screw holes, dents, and gaps with paintable wood filler. Let it dry fully, then sand the repaired areas smooth. Lightly sand the entire piece to help primer and paint adhere. You do not always need to strip the wood to bare timber, especially if you are painting, but you do need to remove dirt, gloss, and flaky finish.
If your chairs are very old or have unknown paint, be cautious. Vintage painted furniture can contain lead. Avoid aggressive dry sanding until you know the finish is safe. Use a lead test kit or consult a professional if there is any concern. Work in a well-ventilated area, wear protective gear, and keep dust contained. Pretty furniture is wonderful; breathing mystery dust is less wonderful.
Step 7: Prime and Paint for a French Country Look
French style furniture often looks best in soft, muted shades. Consider warm white, antique cream, pale gray, dusty blue, sage green, greige, or a faded taupe. These colors pair beautifully with linen upholstery and allow carved details to stand out.
Apply one coat of primer if the wood is dark, glossy, stained, or uneven. After the primer dries, sand lightly with fine-grit sandpaper and wipe away dust with a tack cloth. Apply two thin coats of furniture paint, allowing each coat to dry according to the product directions. Thin coats usually look smoother and last longer than one thick coat that tries to do everything at once like an overachieving pancake.
How to Add Subtle Distressing
For a gently aged French finish, lightly sand raised edges, corners, carvings, and areas that would naturally wear over time. Focus on restraint. You want “charming antique market find,” not “rescued from a shipwreck.” A little dark wax or glaze can settle into carvings and add depth. Apply it sparingly, then wipe back the excess until the details look softly aged.
Step 8: Upholster the Seat Cushion
Cut upholstery foam to match the plywood seat. A serrated bread knife or electric carving knife can help create a clean cut. Lay the foam on top of the plywood, then place batting over the foam. The batting should extend several inches beyond the edges so it can wrap around the underside of the plywood.
Flip the board over carefully and staple the batting to the underside. Start at the center of one side, then move to the opposite side, pulling the batting smooth but not so tight that it distorts the foam. Repeat on the remaining sides. Trim excess batting.
Next, lay your fabric wrong-side up on a clean surface. Center the foam-covered board on top. If your fabric has a pattern, such as toile, ticking stripes, or checks, make sure it is straight before stapling. Begin stapling at the center of each side, pulling the fabric snug. Work outward toward the corners, smoothing wrinkles as you go. Fold the corners neatly, like wrapping a gift for someone who notices corners.
Best Fabrics for a French Style Bench
For a French country seat, choose fabrics with texture and softness. Linen, linen blends, cotton duck, toile, ticking stripe, faded floral prints, grain-sack style fabric, and neutral performance upholstery fabrics all work well. If the bench will be used daily, choose durable fabric that can handle real life, including pets, children, coffee, and the occasional dramatic flop after a long day.
Step 9: Attach the Upholstered Seat
Place the finished cushion on the bench frame and check the alignment. Secure it from underneath with screws through the frame into the plywood. Make sure the screws do not go through the top of the seat. If you want the cushion to be removable, use small brackets, hook-and-loop strips, or screws placed where they are easy to access.
For a more finished look, add trim around the lower edge of the cushion. Gimp braid, decorative upholstery trim, or nailhead accents can hide staples and give the seat a polished French settee feel. Keep trim subtle if your chair backs already have carved details.
Step 10: Style the Finished DIY French Seat
Once your bench is complete, let the finish cure before heavy use. Paint may feel dry quickly but can take longer to harden fully. After curing, place your DIY French style seat where it can shine.
In an entryway, pair it with a woven basket, a vintage mirror, and a small pillow. At the foot of a bed, use soft linen cushions and a folded throw. In a dining nook, keep the upholstery practical and add a washable slipcover-style cushion if needed. On a covered porch, use outdoor-rated fabric and a weather-resistant topcoat.
Common Mistakes to Avoid
Using Weak Chairs
Do not build a sitting bench from chairs that are cracked, rotted, or badly unstable. Decorative furniture can be delicate, but seating must be safe.
Skipping Center Supports
A long seat needs support in the middle. Add cross braces or center rails so the plywood does not sag over time.
Over-Distressing the Finish
French style often includes aged finishes, but too much distressing can look forced. Start lightly. You can always add more wear, but removing “oops, too much” is less fun.
Choosing Thin Fabric
Lightweight decorative fabric may look pretty at first but wear quickly. Upholstery fabric or sturdy cotton blends are better for a seat that will be used regularly.
Design Variations to Try
One of the best parts of this project is how easily it can be customized. For a romantic French cottage look, use antique white paint, floral toile, and soft distressing. For a farmhouse French style, choose grain-sack stripes, natural wood accents, and a matte finish. For a more elegant Parisian-inspired bench, use pale gray paint, velvet upholstery, and small nailhead trim.
You can also add a lower shelf between the chair legs for baskets or books. A shelf adds storage and makes the piece feel more substantial. If the chair backs are especially ornate, keep the seat fabric simple so the woodwork remains the star.
Budget-Friendly Tips
This project can be very affordable if you shop creatively. Look for chairs at thrift stores, estate sales, online marketplaces, garage sales, and curbside pickup days. Search for chairs with damaged seats because they are often cheaper, and you will remove the seats anyway.
Use leftover paint from another furniture project if the color fits your design. Check fabric remnants at craft and upholstery stores. A bench seat often needs less fabric than a full chair, so a discounted remnant may be enough. For foam, compare prices and density. High-density foam costs more but usually feels better and lasts longer.
Is This a Beginner-Friendly Project?
This DIY French style seat is suitable for confident beginners and intermediate DIYers. You should be comfortable measuring, cutting wood, drilling screws, sanding, painting, and using a staple gun. The hardest part is not the upholstery or paint; it is making sure the two chairs are aligned and the frame is strong.
If you are new to woodworking, keep the design simple. Use matching chairs, a basic rectangular frame, and a single upholstered cushion. Skip complicated curves or advanced joinery on your first attempt. Once you build one bench, you may suddenly see every abandoned chair as a future masterpiece. This is normal. Your garage may need counseling.
Extra Experience Notes: Lessons From Making a DIY French Style Seat From Two Old Chairs
The first lesson from this project is that the chairs decide more than you think. You may begin with a clear design in your head, but the shape, height, and condition of the chairs will guide the final result. If the chair backs have graceful curves, lean into elegance. If the chairs are simple and rustic, aim for a farmhouse French look. Fighting the original character of the chairs usually creates more work and less charm.
Another important experience is to dry-fit everything more than once. Set the chairs together, step back, look from the front, look from the side, and check whether the backs line up. A small difference may not matter, but uneven chair backs can become obvious after the seat is installed. Clamps are your best friends during this stage. They hold pieces in place while you test the proportions and prevent the project from turning into a balancing act with lumber.
When building the seat frame, strength matters more than speed. It is tempting to attach a board, add a cushion, and call it a day. Do not. A bench is not just decorative; people will sit on it, scoot across it, lean back, and occasionally drop onto it with the full emotional weight of Monday. Use wood glue with screws, add support rails, and check the bench on a level surface. A few extra minutes of reinforcement can add years to the life of the piece.
Painting also teaches patience. French country furniture often looks effortless, but the finish is built in layers. Cleaning, sanding, priming, painting, distressing, glazing, and sealing each play a role. If you rush the drying time, the finish may peel, smear, or remain tacky. Let each layer dry properly. Light sanding between coats can make the final surface feel smoother and more professional.
Upholstery is where many DIYers get nervous, but a bench cushion is one of the friendlier projects to try. The secret is working from the center outward and checking the top often. Staple one side, pull the opposite side snug, then repeat. Do not finish an entire side before checking the fabric pattern. Stripes and toile are beautiful, but they will absolutely announce crooked stapling to the whole room.
Finally, the best French style pieces have personality. Do not erase every sign of age. A small nick, softened edge, or uneven patch of glaze can make the bench feel authentic. The goal is not to create factory-perfect furniture. The goal is to create a seat that looks like it has a story, because now it does. Two old chairs became one beautiful bench, and that is the kind of furniture math we can all support.
Conclusion
Learning how to make a DIY French style seat made from two old chairs is a rewarding way to turn forgotten furniture into something useful, beautiful, and full of character. With two sturdy chairs, a strong wooden frame, a comfortable upholstered cushion, and a soft aged finish, you can create a custom bench that looks elegant without feeling fussy.
This project is practical enough for a hallway, bedroom, dining nook, or covered porch, yet decorative enough to become a conversation piece. It saves money, reduces waste, and gives you full creative control over color, fabric, size, and style. Best of all, it proves that old chairs are not always finished. Sometimes they are just waiting for a second actwith better upholstery.