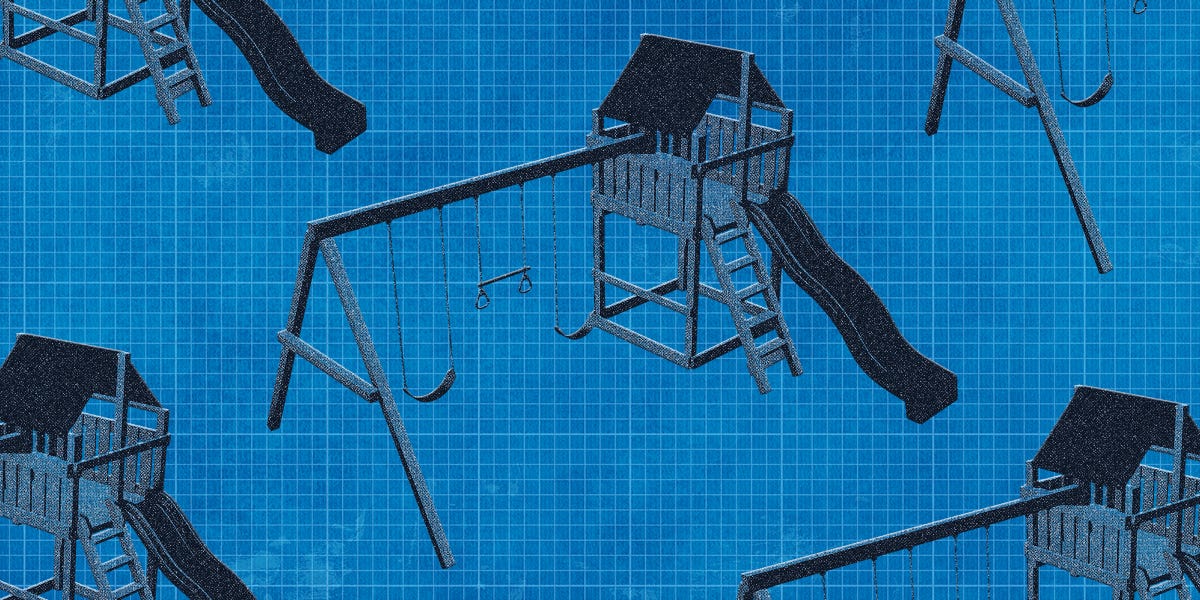
There are backyard projects that make a house prettier, and then there are backyard projects that make kids sprint outside like they just heard the ice cream truck. A DIY swing set belongs firmly in the second category. It turns an ordinary patch of grass into a mini adventure zone, a screen-time escape hatch, and, yes, a very convenient way to tire out small humans before bedtime. Parents call that “play.” Strategists call that “energy management.”
Building a backyard play set is not just about screwing boards together and hoping gravity behaves. A safe, durable wooden swing set needs smart planning, strong materials, proper anchoring, shock-absorbing surfacing, and careful maintenance. The good news? You do not need to be a professional contractor to build a simple A-frame swing set or a small playset with a slide, ladder, and platform. You do need patience, a level, the right hardware, and the humility to read instructions before pretending you already know everything.
This guide walks through how to build a backyard play set from planning to final inspection, with practical tips for layout, lumber, tools, safety spacing, anchoring, surfacing, and real-life lessons from the “measure twice, mutter once” school of DIY.
Why Build a DIY Swing Set Instead of Buying One?
A store-bought swing set can be a great choice, especially if you want a large play tower with pre-cut parts and manufacturer-tested hardware. But a DIY backyard swing set gives you more control over size, materials, layout, accessories, and budget. You can build a compact A-frame with two belt swings, add a trapeze bar, include a small climbing wall, or design a platform that fits your yard instead of trying to squeeze a giant playset between a fence and the barbecue grill like a suburban Tetris level.
DIY also helps you upgrade the parts that matter most. You can choose heavier lumber, corrosion-resistant fasteners, soft swing seats, quality hangers, and a deeper play surface. You can also design for your children’s ages. Toddlers need simpler, lower equipment and close supervision. Older kids may want monkey bars, rings, a climbing wall, or a taller slide. The best backyard play set is not the biggest one; it is the one that fits your yard, your children, and your ability to maintain it.
Step 1: Choose the Right Location
Before buying lumber, pick the playset location. This is where many projects quietly succeed or loudly become a problem. Look for flat, open ground with good drainage, visibility from the house, and plenty of clearance. Avoid placing a swing set near fences, walls, trees, sheds, patios, driveways, fire pits, utility boxes, overhead wires, low branches, or that one suspicious stump everyone keeps forgetting about.
For most backyard play equipment, plan for at least 6 feet of clear use zone around the structure. Swings need more room in front and behind because children do not swing in polite little half-circles. A common safety guideline is to extend the protective surface in front of and behind a swing by twice the height of the top support bar. So, if the swing beam is 8 feet high, you should plan for roughly 16 feet of clear space in front and 16 feet behind the swing path. Yes, that sounds like a lot. No, the fence will not move itself.
Quick Yard Planning Checklist
- Choose level ground or level the area before installation.
- Keep the playset visible for adult supervision.
- Leave wide clearance around swings, slides, ladders, and climbing features.
- Avoid hard surfaces such as concrete, asphalt, compacted dirt, or bare patio stone.
- Think about shade, but do not install directly under weak limbs or overhead hazards.
- Plan drainage so mulch or engineered wood fiber does not become a backyard swamp.
Step 2: Pick a Design That Matches Your Skill Level
The simplest and most beginner-friendly design is a wooden A-frame swing set. It usually includes four angled legs, a heavy top beam, swing hangers, braces, anchors, and two or three swing positions. It is sturdy, classic, and less complicated than a full play tower. A more advanced backyard play set may include a platform, slide, ladder, climbing wall, sandbox area, or roof.
If this is your first major outdoor build, start simple. A strong A-frame with two swings and one gym ring or trapeze bar can provide years of fun without turning your weekend into a lumber-themed survival show. If you want a platform and slide, keep the deck height reasonable. A 4-foot platform often works well for younger children, while a 5-foot platform gives older children more slide length and room to grow. Higher platforms require more serious railing, barrier, and fall-protection planning.
Step 3: Gather Materials and Tools
Your exact material list depends on the design, but a basic A-frame wooden swing set often uses a heavy top beam, four 4×4 legs, cross braces, swing hangers, bolts, washers, lock nuts, anchors, and swing seats. Many DIY builders use cedar, redwood, or pressure-treated lumber. Cedar has a warm look, resists rot naturally, and is pleasant to work with. Pressure-treated lumber is commonly used outdoors, but it requires compatible fasteners and careful handling when cutting or sanding.
Use hardware rated for outdoor play equipment. This is not the place for mystery screws from a coffee can in the garage. Swing hangers should be through-bolted with washers and lock nuts when the design calls for it. For pressure-treated lumber, use stainless steel or hot-dipped galvanized fasteners and connectors that are rated for treated wood. Standard indoor screws can corrode faster outdoors, and corroded hardware is not exactly the legacy anyone wants to leave in the backyard.
Common Tools
- Tape measure, carpenter’s square, pencil, and string line
- Level or laser level
- Circular saw or miter saw
- Drill and impact driver
- Socket set and wrenches
- Post-hole digger or shovel, depending on anchor type
- Clamps, sawhorses, and a sturdy ladder
- Safety glasses, gloves, hearing protection, and dust mask
Step 4: Prep the Ground
Clear the play area of rocks, roots, debris, and anything that could become a tripping hazard. Mark the perimeter with stakes and string. If the ground slopes, level the area before assembly. A swing set installed on uneven ground can rack, shift, or tip under active use. Children are basically tiny physics experiments with sneakers, so do not give the structure a bad starting point.
Remove grass inside the play zone if you plan to install loose-fill surfacing. Dig down enough to create space for your shock-absorbing material and edging. Add landscape fabric only if it drains well and does not interfere with anchors. Install a border using landscape timbers, composite edging, or rubber playground borders to keep mulch, wood chips, or engineered wood fiber contained.
Step 5: Cut and Pre-Drill the Lumber
Measure carefully before cutting. Label each board as you go: left leg, right leg, top brace, platform joist, ladder rail, and so on. Your future self will thank you, especially when everything looks like “just another board” after lunch.
Pre-drill holes for bolts and lag screws, especially near board ends. Pilot holes reduce splitting and help hardware seat properly. If using brackets, check the manufacturer’s instructions for exact lumber dimensions. Some brackets are designed for kiln-dried lumber, and wet or oversized boards may not fit without planing. Do not force wood into a bracket with rage and a sledgehammer. That is not carpentry; that is a cry for help.
Step 6: Build the A-Frames
For a basic A-frame swing set, assemble each side frame on the ground. Place two legs at the correct angle and secure them with an approved swing set bracket or a properly designed top connection. Add cross braces to prevent side-to-side movement. Use bolts, washers, and lock nuts where required, and tighten everything firmly without crushing the wood fibers.
If your design includes a platform, assemble the platform frame square and level. Use joists and deck boards with small gaps for drainage. Add railings or barriers when the deck height requires them, and avoid openings that could trap a child’s head or neck. As a practical rule, unsafe gaps are often those between 3.5 inches and 9 inches, so design openings either smaller or larger depending on the feature and safety purpose.
Step 7: Install the Top Beam and Swing Hangers
The top beam carries the swinging load, so treat it like the star of the show. Mark hanger locations carefully. For comfortable spacing, leave enough room between swings and between each swing and the support legs. Many safety recommendations call for at least 24 inches between belt swings. Avoid cramming three swings onto a beam that was meant for two. Children may be small, but their swinging paths are dramatic.
Drill straight holes through the beam where the swing hangers will go. Install hangers according to the manufacturer’s instructions, usually with bolts, washers, and locking nuts. Do not rely on undersized hooks, open S-hooks, or lag-only swing hardware unless the hardware manufacturer specifically approves that method for your exact application. Close S-hooks tightly so they form a secure loop and cannot snag clothing.
Step 8: Stand the Structure Upright
This is a two-adult job. Actually, it is a “two adults minimum and no kids underfoot” job. Carefully lift the assembled frame into position. Check that each leg sits where planned, the beam is level, and the structure is square. Temporarily brace the frame if needed while you adjust.
Once upright, tighten all hardware again. Wood can shift slightly during lifting. Check that brackets sit flush, braces are secure, and the frame does not wobble. If it does wobble, stop and correct the issue before hanging swings. A little movement in a swing seat is fun. A little movement in the main frame is a warning sign wearing a clown nose.
Step 9: Anchor the Swing Set
Anchoring is not optional. Swing sets experience forward, backward, and side loads, especially when kids pump hard or jump off at the peak of motion. Use manufacturer-approved ground anchors, auger anchors, concrete footings, or another engineered anchoring method suitable for your soil and design. Many residential playsets use anchors at each leg, attached with bolts or heavy-duty hardware.
If using screw-in ground anchors, drive them deep according to the product instructions and attach them securely to the legs. If using concrete footings, make sure the posts or anchors are correctly placed, protected from moisture, and allowed to cure before use. Keep anchor tops below the play surface or covered by protective surfacing so they do not become tripping hazards.
Step 10: Add Swings, Slide, Ladder, and Accessories
Choose soft swing seats made of rubber, plastic, or canvas rather than wood or metal. Soft seats reduce injury risk and are more comfortable when a child decides to swing for 47 consecutive minutes while narrating a superhero story. Hang swings at the correct height, commonly leaving at least 8 inches between the protective surface and the underside of the swing seat, though you should follow the manufacturer’s instructions.
If adding a slide, attach it to the platform using the provided hardware. Make sure the platform entry is guarded, the slide is stable, and the exit zone has enough protective surfacing. If adding a climbing wall, use holds designed for children and space them appropriately. For ladders, make rungs easy to grip and avoid awkward gaps. Never attach loose ropes, clotheslines, jump ropes, pet leashes, or loop-forming cords to the playset. They can create strangulation hazards.
Step 11: Install Protective Surfacing
The surface under a backyard swing set matters as much as the structure above it. Grass looks soft, but it wears down, compacts, and loses cushioning. Dirt, concrete, asphalt, and thin mats are not protective surfaces for elevated play equipment. Better options include engineered wood fiber, wood chips, shredded rubber mulch, sand, pea gravel, or safety-tested rubber tiles or poured-in-place surfacing.
For many home playsets, a maintained depth of 9 inches of loose-fill material is a common recommendation for equipment up to certain heights. Because loose fill settles over time, starting with about 12 inches can help maintain the needed depth after compaction. Rake the surface regularly, especially under swings and at slide exits, where kids naturally kick material away like tiny excavation crews.
Step 12: Do a Final Safety Inspection
Before the grand opening ceremony, inspect every inch of the playset. Tighten nuts and bolts. Cap exposed ends. Sand rough edges. Check for splinters, sharp corners, protruding hardware, open hooks, wobbly rails, uneven ladder rungs, and pinch points. Make sure the structure is anchored, level, and stable. Confirm that swings move freely without hitting supports, other swings, or accessories.
Then create a simple family rule list. Sit on swings; do not stand. One person per swing. Do not walk in front of moving swings. No bike helmets on the playset because straps can catch. No ropes or leashes tied to the structure. No launching competitions called “Who Can Fly the Farthest,” because emergency rooms have enough paperwork already.
Maintenance: Keep the Backyard Play Set Safe
A DIY swing set is not a “build it and forget it” project. Weather, sun, moisture, movement, and enthusiastic children all take a toll. Check nuts and bolts at least twice a month during heavy-use seasons. Inspect swing chains, ropes, seats, and hangers monthly. Look for rust, cracks, splinters, loose anchors, soft wood, insect damage, and worn surfacing.
Rake loose-fill material back into high-impact zones and top it off when depth drops. Re-stain or seal wood as needed with a child-safe exterior product. Replace damaged parts immediately. If a component looks questionable, remove it from service until fixed. “It will probably be fine” is a sentence best reserved for slightly overbaked cookies, not playground equipment.
Budget Tips for Building a DIY Backyard Swing Set
The final cost depends on lumber prices, hardware quality, surfacing choice, and accessories. A simple A-frame swing set usually costs less than a full play tower with a slide and roof. However, do not cut corners on structural hardware, anchors, swing hangers, or safety surfacing. Save money by simplifying the design, buying standard lumber sizes, building in phases, and using a hardware kit from a reputable manufacturer.
One smart approach is to build the strongest basic frame you can afford, then add features later. Start with two belt swings and a trapeze bar. Next season, add a climbing wall or slide if the structure was designed to accept it. This phased approach keeps the project manageable and gives kids something new to get excited about later.
Common DIY Swing Set Mistakes to Avoid
- Building too close to obstacles: Swings need generous clearance, not a dramatic near-miss with the fence.
- Using the wrong fasteners: Outdoor and pressure-treated lumber require corrosion-resistant hardware.
- Skipping anchors: A swing set must be secured against tipping and shifting.
- Relying on grass as cushioning: Grass is not enough for fall protection.
- Ignoring maintenance: Loose bolts, worn seats, and compacted mulch need regular attention.
- Overbuilding for age: Match the playset to the children using it now, not an imaginary ninja-training academy.
Real Backyard Experience: What You Learn While Building a DIY Swing Set
The first thing you learn while building a DIY swing set is that your yard is not as level as it looks. From the kitchen window, it may appear like a smooth green carpet. Once you stretch a string line across it, the truth emerges: your lawn has opinions. One corner dips, another rises, and suddenly you are negotiating with dirt like it is a tiny mountain range. Taking time to level the play area makes the whole build easier. The frame stands straighter, the anchors seat better, and the finished playset feels solid instead of “close enough if nobody looks too hard.”
The second lesson is that hardware matters more than expected. Before building, it is tempting to focus on big visual pieces: the beam, the slide, the swings, maybe a cute little roof. But the bolts, washers, hangers, brackets, and anchors are what make the structure trustworthy. When you hold a real swing hanger in one hand and a random garage hook in the other, the difference becomes obvious. Good hardware feels boring in the best possible way. It does not sparkle. It does not brag. It simply holds up while kids test Newton’s laws with alarming enthusiasm.
You also learn that children do not use playsets the way adults imagine. Adults picture gentle swinging, careful climbing, and peaceful backyard memories. Kids treat the same structure like a pirate ship, rocket launcher, restaurant drive-thru, castle wall, and emergency squirrel observation station. That is why safety spacing and simple rules matter. The playset should be designed not just for the intended use, but for the creative chaos that will absolutely happen five minutes after you say, “Be careful.”
Another experience worth sharing: surfacing always takes more material than you think. A few bags of mulch may look like plenty in the store, but once spread across a real use zone, they disappear like snacks at a birthday party. Buy more than your first estimate, install a border, and mark the proper depth on a hidden part of a post so you can quickly see when it needs topping off. The area under swings will thin out fastest because little feet drag, kick, skid, and dig there constantly.
Finally, the best part of building a backyard play set is not the finished structure itself. It is the first test swing, the first proud climb up the ladder, and the first time a child declares that the whole thing is now a spaceship and you are not allowed aboard without a password. A DIY swing set takes planning, sweat, sawdust, and probably one extra trip to the hardware store. But when it is built carefully, inspected regularly, and used with supervision, it becomes more than a weekend project. It becomes the backyard place where summer afternoons stretch longer, imaginations get louder, and childhood gets a little more room to run.
Conclusion
Building a DIY swing set is one of the most rewarding backyard upgrades you can tackle. The key is to balance fun with safety: choose a level location, design enough clearance, use strong lumber, install proper outdoor-rated hardware, anchor the structure, add shock-absorbing surfacing, and inspect it often. A simple wooden A-frame can be a perfect starter project, while a larger backyard play set with a slide, ladder, and climbing wall can grow with your family when planned carefully.
Do not rush the layout. Do not guess on hardware. Do not skip surfacing. And do not underestimate how much joy two swings and a sturdy beam can bring. Build it well, maintain it faithfully, and your backyard may become the most popular destination in the neighborhoodno ticket booth required.