Glossy paint is like that one guest who refuses to leave the party: shiny, stubborn, and determined to make everything else slide right off. If you have ever painted over a slick door, cabinet, trim board, or wall only to watch the new coat peel, chip, bead, or scratch like a lottery ticket, the problem probably was not the paint. It was the prep.
Learning how to degloss paint is one of the most useful DIY painting skills you can master. Deglossing simply means dulling a shiny painted surface so primer or fresh paint can grab on properly. You are not always trying to strip the old paint completely. Most of the time, you are creating a clean, slightly rough, bond-friendly surface. Think of it as giving your new paint tiny little handlebars.
This guide explains how to degloss paint safely and effectively using sanding, liquid deglosser, or a combination of both. You will also learn when to clean, when to prime, what mistakes to avoid, and how to handle tricky surfaces like cabinets, trim, doors, furniture, and older homes.
What Does It Mean to Degloss Paint?
To degloss paint means to reduce or remove the shiny surface layer from an existing painted finish. High-gloss and semi-gloss paints are popular for kitchens, bathrooms, doors, cabinets, baseboards, and trim because they are durable and easy to wipe clean. That toughness is great when you are removing fingerprints, spaghetti sauce, or mysterious hallway smudges. It is less great when you want new paint to stick.
Glossy finishes are smooth and nonporous. Fresh paint needs either a mechanically roughened surface, a chemically etched surface, or a strong bonding primer to adhere well. Without that prep, the new coating may sit on top rather than bonding into the surface. The result can be peeling, scratching, uneven sheen, or paint that comes off when bumped by a chair, fingernail, or highly motivated toddler.
When Should You Degloss Paint?
You should degloss paint whenever you are repainting a surface that has a slick, shiny, hard, or washable finish. Common examples include painted kitchen cabinets, bathroom vanities, interior doors, windowsills, baseboards, crown molding, stair railings, built-ins, painted furniture, metal surfaces, and glossy walls.
Deglossing is especially important when painting over oil-based paint with water-based paint. Oil-based finishes are usually harder and smoother, which means latex or acrylic paint may struggle to bond unless the surface is cleaned, dulled, and primed correctly.
Quick Gloss Test
Stand beside the surface and look at it from an angle. If it reflects light clearly, it probably needs deglossing. You can also run your hand across it. If it feels slick like a refrigerator door, do not skip prep. Paint is not magic. It is chemistry wearing a pretty color.
Safety First: Check for Lead Paint
Before sanding or scraping old paint, consider the age of the home. In the United States, homes built before 1978 may contain lead-based paint. Disturbing old lead paint can create hazardous dust, especially when sanding, scraping, or drilling. If the surface may contain lead, use a lead test kit or hire a certified lead professional. For major projects in older homes, a lead-safe certified contractor is the smartest option.
If you are unsure whether lead paint is present, do not aggressively sand the surface. Use lead-safe practices, avoid creating dust, keep children and pets away from the work area, and consider professional help. A beautiful paint job is not worth turning your living room into a science experiment nobody asked for.
Tools and Supplies You May Need
The supplies depend on the deglossing method, but most projects use a similar prep kit. Gather painter’s tape, drop cloths, gloves, eye protection, microfiber cloths, a mild cleaner or degreaser, a bucket of clean water, fine-grit sandpaper or sanding sponge, liquid deglosser if using the chemical method, lint-free rags, primer, paint, and good ventilation.
For cabinets and furniture, you may also need a screwdriver, labels for doors and drawers, wood filler, a putty knife, and a vacuum with a brush attachment. For walls and trim, keep caulk and patching compound nearby. Deglossing makes paint stick, but it will not magically hide dents, cracks, grease, or the suspicious gouge behind the sofa.
Method 1: How to Degloss Paint by Sanding
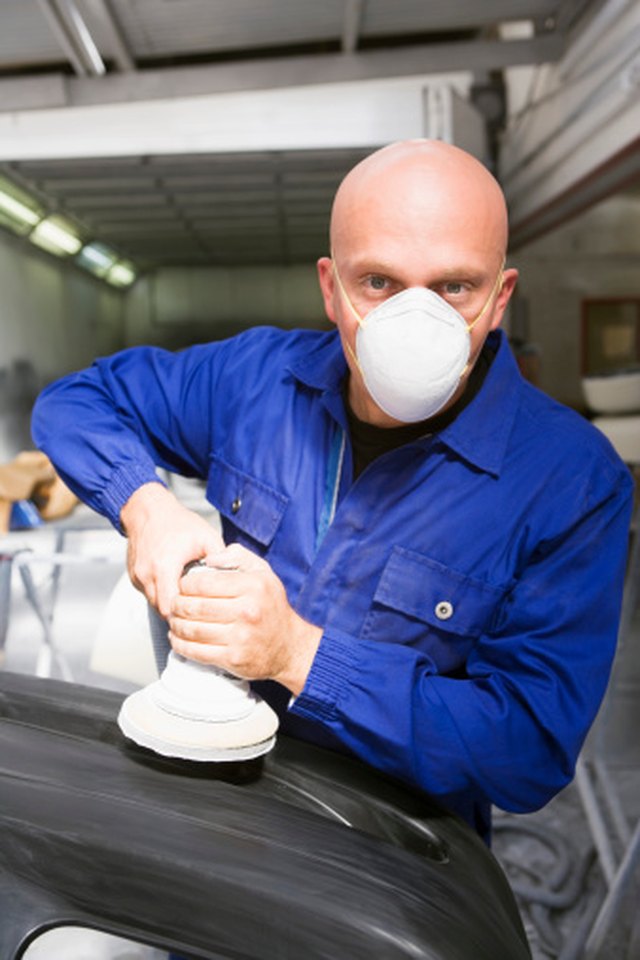
Sanding is the classic way to degloss paint. It physically scratches the glossy surface so primer or paint has something to grip. You do not need to remove all the old paint. The goal is to dull the shine evenly.
Step 1: Clean the Surface
Always clean before sanding. Dirt, grease, wax, soap residue, and cooking oils can clog sandpaper and get pushed deeper into the surface. Wash the area with mild detergent or a suitable degreaser, rinse with clean water, and let it dry completely. Kitchen cabinets often need extra cleaning because airborne grease loves cabinet doors the way cats love cardboard boxes.
Step 2: Sand Until the Shine Is Gone
Use fine-grit sandpaper for most previously painted surfaces. A sanding sponge works well for trim profiles, cabinet edges, and curved furniture details. Sand evenly with light to moderate pressure. You are not trying to carve a canoe; you are only creating a dull, slightly toothy surface.
For very hard oil-based or high-gloss finishes, a slightly stronger grit may be needed at first, followed by finer sanding to smooth scratches. Avoid deep sanding marks, especially on doors and furniture, because glossy topcoats can reveal them later like bad lighting reveals dust.
Step 3: Remove Dust Thoroughly
After sanding, vacuum the surface and wipe it with a damp microfiber cloth or tack cloth. Dust left behind can weaken adhesion and create a gritty texture. Let everything dry before priming or painting.
Method 2: How to Degloss Paint With Liquid Deglosser
Liquid deglosser, sometimes called liquid sandpaper, is a chemical surface prep product designed to dull glossy finishes and improve adhesion. It can be especially useful for detailed trim, carved furniture, cabinet doors with grooves, or projects where sanding dust would be annoying.
Liquid deglosser does not usually level rough paint, remove peeling paint, or repair damaged surfaces. It works best on sound, intact glossy paint. If the old coating is flaking, bubbling, or cracking, you still need scraping, sanding, patching, and possibly priming.
Step 1: Ventilate and Protect Yourself
Open windows, use fans when appropriate, and wear gloves and eye protection. Some deglossers are water-based and lower odor, while others have stronger fumes. Always follow the product label. If the label says to avoid skin contact or use in a well-ventilated area, believe it. Labels are boring, but they are rarely joking.
Step 2: Apply the Deglosser
Pour a small amount onto a lint-free cloth or applicator pad. Wipe it over the glossy paint in manageable sections. Work with the grain on wood surfaces and keep your strokes consistent. Do not flood the surface unless the product directions specifically allow it.
Step 3: Let It Work, Then Wipe as Directed
Different products have different timing. Some surfaces can be coated soon after treatment, while others have a longer open window. Follow the instructions on the exact product you are using. The key is to apply primer or paint within the recommended time frame so the surface is ready for bonding.
Step 4: Test for Dullness
Once treated, the surface should look less shiny and feel less slick. If it still looks like polished glass, you may need another pass, light scuff sanding, or a bonding primer. Deglosser is helpful, but it is not a wizard in a bottle.
Method 3: Combine Sanding and Deglosser for Tough Surfaces
For stubborn surfaces like glossy cabinets, old enamel trim, or furniture with years of polish and wax buildup, combining methods can give better results. Clean first, lightly sand to dull and level the finish, remove dust, then use a liquid deglosser or bonding primer as needed.
This approach is popular for kitchen cabinets because cabinets face constant touching, cooking residue, moisture, and cleaning. A weak prep job on cabinets shows quickly around handles, corners, and drawer fronts. If you want the finish to survive daily life, give the surface more attention than you think it needs.
Do You Need Primer After Deglossing?
Often, yes. Deglossing improves adhesion, but primer adds another layer of insurance. Bonding primer is especially useful when painting over glossy paint, oil-based paint, stained wood, laminate, metal, or surfaces that will receive heavy use.
Primer helps create a uniform base, blocks some stains, improves grip, and can reduce the number of topcoats needed. For cabinets, trim, doors, and furniture, primer is usually worth the extra step. For walls with a mild sheen and paint in good condition, cleaning and light sanding may be enough if you are repainting with a compatible paint. When in doubt, prime. Future you will be less cranky.
How to Degloss Painted Cabinets
Cabinets are one of the most common reasons people search for how to degloss paint. Start by removing doors, drawers, and hardware. Label everything so you do not create a puzzle called “Why Does This Door Not Fit Anywhere?” Clean all surfaces thoroughly with a degreaser, especially near the stove and handles.
Lightly sand or apply liquid deglosser to dull the finish. Pay attention to edges, corners, and recessed panels. Wipe clean, let dry, apply bonding primer, and finish with a durable cabinet paint or enamel. Use thin coats rather than one heavy coat. Heavy paint coats may look efficient, but they dry slowly, sag easily, and collect brush marks like souvenirs.
How to Degloss Trim and Doors
Trim and doors are often painted with semi-gloss or gloss paint because they take abuse. To degloss them, clean first, then scuff sand with a sanding sponge. A sponge conforms to profiles and edges better than flat sandpaper. Wipe away dust, caulk gaps if needed, prime bare or glossy areas, and paint with smooth, even strokes.
For paneled doors, work from recessed panels to rails and stiles. Keep an eye on drips in corners. Glossy trim can make a room look crisp, but poorly prepped trim can peel where hands, shoes, bags, and vacuum cleaners bump it.
How to Degloss Painted Walls
Glossy walls are common in bathrooms, kitchens, laundry rooms, and kids’ rooms. Clean the walls first to remove soap film, oils, and fingerprints. Lightly sand shiny areas with fine-grit sandpaper, then wipe away dust. If the wall has stains, patched spots, or a dramatic color change, apply primer before repainting.
Bathrooms deserve special attention because moisture can interfere with adhesion. Make sure the surface is dry before priming or painting. If mildew is present, clean it properly and fix the moisture issue before covering it. Paint is decorative, not a therapist for damp drywall.
Common Mistakes When Deglossing Paint
Skipping the Cleaning Step
Deglossing a dirty surface is like putting a sticker on a greasy pizza box. It may stick briefly, but nobody should trust it. Always remove grease, dust, wax, and grime before sanding or using a chemical deglosser.
Sanding Too Aggressively
The goal is dull, not destroyed. Over-sanding can expose raw material, create scratches, or damage detailed surfaces. Use controlled pressure and check your progress often.
Ignoring Product Instructions
Liquid deglossers vary. Some need wiping, some are no-rinse, and some have specific coating windows. Read the label before starting so you do not accidentally miss the best time to prime or paint.
Painting Over Peeling Paint
Deglosser will not glue down failing paint. Scrape loose areas, sand edges smooth, patch where needed, and prime before painting. If the old paint is failing, the new paint will inherit the drama.
Best Paint Deglossing Tips for a Smooth Finish
Work in good lighting so you can see shiny spots. Use a raking light or flashlight along the surface to reveal missed areas. Keep your sanding motion even. Change sandpaper when it becomes clogged. On cabinets and furniture, handle pieces with clean gloves after deglossing to avoid transferring oils from your hands.
After priming, lightly sand rough spots before applying the finish coat. Remove dust carefully. Apply paint in thin, even coats and allow proper drying time between coats. The best finish often comes from patience, not from loading the brush like you are frosting a birthday cake.
Deglossing vs. Stripping Paint: What Is the Difference?
Deglossing dulls the surface so new paint can bond. Stripping removes the old finish completely. You do not need to strip paint if the existing coating is sound, firmly attached, and compatible with your repainting plan. Deglossing is faster, cleaner, and less invasive for many DIY projects.
Stripping may be necessary when the old finish is badly damaged, layered too thickly, flaking everywhere, or hiding wood detail you want to restore. For most repainting projects, though, clean, dull, prime, and paint is the winning formula.
How Long After Deglossing Can You Paint?
The answer depends on the method. After sanding, you can usually prime or paint once the dust is removed and the surface is dry. After liquid deglosser, follow the product label. Some products allow coating shortly after application, while others provide a longer window. Do not guess. Timing matters because the surface condition created by the deglosser may change if you wait too long.
Can You Degloss Paint Without Sanding?
Yes, you can often degloss paint without sanding by using liquid deglosser or a high-quality bonding primer designed for slick surfaces. However, “no sanding” does not mean “no prep.” You still need to clean thoroughly, remove loose paint, repair damage, and follow directions. If the surface is rough, uneven, or peeling, sanding is still necessary.
Experience-Based Tips: What Actually Helps in Real Projects
After working through glossy paint projects, one lesson becomes obvious: the surface tells you what it needs if you slow down long enough to look. A glossy bathroom door, for example, may only need washing, light scuff sanding, primer, and two thin coats. But a kitchen cabinet near the stove may need repeated degreasing before any deglosser or sandpaper touches it. If your cloth keeps coming away yellowish or sticky, the surface is not clean yet. Paint does not bond well to old cooking oil, even if that oil has been there since the era of questionable wallpaper borders.
Another real-world tip is to test a small hidden area first. This matters with liquid deglosser because some finishes soften quickly, while others barely react. Testing behind a cabinet door or on the back edge of furniture helps you learn how the product behaves before you commit to the visible surface. If the finish becomes gummy, streaky, or uneven, stop and adjust your method.
On cabinets, organization saves more time than any fancy tool. Remove one door at a time, number the hinges, and label each piece. Take photos before disassembly. It may feel unnecessary until you are standing in the kitchen with fourteen identical white doors and the confidence of a raccoon in a hardware store.
For trim, sanding sponges are often better than flat sheets of sandpaper. They bend around curves, grooves, and profiles without cutting sharp lines into the surface. On doors, a combination of sponge sanding around panels and flat sanding on broad areas creates a more even finish.
One of the biggest beginner surprises is how much cleaning matters. People often want to jump straight to painting because color is the fun part. Prep feels like chores wearing safety glasses. But the difference between a paint job that lasts and one that chips in a month is usually surface preparation. Deglossing is not glamorous, but it is the quiet hero behind a smooth cabinet, a crisp door, or trim that does not peel when someone bumps it with a laundry basket.
Finally, do not rush drying and curing. Paint may feel dry to the touch before it is ready for heavy use. Cabinet doors, shelves, and tabletops need extra patience before being slammed, stacked, scrubbed, or decorated with small appliances. Give the finish time to harden. A few extra days of caution can save you from fingerprints, scratches, and the deep emotional sigh of having to repaint something you just finished.
Conclusion
Knowing how to degloss paint turns a risky repainting project into a durable, professional-looking finish. The basic formula is simple: clean the surface, dull the shine, remove dust or residue, prime when needed, and paint with thin, even coats. Whether you use sandpaper, liquid deglosser, or both, the purpose is the same: help the new paint bond instead of slide around like socks on a hardwood floor.
For glossy cabinets, trim, doors, walls, and furniture, do not skip prep. Check for lead paint in older homes, protect yourself, follow product instructions, and choose the right primer for hard-to-stick surfaces. A little patience before painting can add years to the life of your finishand save you from the heartbreak of peeling paint.
Note: This article is written for general DIY painting education. Always follow the label directions on the exact products you use, and use lead-safe precautions or professional help when working on painted surfaces in older homes.