Your refrigerator works 24/7, never complains, and still somehow gets rewarded with sticky jam rings, mystery crumbs, and a condiment graveyard in the door bins. Rude. The good news is that cleaning the inside of your fridge does not have to become a full Saturday meltdown with rubber gloves, dramatic sighing, and a playlist titled “Domestic Despair.” For routine messes, you can absolutely clean the inside of your fridge in under 10 minutes if you use a smart system.
The trick is to stop thinking of fridge cleaning as a deep-clean marathon and start treating it like a fast reset. A quick clean keeps odors under control, helps reduce food waste, and makes it easier to spot that yogurt cup that expired during a different presidential administration. It also keeps drips from raw meat, sauces, and leftovers from turning your crispers into a science fair.
This guide breaks down exactly how to clean the inside of your fridge fast, what cleaner works best, what mistakes to avoid, and how to keep it looking fresh longer. And yes, we are doing this in standard American English, with practical advice, zero fluff, and only a tiny bit of judgment for the bottle of ranch with one teaspoon left in it.
Why a Quick Fridge Clean Actually Matters
A fast refrigerator cleaning routine is not just about appearances. It is about food safety, smell control, and making your kitchen life easier. Spills inside the fridge can spread bacteria, especially when juices from raw foods drip onto shelves or bins. Sticky buildup also traps odors and makes every future clean harder than it needs to be.
Regular maintenance solves most of this before it turns into a bigger project. If you wipe spills quickly, toss old food weekly, and do a short interior clean on a regular basis, your fridge stays easier to manage. That means less crusty buildup, fewer weird smells, and fewer moments where you stare into the fridge wondering whether that container holds soup or a biology experiment.
There is another bonus: a clean fridge changes how you use it. When shelves are visible and bins are not coated in invisible jelly residue, you can actually find food before it goes bad. That can save money, reduce waste, and make meal prep feel less chaotic. A clean fridge is basically a tiny act of domestic optimism.
What You Need for a 10-Minute Fridge Clean
You do not need a cabinet full of specialty products. In fact, keeping it simple is usually better. For most refrigerator interiors, a mild cleaner and a soft cloth do the job just fine.
- Microfiber cloth or soft sponge
- Warm water
- Mild dish soap
- Optional baking soda solution for odors and stuck-on messes
- Dry towel or paper towels
- Small bowl or spray bottle
- Trash can nearby for expired food and empty containers
If your fridge has removable drawers or shelves, you can wash them separately with warm, soapy water. Just do not rush cold glass shelves into warm water right away. Let them come closer to room temperature first so you do not risk cracking or shattering them. That is one of those “learn it once, remember forever” kitchen lessons.
The Under-10-Minute Method
This method is designed for a normal lived-in fridge, not one that has been ignored since the Super Bowl. If your refrigerator has major leaks, mold, or ancient spills welded to the shelf like industrial adhesive, that is a deeper clean. But for everyday mess? This routine works beautifully.
Minute 1: Open, Assess, and Toss
Start by opening the fridge and doing a ruthless 60-second scan. Toss expired food, wilted produce, takeout containers with suspicious fogged-up lids, and anything that makes you say, “Hmm, I should smell this.” No, you should not. Straight to the trash.
Focus on the obvious clutter first: old leftovers, empty jars, dripping condiment bottles, and produce that is past its prime. The goal is to remove enough stuff to expose the dirty areas without turning the kitchen counter into a cold-food parking lot.
Minute 2 to 3: Pull the Dirtiest Items Out
Take out the easiest offenders: sticky bottles, the crisper drawer if it is full of onion skins and cilantro sadness, and any shelf liners or small bins that lift out quickly. If you are in a real hurry, do not remove every single shelf. Target only what is actually dirty.
Place perishables on the counter only briefly, or in a cooler if your kitchen is warm and the clean is going to take longer. Speed is your friend here, so keep the fridge door open only as long as necessary.
Minute 4 to 6: Wipe the Interior
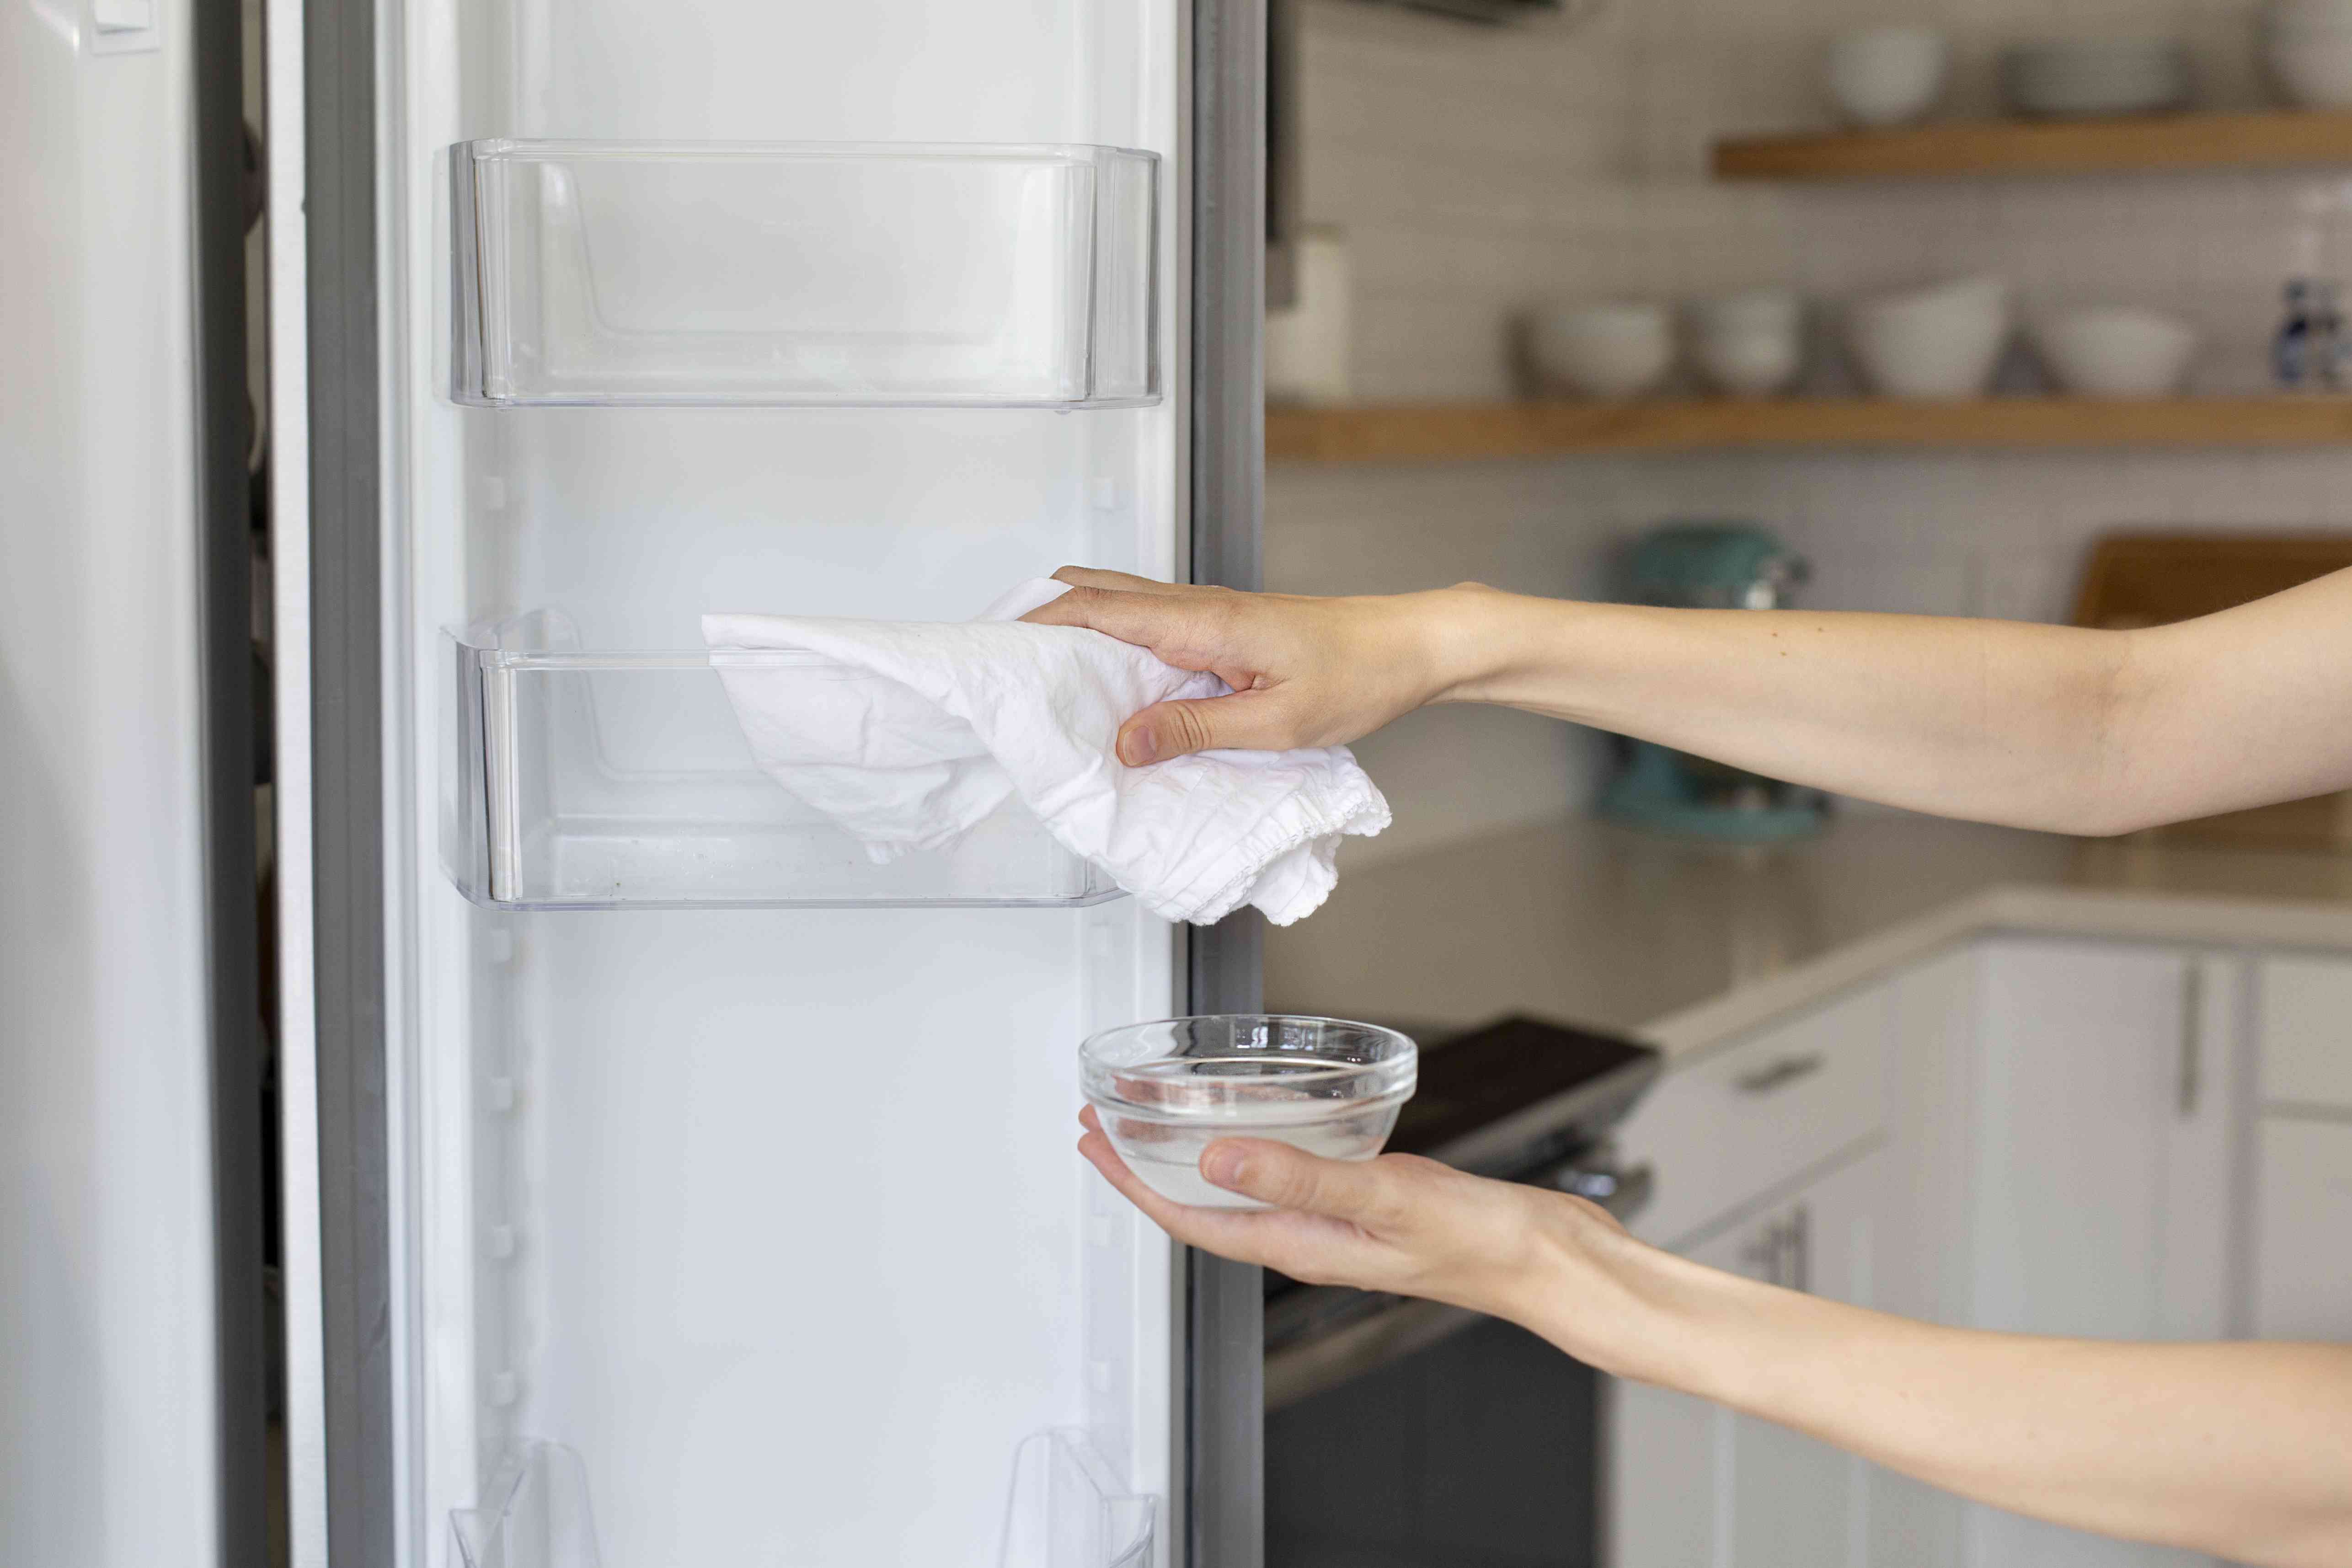
Mix warm water with a few drops of mild dish soap, or use a baking soda and warm water solution if odors are part of the problem. Wipe the interior walls, fixed shelves, corners, and door bins. Focus on the places that collect crumbs and drips: under milk containers, around jam jars, and the bottom lip of the shelves.
For sticky spots, let your damp cloth sit on the mess for 10 to 15 seconds before wiping. That softens the grime so you are not scrubbing like you are refinishing a deck. A soft toothbrush or folded cloth edge can help get into corners and around seams.
If there is a spill from raw meat or another especially gross leak, clean it thoroughly and wipe again with fresh clean water. Then dry the area. Moisture left behind can encourage odors and future gunk buildup.
Minute 7 to 8: Clean the Removable Parts
Wash the drawer, bin, or shelf you removed with warm, soapy water. Rinse it well and dry it with a towel. If it is glass and came out cold, give it a minute before using warmer water. If it is plastic, skip anything abrasive that could scratch the surface and make it harder to clean later.
If you pulled out condiment bottles, wipe the bottoms before putting them back. This tiny move is wildly underrated. A clean shelf means very little if every bottle returns with a sticky ring around its base like it just came back from a syrup convention.
Minute 9: Dry Everything
Use a dry towel or paper towel to remove remaining moisture from shelves, walls, and bins. This step matters more than people think. Dry surfaces help reduce odor, prevent drips, and keep grime from sticking as quickly next time.
Minute 10: Restock Smarter
Put food back in a more organized way than before. Keep older items toward the front so they get used sooner. Group condiments together. Put produce in drawers instead of loose on shelves. Wipe the bottoms of containers that are damp or sticky before they go back in.
That is it. Ten minutes, one fridge, significantly less chaos.
The Best Cleaner for the Inside of a Fridge
If you are wondering what to use to clean the inside of a refrigerator, the safest everyday answer is mild dish soap and warm water. It is simple, food-safe when rinsed properly, and effective for normal messes. For deodorizing and light scrubbing, a baking soda solution is also a favorite because it helps clean without leaving behind strong chemical smells.
White vinegar is popular for deodorizing too, but use it thoughtfully. It can be helpful for certain stains and smells, yet some experts and appliance brands caution against repeated use on certain rubber parts and plastics. For a quick general interior clean, soap and water or baking soda and water are the most broadly reliable choices.
The keyword here is gentle. The inside of your fridge is not the place for bleach-heavy clouds, harsh abrasives, or mystery cleaners with labels that read like a chemistry final. If a product is strongly scented, abrasive, or not recommended by your appliance brand, skip it.
What Not to Do
Fast cleaning is great. Fast bad decisions are not. Avoid these common mistakes when cleaning the inside of your fridge:
- Do not use abrasive scrubbers that can scratch shelves and liners.
- Do not pour lots of water around controls, lights, or vents.
- Do not shock cold glass shelves with warm or hot water.
- Do not leave food out too long while you clean.
- Do not ignore door seals, where grime loves to hide.
- Do not put removable parts in the dishwasher unless your model says it is safe.
A scratched shelf, cracked glass panel, or soggy electrical area is a terrible reward for 10 minutes of effort. Keep it simple and controlled.
How to Keep Your Fridge Clean Longer
The best fridge-cleaning hack is not some magic spray. It is prevention. Once your refrigerator is clean, a few habits will keep it that way longer.
Wipe Spills Right Away
The moment something drips, wipe it. Future You will be thrilled. Present You may grumble, but it takes 15 seconds and prevents the dreaded sticky shelf laminate.
Do a Weekly Toss Check
Once a week, scan for expired food, limp herbs, and leftovers that have completed their emotional journey. Toss them before they become odor generators.
Use Bins or Zones
Grouping foods by type makes the fridge easier to maintain. Keep sauces together, deli items together, and “eat this first” foods up front. It is easier to clean around organized things than around random cheese chaos.
Wipe Bottle Bottoms
This one sounds ridiculously specific because it is. But it works. Salad dressing, ketchup, pickle jars, and juice bottles love to leave sticky rings. A quick wipe before they go back saves a lot of shelf scrubbing later.
Replace the Baking Soda Regularly
If you use an open box of baking soda to absorb odors, replace it every so often. It is there to help with smell, not to become a permanent decorative resident of Shelf Three.
When a 10-Minute Clean Is Not Enough
Sometimes your refrigerator needs more than a quick spruce-up. A deeper clean may be necessary if you notice any of these:
- Strong odor that does not disappear after wiping surfaces
- Leaked raw meat juices or major spills
- Mold, mildew, or slimy drawer buildup
- Crumbs and liquid trapped under drawers or in seams
- Sticky door gaskets or heavily soiled bins
In those cases, remove more components, wash them thoroughly, clean the seals carefully, and dry everything well before restocking. You may also want to check the drip tray or lower hidden areas if smells keep coming back. But that is a different mission. Today we are talking about the quick clean that keeps things under control before they reach horror-movie status.
Real-Life Experiences With Cleaning the Inside of a Fridge in Under 10 Minutes
Here is the funny thing about fridge cleaning: the hard part is rarely the cleaning itself. The hard part is opening the door, seeing three half-empty mustard bottles, a lime that feels like a ping-pong ball, and a container of leftovers from “earlier this week” that was actually two Mondays ago, and then pretending you are too busy to deal with it. Most people do not need better cleaning skills. They need a better starting move.
In real kitchens, the most successful quick-clean moments usually happen right before something else. Right before grocery shopping. Right before guests come over. Right before meal prep on Sunday. There is a little window of motivation where you look at the fridge and think, “I cannot put new food into this chaos.” That is the moment when a 10-minute clean shines. You are not aiming for showroom perfection. You are resetting the space so it is functional again.
One common experience is discovering that the mess is not as big as it looked. The shelf seems disastrous until you realize the “massive spill” is just one sticky patch from barbecue sauce and a few cilantro leaves glued to the corner like tiny green confetti. Once the expired items are out, the job often shrinks fast. This is why the toss-first method works so well. Clutter makes dirt look bigger and more discouraging.
Another real-life lesson is that smells are sneaky. People often assume the whole fridge is dirty when the real culprit is one lonely offender: a forgotten cucumber in the crisper, a drippy deli package, or a takeout box hiding behind the orange juice like it is in witness protection. A fast clean helps because it forces a brief audit. You stop guessing and start finding.
There is also a weirdly satisfying moment that happens after a quick fridge clean, and anyone who has done it knows exactly what this feels like. You put the food back in, the shelves are no longer tacky, the jars are lined up like they have their lives together, and suddenly opening the fridge feels peaceful. Not glamorous, exactly. More like, “Wow, I might actually be an adult.” It is one of those tiny household wins that makes the whole kitchen feel cleaner even though you technically only wiped four shelves and scolded a bottle of hot sauce.
People with busy families, shared kitchens, or roommates know this even more. A perfectly organized fridge may last six hours, but a quick reset still matters. It is easier to maintain something that has already been brought back from the edge. Even if the strawberry drawer becomes chaos again by Thursday, starting from clean gives you a fighting chance.
And perhaps the biggest experience-based truth is this: speed beats perfection. Waiting for the “right” time to do a full deep clean often means doing nothing at all. But a fast wipe-down today is infinitely better than a fantasy deep clean next month. Ten minutes is realistic. Ten minutes fits between dinner and homework, between errands and bedtime, or while coffee brews on a Saturday morning. That is why this method works in real homes. It respects how people actually live.
Conclusion
If you want to clean the inside of your fridge in under 10 minutes, the winning formula is simple: toss expired food, remove the dirtiest items, wipe interior surfaces with mild soap and warm water or a baking soda solution, dry everything well, and restock with a little more intention than before. That is it. No dramatic overhaul, no chemical fog, and no need to block off half your day.
Do this regularly, and your refrigerator will stay fresher, smell better, and feel far less chaotic. Plus, you will stop discovering sticky jelly rings with the emotional force of jump scares. Honestly, that alone is worth the effort.