Oars have a funny way of making a room feel like it owns a porch, a lake view, and at least one good story about “the one that got away.” Whether you found a pair of vintage wooden oars at a flea market, inherited paddles from a family cabin, or bought decorative oars for a coastal-style living room, hanging them correctly matters. A crooked oar can look charming. An oar that falls at 2 a.m. sounds like a pirate invasion.
The good news: learning how to hang oars on a wall is not complicated. The best method depends on the weight of the oars, the wall material, your decorating style, and whether you want the hardware to be visible or hidden. Some people prefer rustic leather straps. Others like clean metal brackets. Some want crossed oars above a sofa, while others want a single horizontal paddle over a bed, doorway, fireplace, hallway bench, or lake house entryway.
This guide covers four reliable ways to hang oars on a wall, including practical mounting tips, layout ideas, hardware suggestions, and real-life advice for avoiding common mistakes. The goal is simple: make your oars look intentional, secure, and stylishwithout turning your drywall into Swiss cheese.
Before You Hang: Measure, Plan, and Check the Wall
Before choosing your favorite hanging method, spend a few minutes planning the layout. Oars are long, narrow, and visually strong, which means they can either anchor a wall beautifully or make the space feel oddly unbalanced. Measure the length of each oar, the width of the blade, and the area where you want to display it. A single oar may look best centered above furniture, while a pair of oars can create symmetry above a sofa, headboard, console table, or fireplace mantel.
For most wall displays, the center of the arrangement should sit around eye level, often near 57 to 60 inches from the floor. If the oars are going above furniture, leave enough breathing room between the furniture and the bottom edge of the display. A gap of 6 to 12 inches usually looks natural, depending on the height of the furniture and the size of the oars.
Tools and Supplies You May Need
- Measuring tape
- Pencil
- Painter’s tape
- Level
- Stud finder
- Drill and drill bits
- Screws
- Wall anchors or toggle bolts
- Hooks, brackets, leather straps, D-rings, or picture wire
- Felt pads or clear bumpers to protect the wall
If the oars are heavy or valuable, mount the hardware into wall studs whenever possible. Drywall anchors can work for lighter decorative oars, but real wooden rowing oars may be heavier than they look. When in doubt, choose stronger hardware than you think you need. A sturdy mount is not overkill; it is just good manners toward your wall.
1. Hang Oars Horizontally with Wall Hooks or Brackets
The easiest and most flexible way to hang oars on a wall is to use wall hooks, J-hooks, U-brackets, or small utility brackets. This method works especially well for horizontal displays, whether you are hanging one oar by itself or a pair of oars stacked one above the other.
Horizontal oars are popular in coastal homes, lake cabins, beach cottages, kids’ rooms, hallways, and casual living spaces. The line of the oar naturally stretches across the wall, making it useful for filling narrow spaces above windows, doorways, beds, and console tables. If your oar has a colorful blade or weathered finish, this method also keeps the most decorative part visible.
How to Do It
First, decide where the oar will sit. Hold it against the wall and use painter’s tape to mark the general placement. Step back and look at the wall from different angles. If the display is above furniture, make sure the oar feels connected to the furniture rather than floating in the wilderness like a lost canoe.
Next, mark two support points. For most oars, one hook near the handle side and one hook near the blade side will provide enough support. Avoid placing both hooks too close to the center, because the ends may sag or wobble. If the oar is long or heavy, consider using three supports: one near each end and one near the center.
Use a stud finder to check whether your support marks line up with studs. If they do, drill pilot holes and drive screws directly into the studs. If not, install proper wall anchors based on the weight of the oar and the type of wall. For drywall, toggle bolts or strong hollow-wall anchors are better than small plastic anchors for heavier pieces. For plaster, pre-drilling is important to reduce cracking.
Once the hooks or brackets are installed, place the oar on them and check the level. Add clear rubber bumpers or felt pads behind the oar if it touches the wall. These small pads prevent scratches and help keep the oar from sliding or rattling.
Best For
- Single oars displayed horizontally
- Two or three oars arranged in parallel rows
- Lake house, beach house, cabin, or nautical decor
- People who want a simple, strong mounting method
Design Tip
For a clean look, choose brackets in a finish that matches your room hardware, such as black, brass, bronze, or brushed nickel. For a rustic look, use iron hooks or handmade wooden pegs. If the oar is painted, let the color of the oar be the star and keep the hardware understated.
2. Use Leather Straps for a Rustic Nautical Look
Leather straps are one of the most attractive ways to hang oars on a wall. They look intentional, warm, and slightly adventurousas if your wall has spent weekends rowing across a misty lake. This method is especially good for decorative wooden oars, canoe paddles, vintage oars, and handmade paddles.
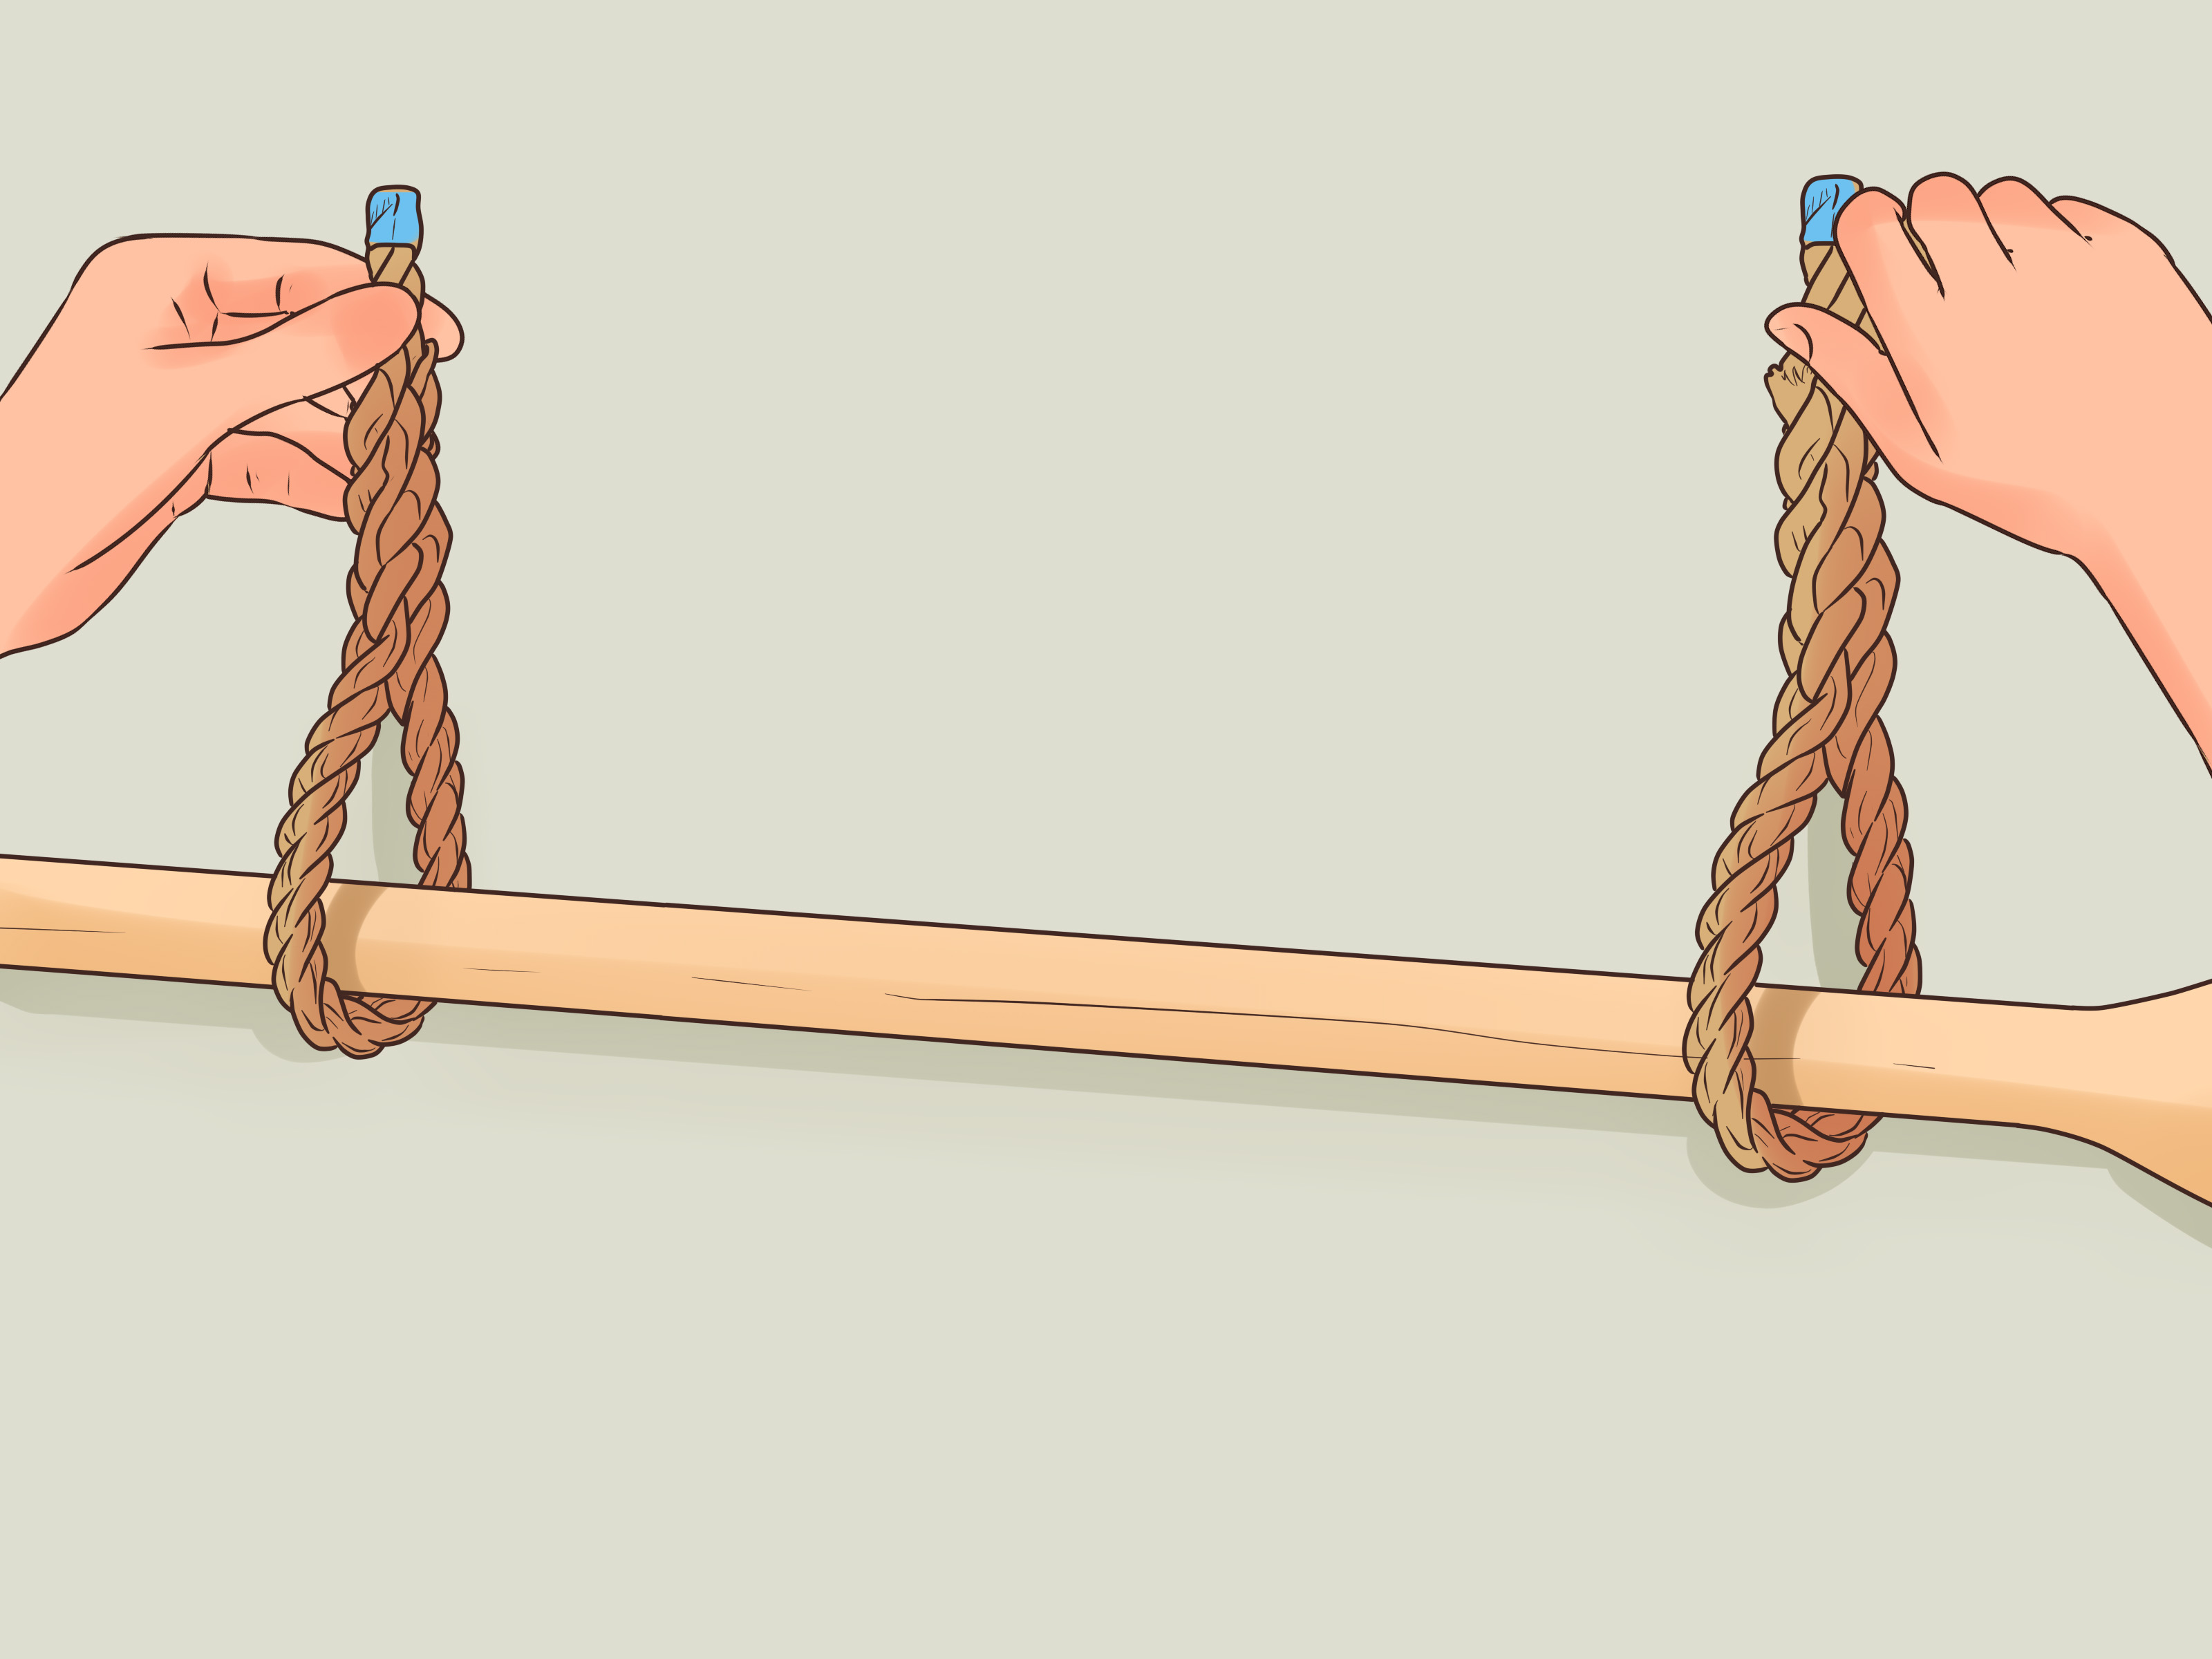
You can buy leather oar hangers, use belt leather, or repurpose sturdy leather straps. The idea is simple: two loops of leather hold the oar in place, and each loop is fastened to the wall with a screw. The straps become part of the design rather than something you try to hide.
How to Do It
Measure the diameter of the oar shaft where the straps will sit. Cut two equal leather strips long enough to wrap loosely around the oar with room for a screw at the top. The straps should hold the oar securely without squeezing it so tightly that they damage the finish.
Fold each strap into a loop and mark the screw point. If you are using thick leather, punch a small hole before installing the screw. This gives the screw a cleaner path and helps prevent the leather from twisting. Place the oar on the wall and use painter’s tape to test the height and spacing. The two straps should be far enough apart to balance the oar visually and physically.
Install the straps into studs when possible. If the studs do not line up with your ideal placement, use wall anchors appropriate for the load. Slide the oar into the loops and adjust it until it sits level. If the oar wants to rotate, add a small clear bumper behind the shaft or choose a slightly tighter strap fit.
Best For
- Vintage wooden oars
- Rustic cabins and lake houses
- Farmhouse, coastal, and cottage-style interiors
- Decorative displays where visible hardware adds character
Design Tip
Brown leather gives oars a classic outdoorsy look, while black leather feels more modern and graphic. You can also use brass screws or decorative screw caps for a polished finish. If you are hanging multiple oars, keep the strap color consistent so the arrangement feels curated rather than improvised.
3. Mount Oars with Hidden D-Rings, Sawtooth Hangers, or Picture Wire
If you want the oars to look like wall art, hidden hanging hardware may be the best choice. Many decorative oars come with D-rings already attached to the back, allowing them to mount vertically or horizontally. If your oars do not have hardware, you can add D-rings, small sawtooth hangers, or picture wire to the back of the shaft or a small backing strip.
This method creates a cleaner appearance because the support system is mostly hidden. It works especially well for painted decorative oars, lightweight paddles, and oars that are part of a gallery wall. The final look is less “storage rack” and more “coastal art installation.” Very fancy. Your wall may request a tiny museum label.
How to Do It
Place the oar face down on a soft towel to protect the finish. Decide where the hanging hardware should go. For horizontal hanging, two D-rings placed evenly along the back of the shaft usually work well. For vertical hanging, hardware near the top may be enough for a lightweight decorative oar, but longer oars may need a lower stabilizer to keep them from swinging.
Use small screws that are short enough not to poke through the front of the oar. This is important. Nobody wants a beautiful vintage oar with screw tips making a surprise appearance on the painted side. If the oar is thin or valuable, attach the hardware to a small wood cleat or backing strip instead of directly into the oar.
After attaching the hardware, transfer the measurements to the wall. Use a level and painter’s tape to mark the exact spots. Install picture hooks, screws, or anchors based on the oar’s weight. Hang the oar and check that it rests flat. Add felt pads or bumpers behind the blade and handle if needed.
Best For
- Painted decorative oars
- Lightweight paddles
- Gallery wall arrangements
- Clean, modern, or minimal interiors
Design Tip
Hidden hardware looks best when the oar sits close to the wall. Use this method when the oar has a decorative face you want to highlight, such as stripes, hand-painted details, house numbers, nautical colors, or a weathered finish. For a balanced display, pair the oar with framed coastal prints, black-and-white lake photos, woven baskets, or a small mirror.
4. Hang Crossed Oars in an X Shape
Crossed oars are a classic nautical wall display. The X shape brings movement and symmetry to a room, making it a strong focal point over a sofa, mantel, bed, or entryway bench. This arrangement works especially well with a matching pair of oars, but mismatched vintage oars can look wonderful too if their colors and sizes complement each other.
The challenge with crossed oars is stability. Because the oars overlap, they need support at more than one point. You can use small hooks, brackets, leather ties, rope, or a combination of hidden and visible hardware. The goal is to keep the oars from shifting while making the crossing point look neat.
How to Do It
Lay the oars on the floor first and experiment with the angle. A wide X feels dramatic and fills more wall space. A narrow X feels taller and more compact. Once you like the shape, measure the overall width and height of the arrangement. Use painter’s tape on the wall to outline the approximate size.
Mark the crossing point and the support points. In many cases, each oar should be supported near both ends, or at least at one end plus the center crossing area. Small cup hooks, decorative brackets, or discreet pegs can hold the oars in position. If you want a rustic look, wrap the center crossing point with rope or leather cord. The wrap can be decorative, but it should not be the only thing holding heavy oars on the wall.
Mount the hooks or brackets securely, checking for studs where possible. Hang one oar first, then the second. Adjust until the X is symmetrical. If the oars slide at the crossing point, add a small clear bumper between them or tie them gently together with leather lace, jute rope, or waxed cord.
Best For
- Pairs of matching oars
- Large empty walls
- Entryways, living rooms, bedrooms, and fireplace walls
- Traditional nautical, coastal, Americana, or cabin decor
Design Tip
Crossed oars look best when they have enough room to breathe. Avoid squeezing them into a tiny wall space where the blades nearly hit trim, shelves, or window frames. If the display feels too large, try crossing shorter canoe paddles instead of full-size rowing oars.
Choosing the Right Hardware for Your Wall Type
The safest way to hang oars depends partly on the wall. Drywall, plaster, brick, paneling, and shiplap all behave differently. For drywall, studs provide the strongest support. If you cannot hit studs, use anchors rated for more weight than your oars actually weigh. For plaster walls, drill slowly and avoid forcing oversized anchors, because old plaster can crack. For brick or masonry, use masonry bits and anchors designed for hard surfaces.
Wood paneling and shiplap can sometimes hold lightweight decorative oars with screws, but the strength depends on what is behind the boards. Thin paneling over drywall is not the same as solid wood. If the oars are heavy, locate studs behind the wall surface and fasten into those instead.
Where to Display Oars for the Best Look
Oars work beautifully in more places than just beach houses. In a living room, a pair of oars above the sofa can add texture and a relaxed vacation mood. In a bedroom, one long oar above the headboard can replace traditional framed art. In an entryway, oars can make a strong first impression, especially when paired with a bench, woven baskets, or a row of coat hooks.
For a kitchen or dining room, smaller paddles may work better than full-length oars. They add personality without overwhelming the space. In a kid’s room or nursery, painted oars can support a playful nautical theme. In a hallway, vertical oars can draw the eye upward and make the area feel taller.
When decorating with oars, balance is everything. If the oars are rustic, pair them with clean furniture so the room does not feel like a fishing shed exploded. If the oars are bright and painted, keep surrounding decor simpler. A little nautical charm goes a long way. Too much, and guests may start looking for the captain.
Common Mistakes to Avoid
One common mistake is using adhesive hooks for heavy or valuable oars. Adhesive products can be useful for lightweight temporary decor, but they are not the best choice for long wooden objects that could fall and cause damage. Another mistake is hanging oars too high. Because oars are long, people often place them near the ceiling, where they look disconnected from the room. Try to relate the display to nearby furniture, windows, or architectural lines.
Another issue is poor spacing. If you are hanging multiple oars, measure carefully so the spacing looks intentional. Uneven gaps are very noticeable with long straight objects. Finally, do not ignore the wall surface. A heavy oar mounted into weak drywall with tiny screws is asking for drama. Use proper anchors, pilot holes, and secure hardware.
Maintenance and Care After Hanging
Once your oars are on the wall, they do not need much maintenance. Dust them with a soft cloth and avoid harsh cleaners, especially on painted or antique finishes. If the oars are vintage, do not sand or refinish them too aggressively unless restoration is your goal. The scratches, faded paint, and worn handles are often what make them interesting.
Check the hardware every few months, especially if the oars hang in a busy area or near a door that gets slammed. Seasonal humidity can also affect wood, causing slight expansion or contraction. If anything feels loose, tighten the screws or upgrade the anchors before the display becomes a gravity experiment.
Extra Experience: What I Learned from Hanging Oars on Real Walls
After working with oars as wall decor in different spaces, one lesson becomes obvious: the wall always has an opinion. You may picture a perfect horizontal display above a console table, only to discover that the studs are nowhere near your ideal hook placement. This is why painter’s tape is a lifesaver. Before drilling, tape the outline of the oar or crossed-oar arrangement on the wall. Leave it there for a few hours. Walk past it. Look at it from the sofa. Look at it from the doorway. If it still feels right later, then drill.
Another practical experience is that oars often look lighter than they are. Decorative paddles made for wall art are usually easy to hang, but real wooden oars can be surprisingly substantial. The blade adds weight and makes the object feel unbalanced. If you support only the center of the shaft, the oar may tilt or rotate. Two well-spaced supports usually solve this problem. For longer oars, three supports can make the display feel much more secure.
Leather straps are beautiful, but they need careful spacing. If the loops are too loose, the oar can roll forward. If they are too tight, they can rub the finish. A good trick is to line the inside of the strap with a small piece of felt or soft suede. It protects the oar and gives the strap a little grip. This is especially helpful for painted oars with glossy surfaces.
Crossed oars look simple in photos, but they take patience in real life. The best approach is to build the X shape on the floor first. Take a photo of the arrangement, then recreate it on the wall. If you try to design the X while holding two long oars in the air, you will quickly understand why boats require teamwork. Use a second person if possible. One person can hold the oars while the other checks the level and marks the support points.
Color also matters more than people expect. Natural wood oars look warm and timeless, but they can disappear on beige or tan walls. Painted oars create stronger contrast and work well as a focal point. Navy, white, red, forest green, and weathered blue are classic choices for nautical decor. If your room already has a lot of patterns, a simple wood finish may be calmer. If your room feels plain, painted oars can bring just enough personality without needing a full redesign.
One of the best places to hang oars is above a bench in an entryway or mudroom. The shape feels welcoming, and the display connects naturally with outdoor gear, woven baskets, raincoats, and boots. Another strong location is above a bed in a guest room, especially in a lake house or coastal rental. Oars create a theme instantly, but they do not feel as predictable as seashell prints or anchor signs.
The most important experience-based advice is to think of oars as sculpture, not just wall filler. Their shape has direction, texture, and history. Let them breathe. Give them proper hardware. Pair them with a few thoughtful pieces instead of surrounding them with every nautical object known to humankind. When done well, hanging oars on a wall adds character, movement, and a relaxed sense of place. It says, “This home has stories,” without needing to shout, “Ahoy!” every time someone walks in.
Conclusion
Hanging oars on a wall is one of the easiest ways to bring coastal, lake house, cabin, or nautical style into a room. The key is choosing a method that fits both the oars and the wall. Hooks and brackets are practical and strong. Leather straps add rustic charm. Hidden D-rings or picture wire create a clean art-like display. Crossed oars make a bold focal point with classic personality.
Take time to measure, locate studs when possible, use the right anchors, and test the layout before drilling. Whether your oars are antique, handmade, painted, or purely decorative, the right hanging method will make them look like they belong on the wallnot like they washed ashore there after a decorating storm.
Note: This article synthesizes practical guidance from reputable U.S. home improvement, hardware, interior decorating, and boating decor references, rewritten in original language for web publication.