Note: This article is written for web publishing and focuses on practical low power design lessons inspired by DIY weather station projects, sensor-node engineering, and real-world outdoor monitoring challenges.
Introduction: A Tiny Weather Station With a Big Engineering Lesson
A weather station looks simple from the outside. It sits in the yard, quietly judging the sky, measuring temperature, humidity, air pressure, rain, wind, and maybe light intensity. It does not complain. It does not ask for coffee. It just reports the weather like a tiny meteorologist with no umbrella.
But when that weather station is expected to run outside on a battery and a small solar panel, the project becomes much more than a weekend gadget. Suddenly, every milliamp matters. Every sensor becomes a suspicious little power thief. Every wireless transmission is a luxury expense. And that innocent-looking microcontroller? If you leave it awake all day, it will eat your battery like a raccoon in a campground cooler.
That is why a project like Weather Station Is A Tutorial In Low Power Design is so valuable. It shows that low power design is not one magic trick. It is a collection of smart decisions: sleep more, transmit less, power sensors only when needed, choose efficient charging hardware, protect the battery, and design the system around real outdoor conditions instead of wishful spreadsheet math.
In this article, we will explore how a low power weather station works, why it is such a perfect teaching tool, and how builders can apply the same lessons to IoT sensor nodes, solar-powered monitors, remote data loggers, smart agriculture devices, and other battery-powered electronics.
Why a Weather Station Is the Perfect Low Power Design Project
A weather station forces you to deal with nearly every classic embedded design problem at once. It has sensors, wireless communication, environmental exposure, battery management, solar charging, firmware timing, data accuracy, and long-term reliability. In other words, it is not just a weather station. It is an engineering obstacle course wearing a rain hat.
The beauty of the project is that the goals are clear. The device must wake up, measure conditions, send or store data, and go back to sleep. It does not need to stream video, animate a screen, or calculate the meaning of life. That makes it an ideal platform for learning how to reduce power consumption without making the system useless.
The Core Low Power Idea: Duty Cycling
The heart of low power design is duty cycling. Instead of running continuously, the weather station spends most of its time asleep. It wakes at intervals, takes readings, sends data, then shuts down again. If the active cycle lasts only a few seconds and the sleep cycle lasts several minutes, the average current drops dramatically.
For example, imagine a station that wakes every five minutes. It powers the sensors, reads temperature, humidity, pressure, and battery voltage, connects to Wi-Fi or LoRa, sends a packet, and returns to deep sleep. The active current may be high for a short burst, but the long sleeping period keeps the total energy budget low.
This is the first big lesson: low power design is not about making every moment ultra-efficient. It is about making waste rare.
The Hardware Behind a Low Power Weather Station
A typical DIY low power weather station may include a microcontroller, environmental sensors, a radio, a battery, a solar panel, a charge controller, voltage regulation, and a weatherproof enclosure. Each part affects the final battery life.
Microcontroller: The Brain That Must Learn to Nap
Popular choices include ESP8266, ESP32, Arduino-compatible low power boards, STM32 boards, and Nordic nRF52 modules. ESP-based boards are popular because they are affordable and Wi-Fi capable, but Wi-Fi is power-hungry. That does not make ESP32 or ESP8266 a bad choice. It simply means the firmware must be disciplined.
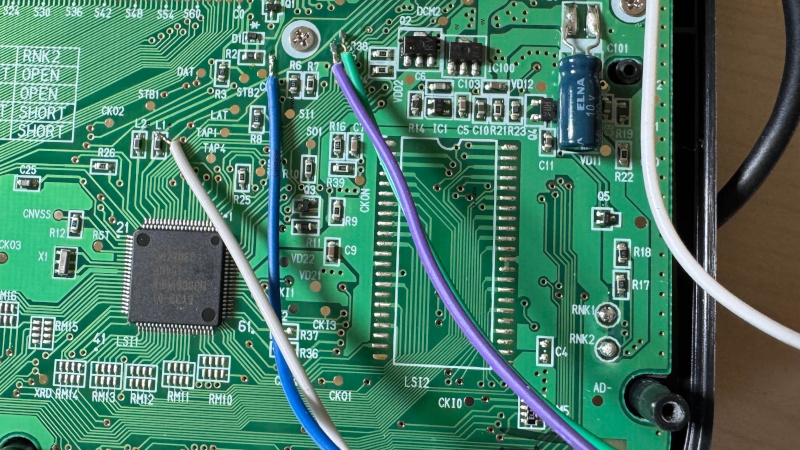
Deep sleep mode is essential. In deep sleep, the main CPU and many peripherals shut down, leaving only the minimum hardware needed to wake the device later. A well-designed board can sleep with very low current, but many development boards include USB chips, LEDs, regulators, and other components that continue drawing power. This is where many beginners get ambushed. The microcontroller may be sleeping, but the board around it is throwing a tiny all-night party.
Sensors: Accurate, Low Power, and Not Always Awake
Common weather station sensors include BME280 or BMP280 modules for temperature, humidity, and pressure; SHT30 or Si7021 for temperature and humidity; tipping-bucket rain gauges; reed-switch wind speed sensors; wind vanes; light sensors; and battery voltage dividers.
The Bosch BME280 is widely used because it combines pressure, temperature, and humidity sensing in a compact low power package. However, even efficient sensors should not be left powered unnecessarily. A strong low power design often switches sensor power using a MOSFET or load switch, turning sensors on only when the microcontroller is awake.
This matters because “small” current adds up. A sensor drawing a fraction of a milliamp may seem harmless, but over days and weeks it can quietly drain a small battery. Low power design is like budgeting with pennies: ignore enough of them and suddenly you cannot afford lunch.
Wireless Communication: The Expensive Part of the Bill
Wireless transmission is usually the biggest energy event in the cycle. Wi-Fi provides convenience and direct internet connectivity, but it can draw significant current during association and transmission. LoRa, BLE, Sub-GHz radios, and ESP-NOW can be better options depending on distance, gateway availability, and data size.
The best communication strategy is simple: send fewer bytes, less often. A weather station does not need to upload a novel. A compact packet with temperature, humidity, pressure, rainfall count, wind speed, battery voltage, and timestamp is usually enough. If the firmware spends more time negotiating Wi-Fi than reading the weather, the design needs a stern conversation.
Solar Power and Battery Design: The Reality Check Department
Solar power sounds easy until clouds, winter, shade, dirt, and bad panel angles enter the chat. A solar-powered weather station must survive not only sunny afternoons but also several ugly days in a row. The design should assume imperfect weather because, ironically, the device exists to measure imperfect weather.
Choosing the Battery
Common choices include Li-ion cells, LiPo packs, LiFePO4 batteries, and primary lithium cells for very remote stations. Battery size should be based on average daily energy use and the number of sunless days the station must survive. This is called autonomy.
If a station consumes 20 milliamp-hours per day and needs to survive seven cloudy days, the battery should provide more than 140 milliamp-hours of usable capacity. In practice, the battery should be larger because cold weather, battery aging, voltage converter losses, and cloudy charging conditions all reduce available energy.
Solar Panel Sizing
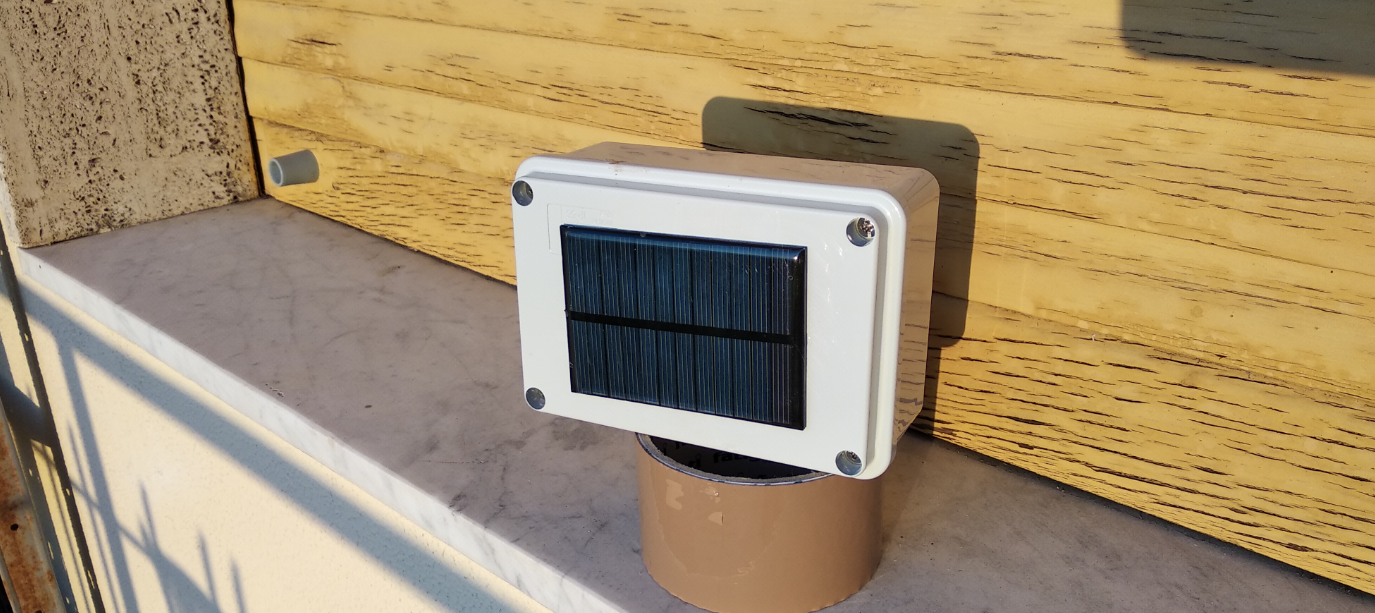
A small solar panel can work beautifully if the load is low. But if the firmware wakes too often, keeps Wi-Fi active too long, or uses an inefficient regulator, the panel becomes a decorative rectangle. Panel sizing should account for local sunlight, mounting angle, seasonal changes, and shading.
The charge controller is equally important. A poor charging circuit can waste precious solar energy or mishandle the battery. A better charger with smart load sharing, low quiescent current, and proper battery protection can make the difference between a station that runs indefinitely and one that dies every third cloudy Tuesday.
Firmware: Where Low Power Design Really Wins
Hardware matters, but firmware often decides whether the station survives. Good low power firmware is boring in the best possible way. It wakes, measures, transmits, checks health, and sleeps. No drama. No endless retry loops. No “just one more connection attempt” that drains the battery before breakfast.
Use Long Measurement Intervals
Weather changes gradually most of the time. For many home or educational projects, five-minute, ten-minute, or fifteen-minute readings are enough. Wind gusts and rainfall may need event counting, but temperature and pressure do not usually need second-by-second updates.
Longer intervals reduce wakeups, sensor power time, and transmissions. This is the easiest low power win. It is the embedded equivalent of turning off lights when you leave a room, except the room is a microcontroller and the light is your battery crying softly.
Power Sensors Only When Needed
Some sensors support sleep modes, but many breakout boards include pull-up resistors, regulators, or LEDs that still consume power. Cutting power to the sensor rail during sleep can reduce leakage. The firmware should allow a brief warm-up time after enabling power, then take the reading and shut the rail down again.
Avoid Endless Network Retries
Wireless failures are normal. Routers reboot. Gateways disconnect. Storms interfere. The firmware should not stay awake forever trying to upload data. A better strategy is to try a limited number of times, store the reading locally if needed, and return to sleep. Reliability is important, but a dead weather station reports exactly zero useful data.
Measure Battery Voltage Carefully
Battery voltage monitoring is useful, but voltage dividers can waste current if permanently connected. A common solution is to enable the divider only during measurement or use very high-value resistors with attention to ADC accuracy. Battery data helps the station adapt: when voltage is low, it can reduce reporting frequency or skip power-heavy transmissions.
Sensor Placement: Low Power Is Useless If the Data Is Bad
A low power weather station should still be a good weather station. Placement matters. A temperature and humidity sensor should be shielded from direct sun and placed over representative ground, not above asphalt, concrete, roofs, or heat-reflecting walls. Rain gauges need open exposure and must be kept level and clean. Wind sensors should be placed as high and unobstructed as practical.
All-in-one weather stations are convenient, but they force compromises. The ideal height for wind measurement is not the same as the ideal height for temperature and rain. A modular station can place sensors where they perform best, but it adds wiring and complexity. The right answer depends on the goal. For a backyard hobby station, a good compromise may be acceptable. For research-quality data, siting discipline becomes much more important.
Common Mistakes in Low Power Weather Station Design
Using a Development Board Without Checking Sleep Current
Many development boards are built for convenience, not battery life. USB-to-serial chips, power LEDs, and inefficient voltage regulators can draw more current than the sleeping microcontroller. Builders should measure actual sleep current with a multimeter or power analyzer instead of trusting ideal chip specifications.
Leaving LEDs On
A single status LED can waste more power than expected. It may look harmless, blinking proudly like a tiny lighthouse, but in a low power system, unnecessary LEDs are freeloaders. Disable them or remove them if the station must run for months.
Oversampling Data
Measuring every few seconds may feel impressive, but it often creates more data than value. For most weather variables, smart intervals beat constant sampling. Rain and wind can use interrupt-based counting while the main controller sleeps.
Ignoring Quiescent Current
Voltage regulators, battery chargers, boost converters, and sensor boards all have quiescent current. This is the current they consume just existing. In low power design, quiescent current is not background noise. It is part of the main plot.
Low Power Design Checklist for a Weather Station
Before declaring a weather station “solar powered,” builders should answer several practical questions. What is the measured sleep current? How long is the active period? How much current does the radio draw? How often does the device transmit? What is the battery capacity in real conditions? What happens after three cloudy days? What happens when Wi-Fi fails? What happens when the battery voltage drops?
A strong design includes deep sleep, limited wake time, switched sensor power, efficient regulation, realistic solar sizing, good enclosure ventilation, protected battery charging, and firmware that fails gracefully. The best weather station is not the one with the most features. It is the one still running when the novelty has worn off and the sky is doing something interesting.
Specific Example: A Practical Low Power Weather Station Workflow
Here is a sensible operating cycle for a DIY station:
- Wake from deep sleep every five or ten minutes.
- Enable sensor power using a MOSFET or load switch.
- Wait briefly for sensors to stabilize.
- Read temperature, humidity, pressure, rainfall count, wind data, and battery voltage.
- Package the data into a compact message.
- Transmit using Wi-Fi, LoRa, BLE, or another suitable radio.
- If transmission fails, retry only a limited number of times.
- Save unsent data if local storage is available.
- Turn off sensors and radio.
- Return to deep sleep.
This simple rhythm can reduce average current dramatically. It also makes debugging easier because each phase is clear. If the battery drains too quickly, measure each phase separately. The culprit is usually hiding in plain sight, wearing a tiny LED.
Why This Project Teaches More Than Weather
A low power weather station teaches embedded engineering habits that apply everywhere. Smart agriculture nodes, soil moisture monitors, wildlife trackers, remote water-level sensors, air-quality monitors, and industrial condition sensors all face the same challenge: collect useful data without constant power.
The lesson is not “use this exact board” or “buy this exact sensor.” The lesson is design discipline. Measure real current. Use sleep modes. Switch off unused hardware. Match the radio to the job. Plan for bad weather. Protect the battery. Reduce firmware waste. Test outside, not just on a desk next to a cheerful USB cable.
Field Experience: What Building a Low Power Weather Station Teaches You the Hard Way
The first experience most builders have with a low power weather station is optimism. You connect a sensor, print readings to a serial monitor, upload data to a dashboard, and feel like a wizard. Then you move the project outside, put it on a battery, and discover that the wizard forgot about voltage regulators, condensation, Wi-Fi range, and the fact that the sun does not work the night shift.
One practical lesson is that bench testing can lie. A station that works perfectly over USB may fail outdoors because the battery voltage dips during radio transmission. Wi-Fi modules can demand sudden current peaks, and a weak battery or thin wiring can cause brownouts. Adding a suitable capacitor near the radio, using a better regulator, or lowering transmit frequency can improve stability.
Another lesson is that enclosures are tricky. A sealed box protects electronics from rain, but it can trap heat and moisture. A vented radiation shield helps temperature readings, but it must keep water out while allowing airflow. If the temperature sensor sits too close to the main board, it may measure the warmth of the electronics instead of the air. That is not meteorology; that is your circuit bragging about its body heat.
Solar placement also becomes a real-world puzzle. The best location for the solar panel may not be the best location for the sensors. A panel wants full sun. A temperature sensor wants radiation shielding and good ventilation. A rain gauge wants open sky. A wind sensor wants height. The builder becomes a tiny urban planner, negotiating between physics, weather, trees, rooflines, and possibly a neighbor who asks why there is a science stick in the yard.
Battery behavior is another humbling experience. A battery that seems huge on paper may underperform in cold weather or after repeated shallow charging. Low temperatures can reduce usable capacity. Cheap charge modules may waste power. Boost converters may keep drawing current even when the station sleeps. The fix is not always a bigger battery. Often, the better solution is reducing the average load.
Data quality also needs attention. A sensor exposed to direct sunlight will overreport temperature. A rain gauge under a tree will underreport rainfall. A wind sensor mounted too low will miss gusts. Low power design keeps the station alive, but good siting keeps the data meaningful. Both matter.
The most satisfying moment comes after several days of stable operation. The dashboard updates. The battery voltage stays healthy. The solar panel recovers the daily energy. The station survives rain, heat, and router hiccups. At that point, the project stops feeling like a pile of parts and starts feeling like a real instrument. It becomes a small, quiet machine that understands the sky better than your phone app understands your backyard.
That is the real magic of a low power weather station. It teaches patience, measurement, restraint, and respect for the physical world. It rewards careful engineering instead of brute force. And it proves that a well-designed device does not need to shout, glow, or run constantly to be useful. Sometimes the smartest machine is the one that knows when to go back to sleep.
Conclusion: Low Power Design Is a Mindset, Not a Checkbox
Weather Station Is A Tutorial In Low Power Design is more than a clever project title. It captures the central truth of battery-powered electronics: efficiency is designed into every layer. The sensor choice matters. The microcontroller matters. The charger matters. The firmware matters. The enclosure and siting matter. Even the upload interval matters.
A reliable low power weather station does not happen by accident. It comes from measuring current, cutting waste, extending sleep, limiting wireless activity, and building for real environmental conditions. The reward is a device that can run for weeks, months, or even indefinitely with the right solar and battery setup.
For makers, students, engineers, and IoT builders, few projects teach the lesson better. A weather station gives instant feedback, useful data, and enough engineering challenges to keep things interesting. It is practical, educational, and just complicated enough to make you respect every milliamp. And yes, it may also make you check the forecast with suspicious professional intensity.