Some home projects whisper, “I am tasteful.” This one walks in wearing vintage hardware and says, “I used to hold cough drops and mystery ointments, and now I am art.” If you’ve got an old medicine cabinetespecially one with a glass or mirrored dooryou’re sitting on a seriously underrated upcycle opportunity.
An old medicine cabinet glass etching upcycle can turn a dated bathroom relic into a custom privacy panel, wall décor, entry organizer, or a statement piece that looks far more expensive than it is. And yes, you can absolutely make it look polished without needing a design degree or a wizard’s robe. You just need a smart plan, good prep, and the right etching approach for your glass.
This guide combines real-world DIY practices and product guidance to help you decide between true glass etching, frosted spray faux-etching, or temporary film, then walk your old cabinet glass into its glamorous second act.
Research support for permanence/removability options and spray/etching comparisons:
Why Old Medicine Cabinets Make Great Upcycle Candidates
Old medicine cabinets are perfect for upcycling because they already combine what decorators love: glass, metal or wood framing, compact proportions, and wall-ready hardware. Even when the cabinet box is ugly, the door, mirror, and shelves are often worth saving.
DIY makeovers commonly go in two directions:
- Keep the cabinet shell and update the frame + etched glass for a fresh, custom look.
- Repurpose the door/glass into wall art, a memo board, a key drop, or a decorative privacy insert.
Plenty of bathroom makeover examples also show homeowners removing dated medicine cabinets and reusing the opening or even salvaging the shelves/materials for a better-looking feature. That’s your sign: “dated” and “done for” are not the same thing.
Cabinet removal and reuse inspiration:
Before You Start: Safety Checks That Matter (A Lot)
1) Check the age of the home and the cabinet finish
If your home was built before 1978, treat any painted cabinet frame or surrounding wall as a possible lead-paint situation until proven otherwise. Renovation work can create dangerous lead dust, and that risk goes way up when sanding, scraping, or cutting into surrounding surfaces.
If you’re only etching removable glass away from the wall, your risk is lowerbut if you’re removing or refinishing the cabinet frame, don’t skip this step.
Lead safety and RRP context:
2) Etching cream is not “just a craft lotion”
Real etching cream is a chemical product that can damage skin, eyes, and nearby surfaces if used carelessly. Manufacturer guidance and DIY tutorials consistently emphasize gloves, eye protection, ventilation, and working near a water source for safe rinse-off. Translation: this is a fun project, but keep the “science experiment” respect level high.
Etching cream safety:
3) Test the glass first
Not all glass behaves the same. Some products note that certain materials (including some Pyrex and non-glass surfaces) won’t etch properly. Coated or treated colored glass can also be unpredictable. Always test a hidden corner or a scrap piece before committing to your beautiful fern motif.
Material compatibility:
Choose Your Look: True Etching vs. Faux Etched Finish vs. Removable Film
Option A: True Glass Etching (Permanent)
This is the classic etched look: permanently frosted designs created by chemically altering the glass surface. It’s ideal if you want a long-lasting finish on a cabinet door, mirror panel, or salvaged glass shelf insert.
- Best for: decorative motifs, monograms, pharmacy-style labels, borders, privacy zones
- Pros: durable, high-end look, doesn’t peel
- Cons: irreversible, requires careful masking and safety gear
Option B: Frosted Glass Spray (Faux-Etched Look)
Frosted glass spray is a fantastic shortcut if you want the etched aesthetic without using caustic cream. HGTV and BHG both describe it as an easy way to get an etched-style finishespecially when using painter’s tape or stencils for patterns and stripes.
- Best for: broader frosted areas, geometric patterns, quick makeovers
- Pros: simpler process, good for large areas, can be removed with solvents on glass
- Cons: less premium than true etching up close, overspray risk, not for constant water exposure
Option C: Adhesive Frosted Film (Temporary / Renter-Friendly)
If your cabinet glass is part of a rental or you want a no-commitment test run, adhesive privacy film gives you the frosted look and can often be removed without residue. It’s the “try bangs before cutting bangs” version of this project.
Comparison of methods and renter/permanent notes:
Best Upcycle Ideas for Old Medicine Cabinet Glass
1) Vintage Apothecary Door Panel
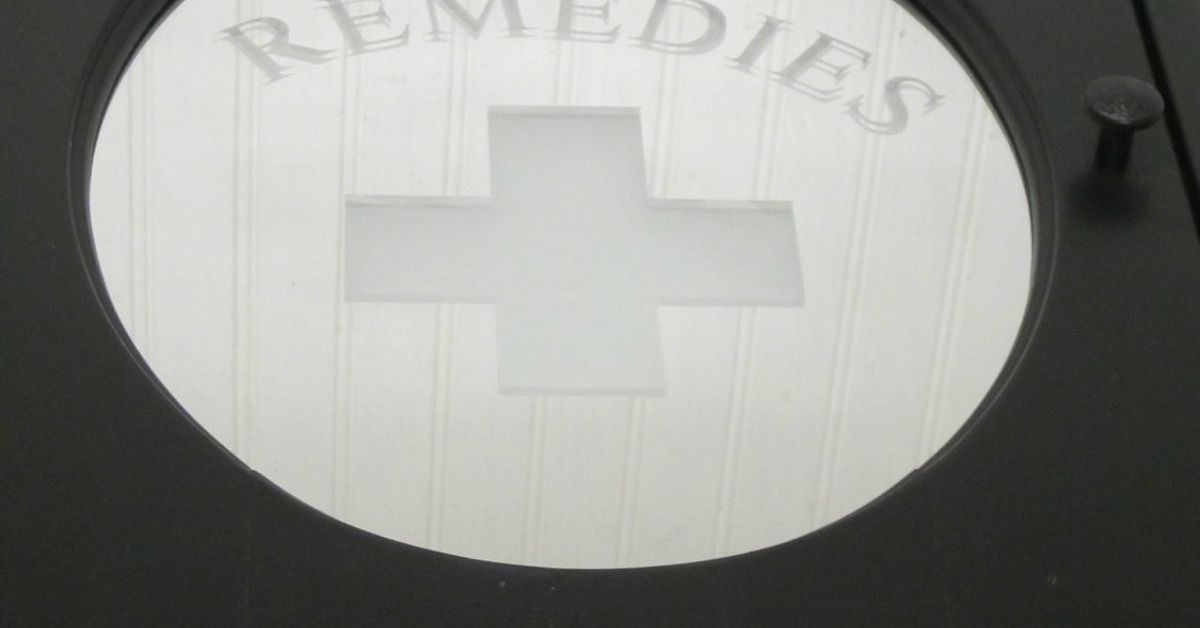
Etch a centered label like APOTHECARY, LINENS, FIRST AID, or your family name. Pair it with a painted frame (matte black, soft sage, warm white) and updated hardware for a classic look.
2) Botanical Privacy Glass
Use leaf silhouettes or wildflower stems around the border, leaving the center clearer. This creates privacy while still letting light bounce around the roomespecially useful if you’re reusing the glass in a bathroom or laundry door panel.
3) Entryway Catch-All from the Cabinet Door
Remove the door, etch a decorative border or phrase, and mount hooks below it. This approach works especially well with mirrored doors and can create a practical “drop zone” for keys, dog leashes, or reusable bags.
4) Cabinet-to-Open-Niche Hybrid
If the box is beyond saving but the glass shelves and door are usable, repurpose the shelves in an open niche and use the etched door as nearby wall décor. This keeps a piece of the original cabinet in the redesigned space, which is a nice storytelling detail in older homes.
Upcycle direction inspiration from makeover examples:
Materials and Tools for a Clean, Professional Result
For True Glass Etching
- Old medicine cabinet glass or mirror (removed and cleaned)
- Etching cream (follow manufacturer instructions exactly)
- Vinyl stencil, contact paper stencil, or reusable stencil
- Masking tape / painter’s tape
- Lint-free cloth and glass cleaner (or isopropyl alcohol for prep)
- Small brush or applicator
- Gloves, eye protection, long sleeves
- Plastic drop cloth / protected work surface
For Frosted Spray (Faux Etch)
- Frosted glass spray
- Stencil or painter’s tape pattern
- Masking paper / plastic for overspray control
- Gloves + ventilation setup (garage/outdoor area preferred)
For Cabinet Frame Refresh (Optional)
- Cleaner/degreaser
- Sandpaper or scuff pad (if safe and appropriate)
- Primer suited to the frame material
- Paint formulated for the job (bathroom humidity matters)
- New knob, pull, or hooks
Material/process guidance:
How to Do an Old Medicine Cabinet Glass Etching Upcycle (Step-by-Step)
Step 1: Remove and inspect the glass safely
Remove the cabinet door (or cabinet) carefully and label hardware in a zip bag. If you’re taking the whole cabinet out, support it while removing screws and note stud locations if you plan to reuse the opening later. Inspect the glass for chips, deep scratches, or loose mirror backing before deciding your design placement.
Removal steps and wall planning:
Step 2: Clean like you mean it
Etching hates grease, dust, and fingerprints. Clean the glass thoroughly, dry it completely, and avoid touching the area you plan to etch. Several tutorials and manufacturer instructions stress this because even tiny contamination can cause weak or patchy etching.
Pro move: after cleaning, handle the glass by the edges only.
Cleaning and fingerprint-free prep:
Step 3: Apply stencil and seal the edges
Whether you use reusable stencil sheets, vinyl cut on a Cricut, or contact-paper masking, your goal is the same: no gaps, no bubbles, no sneaky etching cream leaks.
Smooth the stencil firmly. Many makers use a credit card or flat tool to press edges down. Add masking tape around the design to protect surrounding glass. Hold the piece up to the light and patch accidental holes or tears with tape.
Stencil application and edge sealing:
Step 4: Set up your workspace (ventilation + water source)
Work in a well-ventilated area, near running water, with gloves and eye protection on before opening the etching cream. Manufacturer directions also emphasize temperature: around 70°F (or at least over 70°F for some etching workflows) can improve results.
Workspace, PPE, and temperature guidance:
Step 5: Apply etching cream in a thick, even coat
This is not the moment for a dainty brushstroke. Apply a thick coat so the design is fully covered and you can’t see through the cream. Thin coats can produce uneven areas and visible brush marks.
Some stencil systems call for about one minute, while vinyl-mask methods often run closer to five minutes. Follow your specific product/stencil instructions, and when in doubt, test on scrap glass first.
Thick coat + timing differences:
Step 6: Rinse thoroughly and remove stencil
Rinse from top to bottom, wash off all cream residue, and avoid splashing. The etched effect usually looks better once the glass is completely rinsed and dried. Then remove the stencil and clean the glass again for the final reveal.
If you’re working with porcelain or enamel sinks, be cautioussome DIY guides and kit instructions warn repeated exposure can dull certain sink surfaces. A plastic bucket or stainless sink is often a safer choice.
Rinsing and sink cautions:
Step 7: Refresh the frame (optional but highly recommended)
The etched glass gets all the glory, but the frame determines whether your project looks “designer upcycle” or “garage mystery item.” Clean, prep, prime, and paint based on the frame material and finish. Moisture-prone bathrooms reward careful prep and the right primer/paint system.
Primer/prep importance:
Faux-Etched Version: Using Frosted Glass Spray on Old Cabinet Glass
If you want a quick transformation or a larger frosted zone, frosted spray is a strong option. It can mimic the etched look, especially with tape stripes or stenciled patterns.
Spray Tips That Save the Project
- Work outdoors or in a well-ventilated area (an open garage works).
- Mask aggressively to prevent overspray on walls, floors, and hardware.
- Apply in even passes and keep the can moving.
- Use multiple wet coats rather than one heavy blast.
- Check coverage from different angles while drying.
Rust-Oleum guidance also includes practical limits: use within the recommended temperature/humidity range and avoid surfaces exposed to repeated water contact (like the inside of a shower door). In other words, this is excellent for decorative cabinet glass, but not a magic shield for every wet-zone surface.
Frosted spray application details and limits:
Design Mistakes to Avoid (So You Don’t Have to “Call It Rustic”)
1) Etching one giant solid block
Large solid etched areas can reveal natural glass texture/striations and look uneven. Many manufacturers suggest using designs with detail instead of one huge filled shape. Borders, linework, labels, and repeated motifs usually look cleaner and more intentional.
2) Weak masking
If the stencil edges aren’t fully adhered, etching cream can seep underneath and blur the design. Press edges firmly, tape the perimeter, and inspect for tiny holes.
3) Skipping test pieces
Timing varies by product, stencil type, glass composition, and how thickly you apply the cream. A five-minute test on scrap glass can prevent a very dramatic ten-minute regret.
4) Painting first, then panicking at paint on the glass
If you refresh the frame and get latex paint on smooth glass, removal is usually manageable with proper scraping technique (like using a razor scraper at the correct angle). Still, preventing mess is easier than heroic cleanup.
Common mistakes supported by guidance:
Styling Your Finished Piece
Once your etched glass upcycle is done, give it a setting that shows it off. A few easy ideas:
- Bathroom: Rehang over the vanity with updated pulls and warm wall sconces.
- Entryway: Add hooks under the etched door and use it as a key-and-mail station.
- Laundry room: Etch labels like “SOAP,” “LINENS,” or “SUPPLIES” on cabinet fronts.
- Kitchen pantry: Use frosted or etched inserts to hide visual clutter but keep lightness.
- Hallway décor: Frame a salvaged etched mirror door as vintage-inspired wall art.
The secret to making it look expensive? Repeat one finish elsewhere in the roomsame metal tone, same paint color family, or the same motif (like stripes or botanicals).
Conclusion
An old medicine cabinet glass etching upcycle is one of those rare DIY projects that checks all the boxes: budget-friendly, creative, functional, and genuinely custom. You get to preserve a little architectural history, improve the look of your space, and end up with a piece that feels far more intentional than anything mass-produced.
If you want the most polished result, focus on the fundamentals: clean glass, solid stencil adhesion, proper safety gear, correct etching timing, and a finished frame that complements your room. Do that, and your old cabinet won’t just be “saved” it’ll become the piece people ask about.
And honestly, that’s the best kind of upcycle: the one that starts with “Should I throw this away?” and ends with “Why does this look like I bought it from a boutique?”
Practical Experience Notes (500+ Words): What DIYers Commonly Learn the Hard Way
The most useful experiences around an old medicine cabinet glass etching upcycle usually have less to do with artistic talent and more to do with workflow. In real DIY settings, people often assume the “hard part” is the design. In practice, the hard part is restraint: taking time to prep the glass, slow down at the stencil stage, and protect nearby surfaces before the fun starts. The difference between a crisp, professional etched panel and a smudgy “close enough” panel is often just fifteen extra minutes of prep.
One of the most common experiences is discovering that old glass looks clean when it is not actually clean. A medicine cabinet door that has spent years in a bathroom may have invisible residues from hairspray, hand soap mist, cleaning products, and plain old skin oils. DIYers frequently report that their first etch came out patchy, then their second one looked dramatically better after they cleaned more thoroughly and avoided touching the design area. This is why so many instructions emphasize fingerprints. It sounds fussy until you see the results side by side.
Another common lesson: stencil quality matters, but edge adhesion matters more. People can get excellent results with simple masking materials, premium vinyl, or reusable stencil systemsas long as the edges are pressed down securely. Tiny gaps are where trouble starts. A lot of experienced crafters learn to hold the piece up to a light source before applying cream or spray, because small tears and pinholes are much easier to fix with tape beforehand than to explain afterward as “part of the design.” (It is almost never part of the design.)
Timing is also a recurring surprise. Many beginners assume “longer equals better” with etching cream, but real project experience shows that timing depends on the product, stencil type, and glass surface. Some applications are intentionally short; others need a few minutes to fully develop a strong frosted effect. DIYers who get the best outcomes usually follow manufacturer directions for their exact system, then test on scrap or a hidden corner when using unfamiliar glass. That tiny test removes a lot of anxiety and prevents over-etching, under-etching, or uneven coverage.
People also tend to underestimate how much the frame finish changes the final impression. A beautifully etched panel set back into a chipped, yellowing, or rusty frame can still look unfinished. On the other hand, even a simple etched stripe pattern looks upscale when paired with a freshly painted frame, clean hardware, and a thoughtful placement in the room. Many DIYers end up saying the etching was the fun step, but painting and hardware updates were what made the project look complete.
There’s also a practical lesson in choosing the right method. DIYers who want a permanent custom design usually love true etching once they try it. But those working on larger glass areas, testing ideas, or avoiding caustic products often feel relieved they chose frosted spray or removable film first. In other words, the “best” technique is not always the fanciest oneit is the one that matches your confidence level, workspace, and tolerance for permanence.
Finally, a surprisingly common experience is emotional: people start this project thinking they are just salvaging an old cabinet, and finish realizing they changed the whole mood of the space. Old medicine cabinets often sit at eye level, which means even a small update has a big visual impact. That’s why this project feels so satisfying. You are not just reusing glassyou are turning a once-ignored object into something that looks intentional, personal, and a little bit brilliant.
Sources synthesized (10–15 reputable U.S. sites + official product docs) for factual guidance: EPA (lead-safe DIY/RRP), CPSC (lead paint), This Old House, Bob Vila, HGTV, Better Homes & Gardens, The Spruce Crafts, Cricut, Armour Products manuals/kits, Rust-Oleum support/TDS, Sherwin-Williams, Young House Love, A Piece of Rainbow, Fynes Designs.