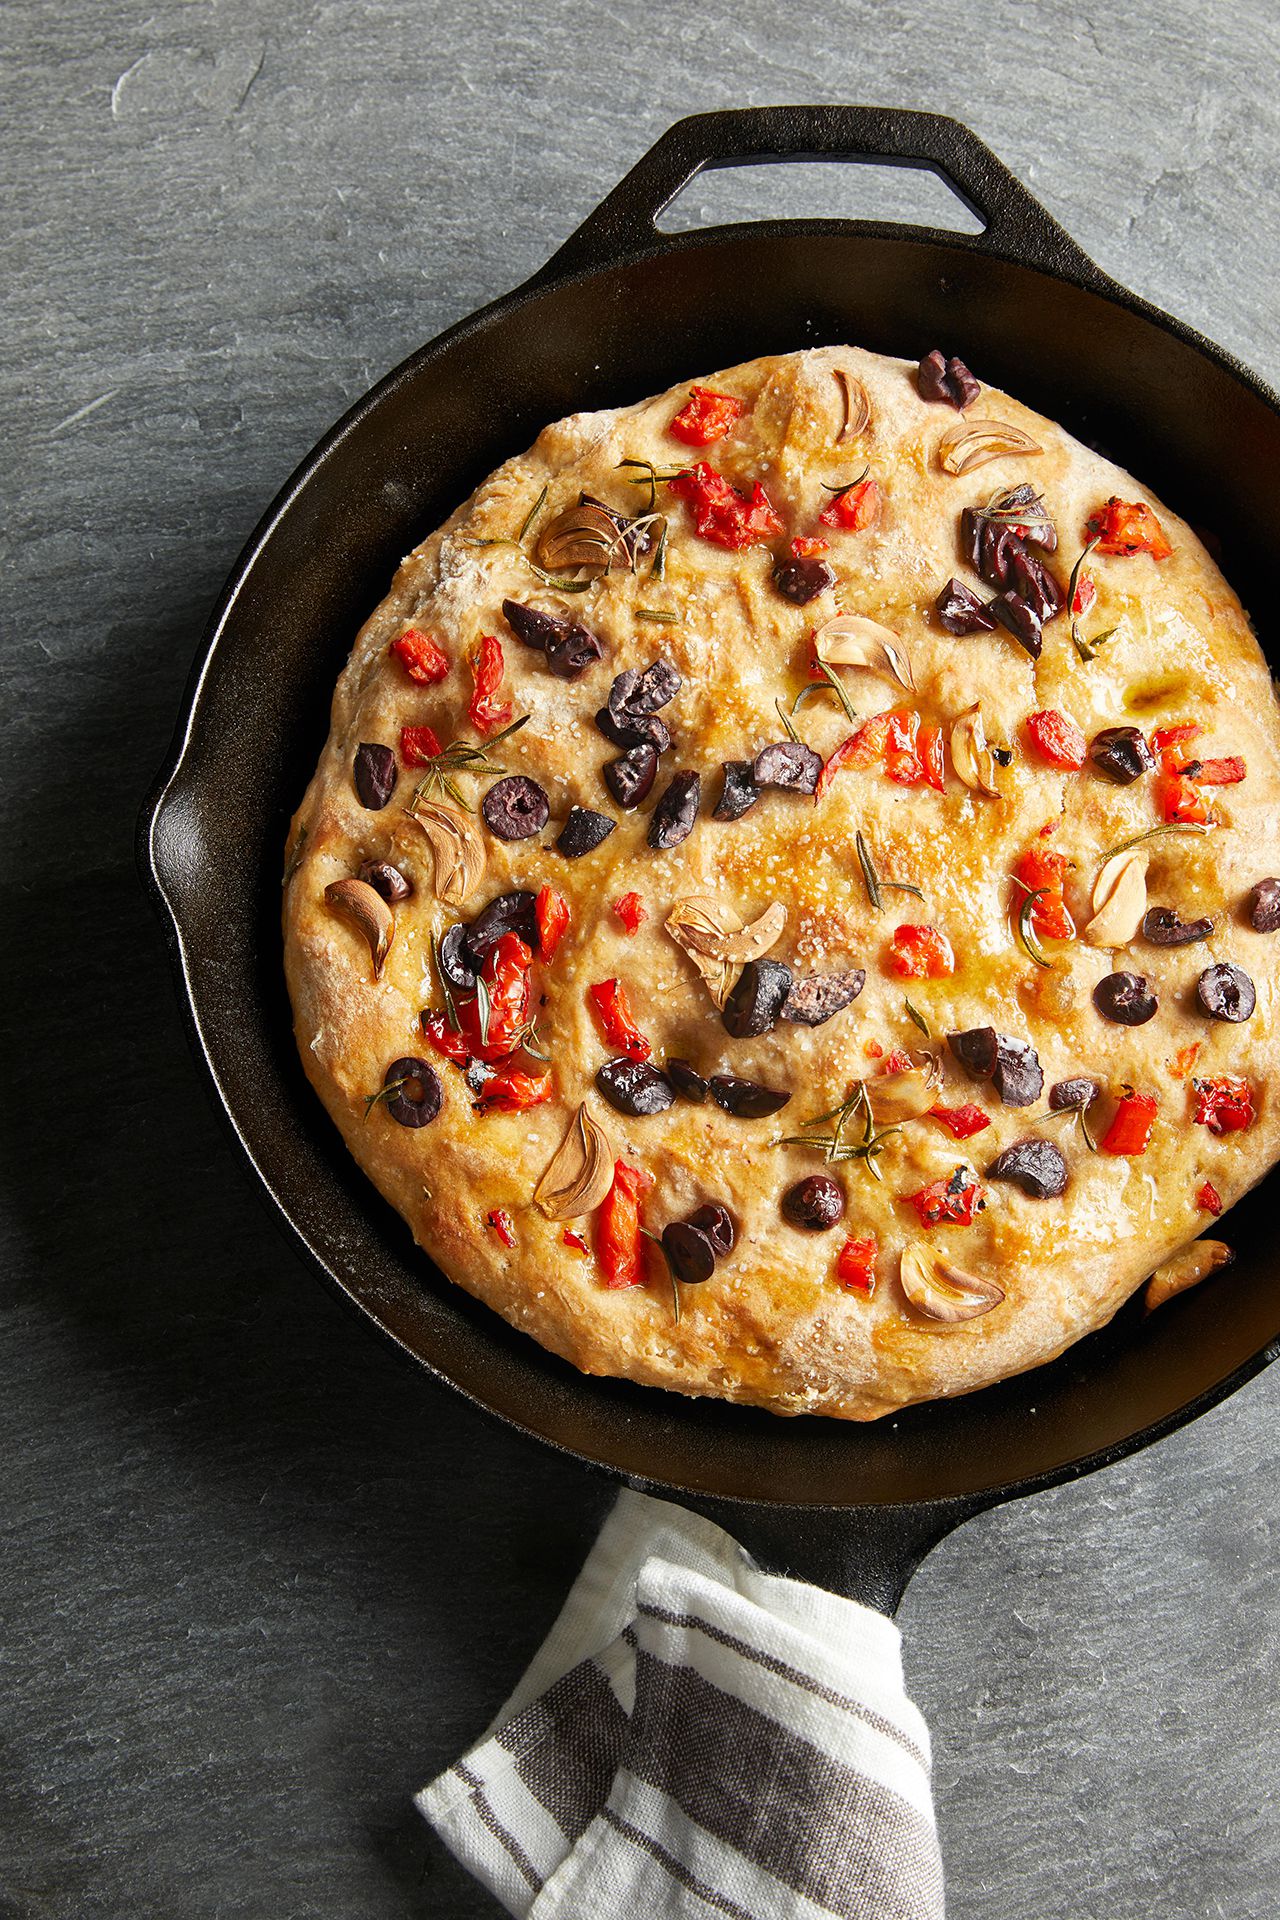
If you’ve ever wanted homemade bread but didn’t want to commit to homemade bread (emotionally, spiritually, or with your forearms),
this no-knead skillet focaccia is your low-effort, high-reward situation. You stir a shaggy dough, let time do the heavy lifting, and bake it in a hot skillet
until the edges turn into crispy, olive-oil-fried magic. The center stays pillowy. The top gets dimples you can proudly poke like you’re testing a mattress at IKEA.
This is the kind of bread that makes people say, “Wait… you made this?” with the exact tone reserved for surprising plot twists and perfectly parallel parking.
It’s beginner-friendly, weeknight-flexible, andmost importantlybuilt for maximal crunchy corners.
Why This No-Knead Skillet Focaccia Works
Great focaccia is basically three things: a well-hydrated dough, lots of olive oil, and enough patience to let yeast do its tiny, invisible job.
The “no-knead” part doesn’t mean “no structure.” It just means we build strength gently (with folds and rest time) instead of wrestling the dough like it owes you money.
- High hydration = airy crumb. Wet dough traps big bubbles and bakes up light and open.
- Cold fermentation = flavor. An overnight rest in the fridge deepens the taste and makes the dough easier to handle.
- Cast iron = crispy bottom + bold edges. A skillet acts like a heat battery, browning the crust like it’s auditioning for a commercial.
- Olive oil does double-duty. It prevents sticking and “shallow-fries” the crust for that signature focaccia crunch.
What You Need
Equipment
- 10-inch or 12-inch cast iron skillet (oven-safe metal skillet works too)
- Large mixing bowl
- Rubber spatula or dough whisk (a sturdy spoon is fine)
- Plastic wrap, lid, or a clean towel
- Kitchen scale (optional, but it makes bread life easier)
Ingredients
Makes: 1 round focaccia (about 8 wedges) • Great for: sandwiches, soups, snack attacks
- Bread flour 400g (about 3 1/3 cups) or all-purpose flour 400g (slightly less chewy, still excellent)
- Warm water 320g (about 1 1/3 cups) (think “bathwater,” not “volcano”)
- Instant yeast 1 tsp (or active dry yeast 1 tsp; see tips below)
- Fine salt 10g (about 1 3/4 tsp)
- Extra-virgin olive oil 60g (about 1/4 cup), plus more for the skillet and topping
- Honey or sugar 1 tsp (optional; helps fermentation and browning)
- Flaky sea salt for finishing
- Fresh rosemary (optional but classic)
The No-Knead Skillet Focaccia Recipe
Step 1: Mix the Dough (5 minutes)
In a large bowl, whisk together the flour, salt, and yeast. Add the warm water, olive oil, and honey (if using).
Stir until no dry flour remains. The dough will look shaggy and stickylike it’s not sure it wants to be bread yet. That’s normal.
Step 2: Rest (15 minutes)
Cover the bowl and let the dough rest for 15 minutes. This short rest starts gluten development without kneading.
Consider it a spa appointment for flour.
Step 3: Do 3 Gentle Folds (5 minutes total)
Wet or lightly oil your hand. Grab one side of the dough, stretch it up, and fold it over the center. Rotate the bowl and repeat 8–12 times until you’ve worked your way around.
Cover and rest 15 minutes. Repeat this fold-and-rest cycle two more times (so: fold/rest, fold/rest, fold/rest).
By the last fold, the dough should feel smoother and a bit bouncier. Still stickybut now it has confidence.
Step 4: Choose Your Timeline
Option A: Overnight (best flavor, easiest handling)
Cover the bowl and refrigerate for 8 to 24 hours (and up to 72 hours if your schedule is chaotic-good). Cold fermentation builds depth and improves texture.
Option B: Same-Day (still great, just faster)
Cover and let rise at room temperature for 1 to 2 hours, until noticeably puffy and bubbly.
Warmer kitchens rise faster; cooler kitchens take longer. Dough follows its own calendar.
Step 5: Oil the Skillet Like You Mean It
Pour 2 to 3 tablespoons of olive oil into your skillet and tilt to coat the bottom and sides generously.
This isn’t the moment to be shyfocaccia is famous for its crisp, olive-oil-rich crust.
Step 6: Second Rise in the Skillet (1 to 3 hours)
Scrape the dough into the skillet. Flip once so both sides get a glossy oil coat. Cover and let it rise until it looks
marshmallowy, jiggly, and airy. If the dough is cold from the fridge, expect 2 to 3 hours.
If it’s room temp, 60 to 90 minutes is common.
If the dough doesn’t reach the edges right away, don’t force it. Give it 15 minutes, then gently nudge it outward.
Dough hates being rushed. It will expand when it’s ready.
Step 7: Preheat + Dimple (the fun part)
Preheat the oven to 450°F. Once the dough is puffy, drizzle 1 to 2 tablespoons olive oil over the top.
Oil your fingertips, then press straight down to create dimples all overgo confidently, almost to the pan.
Those dimples hold little pools of oil and create the classic focaccia top.
Finish with flaky sea salt and rosemary (or your favorite toppingsideas below).
Step 8: Bake (20 to 28 minutes)
Bake on the middle rack until deeply golden on top and crisp at the edges, typically 20 to 28 minutes.
If your oven runs cool, it may take a bit longer. You’re looking for a bold tannot “slightly beige.”
Step 9: Bonus Crisp (Optional, but dangerously good)
Carefully lift the focaccia out of the skillet (use a spatula if needed) and place it directly on the oven rack for 3 to 6 minutes.
This crisps the sides and bottom even more. Let cool on a rack for at least 10 minutes before slicingsteam needs a minute to settle.
Flavor and Topping Ideas (Without Making It Soggy)
Focaccia is basically a canvas, and olive oil is your paint. Keep toppings balancedtoo wet and the dough can struggle to rise or bake through.
Here are combinations that play nice with a high-hydration no-knead bread:
Classic and Foolproof
- Rosemary + flaky salt
- Everything bagel seasoning + chives
- Black pepper + parmesan (add cheese in the last 10 minutes to avoid overbrowning)
Pizza-Shop Energy
- Thinly sliced garlic + oregano + red pepper flakes
- Olives + rosemary + lemon zest
- Caramelized onions + thyme (add onions after dimpling)
Tomato Options That Won’t Flood the Dough
- Cherry tomatoes, halved and gently pressed in (pat cut sides dry)
- Sun-dried tomatoes (less moisture, big flavor)
- A thin swipe of tomato paste after the first bake, then a quick broil (for a “focaccia pizza” moment)
Ingredient Notes (So You Don’t Get Ambushed)
Instant Yeast vs. Active Dry
Instant yeast can be mixed directly with flour. Active dry yeast works toojust dissolve it in the warm water first and let it sit 5 minutes until foamy.
If it doesn’t foam, your yeast might be expired (or your water was too hot and sent it to an early retirement).
Bread Flour vs. All-Purpose
Bread flour gives a chewier crumb and better structure for big bubbles. All-purpose flour makes a slightly softer bite.
Both are valid. This is a safe space.
Olive Oil Quality Matters (But Don’t Panic)
Use an olive oil you enjoy the taste of, because focaccia is basically an olive oil delivery system with good PR.
You don’t need a $40 bottlebut if your oil tastes bitter or stale straight from the spoon, the bread will not magically fix that.
Troubleshooting: Quick Fixes for Common Focaccia Drama
“My dough is so sticky I could wallpaper with it.”
Correct. High hydration dough is sticky. Use wet hands, oil your fingertips, and resist the urge to add lots of flour.
Extra flour can make the crumb tighter and the bread drier.
“It barely rose.”
Check yeast freshness, water temperature, and room temp. Cold kitchens slow fermentation dramatically.
If needed, let the dough rise in the oven with the light on (oven OFF) to create a gentle warm environment.
“The center is gummy.”
It likely needed more bake time. Focaccia should feel light and sound slightly hollow when tapped.
Next time, bake a few minutes longer or lower the rack slightly so heat reaches the center more evenly.
“The bottom got too dark.”
Cast iron browns aggressively (it’s proud of its job). Try baking one rack higher, reducing oven temp to 425°F,
or shortening bake time and finishing on the rack for crispness instead.
How to Serve Skillet Focaccia
- Sandwiches: Slice horizontally and fill with turkey, provolone, arugula, and a swipe of mayo. Suddenly lunch is a personality.
- Soup sidekick: Dip into tomato soup, minestrone, or anything brothy and grateful.
- Snack board hero: Serve with hummus, olives, and a dramatic sprinkle of flaky salt.
- Brunch move: Toast wedges and top with scrambled eggs and hot sauce. You’re welcome.
Storage and Reheating
Focaccia is best the day it’s baked, when the crust is crisp and the crumb is cloud-like. But leftovers still shine if you reheat properly.
Store at room temperature wrapped loosely in foil or in a paper bag for 1 day (airtight containers can soften the crust).
For longer storage, freeze slices tightly wrapped.
Reheat at 375°F for 8–12 minutes (or toast slices in a skillet). The goal is to revive the crust without drying the center.
Conclusion: Your Skillet Just Became a Bakery
This no-knead skillet focaccia recipe is the sweet spot between “artisan bread project” and “I need carbs now.”
You get deep flavor (especially with an overnight rest), dramatic bubbles, and a crispy olive-oil crustwithout kneading,
special equipment, or a complicated shaping routine.
Once you bake it once, you’ll start eyeing your skillet like it’s a subscription service. Try different toppings, tweak the timeline,
and keep flaky salt within arm’s reach. Future you will be extremely pleased.
Extra: of Real-World Focaccia Experiences (So You Feel Seen)
Let’s talk about what actually happens when you make no-knead focaccia at homebecause the recipe is simple, but the experience is a whole vibe.
First, there’s the moment you mix the dough and think, “This can’t be right.” It’s sticky, messy, and has the structural integrity of a sleepy jellyfish.
This is where many good people panic and start adding flour. Don’t. Walk away slowly. Give it time. The dough is not broken; it’s just wet on purpose.
Then comes the folding stage, which feels suspiciously like you’re doing the bare minimum and still getting credit. You lift, fold, rotate, repeat,
and suddenly the dough starts behaving. It tightens up. It smooths out. It stops trying to glue itself permanently to your hand like a clingy sticker.
This is the first little dopamine hityour brain goes, “Oh. I am a bread person.” Congratulations, you’ve been recruited.
If you do the overnight rise, the next day is even better. You open the fridge and the dough is puffed and bubbly, like it had a productive meeting while you slept.
Cold dough is easier to handle, tooless sticky, more cooperative. It’s the bread equivalent of getting eight hours of sleep and drinking water.
When you slide it into an oil-slicked skillet, it relaxes and spreads like it owns the place. Honestly, inspirational.
The dimpling step deserves its own fan club. You drizzle olive oil, oil your fingertips, and press little craters into the surface.
It’s weirdly therapeuticlike bubble wrap, but tastier and socially acceptable at dinner parties. And those dimples do real work:
they hold oil, encourage browning, and create the signature focaccia look that makes your bread instantly recognizable as “the fancy one.”
Baking is where the house starts smelling like an Italian bakery moved in and started paying rent in rosemary.
Around minute fifteen, you’ll probably crouch in front of the oven door like a proud parent at a school play.
The top turns golden, the edges crisp, and the bubbles rise in dramatic little domes.
If you do the “finish on the rack” trick, you’ll hear a faint crackle as the crust dries and crispsbread ASMR at its finest.
And finally: slicing. This is where patience matters. Cut too early and steam escapes, potentially leaving the crumb slightly gummy.
Wait ten minutes and you’ll get clean slices with an airy, tender interior. The first bite is always the same:
crisp edge, olive oil richness, flaky salt sparkleand the immediate thought, “Why don’t I do this every week?”
You might not do it every week, but you’ll definitely talk about doing it every week. That counts.