There are desserts you plan for, and then there are desserts that happen because your sweet tooth kicks down the door at 9:47 p.m. and demands a warm cookie immediately. That, dear reader, is where this microwave pizookie recipe shines like a chocolate-chip-studded superhero.
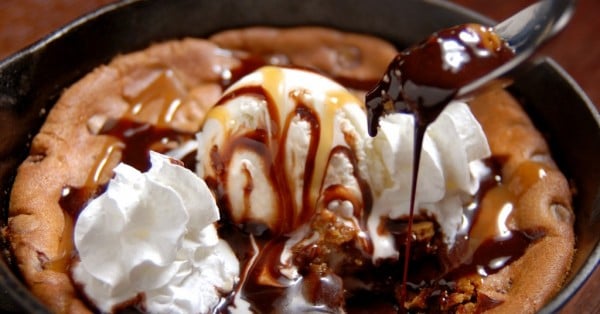
A pizookie is the glorious mashup of a pizza-sized cookie and a warm skillet dessert, usually served gooey in the center with a scoop of vanilla ice cream melting dramatically on top. Traditionally, it is baked in a skillet or deep dish, but today we are shrinking the drama, speeding up the process, and skipping the oven entirely. This version gives you a soft, chewy, chocolatey, single-serve pizookie in just a few minutes.
No mixer. No baking sheet. No waiting for dough to chill while you stare into the refrigerator like it owes you money. Just a microwave-safe ramekin or mug, a spoon, pantry ingredients, and the kind of dessert satisfaction that makes you whisper, “I deserve this,” even if you already had snacks.
What Is a Microwave Pizookie?
A microwave pizookie is a mini deep-dish cookie cooked in the microwave instead of the oven. It has the same soul as a classic skillet cookie: buttery dough, brown sugar richness, melty chocolate chips, crisp-ish edges if cooked in a wider dish, and a soft center that practically begs for ice cream.
The main difference is speed. A traditional pizookie may take 20 minutes or more to bake. This microwave version cooks in about 45 to 75 seconds, depending on your microwave wattage and the size of your dish. It is not meant to be a crisp bakery cookie. It is meant to be warm, gooey, spoonable, and dangerously convenient.
Why You Will Love This Microwave Pizookie Recipe
This recipe is built for real life. The kind of life where you want dessert but do not want to preheat the oven, wash three bowls, or explain to your household why you made 24 cookies “for testing.”
It Is Fast
From melting the butter to adding the final scoop of ice cream, this dessert can be ready in under five minutes. It is ideal for late-night cravings, dorm cooking, small apartments, office treat emergencies, or any situation where patience has left the building.
It Uses Pantry Staples
You only need basic ingredients: butter, sugar, flour, vanilla, salt, an egg yolk, and chocolate chips. No cake mix. No strange powders. No ingredient that requires a treasure map through a specialty grocery aisle.
It Makes One Generous Serving
This is technically a single-serving pizookie, although it can be shared by two people with strong self-control. If you do share, congratulations on your emotional maturity.
It Is Customizable
Chocolate chips are classic, but you can add peanut butter chips, chopped nuts, crushed cookies, caramel bits, mini marshmallows, or a sprinkle of flaky sea salt. The microwave pizookie is basically a tiny dessert playground.
Ingredients for the Best Microwave Pizookie
- 1 tablespoon unsalted butter, melted
- 1 tablespoon packed brown sugar
- 1 teaspoon granulated sugar
- 1/4 teaspoon vanilla extract
- 1 small pinch salt
- 1 egg yolk
- 3 tablespoons all-purpose flour
- 1/8 teaspoon baking soda
- 2 tablespoons chocolate chips, plus more for topping
- Vanilla ice cream, for serving
- Optional toppings: hot fudge, caramel sauce, chopped pecans, flaky sea salt, whipped cream, or sprinkles
The Best Dish to Use
For a true pizookie feel, use a small microwave-safe ramekin, shallow bowl, or wide mug that holds at least 8 ounces. A wider dish helps the dough cook more evenly and gives you a better ratio of edge to gooey center. A narrow mug works too, but the center may stay softer while the edges firm up faster.
Avoid metal, cracked ceramics, or anything that is not labeled microwave-safe. Dessert is exciting. Sparks are not.
How to Make a Microwave Pizookie
Step 1: Melt the Butter
Add the butter to your microwave-safe ramekin or mug. Microwave for 15 to 25 seconds, just until melted. The butter should be liquid but not aggressively bubbling like it is trying to launch itself into orbit.
Step 2: Mix the Sugars
Stir in the brown sugar and granulated sugar until the mixture looks glossy and slightly thick. Brown sugar gives the pizookie chewiness and a caramel-like flavor, while a little white sugar helps balance the texture.
Step 3: Add Vanilla, Salt, and Egg Yolk
Mix in the vanilla extract, salt, and egg yolk. Use only the yolk, not the whole egg. A full egg can make a small microwave cookie taste rubbery or cakey. The yolk brings richness, moisture, and that soft cookie texture you actually want.
Step 4: Add the Dry Ingredients
Stir in the flour and baking soda until just combined. Do not overmix. Once you no longer see dry flour, stop stirring. Overworking the dough can make the pizookie tougher, and this dessert did not come all this way to become a tiny tire.
Step 5: Fold in Chocolate Chips
Add the chocolate chips and gently stir. Sprinkle a few extra chips on top so the finished pizookie looks bakery-level dramatic. This is not required, but we eat with our eyes first, and our eyes enjoy chocolate.
Step 6: Microwave
Microwave on high for 45 seconds. Check the top. It should look puffed and mostly set around the edges, but the center may still appear slightly soft. If needed, microwave in 5- to 10-second bursts until it looks just set.
Most microwave pizookies are done between 50 and 75 seconds. Do not overcook it. The pizookie continues to firm up as it rests, and the difference between gooey and dry can be one overly confident extra 20 seconds.
Step 7: Rest and Top
Let the pizookie rest for 1 to 2 minutes. This helps the heat finish cooking the center and prevents you from burning your tongue, which is a tragic way to meet dessert. Top with vanilla ice cream, chocolate sauce, caramel, or a pinch of flaky sea salt.
Microwave Pizookie Recipe Card
Quick Microwave Pizookie
Prep time: 3 minutes
Cook time: 45 to 75 seconds
Total time: About 5 minutes
Servings: 1 generous serving
Ingredients
- 1 tablespoon unsalted butter, melted
- 1 tablespoon packed brown sugar
- 1 teaspoon granulated sugar
- 1/4 teaspoon vanilla extract
- Pinch of salt
- 1 egg yolk
- 3 tablespoons all-purpose flour
- 1/8 teaspoon baking soda
- 2 tablespoons chocolate chips
- Vanilla ice cream, for topping
Instructions
- Melt butter in an 8-ounce microwave-safe ramekin, shallow bowl, or mug.
- Stir in brown sugar, granulated sugar, vanilla, and salt until combined.
- Add egg yolk and mix until smooth.
- Stir in flour and baking soda just until no dry streaks remain.
- Fold in chocolate chips and sprinkle a few extra on top.
- Microwave on high for 45 seconds, then continue in 5- to 10-second intervals if needed.
- Let rest for 1 to 2 minutes, then serve warm with ice cream.
Tips for a Gooey, Bakery-Style Result
Use Brown Sugar for Chew
Brown sugar is the secret to that soft, chewy middle. It adds moisture and a deeper flavor than white sugar alone. If you use only granulated sugar, your microwave cookie may taste flatter and turn firmer faster.
Do Not Skip the Salt
A tiny pinch of salt makes the chocolate taste richer and keeps the dessert from becoming one-note sweet. If you have flaky sea salt, add a little on top after cooking for a grown-up finish. It says, “I am sophisticated,” even if you are eating in pajamas.
Microwave in Short Bursts
Microwaves vary wildly. A 700-watt microwave may need more time, while a 1,200-watt microwave can overcook the edges quickly. Start with less time and add more as needed. You can always cook it longer, but you cannot un-dry a cookie.
Let It Rest Before Eating
The resting time is small but important. The center finishes setting, the chocolate stays melty, and the texture becomes more like a real deep-dish cookie. Also, molten sugar is hot enough to humble anyone.
Flavor Variations
Peanut Butter Chocolate Pizookie
Add 1 teaspoon creamy peanut butter to the dough before microwaving, then top with peanut butter chips and vanilla ice cream. This version tastes like a peanut butter cup decided to pursue higher education.
Double Chocolate Pizookie
Replace 1 teaspoon of the flour with unsweetened cocoa powder and use chocolate chunks instead of chips. Add a drizzle of hot fudge after cooking for maximum drama.
Cookies and Cream Pizookie
Stir in 1 crushed chocolate sandwich cookie with the chocolate chips. Top with cookies-and-cream ice cream if you want to fully commit to the theme.
Salted Caramel Pizookie
Add a few caramel bits to the dough and finish the cooked pizookie with caramel sauce and flaky sea salt. This one tastes like something you would pay too much for at a restaurant and not regret.
Nutty Chocolate Chip Pizookie
Fold in 1 tablespoon chopped pecans or walnuts. Nuts add crunch, flavor, and a tiny sense of responsibility because technically something from a tree is involved.
Troubleshooting Your Microwave Pizookie
Why Is My Pizookie Dry?
It was probably overcooked or had too much flour. Spoon flour lightly into the measuring spoon and level it off instead of packing it down. Also, stop microwaving when the center still looks a little soft. That softness becomes gooey magic after resting.
Why Is It Too Wet in the Middle?
It may need another 5 to 10 seconds, or your dish may be too narrow. A deep mug can trap moisture and cook unevenly. Try a wider ramekin next time for more even heat.
Why Did It Taste Eggy?
Make sure you use only the egg yolk and mix it thoroughly into the butter and sugar. A whole egg is too much for this small recipe and can create a spongy, omelet-adjacent situation. Nobody invited breakfast.
Why Did It Overflow?
Your dish may have been too small, or you added too much baking soda. Use an 8-ounce or larger container and measure the baking soda carefully. This is dessert, not a science fair volcano.
Can You Make It Without Egg?
Yes. For an egg-free microwave pizookie, replace the egg yolk with 1 tablespoon milk or 1 tablespoon plain yogurt. The texture will be slightly less rich, but still soft and delicious. You may need to reduce the microwave time by a few seconds because egg-free dough can firm up faster.
Can You Make It Gluten-Free?
You can make a gluten-free microwave pizookie by using a 1:1 gluten-free all-purpose flour blend designed for baking. The texture may be a little more delicate, so let it rest before digging in. If the dough looks dry before cooking, add 1/2 teaspoon milk.
Can You Make It Ahead?
This recipe is best fresh, but you can mix the dough in the ramekin, cover it, and refrigerate it for up to 24 hours. When ready to cook, let it sit at room temperature for about 10 minutes, then microwave as directed. Chilled dough may need a few extra seconds.
Serving Ideas
The classic topping is vanilla ice cream, because warm cookie plus cold ice cream is one of civilization’s better decisions. But you can also serve your microwave pizookie with whipped cream, chocolate syrup, sliced strawberries, crushed pretzels, toasted coconut, or a spoonful of Nutella.
For a party-style dessert, make several ramekins and set up a mini topping bar. Let everyone add their own ice cream, sauces, and crunchy toppings. It is easier than baking a full dessert and more fun than pretending fruit salad counts as cake.
Food Safety Note
Because this recipe contains raw flour and egg yolk before cooking, do not eat the uncooked dough. Microwave until the dough is visibly set around the edges and allow it to rest before serving. If you are cooking for young children, older adults, pregnant people, or anyone with a weakened immune system, take extra care to cook the dessert thoroughly.
Experience Notes: What I Learned Making Microwave Pizookies
The first thing you learn when making a microwave pizookie is that the microwave has a personality. Some are gentle and polite. Others behave like tiny countertop dragons. That is why timing matters more than confidence. The first time I tested a microwave cookie-style dessert, I thought, “One full minute sounds harmless.” It was not harmless. The edges turned firm, the center puffed, and the whole thing had the emotional texture of a cookie-flavored sponge. Still edible? Yes. Worth repeating? Not without ice cream and forgiveness.
The best version came from treating the microwave like a powerful tool, not a magic box. Starting at 45 seconds made a huge difference. At that point, the top looked slightly underdone, but after resting for two minutes, the center settled into a warm, spoonable texture. That is the sweet spot. A microwave pizookie should not look completely dry when you pull it out. If it looks fully baked in the microwave, it may be overbaked by the time it cools enough to eat.
Dish shape also matters more than people expect. A narrow mug makes the dessert feel cozy, but it can cook unevenly. The bottom may stay soft while the upper edges toughen. A shallow ramekin gives better results because the dough spreads slightly, creating more surface area and a texture closer to a skillet cookie. If you want the “pizookie” experience instead of just a mug cookie, use a small, wide dish.
Another lesson: toppings are not decoration; they are strategy. Vanilla ice cream helps balance the sweetness and softens the heat of the cookie. A drizzle of chocolate sauce makes the dessert feel restaurant-style. A pinch of flaky salt makes it taste more complex, as if you planned the whole thing instead of making it during a commercial break. Even chopped nuts or crushed pretzels can add contrast, which keeps every bite from being simply soft and sweet.
The egg yolk is also worth the tiny inconvenience of separating an egg. Without it, the pizookie can still be good, especially with milk or yogurt as a substitute, but the yolk gives the dough a richer, more classic cookie flavor. It helps create that tender center that makes a warm pizookie so satisfying. Just do not use the whole egg unless you are scaling the recipe up. In a single serving, one whole egg takes over like a guest who brought a guitar to dinner.
Finally, the microwave pizookie is best enjoyed immediately and without overthinking it. This is not a dessert that needs perfect plating or a long backstory. It is meant to be made quickly, topped generously, and eaten while the chocolate is still glossy. The beauty of it is not just that it tastes good. It is that it gives you the warm-cookie experience without turning your kitchen into a baking project. Sometimes the best dessert is the one that appears fast, uses one spoon, and leaves you with only a ramekin to wash.
Conclusion
This Microwave Pizookie Recipe proves that you do not need an oven, a skillet, or a heroic amount of patience to enjoy a warm, gooey cookie dessert. With a few pantry staples and less than five minutes, you can make a soft chocolate chip pizookie that tastes indulgent, comforting, and just fancy enough to top with ice cream.
The key is simple: use brown sugar for chew, egg yolk for richness, a microwave-safe ramekin for even cooking, and short cooking intervals to protect that gooey center. Once you master the base recipe, the variations are endless. Add peanut butter, caramel, nuts, cocoa powder, crushed cookies, or whatever your dessert-loving heart demands.
Whether you are cooking for one, making a quick after-dinner treat, or trying to survive a sudden chocolate craving with dignity, this microwave pizookie is the answer. It is fast, fun, customizable, and delightfully low-effort. In other words, it is exactly the kind of dessert modern life deserves.