A stylish area rug can transform a room, but the price tag sometimes suggests it was handwoven by royalty using threads of pure gold. Fortunately, a canvas painter’s drop cloth offers a much more budget-friendly starting point. Add a no-sew hem, a painted pattern, handmade yarn tassels, and a nonslip rug pad, and that humble piece of worksite fabric becomes surprisingly polished home decor.
This no sew drop cloth rug DIY is suitable for a bedroom, home office, covered porch, reading corner, or low-traffic living area. You can customize its dimensions, colors, pattern, and tassel spacing without touching a sewing machine. The finished piece is lightweight and decorative, with the relaxed texture of a vintage floor cloth and the personality of a bohemian rug.
Why Make a Rug From a Canvas Drop Cloth?
Canvas drop cloths are durable, reusable, affordable, and commonly made from cotton or a cotton blend. Unlike plastic sheeting, canvas has a woven surface that accepts fabric paint and adhesives. Many drop cloths also arrive with finished factory edges, reducing the amount of hemming required.
A DIY canvas rug also gives you control over the design. Instead of searching for the mythical rug that is the correct size, color, pattern, and price, you can make one that matches your room. It is especially useful when you need an unusual size for an entryway, beside a bed, or beneath a narrow console table.
Keep expectations realistic, however. A homemade drop cloth rug is thinner than a woven wool or synthetic area rug. It works best as a decorative floor covering in a dry indoor space or protected outdoor area, not as a substitute for heavy-duty carpet in a muddy entrance.
Materials and Tools
- Heavy cotton or cotton-blend canvas drop cloth
- Measuring tape and washable fabric marker or pencil
- Sharp fabric scissors
- Iron and ironing board
- Permanent fusible hem tape or flexible fabric adhesive
- Painter’s tape, stencil, or cardboard pattern template
- Fabric paint, or acrylic paint combined with textile medium
- Foam roller, stencil brush, or dense cosmetic sponge
- Cardboard or plastic sheet for protecting the work surface
- Cotton yarn, macramé cord, or soft acrylic yarn
- Scrap cardboard for making matching tassels
- Strong flexible fabric glue for attaching the tassels
- Nonslip rug pad approved for your flooring
Choosing the Right Drop Cloth
Select a washable canvas drop cloth with an even weave and enough weight to lie reasonably flat. An 8-ounce canvas generally feels more substantial than a lightweight utility cloth. Inspect the package dimensions carefully because advertised measurements can vary slightly from the actual finished size.
Avoid drop cloths with obvious plastic backing if you plan to iron them. Backed products may require different adhesives and lower-temperature handling. Natural canvas is usually easier to fold, paint, and customize.
Step 1: Decide on the Finished Rug Size
Measure the floor area rather than guessing while holding a folded drop cloth at arm’s length. Painter’s tape can be placed directly on the floor to outline the proposed rug. This simple preview helps you check furniture clearance, walking space, and whether opening doors will drag across the finished piece.
Add approximately two inches to every cut edge for a one-inch double-fold hem. If you want a 4-by-6-foot rug and all four sides must be cut, allow extra canvas accordingly. Whenever possible, preserve the drop cloth’s factory-finished edges to save time.
Step 2: Wash, Dry, and Press the Canvas
If the product label permits washing, launder the drop cloth before cutting it. Prewashing removes manufacturing dust, softens the fabric, and allows initial shrinkage to happen before you establish the final dimensions. Skip fabric softener because it may leave a coating that interferes with paint or glue.
Dry according to the care label, then press the canvas. Concentrate on the deep package creases. It does not need to become as smooth as a formal shirt, but large wrinkles can distort measurements and cause painter’s tape to lift.
Before committing to the full project, test your paint, hem tape, and adhesive on a trimmed scrap. A five-minute sample can prevent a five-foot surprise.
Step 3: Cut and Create a No-Sew Hem
Spread the canvas on a large, clean surface. Measure in several places, mark the cutting line with a straightedge, and cut slowly using sharp scissors. A square corner or carpenter’s square helps keep the rug from developing an accidental trapezoid personality.
Option A: Fusible Hem Tape
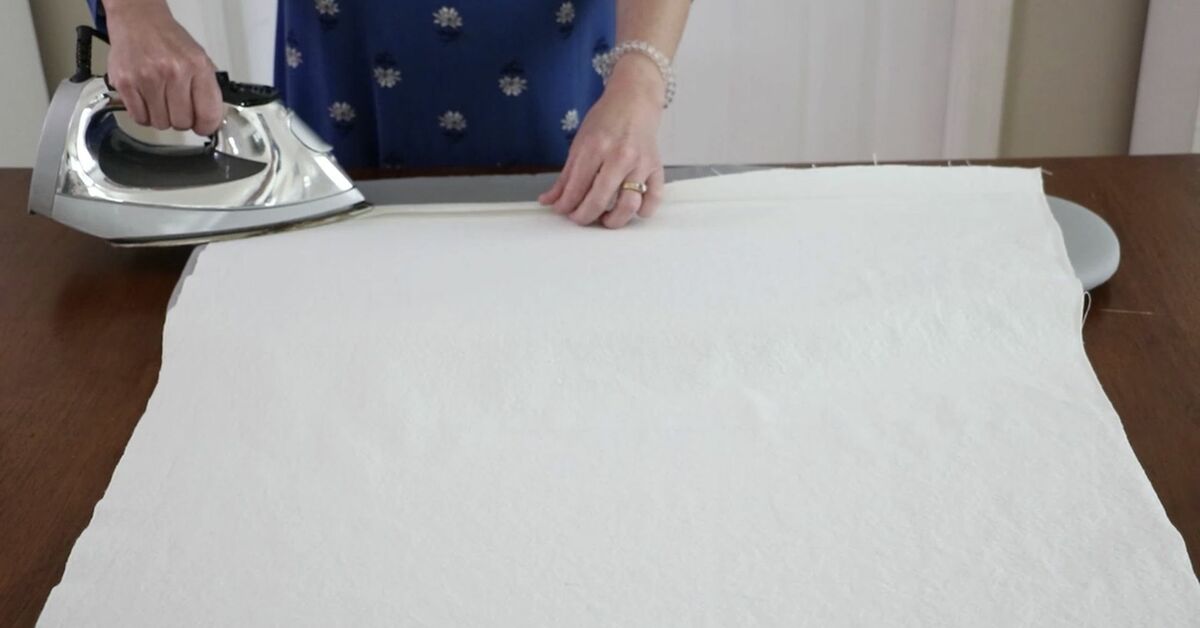
Fold the raw edge toward the back by one inch and press it. Fold it over once more to hide the cut edge. Insert permanent fusible hem tape inside the second fold and activate it according to the manufacturer’s temperature and timing directions. Use a pressing cloth when recommended, and work in short sections so the fold remains straight.
Option B: Flexible Fabric Adhesive
If ironing is unsuitable, apply a thin, even line of permanent fabric adhesive inside the folded hem. Excess glue can soak through canvas and leave a stiff, shiny ridge, so more is not merrier here. Press the fold firmly and use clips or heavy books protected with wax paper to hold it while it sets.
Drying and curing times vary by formula, application thickness, temperature, and humidity. Some products feel dry quickly but need much longer before they reach full strength. Follow the adhesive label instead of testing the bond every six minutes like an impatient raccoon.
Step 4: Plan the Rug Design
A simple pattern usually looks more intentional than an overcrowded one. Stripes, diamonds, arches, crosses, checkerboards, and irregular brush marks all work well on canvas. Neutral tan and black create a modern farmhouse look, while terracotta, sage, cream, and dusty blue produce a softer bohemian palette.
Sketch the pattern on paper first. Mark the center of the rug and establish light guidelines with a removable fabric marker or pencil. When using painter’s tape, press every edge firmly. Paint likes to creep under loose tape with the enthusiasm of a toddler entering an unlocked pantry.
Step 5: Paint the Canvas
Place cardboard, plastic sheeting, or another protective barrier beneath the entire rug. Paint can travel through the woven fibers even when the top surface does not look saturated.
Use fabric paint when possible. If using acrylic craft paint, combine it with a compatible textile medium according to the manufacturer’s directions. Textile medium improves flexibility and helps prevent the dry, crunchy finish that plain acrylic paint may create.
- Stir the paint thoroughly without whipping air into it.
- Apply a small amount with a foam roller, stencil brush, or sponge.
- Use an up-and-down motion over stencils to reduce paint bleeding.
- Build color with two thin coats instead of one heavy layer.
- Let the paint become fully dry before removing tape.
- Pull tape back over itself slowly rather than lifting it straight upward.
Follow the paint label for curing or heat-setting requirements. If heat setting is recommended, confirm that every material in the rug can tolerate the required temperature. Never iron directly over plastic backing, uncured adhesive, or yarn that may melt.
Step 6: Make the Yarn Tassels
Cut a piece of sturdy cardboard to the desired tassel length. A 4-inch card makes approximately 4-inch tassels before final trimming. Wrap yarn around the card 25 to 40 times, depending on the yarn thickness and how full you want each tassel to appear.
- Slide a separate piece of yarn beneath the wrapped strands at the top.
- Tie it securely with a double knot, leaving long tails for attachment.
- Cut through the loops along the opposite edge of the cardboard.
- Fold the bundle in half around the top tie.
- Wrap another strand around the bundle about one inch below the top.
- Knot the strand firmly and trim the bottom evenly.
Make one sample before producing the full batch. Place it beside the rug to confirm the scale and color. Depending on rug width, tassels spaced four to six inches apart usually create a decorative border without resembling a yarn convention.
Step 7: Attach Tassels Without Sewing
Lay the cured rug facedown and mark equal intervals along the two short edges. Position each tassel so its head sits just beyond the hem while its attachment tails extend onto the back.
Apply flexible permanent fabric glue to the tails and press them against the hem. For a stronger bond, cross the tails in opposite directions and cover them with a small glued patch of canvas or cotton twill tape. This distributes tension across a wider area instead of asking one dot of adhesive to perform heroic labor.
Keep tassels away from corners where feet are more likely to catch them. Allow the adhesive to cure completely before moving, folding, or walking on the rug.
Step 8: Add a Nonslip Rug Pad
A canvas floor cloth is lightweight and can slide or bunch on hard flooring. Place a nonslip rug pad beneath it, choosing a material specifically approved for hardwood, laminate, vinyl, tile, or whatever surface you have.
Trim the pad approximately one to two inches smaller than the rug on every side so it remains hidden and the rug edges can lie flat. A suitable pad improves traction, adds modest cushioning, and helps protect the floor from abrasion. Check it periodically because compatibility and care requirements vary among flooring finishes and pad materials.
Do not place the rug where a curled edge, long tassel, or moving fabric could create a tripping hazard. Keep it away from fireplaces, candles, heaters, and other ignition sources. A decorative DIY rug has many talents, but fire resistance should not be assumed.
Cleaning and Maintenance
Vacuum the rug with low suction or a handheld attachment, avoiding aggressive beater bars that could pull the tassels. Shake it outdoors when practical and blot spills promptly with a clean cloth. For stains, spot-clean with mild detergent after testing an inconspicuous area.
Machine washing may weaken glued hems, loosen tassels, fade painted designs, or damage a floor-safe backing. Only wash the completed rug if every paint, adhesive, yarn, and canvas component is labeled washable. Air-drying flat is generally gentler than placing the rug in a hot dryer.
Common Problems and Simple Fixes
Paint Bleeds Under the Tape
Use less paint, press the tape edges more firmly, and apply color in thin layers. A nearly dry stencil brush provides better control than a heavily loaded roller.
The Hem Feels Hard or Looks Shiny
Too much adhesive probably soaked through the fabric. Apply a thinner coat on future sections and spread it evenly before pressing the fold.
The Rug Will Not Lie Flat
Confirm that the hem is even and the paint and glue are fully cured. Lay the rug flat with clean, protected weights near the corners. A properly fitted rug pad can also reduce shifting and bunching.
The Tassels Look Uneven
Comb the tassels gently with your fingers and trim them against a straight piece of cardboard. Handmade tassels do not need military precision, but they should at least appear to attend the same meeting.
Practical Experience: What DIYers Learn From Making a Drop Cloth Rug
The most common lesson from this project is that preparation matters more than artistic talent. Canvas fresh from the package looks deceptively ready to use, yet its deep folds can shift measurements, interrupt painted lines, and prevent tape from sealing properly. Washing, drying, and pressing may feel like the boring portion of the project, but it produces a noticeably cleaner result.
Another useful experience is learning to test every material together. Canvas products vary in fiber content, weave, coating, and weight. A paint that looks rich on one drop cloth may soak unevenly into another. Likewise, a fabric glue that performs beautifully on thin cotton may require more pressure or curing time on heavy canvas. A small sample reveals how the color dries, whether the fabric stiffens, and whether the adhesive leaves a visible mark.
Many first-time makers also discover that restraint improves the painted design. It is tempting to load a roller generously because canvas absorbs paint quickly. Unfortunately, a wet roller pushes paint beneath tape and into fuzzy edges. Several light applications take longer, but they preserve the pattern and keep the finished rug more flexible underfoot.
Pattern scale can be surprising as well. A tiny motif that looks charming on paper may disappear once enlarged across a 4-by-6-foot surface. Large geometric elements usually read more clearly from standing height. Before painting, arranging paper versions of the shapes on the canvas provides a realistic preview and makes spacing errors easier to correct.
Tassel production is where consistency meets boredom and negotiates a compromise. Wrapping every tassel around the same cardboard template keeps the length uniform. Counting the wraps creates similar fullness, while making all the tassels in batches speeds up the process. Complete the wrapping first, then tie every bundle, cut every loop, and trim the entire group together.
Attaching tassels teaches another important lesson: glue requires surface area. A tassel held by one narrow strand may detach when vacuumed or stepped on. Spreading its ties across the back of the hem and covering them with a fabric patch creates a much more dependable no-sew connection. Full curing time is equally important. Moving the rug prematurely can weaken bonds that appeared dry on the surface.
Placement changes how successful the finished rug feels. In a quiet bedroom corner, the canvas texture and decorative fringe can look relaxed and expensive. In a busy doorway shared by children, pets, wet shoes, and a robot vacuum with personal grudges, the same rug may require constant attention. Choosing a low- or moderate-traffic location allows the handcrafted details to last longer.
The nonslip pad may be the least glamorous purchase, but it often makes the biggest functional difference. Without one, thin canvas can wrinkle when walked on and migrate several inches during ordinary use. With an appropriately sized, floor-compatible pad, the rug looks flatter, feels more substantial, and is easier to vacuum.
Finally, handmade irregularities are not automatically mistakes. Slight variations in the paint or tassels can give the rug warmth and character. The goal is not to imitate a factory product perfectly. It is to create an affordable, useful piece that fits the room and carries evidence that a real person made itideally without gluing that person permanently to the floor.
Conclusion
Making a no sew drop cloth rug with tassels is an approachable way to turn inexpensive canvas into customized home decor. Careful measuring, a secure folded hem, thin layers of flexible paint, evenly made tassels, and a floor-safe nonslip pad are the ingredients that separate a durable DIY rug from a large painted napkin. Take time with preparation and curing, then enjoy a rug designed specifically for your space.
SEO Tags
Note: Always follow the individual instructions for your canvas, paint, fabric adhesive, fusible tape, and rug pad. Test materials on a scrap first, use adequate ventilation, protect the work surface, and keep the finished rug away from ignition sources and places where loose edges could create a fall hazard.