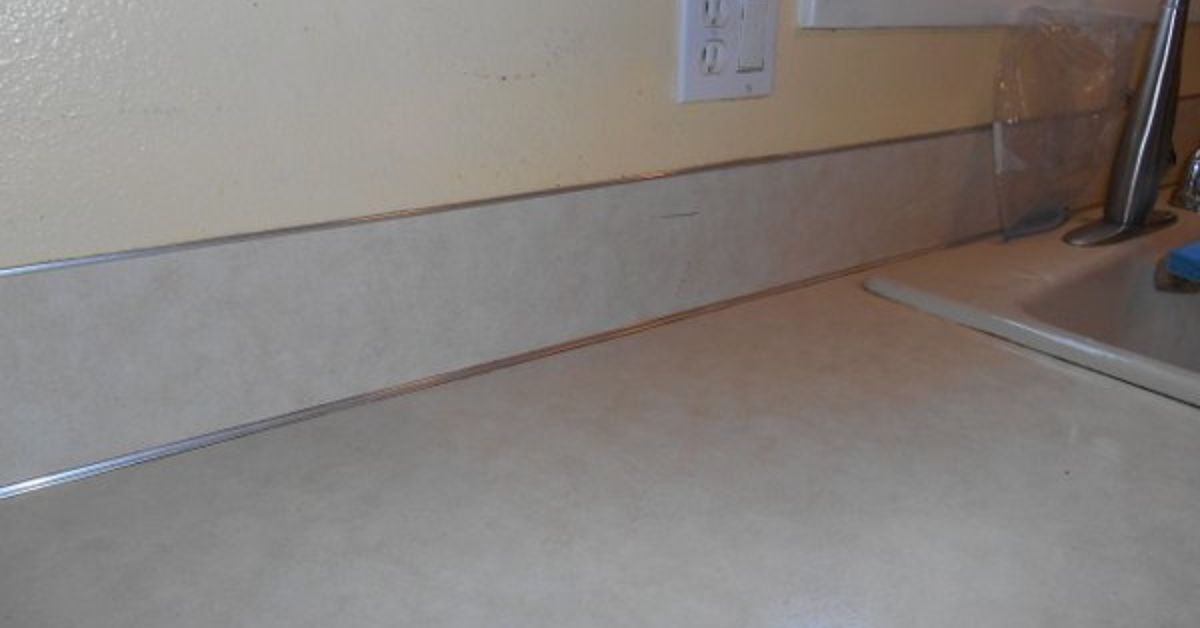
If your kitchen feels tired but your wallet is giving you the “absolutely not” stare, a backsplash re-do might be the best little rebellion you can stage. It is one of the few kitchen upgrades that can change the entire mood of the room without requiring a second mortgage, a demolition crew, or emotional support snacks the size of a casserole dish. A fresh backsplash adds color, texture, personality, and practical protection where splatters love to party.
The good news is that a budget-friendly backsplash makeover does not have to look cheap. In fact, some of the smartest kitchen updates today lean hard into affordable materials, simple layouts, and easy DIY methods that look polished when done with a little planning. Peel-and-stick tile, painted existing tile, beadboard, basic subway tile, mosaic sheets, and even backsplash-safe wallpaper can all deliver a serious visual upgrade for much less than a full renovation.
This guide breaks down how to tackle a kitchen backsplash re-do on a budget, which materials give you the best bang for your buck, what mistakes to avoid, and how to make a modest update look surprisingly custom. Because the goal is not just to save money. The goal is to make your kitchen look like you knew exactly what you were doing the entire time.
Why a Budget Backsplash Re-do Makes So Much Sense
A backsplash sits right in the visual sweet spot of the kitchen. It is framed by cabinets, countertops, lighting, and appliances, which means even a relatively small change gets noticed fast. Swap out an old beige tile from the early 2000s, and suddenly the cabinets look fresher, the counters look more intentional, and the whole room stops feeling like it is waiting for a fax machine.
That is why homeowners often start here. A backsplash re-do is typically more affordable than replacing cabinets or counters, more dramatic than changing hardware alone, and less disruptive than a full remodel. It is also flexible. Renters can choose removable options, DIYers can take on easier installations, and homeowners looking for resale appeal can stick to classic, low-risk styles.
Another reason this project works so well on a budget is scale. Most backsplashes cover a limited amount of wall space, so you can often afford a nicer finish or more elevated look than you could on a floor or countertop. In other words, this is where your budget can wear a blazer and pretend it has its life together.
Set Your Budget Before You Fall in Love With Fancy Tile
Before shopping, decide how much you want to spend and where that money should go. For a backsplash project, the total usually comes down to four things: material, prep work, tools, and whether you are doing it yourself or hiring help. A tight budget can still go far if you choose a forgiving material and keep the design simple.
Low-Budget Range
This is where peel-and-stick tile, tile decals, paint, beadboard panels, or wallpaper-style backsplash solutions shine. These options are ideal if your main goal is visual improvement without a big labor bill. They also work well for rentals, starter homes, and refreshes meant to buy you a few more years before a larger remodel.
Mid-Budget Range
If you have a little more room, basic ceramic subway tile, porcelain tile, and mosaic sheets become realistic choices. These materials still feel accessible, but they look more permanent and often hold up better in busy kitchens. With a clean layout and decent grout work, they can look far more expensive than they are.
Where to Save and Where Not to Cheap Out
Save on material by choosing classic shapes, stock colors, and standard sizes. Save on labor by handling demolition, prep, painting, and cleanup yourself if you are comfortable. Do not go bargain-bin on adhesive, caulk, sealers, or surface prep. A backsplash fails more often because of bad prep than because of bad taste, though bad taste does occasionally clock in for work.
Best Budget-Friendly Backsplash Options
Peel-and-Stick Tile
This is the reigning champion of low-stress kitchen refreshes. Peel-and-stick backsplash products come in styles that mimic subway tile, marble, mosaic, metal, and geometric patterns. They are especially useful for renters or for homeowners who want a fast weekend project with minimal mess.
The upside is obvious: lower cost, faster installation, no grout in many cases, and easier removal than traditional tile. The downside is that not every product looks convincing up close, and performance depends heavily on a clean, smooth, dry surface. For best results, choose a design with realistic texture and keep it away from areas with heavy direct heat unless the manufacturer specifically approves it.
Painted Existing Tile
If your current backsplash is structurally fine but visually tragic, painting it can be the fastest path to redemption. This option works best when the tile is smooth, intact, and not constantly taking a beating behind a high-splatter cooktop. Specialty tile paint or epoxy-based products can brighten a dark kitchen, mute an outdated color, or create the look of a totally new finish.
Painting is not always a forever solution, but it can absolutely be a smart budget move. If you add a stencil pattern or refresh the grout lines too, the transformation can be dramatic. Just be honest about your goals. If you want a luxury stone look with zero maintenance and eternal perfection, paint will smile politely and back away.
Basic Subway Tile
Subway tile remains one of the safest and strongest values in backsplash design. It is classic, widely available, easy to pair with most countertops, and flexible enough to work in farmhouse, modern, transitional, and cottage-style kitchens. A plain white subway tile can look simple in the box and surprisingly sharp on the wall.
The trick is in the details. A stacked layout feels cleaner and more modern. A running bond pattern feels traditional. Dark grout creates contrast and a graphic look, while matching grout makes the wall feel quieter and more expansive. If you want a timeless budget backsplash, this is the workhorse.
Mosaic Tile Sheets
Mosaic sheets can make installation easier because they cover more surface area at once, and they come in everything from glass blends to ceramic patterns. They are a good pick when you want texture or movement without placing every tiny tile by hand like a person making a very stressful jigsaw puzzle.
That said, choose carefully. Some mosaics look busy fast, and some glossy finishes show every spot and splash. If you want a high-end appearance on a modest budget, use mosaic as an accent zone behind the stove or mix it with simpler tile elsewhere.
Beadboard or Tongue-and-Groove Paneling
For cottage, coastal, farmhouse, or vintage-inspired kitchens, beadboard can be a charming budget backsplash. It is affordable, easier to install than tile, and gives the space warmth that tile sometimes lacks. Paint it crisp white for a classic look or match it to the cabinets for a built-in feel.
The catch is maintenance. Any wood-based backsplash must be properly sealed, especially near sinks and cooking areas. It is best for homeowners who love the look and are willing to keep it protected. If you want something with wood vibes but fewer worries, wood-look porcelain can deliver a similar mood with easier care.
Wallpaper, Decals, and Creative Surface Tricks
For low-moisture zones or decorative kitchen corners, waterproof wallpaper, tile decals, and faux-finish solutions can stretch a tiny budget beautifully. These are especially useful when the goal is personality over permanence. They can also work well in rentals or in breakfast nooks where you want visual impact without committing to tile installation.
Just remember that pretty is not the same as practical. Near a sink or stove, always prioritize a surface that can be cleaned easily and stand up to heat, moisture, and grease.
How to Choose the Right Material for Your Kitchen
The best backsplash for your budget is not always the cheapest one. It is the one that fits your kitchen habits, skill level, and tolerance for maintenance. If you cook every day and splatter like an enthusiastic TV chef, choose something easy to wipe down. If you barely boil water, you have more freedom to use decorative or less rugged materials.
Think about four filters: durability, maintenance, style, and installation difficulty. Ceramic and porcelain score well for durability and easy cleaning. Peel-and-stick wins for ease and affordability. Glass can brighten a small kitchen but may show spots. Natural stone can be stunning but often needs more care and usually makes less sense when every dollar has a job.
Also look at what you already have. Busy granite countertops usually pair best with a simpler backsplash. Plain counters can handle more pattern. Small kitchens benefit from lighter colors and fewer visual interruptions. If your cabinets are already dramatic, let the backsplash support the room rather than compete with it like a singer who refuses to share the microphone.
How to Make a Cheap Backsplash Look Expensive
Budget materials can look surprisingly elevated when the installation is thoughtful. Start with a clean palette. White, warm ivory, soft greige, muted sage, pale blue, and charcoal are all versatile choices that tend to age well. Loud patterns and novelty finishes can be fun, but they are harder to pull off on a budget because every mistake becomes more visible.
Second, keep the lines clean. Measure carefully, center the layout where it matters, and avoid tiny slivers of tile in obvious places when possible. Good symmetry makes inexpensive materials look intentional. Crooked lines make even expensive tile look like a very expensive regret.
Third, upgrade the surrounding details. Fresh caulk, polished outlet covers, updated cabinet hardware, and under-cabinet lighting can make a backsplash look more custom. Sometimes the backsplash is not the only glow-up happening. It is just the one that takes all the compliments.
Step-by-Step Game Plan for a Budget Backsplash Re-do
1. Prep the Wall Properly
Clean the area thoroughly to remove grease, soap film, and dust. Repair holes, sand rough patches, and make sure the wall is dry and smooth. This step matters whether you are applying peel-and-stick tile, paint, beadboard, or traditional tile. Skip prep, and you may end up watching corners peel away while pretending not to notice.
2. Measure Twice and Buy Smart
Measure square footage, then add extra material for cuts, waste, and backup. Running short halfway through a project is annoying. Finding out the style is discontinued is character building in the worst possible way.
3. Dry-Fit Before Installing
Lay out tile or panels before committing. Check where seams fall, how the pattern lands near outlets, and whether the center point looks balanced. This is especially important with geometric tiles, mosaics, and anything that has a directional pattern.
4. Work in Sections
Do not rush the whole wall at once. Work from a level reference line, press materials firmly, and keep checking alignment. For tile, use the right spacers and the correct grout type for your joint width. For peel-and-stick products, smooth out bubbles as you go.
5. Finish Like You Mean It
Caulk the seam where backsplash meets countertop. Reinstall outlet covers neatly. Wipe residue, polish the surface, and step back before you decide it needs one more tweak. Many projects are made worse by the final ten minutes of overconfidence.
Common Budget Backsplash Mistakes to Avoid
The first mistake is choosing a trendy material that is fussy to maintain when you really want easy cleanup. A backsplash should not become a part-time job. The second mistake is ignoring the surface underneath. Adhesive products need a proper base, and tile needs a sound wall. The third mistake is overdesigning. Too many textures, colors, and patterns can make a small kitchen feel cluttered instead of curated.
Another common misstep is forgetting the practical zones. Behind the stove and sink, durability matters more than novelty. Finally, do not underestimate the value of good finishing work. Straight cuts, clean caulk lines, and tidy grout can make an average material look excellent.
Real-World Budget Scenarios
If you have a very small budget, focus on a cosmetic refresh. Paint old tile, add peel-and-stick over a smooth surface, or use decals to transform plain ceramic. If you have a moderate budget and want something more lasting, install a basic subway or ceramic tile backsplash yourself and put extra money toward better grout, tools, and trim details. If you are a renter, removable peel-and-stick products are usually the safest bet, especially when you want the kitchen to feel like yours without turning the security deposit into a fond memory.
And if you are planning to sell, go classic. Neutral ceramic or porcelain, simple shapes, and easy-care finishes tend to appeal to the widest audience. Buyers like personality, but they also like not wondering whether they need a special cleaner, a sealant schedule, and a therapist for their backsplash.
Experience and Lessons From Budget Backsplash Re-dos
One of the most common experiences people have with a budget backsplash project is realizing that the transformation feels bigger than expected. A homeowner may start out thinking, “It is just a wall between the counter and cabinets,” and finish the job wondering why the entire kitchen suddenly looks brighter, cleaner, and more current. That happens because the backsplash sits at eye level and reflects light, color, and texture into the room. It punches above its weight.
Another frequent lesson is that prep work deserves more respect than it gets. People often want the fun part first: choosing tile, ordering samples, imagining compliments from friends who casually pretend they always knew you had great taste. But the projects that turn out best usually begin with boring tasks done well. Grease removal, patching, sanding, leveling, and testing the layout are what make a budget install look crisp instead of cobbled together.
Many DIYers also discover that simple choices age better than flashy ones. The tile that looked “so unique” at 11:47 p.m. during an online shopping spiral may not feel quite as charming once it is covering the whole wall. By contrast, plain ceramic subway tile, soft mosaic sheets, or a restrained peel-and-stick pattern often end up feeling smarter over time. Budget projects tend to reward calm decisions.
There is also the experience of learning where not to cut corners. Plenty of people save money beautifully on the visible finish, then lose patience at the finish line and rush the grout, use the wrong adhesive, or skip the caulk. That is usually when a project starts whispering future problems. Cheap material can still work wonderfully. Cheap installation habits are where trouble usually moves in and unpacks a suitcase.
Renters, in particular, often talk about how satisfying a removable backsplash can be. Even temporary kitchens feel more personal when the space has pattern, color, or a cleaner visual line. A peel-and-stick backsplash can make a rental feel less like borrowed square footage and more like home. Homeowners say something similar when they use a modest backsplash update to bridge the gap before a full remodel. It gives them a kitchen they can enjoy now instead of waiting years for a “perfect” renovation.
Perhaps the biggest lesson, though, is that a successful kitchen backsplash re-do on a budget is rarely about copying a luxury kitchen exactly. It is about using affordable materials intelligently, respecting the practical needs of the space, and editing the design so the finished result feels intentional. That is the real win. Not fooling everyone into thinking you spent a fortune, but creating a kitchen that feels cleaner, fresher, and more like you every time you walk in for coffee.
Final Thoughts
A kitchen backsplash re-do on a budget is one of the smartest ways to refresh your kitchen without diving into a full renovation. With the right material, a little planning, and some discipline at the design stage, you can create a finish that feels stylish, practical, and far more expensive than it really was. Whether you choose peel-and-stick tile, painted existing tile, beadboard, mosaic sheets, or classic subway tile, the best result comes from matching the material to your space, your habits, and your budget.
Do the prep. Keep the design clear. Spend where it matters. And remember: a backsplash does not have to be fancy to be fabulous. Sometimes all your kitchen needs is one well-dressed wall and a homeowner who finally stopped apologizing for the old one.