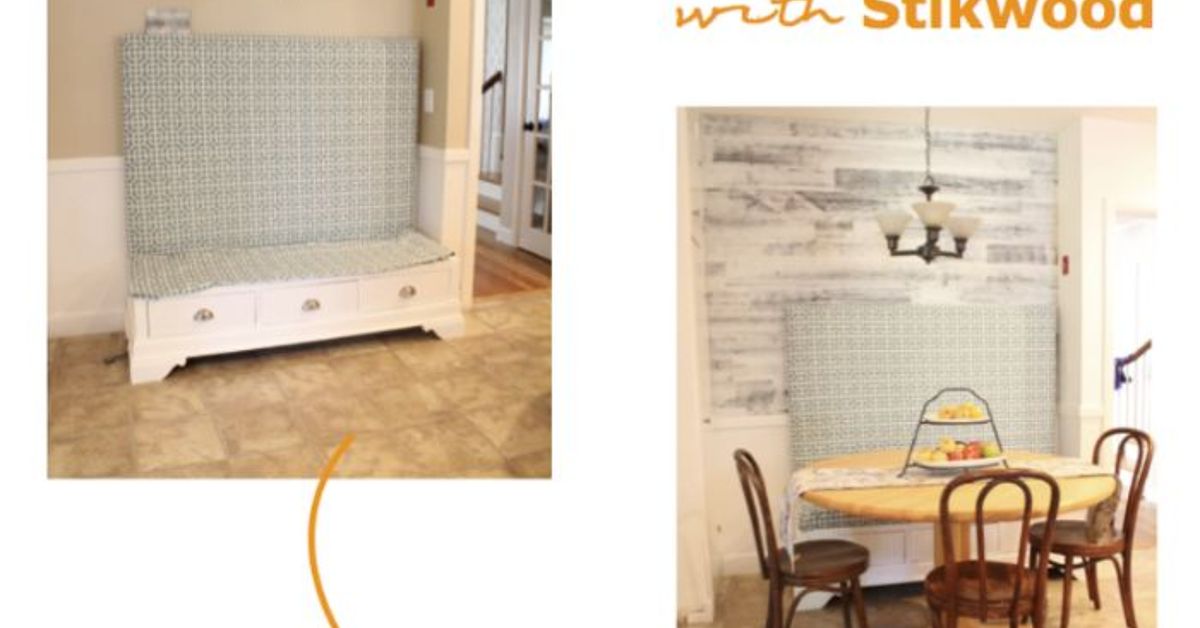
Few home projects deliver as much visual drama with as little demolition as peel and stick wood planking. In a single weekend, an ordinary stretch of drywall can become a warm bedroom backdrop, a rustic dining-room feature, or a modern office wall that makes video calls look suspiciously professional.
The basic process sounds almost comically simple: peel off the backing, stick the plank to the wall, and admire your work. However, the adhesive is only as reliable as the surface beneath it. Careful measuring, wall preparation, acclimation, layout planning, and firm rolling separate a handsome wood accent wall from a collection of expensive boards slowly attempting to escape.
This guide explains how to install peel and stick wood planking correctly, including how to prepare the wall, arrange the boards, work around electrical outlets, avoid awkward seams, and troubleshoot common problems.
Why Choose Peel and Stick Wood Wall Planks?
Self-adhesive wood planks offer the warmth and texture of traditional wood paneling without requiring furring strips, visible fasteners, or buckets of construction adhesive. Depending on the product, the planks may be made from reclaimed wood, sustainably harvested lumber, engineered wood, or a thin real-wood veneer.
Because the boards are lightweight and arrive with adhesive already applied, many homeowners can complete an accent wall using ordinary woodworking tools. The thin profile also works well in hallways and small rooms where thick paneling would consume valuable space.
These products are best suited to clean, smooth, dry interior walls. They are generally less dependable on heavily textured drywall, crumbling plaster, peeling paint, brick, concrete block, wallpaper, or damp surfaces. Unless a product is specifically rated for moisture and heat, avoid shower walls, steamy bathrooms, unconditioned spaces, and areas too close to fireplaces or cooking equipment.
One more reality check: many real-wood peel and stick planks use aggressive adhesive and should be considered permanent. Removal may pull off paint, drywall paper, or joint compound. Renters should confirm both the product’s removability and the property owner’s definition of “minor wall damage,” which can be remarkably creative when a security deposit is involved.
Tools and Materials You Will Need
Gathering everything before installation prevents repeated trips to the garage while holding a half-peeled plank like an unusually rustic sandwich.
- Peel and stick wood wall planks
- Tape measure and pencil
- Four-foot level or laser level
- J-roller or manufacturer-recommended pressure roller
- Miter saw, circular saw, or fine-tooth handsaw
- Jigsaw or oscillating tool for detailed cuts
- Speed square or carpenter’s square
- Stud finder
- Utility knife with fresh blades
- Sandpaper, patching compound, and putty knife
- Clean microfiber cloths and a mild wall cleaner
- Safety glasses, hearing protection, and dust mask
- Outlet-box extenders if required by the plank thickness and local code
- Matching trim or molding, if included in the design
A paint roller is not necessarily a substitute for a J-roller. Paint rollers are designed to flex and distribute liquid, while a firm installation roller applies concentrated, even pressure to activate the adhesive bond.
Plan the Wood Accent Wall Before Opening the Adhesive
Calculate How Much Planking to Buy
Measure the wall’s width and height, then multiply the two numbers to calculate its square footage. For example, a wall measuring 12 feet wide and 8 feet high covers 96 square feet.
Add approximately 10 percent for offcuts, defects, grain selection, and measuring adventures. Complicated walls with windows, angled ceilings, or numerous outlets may require 15 percent extra. Small electrical openings usually do not need to be subtracted because their “saved” material rarely becomes a useful full plank.
Whenever possible, order all boxes at once from the same production batch. Natural wood varies in color and grain, which is part of its charm, but a late replacement box can look like a distant cousin who arrived wearing the wrong outfit.
Choose the Plank Direction
Horizontal planking can make a narrow room appear wider and creates the familiar reclaimed-wood or shiplap effect. Vertical boards visually emphasize ceiling height and can suit contemporary interiors. Diagonal and herringbone patterns produce more movement, but they also require additional cutting, waste, and patience.
Lay several planks on the floor to preview the color range. Mix boards from multiple cartons instead of emptying one box at a time. Distribute dark pieces, knots, saw marks, and dramatic grain throughout the wall so the pattern looks intentional rather than clumped.
Create a Dry Layout
Estimate where the end joints will land and how wide the final row will be. Avoid layouts that leave a tiny strip at the ceiling or a two-inch plank at one edge. Adjust the starting position or trim the first row when necessary to create a more balanced finish.
For a random pattern, stagger joints between adjacent rows and vary the starting lengths. Avoid lining up multiple seams vertically or creating a repetitive stair-step pattern. Random should look relaxed, not as though the wall is marching in formation.
How to Prepare the Wall
Acclimate the Wood
Bring the unopened material into the installation room, then unpack and arrange the planks according to the manufacturer’s directions. Many real-wood products require 48 to 72 hours of acclimation, while some specify at least three days or additional time in humid conditions.
Keep the room near its normal occupied temperature and humidity during acclimation and installation. Wood naturally responds to changes in moisture. Allowing it to adjust beforehand reduces the chance of expansion, contraction, curling, or gaps later.
Inspect and Repair the Surface
The wall should be flat, structurally sound, and free from loose material. Remove nails, hooks, anchors, and protruding debris. Fill dents and holes, let the patching compound dry, and sand high spots smooth. Scrape away flaking paint and remove flexible coverings such as loose wallpaper.
Peel and stick wood planking should not be expected to flatten a wavy wall. Thin boards tend to follow surface irregularities, while stiff boards may bridge a hollow area and lose adhesive contact. Check the surface with a long level or straightedge before committing to the installation.
Freshly patched or bare drywall should generally be primed and painted with a compatible finish. If the wall was recently painted, wait for the coating to cure for the period required by both the paint and plank manufacturers. Paint that feels dry can still be too soft for a permanent adhesive.
Clean and Dry the Wall
Remove dust, grease, smoke residue, and cleaning-product films with a mild cleaner suitable for the existing finish. Kitchen walls may need extra degreasing. Wipe away any residue and allow the surface to dry completely.
Do not apply planks over a damp wall or use wood paneling to disguise an active leak. Moisture problems should be identified and repaired first. Otherwise, the new accent wall may become an attractive lid on a very unattractive problem.
Prepare Outlets and Switches Safely
Turn off power at the circuit breaker before removing outlet or switch cover plates, and verify that the power is off with an appropriate tester. Never cover an electrical box or make wiring inaccessible.
The added thickness of the planks may require a listed electrical box extender so the device and cover plate sit correctly. Electrical requirements vary, especially where combustible wall finishes are involved. If you are uncertain, consult a licensed electrician and follow local code.
Step-by-Step Peel and Stick Wood Plank Installation
Step 1: Establish a Level Starting Line
Do not assume the floor, baseboard, corner, or ceiling is level. Measure several points and use a level or laser to draw a true reference line. A slightly crooked first row becomes impressively crooked after six more rows.
The best starting point depends on the manufacturer’s system and your layout. Some installations begin near the floor, while others use a central reference line and expand outward. Follow the product instructions, especially when the planks have interlocking or overlapping edges.
Step 2: Fit the First Plank Without Exposing the Adhesive
Hold the first board in position with its backing still attached. Confirm its orientation, length, color, and alignment. Mark any required cut, then cut the plank on a stable work surface while wearing suitable safety equipment.
Dry-fit the cut piece again. Adhesive-backed wood often allows little repositioning after firm contact, so this rehearsal is far cheaper than improvisation.
Step 3: Peel, Position, and Press
Remove the backing carefully without touching the adhesive more than necessary. Align one edge of the plank with the reference line and neighboring board. Once the position is correct, lower the remaining plank against the wall and press it firmly from one end to the other.
Use the J-roller immediately, applying firm, even pressure across the entire face and along every edge. Rolling is not a decorative victory lap; it is a critical part of creating full adhesive contact.
Step 4: Continue With Staggered Seams
Install the next plank tightly or with the specified joint spacing. Check the level every few boards rather than trusting the previous row indefinitely. Minor errors can accumulate, especially when natural boards have slightly irregular edges.
Use a mixture of plank lengths and colors. A usable offcut from the end of one row can begin another row, provided it is long enough to avoid weak-looking slivers and repetitive seam placement.
Step 5: Cut Around Outlets, Windows, and Corners
Measure obstacle locations from two fixed reference points, transfer those measurements to the back of the plank, and mark the cutout with a square. A cardboard template can help around irregular shapes.
Make outlet cutouts with a jigsaw or oscillating tool, following the plank manufacturer’s cutting guidance. The opening must provide proper clearance without exposing an oversized gap beyond the cover plate. Dry-fit every detailed cut before peeling the backing.
At an inside corner, leave any expansion allowance required by the manufacturer. At an outside corner, use matching corner trim, a carefully mitered joint, or another approved finishing profile. Trim usually produces a cleaner result than asking two raw edges to negotiate peace on their own.
Step 6: Finish the Top and Edges
Measure each piece in the final row individually because ceilings are not always parallel to floors. Rip planks to width using an appropriate saw and install them with the recommended perimeter clearance.
Add molding or edge trim if the design calls for it. Reinstall electrical devices and appropriately sized cover plates only after any necessary box adjustments have been completed safely.
Common Installation Mistakes to Avoid
- Skipping acclimation: Real wood may change dimension after installation, producing gaps or lifted edges.
- Installing over dust: Adhesive bonds to the dust instead of the wall, which is about as useful as it sounds.
- Following a crooked ceiling: Use a level reference line and custom-cut the final row.
- Peeling too early: Measure, cut, and dry-fit before exposing permanent adhesive.
- Repeating plank colors: Mix boxes and preview the grain distribution on the floor.
- Stacking end joints: Stagger seams to produce a natural, visually balanced wall.
- Applying weak pressure: Roll every plank thoroughly, including its corners and edges.
- Adding random glue or nails: Extra fasteners may damage the finish or void the warranty. Use them only when the manufacturer approves them.
- Ignoring moisture or heat: Confirm that the selected product is rated for the intended location.
- Treating the wall as removable décor: Strong adhesive can damage drywall during removal.
What to Do When a Plank Will Not Stick
If an edge lifts immediately, stop and identify the cause. Common culprits include dust, wall texture, dampness, uncured paint, inadequate rolling pressure, a warped plank, or an uneven surface. Pressing the same failed edge seventeen times may feel productive, but it does not repair the underlying problem.
Consult the manufacturer before adding construction adhesive or nails. Some brands allow approved supplemental fastening in difficult locations; others do not. If the wall is too textured or uneven for the adhesive system, installing a smooth substrate may be more reliable than forcing the product onto an unsuitable surface.
Small gaps can sometimes be disguised with a matching touch-up marker, dark backing strip, or trim supplied by the manufacturer. Large or growing gaps suggest movement, poor adhesion, or insufficient acclimation and should be investigated rather than cosmetically hidden.
Practical Experience: Lessons That Make the Project Easier
The most valuable lesson from successful peel and stick wood wall projects is that installation speed should not be the goal. The boards can go up quickly, but the preparation deserves most of the schedule. Spending an extra hour patching, sanding, cleaning, and drawing accurate reference lines can save several hours of cutting replacement pieces later.
Lighting makes a surprising difference during the planning stage. A board that looks medium brown on the floor may appear almost black once installed in a shadowy corner. Standing the planks against the wall and viewing them in daylight and evening light helps reveal how the full color range will behave. This is especially useful with reclaimed wood, where weathering, knots, and saw marks vary substantially.
It also helps to sort the material loosely into light, medium, and dark groups. The goal is not to create a rigid color formula. Instead, sorting prevents five dark boards from accidentally congregating above the television like a small thundercloud. Mixing lengths and turning selected boards end-for-end produces a more relaxed pattern.
The first row feels slow because it should be slow. Check the level, step back, check it again, and compare the board with nearby architectural lines. Once the plank has been rolled firmly, assume it has made a long-term commitment to that location. A helper is valuable here: one person can watch the reference line while the other positions the board.
Detailed cuts are where enthusiasm often meets reality. Outlet openings become easier when measurements are taken from the installed edge of the previous plank and from the reference line, rather than from a possibly crooked corner. Making a template from scrap cardboard is faster than sacrificing a full wood plank to the ancient DIY tradition of “close enough.”
Another practical improvement is to maintain two work zones. Use one clean area for laying out and protecting finished planks, and another for cutting. Sawdust can cling to adhesive, dirty the wall, and scratch finished surfaces. Vacuuming periodically keeps the project manageable and prevents the room from developing the atmosphere of a frontier lumber mill.
Save useful offcuts, but label or group them by length. Short pieces are excellent for starting new rows and filling spaces beside windows, yet too many tiny fragments make the wall look busy. A few longer runs give the eye somewhere to rest. Before installing an offcut, inspect its cut end and confirm that it will either meet another plank cleanly or disappear beneath trim.
Frequent visual checks are more effective than discovering a layout problem at the final corner. After every two or three rows, step several feet away and look for repeating seams, concentrated colors, drifting lines, and gaps. Correcting the current row is usually possible; correcting a fully rolled wall is more of an archaeological excavation.
Finally, keep the leftover planks after the project. Store them flat in a dry, conditioned area. Matching natural wood several years later can be difficult, and spare pieces are useful if a plank is damaged during furniture installation or electrical work.
The finished wall should feel varied but balanced, textured but not chaotic. When the preparation, layout, and pressure application are handled carefully, peel and stick wood planking can create a substantial architectural feature without turning the room into a full construction site.
Conclusion
Installing peel and stick wood planking is approachable for a careful DIYer, but the adhesive backing does not eliminate the need for craftsmanship. Acclimate the material, repair and clean the wall, establish a truly level starting line, dry-fit every complicated piece, stagger the seams, and roll each board firmly.
The reward is an accent wall with genuine depth, warmth, and charactercompleted with fewer tools and less mess than traditional paneling. Take your time with the first row and the detailed cuts. The rest of the project can move briskly, and your previously forgettable wall may soon become the part of the room everyone assumes cost far more than it did.
Note: Installation requirements differ among products. Follow the plank manufacturer’s instructions, warranty conditions, moisture and heat restrictions, and all applicable building and electrical codes.