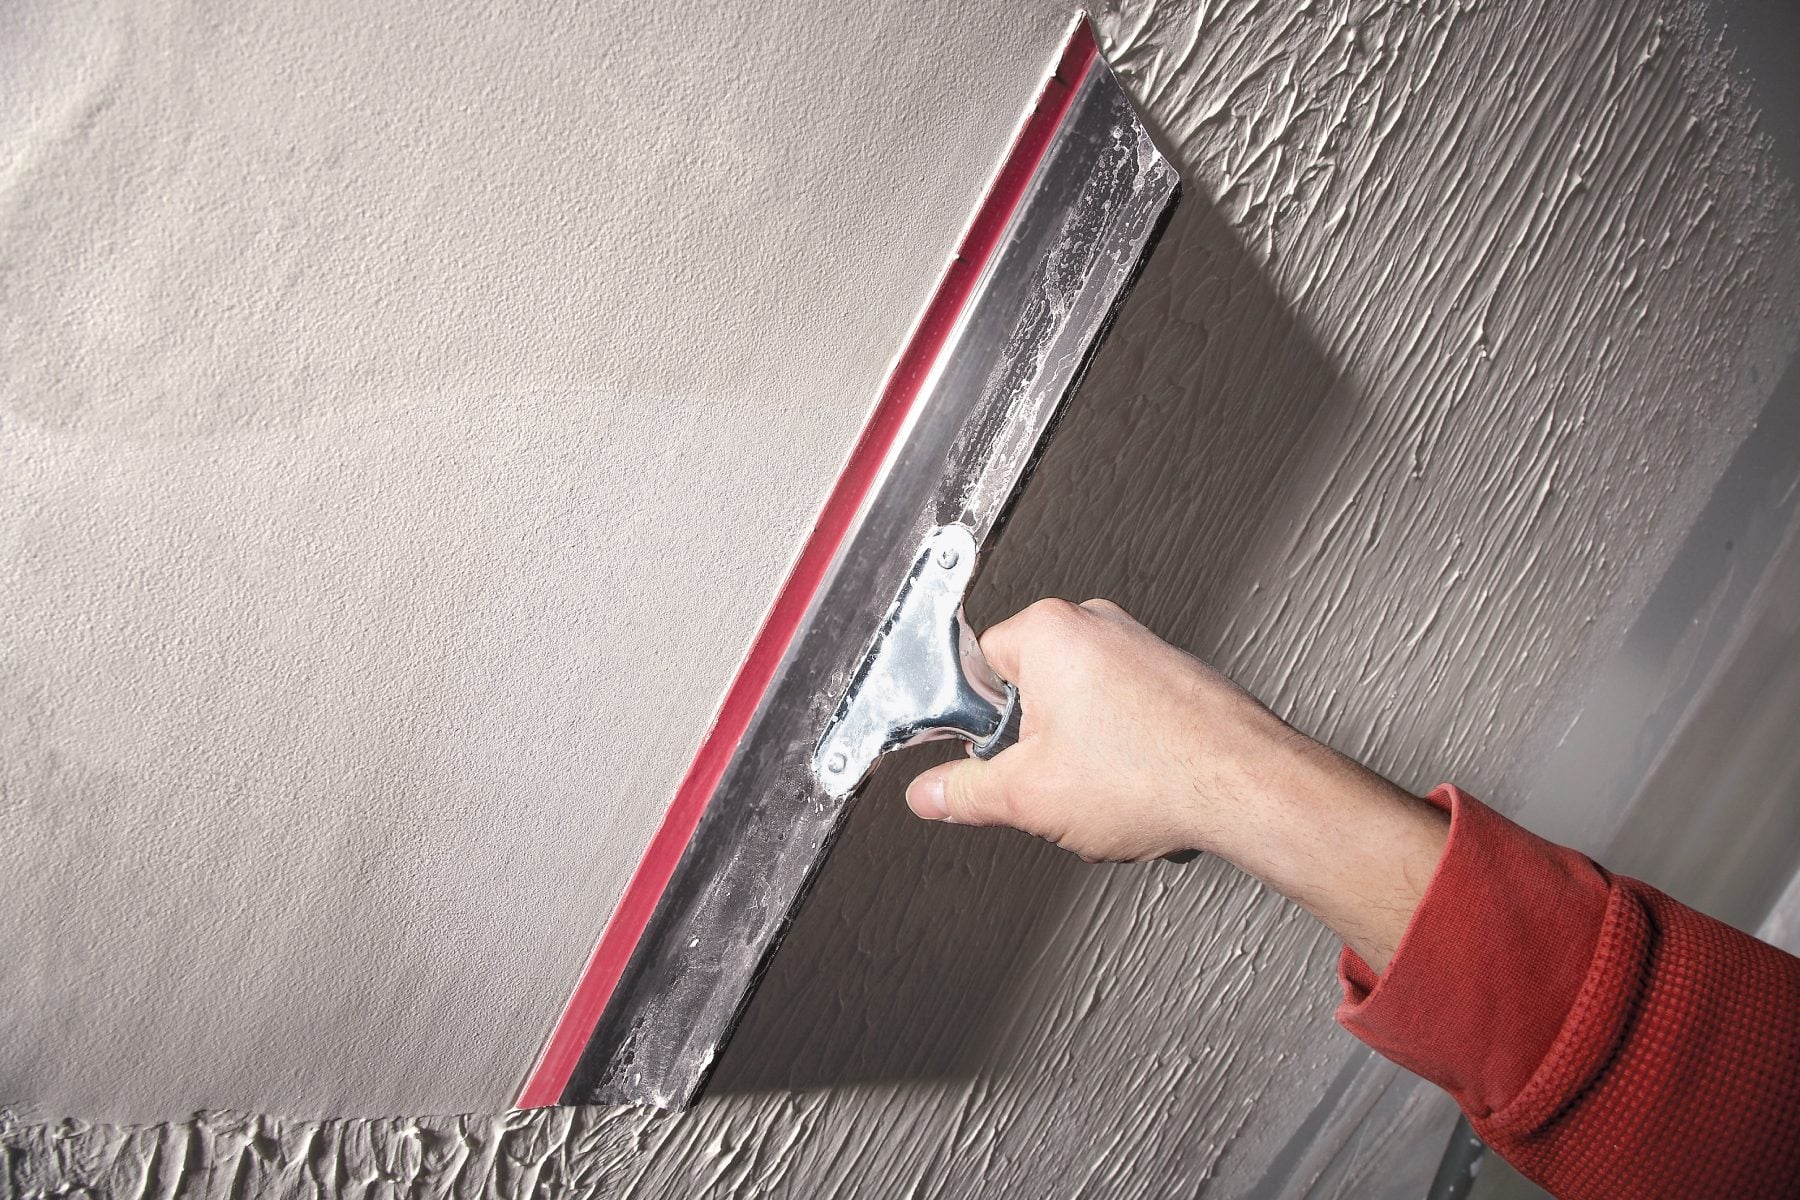
Some walls have “character.” Others have dents, old wallpaper scars, roller texture, mystery patches, and enough visual drama to qualify for their own reality show. A skim coat can calm all that down.
Skim coating is the process of spreading a very thin layer of joint compound across a wall to create a smoother, more uniform surface. It is one of the best DIY methods for refreshing rough drywall, hiding minor imperfections, improving walls after wallpaper removal, or preparing a room for paint. The job is messy, mildly humbling, and strangely satisfying once you see your wall stop looking like it lost an argument with a moving truck.
What Is a Skim Coat?
A skim coat is a thin film of drywall joint compound applied over a wall or ceiling. Unlike filling one dent with spackle, skim coating treats the whole surface so the repaired areas blend with everything around them.
The goal is not to build a thick layer of mud. The goal is to leave behind a smooth, nearly invisible coat that softens texture, fills shallow scratches, and reduces the contrast between drywall paper, old patches, seams, and previous repairs.
When done well, skim coating can help create a finish similar to a high-quality Level 5 drywall finish. It is especially helpful when sunlight hits a wall at an angle, because side lighting has a special talent for revealing every ridge, nail pop, and suspicious-looking patch.
When Should You Skim Coat Walls?
Skim coating is useful when the wall is structurally sound but visually rough. It works well on painted drywall, repaired drywall, lightly textured walls, and walls that look uneven after wallpaper removal.
Good Reasons to Skim Coat a Wall
- You want to smooth orange peel texture or light roller texture.
- You removed wallpaper and found small gouges, adhesive marks, or uneven patches.
- Your drywall repairs stand out under paint.
- You are changing from flat paint to eggshell, satin, or another finish that reflects more light.
- You are preparing a wall for wallpaper, mural panels, or a bold dark paint color.
- Your wall has shallow scratches, hairline surface damage, or small dents spread across a wide area.
When Skim Coating Is Not Enough
Do not use skim coating as a magic blanket over active water damage, loose drywall tape, crumbling plaster, mold, major cracks, or a wall that is moving or bowing. Fix the underlying issue first. Joint compound can make a wall look smoother, but it cannot turn a serious structural problem into a decorative feature.
If an older wall has unknown texture, peeling layers, or materials you suspect may contain hazardous dust, avoid aggressive sanding until the material has been properly evaluated. A smooth wall is nice. A safe work area is nicer.
Tools and Materials for DIY Skim Coating
You do not need a professional drywall truck, a television renovation crew, or the confidence of someone who casually owns five ladders. A few basic tools will handle most residential walls.
- Premixed all-purpose joint compound or finishing compound rated for skim coating
- Five-gallon bucket or clean mixing bucket
- Drill with a mixing paddle, optional but helpful
- Paint roller frame and medium-nap roller cover
- Paint tray or roller bucket
- 10-inch or 12-inch drywall knife
- Wide skimming blade or drywall squeegee knife, optional but useful
- 6-inch drywall knife for corners and small repairs
- Drywall pan or mud pan
- 120-grit to 150-grit sanding sponge
- 180-grit to 220-grit sanding sponge for final touch-ups
- Drop cloths, painter’s tape, plastic sheeting, and clean rags
- Vacuum with a brush attachment or HEPA filtration, if available
- Safety glasses and a properly fitted dust mask or respirator suitable for sanding dust
- Drywall primer or a high-quality interior primer
Choose the Right Joint Compound
For most DIY skim coating projects, premixed joint compound is the simplest choice. It gives you a longer working time, spreads smoothly, and is easier to manage than fast-setting powder compounds.
All-purpose joint compound works well for many walls, while lightweight finishing compounds can be easier to sand. Look for a product label that specifically says it can be used for skim coating, finishing drywall, or broad surface repairs.
Fast-setting compounds can be useful for filling deeper dents, repairing seams, or handling larger problem areas before the skim coat. However, they can set quickly enough to make a beginner feel like they are trying to frost a cake during an earthquake. Use them for repairs only if you understand the working time and can mix small batches.
Skip lightweight spackle for a full wall skim coat. Spackle is excellent for individual nail holes and small dents, but it is not designed to be spread over a large wall surface.
Step 1: Prepare the Wall Properly
Preparation is the least glamorous part of the project, which is precisely why it matters. Skim coating over dirt, loose paint, grease, or peeling paper is like putting a fancy tablecloth over a broken table. It may look better for a minute, but the problem is still waiting underneath.
- Remove outlet covers, switch plates, curtain hardware, and wall décor.
- Protect floors, furniture, trim, and nearby rooms with drop cloths and plastic sheeting.
- Wash walls that feel greasy or dusty, especially in kitchens, laundry rooms, and hallways.
- Scrape away loose paint, damaged drywall paper, bubbles, or flaking compound.
- Repair popped nails, damaged seams, deep dents, holes, and loose drywall tape before skim coating.
- Lightly sand glossy paint so the surface is dull rather than slick.
- Spot-prime exposed drywall paper or torn areas with a suitable primer or sealer before applying compound.
Let cleaned and primed areas dry completely. A skim coat needs a dry, stable surface underneath it. Moisture and impatience are both enemies of a smooth finish.
Step 2: Mix the Joint Compound
Open the bucket and inspect the compound. Premixed mud may be ready to use, but it often benefits from gentle mixing. Stir it by hand or use a drill with a paddle mixer on a slow speed.
Add only a small amount of clean water at a time if the compound feels stiff. The ideal consistency is soft, creamy, and easy to roll onto the wall without dripping down it like pancake batter escaping a plate.
Too thick, and you will fight the wall. Too thin, and the mud will sag, splatter, and glide off your knife with the enthusiasm of a toddler escaping bath time. Mix slowly and test a small section before committing to the entire room.
Step 3: Roll the Mud Onto the Wall
The roller-and-knife method is one of the most beginner-friendly ways to skim coat walls. Instead of trying to load a huge drywall knife with the perfect amount of compound, you roll the mud on first and smooth it immediately afterward.
How to Apply the First Skim Coat
- Pour a manageable amount of thinned joint compound into a roller tray or bucket.
- Work in sections about 3 to 4 feet wide.
- Use the roller to apply a thin, even layer of compound to the wall.
- Do not let the rolled compound dry before smoothing it with a knife.
- Hold a 10-inch or 12-inch drywall knife at a shallow angle.
- Pull the knife from top to bottom or bottom to top in long, controlled passes.
- Use light, steady pressure and overlap each pass slightly.
- Scrape excess mud from the knife into your pan or bucket after every pass.
Do not aim for perfection on the first coat. Aim for coverage. Your first skim coat is there to fill shallow imperfections and establish a smoother base. Tiny ridges and knife marks can be corrected later.
Step 4: Feather the Edges and Control Your Knife Angle
The secret to smoother skim-coated walls is not brute force. It is blade angle, light pressure, and resisting the urge to keep reworking the same spot until it resembles a drywall crime scene.
Hold the knife at roughly a 15- to 30-degree angle. A steeper angle removes too much compound. A flatter angle leaves too much mud behind. Let the edge of the knife glide across the surface rather than digging into it.
When you reach the edge of a section, feather the compound outward. This means applying less pressure to the outside edge of the knife so the coat fades gently into the surrounding surface. Hard edges become ridges, and ridges become sanding projects. Sanding projects become regrets.
Useful Knife Technique Tips
- Keep the knife blade clean. Dried chunks create drag marks.
- Use long passes instead of short, choppy strokes.
- Wipe the knife edge frequently with a damp rag.
- Work across the wall in overlapping sections.
- Do not keep smoothing an area after the mud begins to set.
- Use a smaller knife near trim, corners, windows, and outlets.
Step 5: Let the First Coat Dry
Drying time depends on the compound, room temperature, humidity, ventilation, and how thickly the material was applied. Many skim coats need to dry overnight, while some may be ready sooner under ideal conditions.
Do not judge dryness only by the surface color. The wall should feel firm and dry to the touch. If the compound feels cool, soft, or darker in patches, give it more time. Turning on fans and improving ventilation can help, but blasting a wall with heat may cause uneven drying or cracking.
Step 6: Scrape, Sand, and Apply a Second Coat
Before sanding, run a wide drywall knife gently over the dry wall to knock down ridges, dried drips, and sharp lines. This simple scrape can save a surprising amount of sanding later.
Use a sanding sponge with 120-grit to 150-grit paper to smooth noticeable imperfections. Sand lightly. You are polishing the surface, not trying to excavate it.
Vacuum the dust, wipe the wall with a barely damp microfiber cloth, and inspect the surface under bright side lighting. A flashlight held close to the wall is excellent at exposing high spots, low spots, and lines you did not notice five minutes earlier.
Most walls benefit from a second skim coat. Apply it just as you did the first coat, but use even thinner layers. You can pull your knife in a different direction on the second coat to help flatten small imperfections left by the first pass.
After the second coat dries, lightly sand with 180-grit to 220-grit paper where needed. A third thin coat may be useful for heavily textured walls, dark paint colors, glossy finishes, or rooms with strong natural light.
How to Skim Coat Corners, Trim, and Tight Areas
Large flat walls are the easy part. Corners, windows, doors, baseboards, and outlets are where skim coating starts behaving like a puzzle with wet frosting.
Inside Corners
Use a smaller drywall knife and apply compound to one side of the corner at a time. Let that side dry before coating the other side if you are worried about damaging the first pass.
Outside Corners
Check that corner bead is secure and not dented. Apply thin layers, pulling the knife away from the corner rather than pressing directly into it. Too much pressure can expose the metal or vinyl bead underneath.
Baseboards and Trim
Mask trim carefully and use a smaller knife near edges. Keep the compound thin. A thick pile of mud at the baseboard line is difficult to sand and tends to look worse after paint.
Outlets and Switches
Turn off power at the breaker before removing electrical cover plates. Keep compound out of electrical boxes, and do not coat directly over exposed wiring or damaged electrical components.
Common Skim Coating Problems and How to Fix Them
| Problem | Likely Cause | DIY Fix |
|---|---|---|
| Visible knife lines | Blade angle was too steep or mud was too thick | Scrape high spots, apply a thinner second coat, and sand lightly |
| Compound drips or sags | Too much mud or too much water in the mix | Let it dry, scrape it flat, and use a thicker mix next time |
| Drywall paper bubbles | Loose paper, moisture, or poor surface preparation | Cut away loose paper, seal the exposed area, then patch and skim |
| Cracks after drying | Coat was too thick or the wall is moving | Sand, refill with thin coats, and investigate recurring cracks |
| Flashing after paint | Joint compound was not primed evenly | Apply a uniform drywall primer before repainting |
| Wall still looks wavy | Low spots were not filled or lighting is revealing unevenness | Mark defects with pencil, apply another thin coat, and recheck with side lighting |
Step 7: Prime and Paint the Skim-Coated Wall
Once the wall is fully dry and smooth, remove every trace of sanding dust. Vacuum the wall, wipe it gently with a clean cloth, and allow any remaining moisture to dry.
Do not skip primer. Joint compound is porous, and paint can dry unevenly over unprimed areas. Primer helps create a more uniform surface so the final paint color and sheen look consistent.
Use a drywall primer or a high-quality interior primer recommended for repaired walls. After the primer dries, inspect the wall one more time under strong light. This is your last easy opportunity to correct tiny flaws before paint makes them permanent house guests.
For the smoothest appearance, use quality interior paint and maintain a wet edge while rolling. Flat and matte paints hide minor imperfections best, while eggshell, satin, and semi-gloss finishes make surface flaws more visible.
How Long Does It Take to Skim Coat a Wall?
A small wall may take a few hours of active work spread over one or two days. A full room often takes several days because each coat must dry before sanding, touching up, or applying another layer.
The actual spreading is usually faster than the preparation, drying, cleanup, and sanding. Plan your project around drying time instead of trying to finish everything in one dramatic weekend sprint. Skim coating rewards patience, and it punishes shortcuts with visible ridges.
DIY Skim Coating Experiences: What Homeowners Learn the Hard Way
The first surprise for many DIYers is that skim coating is less about applying mud and more about learning when to stop touching the wall. Beginners often see a small line, try to fix it immediately, create two more lines, and then keep “improving” the surface until the original problem has multiplied like rabbits in a vegetable garden. A better approach is to make one smooth pass, move on, and return after the coat dries. Drywall compound is forgiving, but only after you stop arguing with it.
Another common experience is discovering that thin coats are faster than thick coats, even though thick coats seem like they should save time. A thick layer takes longer to dry, cracks more easily, and creates more sanding dust. A thin coat dries more predictably and is easier to flatten with a wide knife. The wall may need an extra coat, but two thin coats are usually less frustrating than one heavy coat that turns into a geological formation.
Lighting changes everything. A wall can look beautiful during the day and suddenly reveal every defect when a lamp is turned on at night. DIYers who use a flashlight or work light held at an angle usually catch problems before painting. This “raking light” trick can feel rude at first because it points out every tiny ridge. It is still better than discovering those ridges after applying an expensive satin paint color.
Many homeowners also learn that clean tools are not optional. A small dried lump on the edge of a drywall knife can leave a long, ugly trail across an otherwise smooth coat. Keeping a damp rag nearby and wiping the blade often makes the work noticeably easier. It may feel repetitive, but so does sanding an avoidable line for twenty minutes.
The roller method is especially popular because it reduces the skill required to load compound onto a wide knife. Rolling mud onto the wall feels familiar to anyone who has painted before. The key lesson is to work in smaller sections and smooth each area immediately. If you roll the entire wall first, the earliest sections may start drying before you reach them with the knife. Then the mud drags, tears, and becomes less cooperative.
There is also a practical lesson about expectations. Skim coating can dramatically improve a wall, but it is not always necessary to create a perfectly flawless gallery wall in every room. Bedrooms with soft lighting may need only one careful coat and primer. A dining room with large windows, glossy paint, or dramatic pendant lights may deserve more attention. Match the effort to the room, the paint sheen, and how closely people are likely to inspect the wall. Most guests are there for dinner, not a forensic drywall investigation.
Finally, experienced DIYers often say that cleanup should be part of the plan, not an annoying surprise at the end. Joint compound dust travels farther than expected. Cover doorways, protect floors, clean tools before the mud hardens, and vacuum between sanding sessions. A controlled work area makes the project feel manageable. A room coated in white dust makes it feel like you accidentally renovated a bakery.
Final Thoughts on Skim Coating Walls
Learning how to skim coat walls is one of those DIY skills that looks intimidating until you understand the rhythm: prepare, apply thin compound, smooth it with a wide knife, let it dry, sand lightly, and repeat as needed.
The biggest difference between a frustrating project and a successful one usually comes down to patience. Use thin coats, inspect the wall under side lighting, keep your tools clean, and prime before painting. You do not need to create a museum-perfect wall on the first attempt. You only need to make each coat a little smoother than the last.
With the right joint compound, a wide drywall knife, and a willingness to accept that sanding dust may become your temporary roommate, you can turn a tired wall into a clean, paint-ready surface that looks dramatically better.