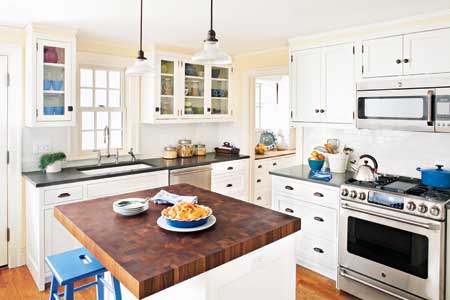
Renovating a home is exciting until the numbers start acting like they discovered caffeine. A simple bathroom refresh becomes “while we’re here, let’s move the plumbing.” A kitchen update becomes “what if we knock down this wall?” And suddenly your budget is in the corner whispering, “I used to be so young.”
The good news: keeping renovation costs down does not mean choosing the cheapest materials, hiring the first person with a pickup truck, or pretending permits are optional. Smart renovation budgeting is about planning carefully, controlling scope, comparing bids, making decisions early, and knowing which upgrades are worth the money. Whether you are remodeling a kitchen, updating a bathroom, finishing a basement, or giving the whole house a glow-up, the same rule applies: the fewer surprises you create, the fewer surprises you pay for.
This guide explains practical, real-world ways to reduce home renovation costs without creating future repair bills. Think of it as a budget seatbelt: not flashy, but very helpful when things get bumpy.
Start With a Realistic Renovation Budget
Before you shop for tile, cabinets, paint colors, or that dramatic pendant light that looks like it belongs in a boutique hotel, set a realistic renovation budget. Many homeowners begin with a dream number instead of a working number. The dream number is what you hope the project costs. The working number is what materials, labor, permits, disposal, design changes, and hidden repairs are actually likely to cost.
Start by listing every part of the project: demolition, framing, electrical, plumbing, flooring, fixtures, appliances, cabinetry, countertops, paint, trim, permits, inspections, cleanup, and temporary living costs if needed. Then add a contingency fund. For many remodeling projects, a 10% to 20% cushion is sensible. Older homes, structural changes, and projects involving plumbing or electrical systems often need more breathing room because hidden issues love to hide behind walls like tiny expensive gremlins.
Create Three Budget Columns
A simple spreadsheet can save a shocking amount of money. Create three columns: estimated cost, quoted cost, and actual cost. Update it weekly. This helps you notice small overruns before they become a financial landslide. A $200 faucet upgrade, a $350 lighting change, and a $600 tile splurge may seem harmless individually. Together, they can quietly eat the budget like snacks during a movie marathon.
Define the Scope Before Anyone Swings a Hammer
One of the fastest ways to blow a renovation budget is to start with a vague plan. “Update the kitchen” is not a scope. “Replace cabinet doors, keep the existing layout, install quartz countertops, add under-cabinet lighting, repaint walls, and replace the sink and faucet” is a scope.
The more detailed your plan is, the more accurate contractor bids will be. A clear scope also reduces misunderstandings. Contractors cannot price what has not been decided. If your quote includes “allowance for tile,” ask what that allowance covers. Is it $3 per square foot or $15 per square foot? Does it include grout, backer board, edge trim, and labor? Vague allowances are where budgets often go to do mysterious disappearing acts.
Separate Must-Haves From Nice-to-Haves
Make two lists before requesting quotes. The first list includes must-haves: fixing water damage, improving safety, replacing failing systems, or making a layout functional. The second list includes nice-to-haves: custom built-ins, specialty tile, luxury hardware, high-end appliances, or designer lighting. When costs rise, cut from the nice-to-have list first. Your future self will appreciate a dry, functional bathroom more than a gold shower niche shaped like a seashell.
Keep the Existing Layout When Possible
If you want to keep renovation costs down, avoid moving plumbing, gas lines, exterior walls, load-bearing walls, and major electrical systems unless there is a strong reason. Keeping the kitchen sink, toilet, tub, shower, and appliances in roughly the same locations can save thousands because moving mechanical systems usually requires more labor, permits, inspections, wall repair, flooring repair, and sometimes structural work.
This does not mean you have to accept a bad layout forever. Sometimes small changes create a big improvement. Replacing a bulky vanity with a floating one can make a bathroom feel larger. Swapping upper cabinets for open shelving in one area can visually lighten a kitchen. Adding better lighting can make a space feel completely different without tearing the house apart.
Get Multiple Contractor Estimates
Never rely on one estimate unless you already have a trusted professional with a proven track record. For most renovation projects, get at least three written estimates. You are not just comparing price. You are comparing scope, timeline, materials, payment schedule, warranty, communication style, and professionalism.
The lowest bid is not always the cheapest in the long run. A very low estimate may leave out important items, use unrealistic allowances, skip permits, or rely on change orders later. A higher bid may include better project management, clearer documentation, licensed subcontractors, and fewer surprises. The goal is not to find the cheapest contractor. The goal is to find the best value from someone qualified, insured, and clear about the work.
Ask the Right Questions
Before hiring, ask whether the contractor is licensed where required, insured, experienced with your type of project, and willing to provide recent references. Ask who will be on site, how changes are priced, how cleanup is handled, and what happens if materials are delayed. A professional contractor should not be offended by these questions. In fact, good contractors usually appreciate organized clients because organized clients are less likely to change their minds every 17 minutes.
Use a Detailed Written Contract
A handshake is friendly. A detailed contract is better. Your renovation contract should include the contractor’s contact information, license details where applicable, scope of work, materials, payment schedule, estimated start and completion dates, permit responsibilities, cleanup expectations, warranty information, and change-order procedures.
Do not pay the full cost upfront. Reasonable deposits vary by project and state rules, but payments should usually be tied to progress milestones. For example, a payment may be due after demolition, another after rough-in inspections, another after installation, and a final payment after completion. This keeps everyone accountable and reduces the risk of paying for work that has not been done.
Control Change Orders Like a Budget Hawk
Change orders are written approvals for changes after work begins. Some are unavoidable. If demolition reveals rotten subflooring or outdated wiring that must be corrected, that is a legitimate change. But many change orders come from indecision: changing tile after it has been ordered, upgrading fixtures mid-project, expanding the scope, or deciding that now is the perfect time to add recessed lighting everywhere, including possibly the dog’s bed.
The best way to reduce change orders is to make selections early. Choose tile, flooring, paint, fixtures, appliances, cabinet hardware, countertops, grout color, lighting, and trim before construction starts whenever possible. Confirm lead times too. A beautiful vanity that arrives six weeks late can delay plumbing, inspections, and final finishes.
Shop Materials Strategically
Materials are one of the biggest areas where homeowners can save money without sacrificing style. Compare prices at home centers, local suppliers, warehouse outlets, online retailers, salvage stores, and clearance sections. Floor models, discontinued finishes, open-box appliances, and overstock tile can offer serious savings.
However, do not buy bargain materials blindly. Check return policies, quantity availability, warranty terms, and compatibility. If you buy clearance tile, purchase more than you think you need because it may be impossible to find later. A good rule is to buy extra for cuts, waste, and future repairs. Nothing says “renovation regret” like needing three more tiles from a discontinued batch called Desert Fog Whisper Beige.
Mix High and Low Finishes
Spend where quality matters most and save where it is less noticeable. In a kitchen, durable cabinets, reliable hardware, and quality countertops may matter more than a luxury backsplash. In a bathroom, waterproofing and ventilation are more important than a trendy mirror. A smart mix of premium and budget-friendly choices creates a polished look without turning your wallet into confetti.
Reuse, Refinish, and Repurpose
Not everything needs to be ripped out. Refinishing hardwood floors can be less expensive than replacing them. Painting existing cabinets and adding new hardware can transform a kitchen. Reglazing a tub may cost far less than replacing it. Keeping interior doors, trim, or built-ins can preserve character while reducing material and labor costs.
Reusing materials is especially valuable in older homes with solid wood, original hardware, or unique architectural details. New does not always mean better. Sometimes the smartest renovation move is to rescue what is already there and let it look intentional. Call it “historic charm” and watch guests nod approvingly.
Know What You Can DIYand What You Should Not
DIY can reduce renovation costs, but only when matched to your skill level. Painting, simple demolition, removing cabinet hardware, landscaping, installing shelves, assembling furniture, and basic cosmetic updates may be good homeowner tasks. You can also save by doing prep work, such as clearing rooms, protecting furniture, and handling minor cleanup if your contractor agrees.
But some work should be handled by licensed professionals, especially electrical, plumbing, gas, structural changes, roofing, waterproofing, and anything involving safety codes. A failed DIY paint job is annoying. A failed DIY shower pan can cause hidden water damage that costs far more than hiring a professional in the first place. The cheapest option is not cheap if you have to pay someone to undo it.
Do Projects in the Right Order
Renovation sequencing matters. If you install new flooring before major plumbing work, you may end up protecting or repairing the floor during later stages. If you paint before drywall repairs are complete, you may paint twice. If you order cabinets without final appliance dimensions, you may discover that your refrigerator fits only in your imagination.
Plan from messy to clean: demolition, structural work, rough plumbing and electrical, insulation, drywall, flooring, cabinetry, fixtures, trim, paint touch-ups, and final cleanup. The exact order varies by project, but the principle is the same. Do not pay to finish something that another trade will need to disturb later.
Time Your Renovation Wisely
Seasonal timing can affect renovation costs. Contractors may be busier during certain months, and materials may fluctuate in price. If your project is not urgent, planning early gives you time to compare bids, wait for sales, order materials before deadlines, and avoid rush charges.
Rushing is expensive. Last-minute decisions often limit your choices and force you into whatever is available quickly. Planning ahead also helps you avoid paying for temporary fixes while waiting for permanent solutions. In renovation, patience is not just a virtue; it is sometimes a discount code.
Do Not Skip Permits
Skipping permits may look like a way to save money, but it can create bigger costs later. Permits and inspections help confirm that work meets local building codes, especially for electrical, plumbing, structural, HVAC, additions, and major remodeling projects. Unpermitted work can complicate insurance claims, resale, appraisals, and future renovations.
Permit rules vary by location, so check with your local building department before work begins. A reputable contractor should be familiar with common requirements in your area. If someone tells you permits are unnecessary for major work without checking local rules, consider that a bright red flag waving enthusiastically in the wind.
Protect Older Homes From Hidden Costs
Older homes can be beautiful, sturdy, and full of character. They can also hide outdated wiring, old plumbing, asbestos-containing materials, lead-based paint, moisture damage, and structural surprises. If your home was built before 1978, lead-safe renovation practices may apply when painted surfaces are disturbed.
Budget for testing, safe handling, and qualified professionals when needed. Cutting corners on hazardous materials is not a money-saving strategy. It is a future problem wearing a discount sticker. Proper safety practices protect your household, workers, and the value of the renovation.
Prioritize Repairs That Prevent Bigger Bills
Cosmetic upgrades are fun, but maintenance should come first. A new kitchen backsplash will not feel very satisfying if the roof leaks above it. Before spending heavily on finishes, check the roof, foundation, drainage, plumbing, electrical panel, HVAC system, windows, insulation, and ventilation.
Projects that prevent water damage, improve safety, or reduce energy waste often deserve priority. For example, fixing poor bathroom ventilation can prevent mold and peeling paint. Improving insulation can make rooms more comfortable and reduce heating and cooling strain. Repairing drainage around the foundation can protect the entire house.
Look for Rebates, Credits, and Utility Incentives
Energy-efficient upgrades may qualify for federal, state, local, or utility incentives, depending on current rules and your location. Insulation, efficient windows, doors, heat pumps, heat pump water heaters, and home energy audits may be eligible for savings programs. Always verify current requirements before purchasing because incentive rules can change, and some programs require specific products, documentation, or installation standards.
Even when incentives are not available, energy upgrades can still reduce long-term costs. The key is to compare upfront price, expected savings, comfort improvements, and maintenance needs. A cheaper product that performs poorly may cost more over time than a better product installed correctly.
Avoid Over-Customizing for the Neighborhood
If resale value matters, avoid spending far beyond what is typical for your area. A luxury chef’s kitchen in a modest neighborhood may be wonderful if you plan to stay for decades and cook like a competitive pasta athlete. But if you expect to sell soon, you may not recover the full cost.
Research comparable homes nearby. Look at what buyers expect in your market. Focus on durable, functional, broadly appealing improvements. Neutral does not have to mean boring; it means the next owner will not walk in and wonder why the laundry room has purple glitter grout.
Reduce Waste and Disposal Costs
Renovation debris can be expensive to haul away. Before demolition, identify what can be donated, sold, reused, or recycled. Cabinets, appliances, doors, light fixtures, sinks, hardware, and leftover materials may have value if they are in usable condition.
Ask your contractor how disposal is handled and whether dumpster fees are included. If you are doing some work yourself, compare dumpster rental, bag-style waste services, municipal bulk pickup, and donation pickup options. Reducing waste is good for the budget and better for the planet, which is nice because Earth has been very patient with our tile samples.
Use Design Help Selectively
Hiring a designer may sound like an added expense, but targeted design help can prevent costly mistakes. A few hours with a kitchen designer, interior designer, architect, or design-build professional can clarify layout, materials, lighting, storage, and sequencing. This is especially useful for kitchens, bathrooms, additions, and projects where multiple trades overlap.
The trick is to use professional input where it matters most. You may not need full-service design for every project. But paying for expert guidance early can be cheaper than changing cabinets, moving outlets, or reordering materials later.
Keep Communication Organized
Poor communication creates expensive confusion. Keep all quotes, contracts, receipts, drawings, product links, paint colors, model numbers, warranties, and change orders in one folder. Use email or a project management app for important decisions so there is a written record.
Schedule regular check-ins with your contractor. Ask what decisions are needed next, what materials are delayed, and whether anything is trending over budget. Clear communication will not prevent every issue, but it makes problems smaller and easier to solve.
Experience-Based Tips: What Really Helps Keep Renovation Costs Down
After studying renovation advice and looking at how real projects tend to go sideways, the most useful cost-saving habit is surprisingly simple: slow down before you start. Homeowners often lose money not because they choose one expensive item, but because they begin without enough information. They approve a general idea, then discover the details during construction, when every decision is urgent and more expensive.
One practical experience-based approach is to “live with the house” before renovating, when possible. Spend time noticing how light enters rooms, where clutter collects, which doors swing awkwardly, where storage is missing, and what actually annoys you every day. A kitchen may not need a full gut renovation if the real problem is poor lighting, worn cabinet fronts, and a bad pantry setup. A bathroom may not need to be expanded if a better vanity, brighter lighting, improved ventilation, and new tile can solve most of the frustration.
Another lesson: mock up decisions before buying. Tape cabinet dimensions on the floor. Use painter’s tape to mark where a kitchen island would sit. Place cardboard where a vanity or built-in might go. This low-cost step can prevent expensive layout mistakes. It is much better to discover that an island blocks the dishwasher before the countertop is installed and everyone is standing around making the same worried face.
Samples are also worth the small upfront cost. Paint, flooring, tile, countertop, and fabric samples can look completely different in your home than they do under showroom lights. Test them in morning and evening light. Put flooring samples near existing trim. Compare cabinet colors against appliances. A $12 sample can prevent a $2,000 regret.
One of the most underrated budget moves is deciding what “finished” means before work begins. For example, does the contractor’s quote include painting trim? Does it include installing towel bars, mirrors, and shelves? Does it include reconnecting appliances? Does it include hauling away debris? Homeowners often assume these finishing details are included, then get surprised by extra labor or end up doing rushed DIY at the end when energy and money are both low.
It also helps to create a “no emotional upgrades after 8 p.m.” rule. Renovation fatigue is real. After weeks of dust, noise, and decision-making, even reasonable people can start making strange choices. Suddenly the expensive imported tile seems necessary because “we deserve one beautiful thing.” Maybe you do. But wait until morning, compare the cost, and decide with coffee instead of construction stress.
Finally, protect the budget by protecting your daily life. Set up a temporary kitchen during kitchen remodels. Keep one clean, quiet room untouched if possible. Store materials neatly. Label boxes. Take photos before walls are closed. The less chaotic the project feels, the less likely you are to make rushed, expensive decisions just to make the renovation end faster.
Renovation costs come down when planning goes up. The homeowners who save the most are not always the ones who choose the cheapest products. They are the ones who define the scope, compare estimates, ask detailed questions, buy carefully, keep layouts efficient, and resist the mighty temptation of “while we’re at it.”
Conclusion
Keeping renovation costs down is not about being cheap. It is about being strategic. A smart renovation budget starts with a clear scope, realistic numbers, multiple estimates, a written contract, and a healthy contingency fund. From there, the biggest savings usually come from keeping existing layouts, reducing change orders, shopping materials carefully, reusing what still works, and hiring qualified professionals for the jobs that truly require expertise.
The best renovation is not always the most expensive one. It is the one that makes your home more functional, comfortable, safe, and valuable without leaving you financially flattened. Plan early, decide carefully, and remember: every dollar you do not waste on avoidable mistakes is a dollar you can spend on something better, like quality finishes, future maintenance, or a celebratory pizza when the dust finally settles.