Learning how to draw flames is one of those art skills that looks dramatic, dangerous, and wildly complicateduntil you realize fire is basically a dancing stack of curved teardrops with attitude. Whether you want to sketch a campfire, design a tattoo-style flame, add fire to a comic book hero, or make a digital illustration glow like it just swallowed the sun, the secret is not copying every tiny flicker. The secret is understanding the movement.
Flames do not stand still. They stretch upward, twist, overlap, split into smaller tongues, and glow from the inside out. That is why a good flame drawing should feel light, energetic, and a little unpredictable. If your first attempt looks like a melted onion, congratulationsyou are already in the correct neighborhood. With a few simple shapes, clean line work, and smart color choices, you can turn that onion into a convincing burst of fire.
This guide breaks the process into 13 beginner-friendly steps. You can follow it with pencil and paper, colored pencils, markers, paint, or a digital drawing app. The method works for cartoon flames, semi-realistic fire, graffiti flames, and decorative flame designs. Grab your sketchbook, sharpen your pencil, and prepare to draw something hotter than your laptop after 37 browser tabs.
Materials You Need to Draw Flames
You do not need fancy supplies to begin. A basic pencil, eraser, and paper are enough for the sketching stage. If you want to color the flames, use colored pencils, alcohol markers, watercolor, acrylic paint, or digital brushes. For a classic fire palette, prepare yellow, orange, red, and a small amount of dark brown, purple, or gray for smoke and shadows. White is also useful for bright highlights, especially when drawing flames on toned paper or a dark background.
If you are working digitally, use separate layers for the sketch, flat colors, glow, highlights, sparks, and background. This makes it easier to adjust your flame drawing without accidentally turning the whole thing into a spicy spaghetti disaster.
How to Draw Flames: 13 Steps
Step 1: Study the Basic Shape of Fire
Before drawing, look at a few safe references: photos of candles, campfires, fireplaces, or stylized fire illustrations. Notice how most flames have a wide base and narrow tips. The shapes often resemble stretched teardrops, ribbons, leaves, or wavy triangles. Fire rises because heat moves upward, so your lines should also travel upward. This simple observation gives your drawing a natural sense of motion.
A common beginner mistake is drawing flames as stiff spikes, like a row of angry shark teeth. Real flames are sharper at the tips but rounded and flowing through the middle. Think less “knife collection” and more “silk scarf in a strong breeze.”
Step 2: Draw a Light Guideline for the Flame
Start with a loose vertical guideline. This line shows the direction your flame will rise. It does not have to be perfectly straight. In fact, a slightly curved line usually looks better because flames rarely move like soldiers standing at attention. A gentle S-curve can make your flame feel alive.
Keep the guideline very light so you can erase it later. If you are drawing a campfire, place the guideline above the logs. If you are drawing a single candle flame, keep it narrow. For a larger cartoon fire, make the guideline taller and add more curves.
Step 3: Sketch the Outer Flame Shape
Now draw the outer silhouette of the flame. Begin near the base, curve upward along one side, bring the line to a point, then curve back down on the opposite side. The shape should look like a long teardrop with a wavy personality. Make the base wider and the top narrower.
Do not worry about perfect symmetry. In fact, avoid it. Flames look more natural when one side leans, bends, or flares outward more than the other. A perfectly mirrored flame can look like a logo, which is fine for graphic design but less lively for natural fire.
Step 4: Add Smaller Flame Tongues Inside
Inside the large outer shape, draw one or two smaller flame tongues. These should follow the same upward motion as the main flame. Use curved lines that taper into points. One inner flame can rise from the base toward the middle, while another can bend to the left or right.
These inner shapes are important because they create depth. They also help separate the hottest part of the fire from the cooler outer edges. In many flame drawings, the center is the brightest area, while the outer edges are orange, red, or darker.
Step 5: Create Overlapping Curves
To make the flame more dynamic, add overlapping curves along the sides. These can look like small hooks, waves, or pointed curls. Let some lines dip inward and others flare outward. The goal is to suggest flickering movement without cluttering the drawing.
Imagine the flame is dancing. One tongue stretches up, another twists away, and a smaller one curls back toward the center. This variety makes your fire drawing more believable and more interesting to look at.
Step 6: Refine the Flame Tips
Flame tips should be sharp but not robotic. Use tapered points at the top of each flame tongue, then soften the curves leading into those points. Some tips can be tall and thin, while others can be short and rounded. This mix creates rhythm.
If every point is the same height, your flame may look like a crown. A fiery crown, sure, but still a crown. Vary the height of each tip so the drawing feels organic.
Step 7: Add the Base of the Fire
If you are drawing a campfire, sketch logs beneath the flame. Draw two or three cylinders crossing at slight angles. Add curved end caps and a few bark lines. If you are drawing a candle flame, add the wick below the flame. If you are drawing decorative flames for a motorcycle, skateboard, or tattoo design, extend the base into sweeping curves.
The base helps explain where the fire is coming from. Even a stylized flame looks stronger when it has a clear source.
Step 8: Clean Up the Line Art
Once you like the overall shape, erase unnecessary guidelines and redraw the main lines more confidently. Use smooth, continuous strokes when possible. Broken or scratchy lines can make flames look messy unless you are intentionally creating a rough sketch style.
For cartoon flames, use bold outlines. For realistic flames, keep the outlines lighter or skip hard outlines altogether. Real fire does not have black borders, but illustrations often use them for clarity and style.
Step 9: Choose Your Flame Colors
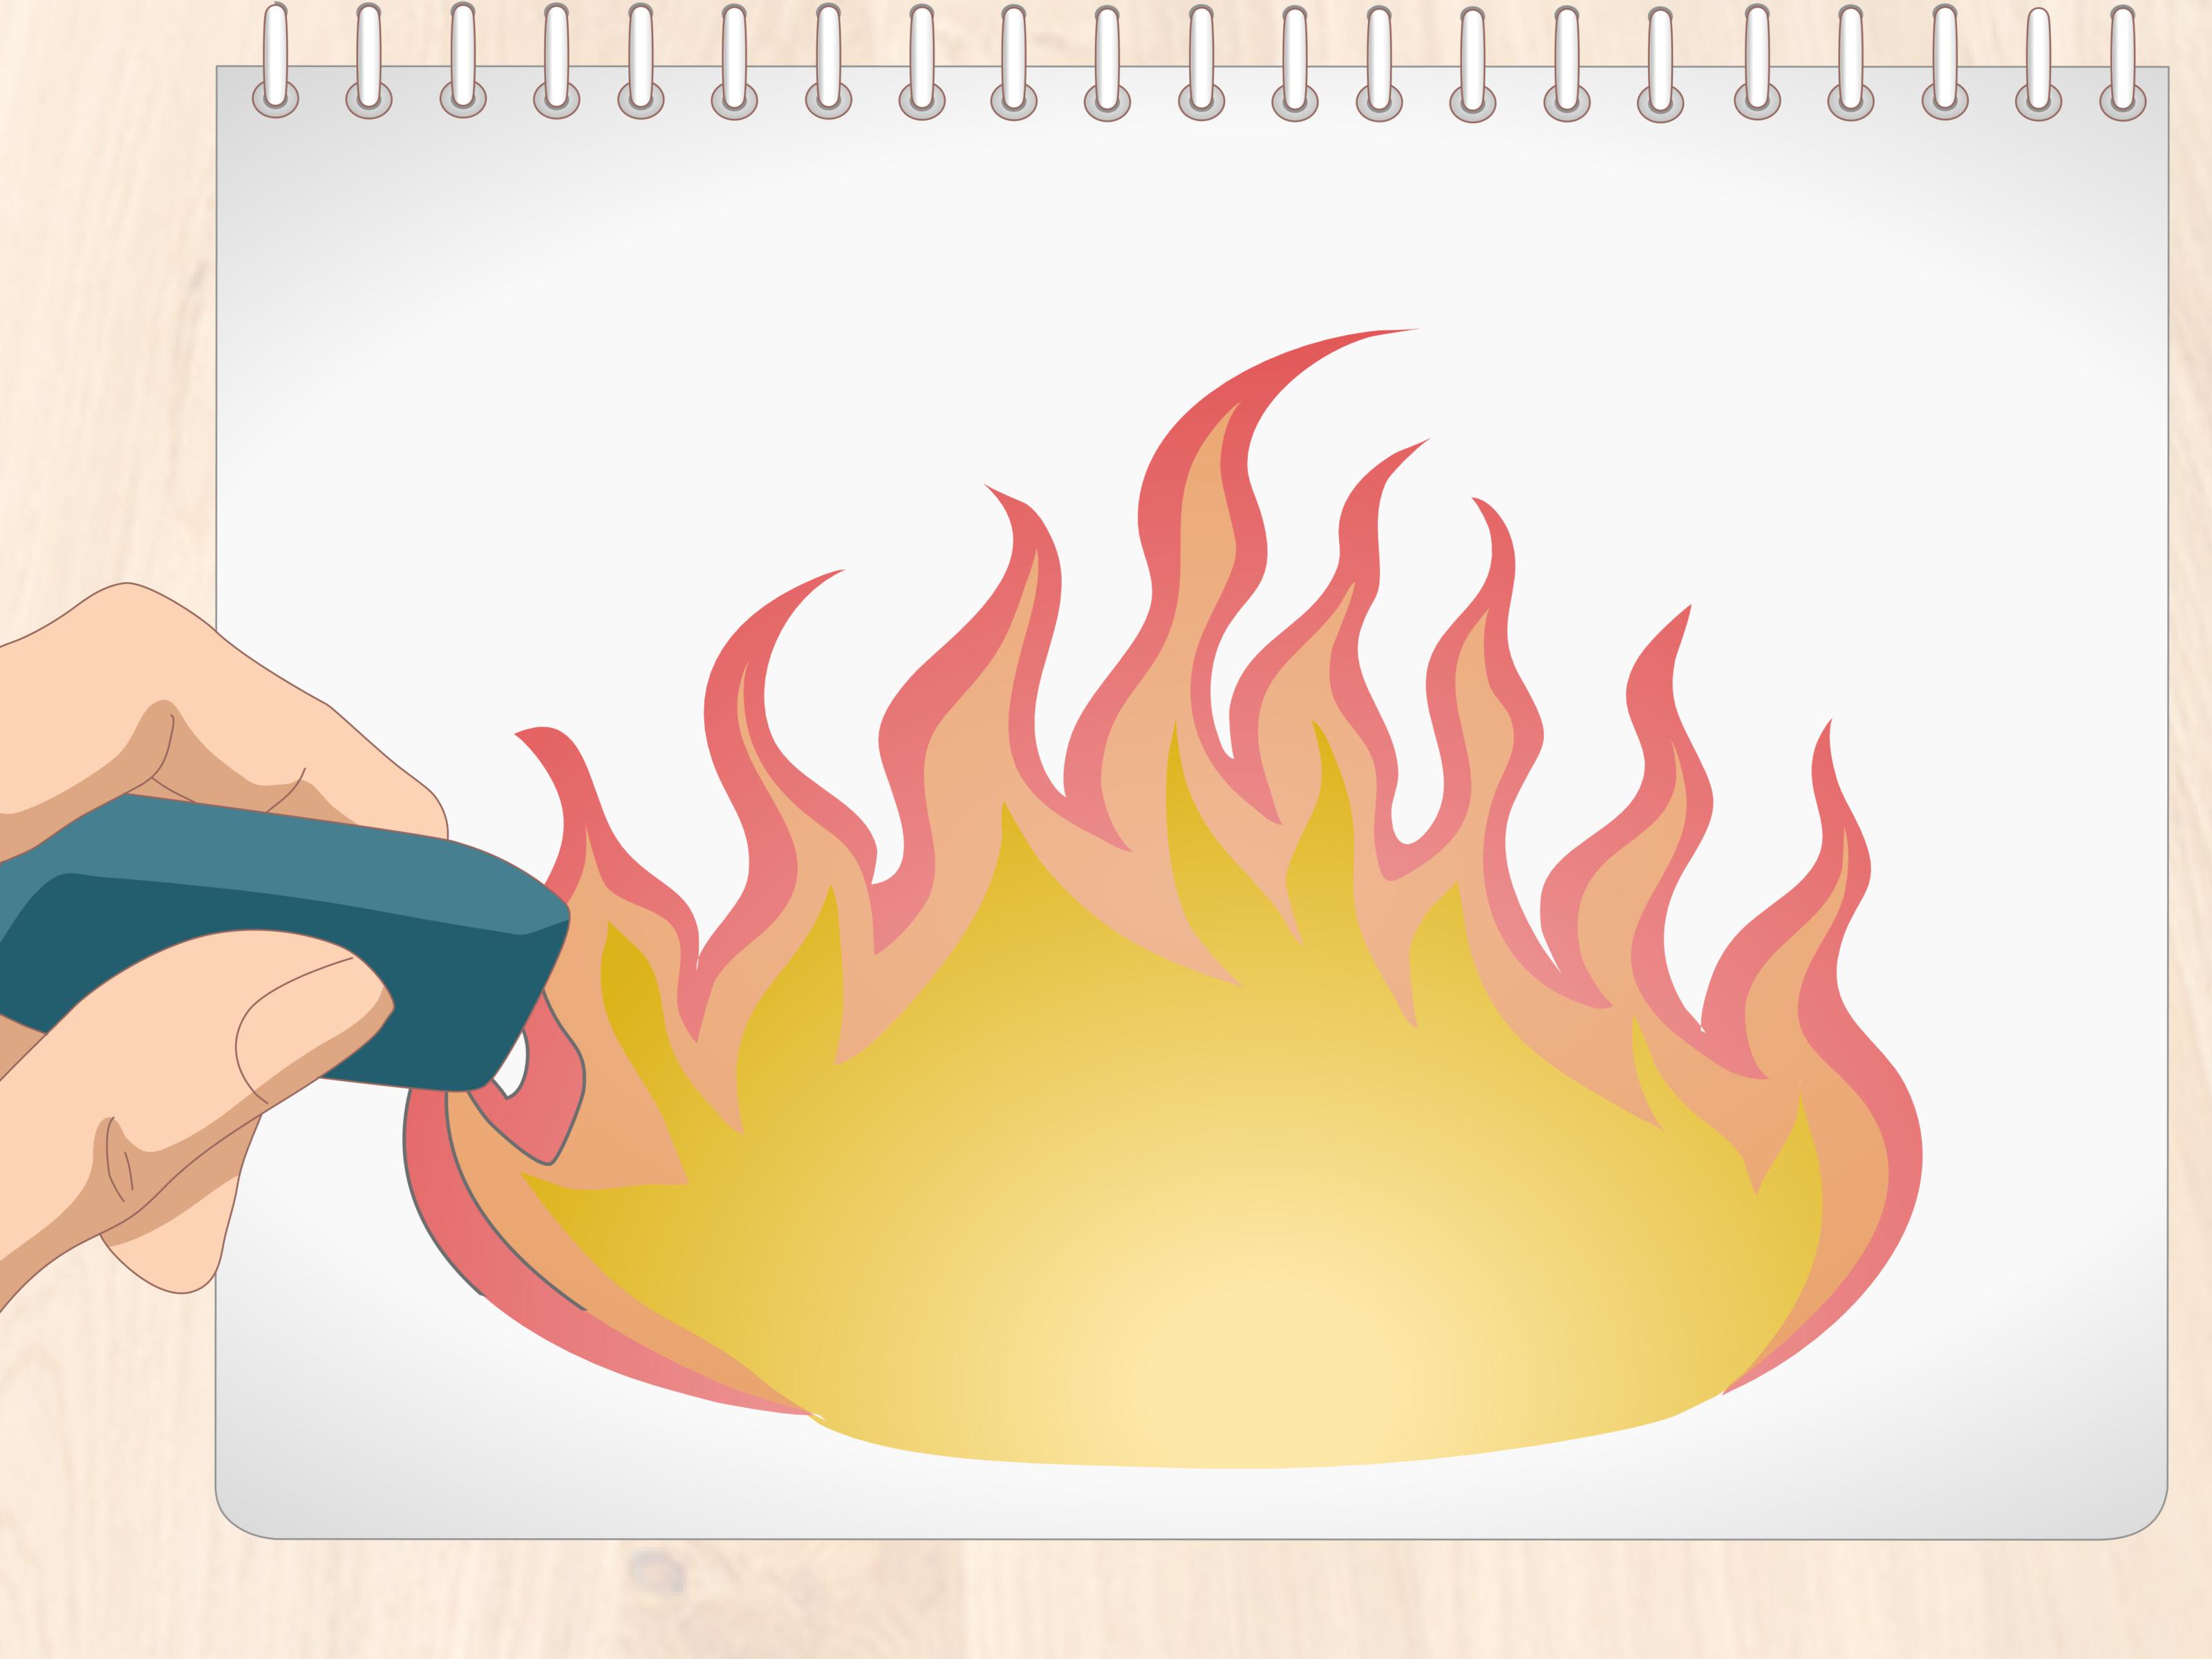
The classic flame color order is simple: yellow or white in the hottest center, orange around it, red near the outer edges, and darker tones only where needed. In many drawings, beginners put red in the middle and yellow outside, but this can make the flame look backward. The brightest color usually belongs near the core.
For a basic flame drawing, use this color plan:
- White or pale yellow: hottest highlights and center glow
- Yellow: inner flame shapes
- Orange: main body of the flame
- Red: outer edges and cooler areas
- Dark brown, gray, or purple: smoke, shadows, or dramatic contrast
Step 10: Fill the Inner Flame First
Color the smallest inner flame with pale yellow or white-yellow. Keep the strokes moving upward, following the direction of the flame. This helps the coloring support the shape instead of flattening it.
If you are using colored pencils, start with light pressure and build layers slowly. If you are using markers, begin with the lightest colors so you can blend darker colors around them. If you are painting digitally, use a soft brush for the glow and a sharper brush for the flame edges.
Step 11: Add Orange and Red Layers
Next, color the middle flame areas orange. Let the orange overlap slightly with the yellow so the transition looks smoother. Then add red along the outer edges and lower areas. You do not need to cover the entire outside with red; use it selectively to add warmth and depth.
Layering is the key to a rich flame drawing. A flat orange shape may read as fire, but layered yellow, orange, and red will feel hotter and more dimensional. Blend where the colors meet, but keep some sharp edges near the flame tips for energy.
Step 12: Add Glow, Sparks, and Smoke
To make your fire drawing pop, add a soft glow around the flame. On paper, lightly shade around the outside with yellow or orange. On a digital canvas, place the glow on a separate layer and blur it slightly. Keep the glow strongest near the base and around the brightest parts of the flame.
Add a few sparks above the fire using tiny dots, short dashes, or little teardrops. Do not overdo it; a small number of sparks can suggest motion, while too many can make the drawing look like the flame sneezed glitter. If you want smoke, use soft gray curves rising above the flame. Smoke should be lighter and more transparent than the fire itself.
Step 13: Add Final Contrast and Details
Finish by checking contrast. Are the brightest areas bright enough? Are the outer edges visible? Does the flame feel like it is moving upward? Add small highlights in the center, deepen a few red or orange edges, and sharpen the most important tips.
If the drawing looks too stiff, reshape a few curves. If it looks too busy, erase or simplify some inner lines. A strong flame drawing is not about adding every detail. It is about choosing the right details.
Easy Flame Drawing Variations
Cartoon Flames
Cartoon flames are the easiest style for beginners. Use bold outlines, simple shapes, and bright colors. Focus on clean curves and clear layers. This style works well for stickers, comics, icons, classroom projects, and playful illustrations.
Realistic Fire
Realistic fire needs softer edges, stronger glow, and fewer black outlines. Instead of drawing every flame tongue with a hard border, use color transitions and value changes. The center should feel bright and almost transparent, while the surrounding areas fade into orange, red, smoke, or darkness.
Graffiti Flames
Graffiti-style flames are bold, exaggerated, and full of motion. Push the curves farther, stretch the tips, and create sweeping shapes that look fast. These flames often work well behind lettering or as decorative borders.
Blue or Magical Flames
For fantasy art, try blue, purple, green, or pink flames. Keep the same shape rules but change the palette. A blue flame might use white in the center, cyan in the middle, and deep blue at the edges. Magical flames can include glowing particles, transparent edges, or unusual shapes.
Common Mistakes When Drawing Flames
One common mistake is making the flame too symmetrical. Fire is uneven, so let your shapes lean and vary. Another mistake is using too much black inside the flame. Black can work for smoke or graphic outlines, but heavy black shading inside the fire may make it look dirty instead of hot.
Beginners also tend to draw too many tiny flame tongues. More details do not always mean better art. A few strong shapes are usually more effective than a crowded mess of wiggly lines. Keep the silhouette readable from a distance, then add smaller details only where they improve the drawing.
Finally, remember that color order matters. The brightest colors should usually sit near the hottest core, while darker colors belong near the outside, the base, or the surrounding smoke.
Tips for Drawing Better Flames
Use reference images, but do not copy them too literally. Fire changes constantly, so it is better to capture the feeling of movement than to reproduce one frozen shape. Practice drawing quick flame silhouettes in 30 seconds each. This builds confidence and helps you understand the flow.
Try drawing flames at different sizes. A candle flame is small, smooth, and controlled. A campfire is wider and more chaotic. A torch flame is tall and directional. A fantasy fireball may twist in every direction. Each version teaches you something new about shape and motion.
If you want your flames to look more powerful, draw them against a darker background. Fire glows best when there is contrast. Even a simple orange flame can look dramatic on dark blue, black, charcoal gray, or deep purple paper.
Experience-Based Advice: What Drawing Flames Teaches You
The first time many artists try to draw flames, they focus too much on the outline. That makes sense because the outline is the easiest thing to see. But after practicing for a while, you start to notice that the real magic is not the outside edge. It is the movement inside the shape. A convincing flame feels like it is rising, twisting, and changing even though the image is still.
One helpful experience is to draw the same flame three different ways. First, draw it as a simple cartoon with thick black lines and flat color. Second, draw it with colored pencils and layered shading. Third, draw it digitally with a glow effect. This exercise shows how style changes the mood. The cartoon version may look fun and bold. The colored pencil version may feel warm and handmade. The digital version may look cinematic, especially if you add a dark background and soft light.
Another useful lesson is that flames reward loose drawing. If your hand is tense, the lines often become stiff. Try warming up with long S-curves before starting the final sketch. Draw ribbons, waves, leaves, and teardrops. These shapes train your hand to create the kind of flowing motion flames need. It may feel silly, but it works. Your sketchbook might look like it was attacked by elegant noodles, but those noodles are building skill.
When practicing, avoid judging the drawing too early. Flame sketches often look strange at the beginning. The first outline may seem awkward, and the inner shapes may look like random bananas. Once color, glow, and contrast are added, the drawing usually comes together. This is especially true with fire because the color does a lot of the storytelling.
For traditional media, colored pencils are excellent for learning control. Start lightly with yellow, add orange around it, then build red along the edges. Blend gradually. Leave some paper white near the hottest center if you want extra brightness. Markers are faster and bolder, but they require planning because you cannot erase them. Watercolor can create beautiful soft flames, though it may spread more than expected. Acrylic paint is great for dramatic fire on canvas, especially when layered over a dark background.
For digital artists, layers are your best friend. Keep the sketch on one layer, flat colors on another, and glow on a separate layer. A soft airbrush can create light around the flame, while a sharper brush can define the tips. If the flame looks too blurry, add a few crisp highlights. If it looks too flat, increase contrast between the bright center and darker outer edge.
One practical habit is to flip your canvas or look at your paper in a mirror. This makes shape problems easier to spot. If the flame leans awkwardly or one side feels too heavy, you will notice it quickly. Another habit is to step back from the drawing. Flames should read clearly from a distance. If the silhouette is confusing, simplify it.
Drawing flames also teaches a broader art lesson: motion matters. The same principles used for fire can help you draw hair, fabric, smoke, water, energy effects, and flowing designs. Once you understand how to guide the viewer’s eye upward through curved shapes, you can apply that skill everywhere. Fire may look wild, but it follows a visual rhythm. Learn that rhythm, and your drawings will feel more alive.
Most importantly, do not be afraid to exaggerate. Real flames are beautiful, but art does not have to be a scientific diagram. A comic flame can be taller, sharper, and brighter. A fantasy flame can be blue, purple, or ghostly green. A tattoo flame can be symmetrical enough to feel designed but still full of motion. The best flame drawing is the one that matches your purpose.
So if your first flame looks wobbly, keep going. Fire is supposed to wobble. That is practically its job description.
Conclusion
Learning how to draw flames is easier when you break fire into simple flowing shapes. Start with a loose guideline, sketch a wide base and pointed tips, add smaller flame tongues, then build color from the bright center outward. Use yellow, orange, and red in layers, add glow and sparks for energy, and keep the whole drawing moving upward.
The more you practice, the more natural your flames will become. Try different styles, from cartoon fire to realistic glowing flames, and pay attention to rhythm, contrast, and color. With these 13 steps, you can create flame drawings that look warm, lively, and ready to light up your artworkwithout setting off the smoke alarm.
Note: This article is written as an original, web-ready educational guide based on widely used drawing principles, art tutorial practices, and flame illustration techniques. No source links or citation placeholders are included in the publishable HTML.