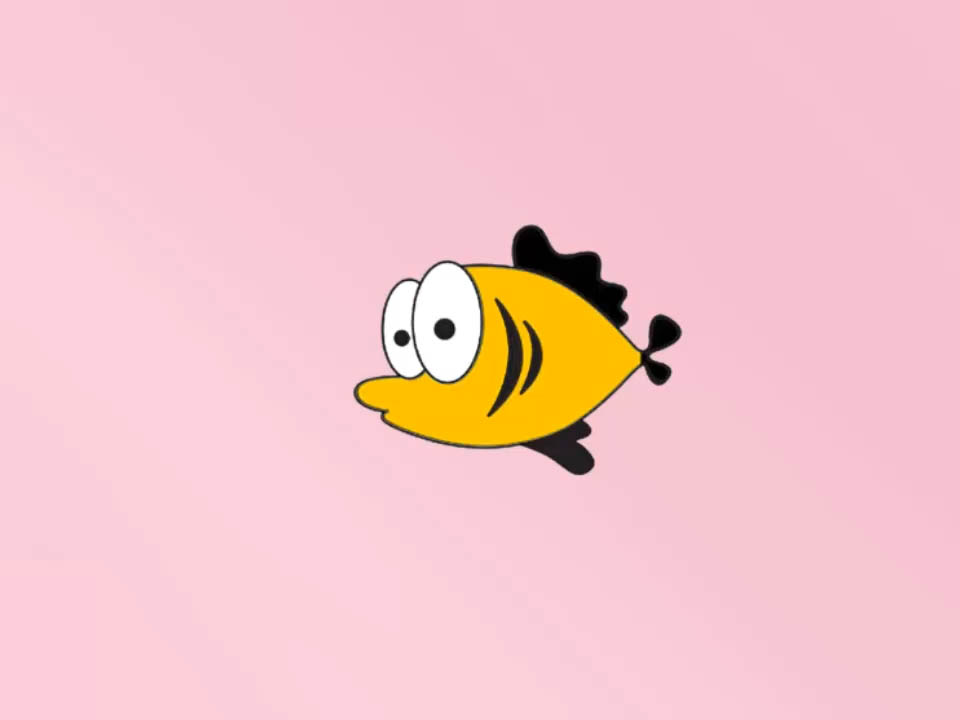
Learning how to draw a fish is one of those delightful art projects that looks simple at first, then suddenly teaches you half the secrets of drawing: shape, proportion, texture, movement, expression, and color. Not bad for a little swimmer with no eyebrows.
The best part is that a fish drawing can be as easy or as detailed as you want. A beginner can make a cheerful cartoon fish with an oval body, triangle tail, and bubble-filled background. A more confident artist can add flowing fins, layered scales, shiny highlights, and realistic curves. This guide walks you through a clean, friendly, 15-step method that works for kids, adults, teachers, homeschool lessons, sketchbook practice, and anyone who has ever stared at a blank page and thought, “I hope this fish does not end up looking like a potato with fins.”
By the end, you will know how to sketch the body, place the fins correctly, add eyes and gills, draw scales without losing your patience, and finish the artwork with color. You do not need fancy supplies. A pencil, eraser, paper, and something to color with are enough. If you have a black marker, colored pencils, crayons, or watercolor pencils nearby, wonderful. If not, your fish will still proudly swim across the page in pencil.
Why Fish Are Great for Beginner Drawing Practice
Fish are ideal for learning because their bodies are built from basic shapes. Most simple fish drawings begin with an oval, teardrop, or football-like shape. The tail is usually a triangle or fan shape. Fins can be curved triangles, leaf shapes, or soft flowing ribbons. Once you understand those parts, you can draw dozens of fish styles: goldfish, koi fish, tropical fish, clownfish, angelfish, betta fish, or a completely imaginary fish wearing colors no aquarium has ever approved.
Another advantage is flexibility. A fish does not need to stand on legs, hold a pose, or keep both eyes perfectly symmetrical like a human face. It can curve, tilt, swim upward, smile, frown, or look mildly surprised. That freedom makes the fish drawing process relaxing and forgiving, especially for beginners.
Supplies You Need
Before you begin, gather a few simple materials. You can use regular printer paper, sketchbook paper, construction paper, or watercolor paper if you plan to paint. A standard pencil is best for the first sketch because you can erase construction lines. A black marker or fineliner helps define the final outline. For color, colored pencils give control, crayons create bold kid-friendly texture, and markers make bright tropical effects.
Recommended Materials
- Pencil
- Eraser
- Drawing paper or sketchbook
- Black marker or fine-tip pen
- Colored pencils, crayons, markers, or watercolor pencils
- Optional: ruler for light guidelines
Now clear your workspace and give your fish some room. Even a tiny fish deserves dramatic ocean real estate.
How to Draw a Fish in 15 Easy Steps
This tutorial focuses on a classic side-view fish. It is simple enough for beginners but detailed enough to look polished when finished. Keep your pencil lines light at first. You will darken the final outline later.
Step 1: Draw a Light Guideline
Start by drawing a faint horizontal line across the middle of your paper. This line shows the direction your fish will swim. It does not have to be perfectly straight, but a light guideline helps keep the body, head, and tail aligned. If you want a more dynamic fish, angle the guideline slightly upward so it looks like the fish is swimming toward the surface.
Step 2: Sketch the Main Body Shape
Draw a large oval or football shape around the guideline. Make the front slightly rounder and the back slightly narrower. This shape is the body of the fish. Do not worry if it looks plain right now. Most drawings begin as simple shapes. The magic comes later, usually after the eraser has done some emotional support work.
Step 3: Add the Narrow Tail Base
At the back of the body, draw a short, narrow section where the tail connects. This part is called the tail base or caudal peduncle. In a cartoon fish, it can simply look like a small neck between the body and tail. Making this area narrower helps the tail look attached rather than pasted on like a paper fan.
Step 4: Draw the Tail Fin
Now add the tail fin. A simple tail can be shaped like a sideways triangle, a rounded fan, or a heart-like split tail. For a classic fish drawing, draw two curved lines spreading out from the tail base, then connect them with a soft V-shaped edge. This gives the fish a lively swimming look.
Step 5: Mark the Head Area
Draw a curved vertical line near the front third of the body. This separates the head from the body. The line should follow the roundness of the fish rather than looking stiff. This head line also gives you a helpful place to add the gill later.
Step 6: Add the Eye
Place a round eye near the upper front part of the head. Add a smaller circle inside it for the highlight, then shade the pupil while leaving the highlight white. This tiny white spot makes the fish look alive. Without it, your fish may look like it just remembered it forgot its homework.
Step 7: Draw the Mouth
At the front tip of the head, draw a small curved line for the mouth. For a friendly cartoon fish, curve the line upward slightly. For a more realistic fish, keep the mouth smaller and less smiley. You can also add a tiny lower lip with a second short curve underneath.
Step 8: Add the Gill Line
Behind the eye, draw a curved gill line. It should sit near the head division you sketched earlier. A simple C-shaped curve works well. You can add a second faint curve beside it if you want more detail, but do not overdo it. The fish needs gills, not decorative curtains.
Step 9: Draw the Top Dorsal Fin
On the top of the body, draw the dorsal fin. Start near the top middle of the fish and create a curved triangle or wavy ridge. Some fish have a stiff triangular dorsal fin, while others have a long flowing one. For beginners, a smooth curved triangle is easiest. Add a few thin lines inside the fin to show fin rays.
Step 10: Add the Bottom Fins
Under the body, draw one or two bottom fins. These are usually smaller than the dorsal fin. Use curved triangle shapes pointing downward and slightly backward. A fish’s fins help suggest movement, so angle them as if water is pushing them gently toward the tail.
Step 11: Draw the Pectoral Fin
Add the side fin, also called the pectoral fin, just behind the gill area. A teardrop or leaf shape works beautifully. This fin sits on the side of the body, so it should overlap the fish slightly. Add a few short inner lines to create structure. This small detail instantly makes the drawing feel more complete.
Step 12: Refine the Body Outline
Look at your fish as a whole. Smooth out the body, adjust the tail, and erase any construction lines you no longer need. If the body feels too round, taper the back a little more. If the tail looks too small, widen it. Fish come in many shapes, so perfection is not the goal. A believable, balanced silhouette is the goal.
Step 13: Add Scales
Scales can be drawn in several ways. The easiest method is to create rows of small curved U-shapes across the body. Start behind the gill and move toward the tail. Keep the scales larger near the middle and smaller near the edges. You do not need to cover every inch. Sometimes a few rows of scales are enough, especially for a clean cartoon fish drawing.
If you want a more realistic look, lightly sketch diagonal rows first, then add overlapping arcs. This creates a neat pattern without making the fish look like it is wearing chain mail to a medieval seafood festival.
Step 14: Trace the Final Lines
Once you like your sketch, trace the final outline with a black marker or darker pencil. Trace the body, tail, fins, eye, mouth, gill, and selected scale lines. Let the ink dry before erasing pencil marks. If you are using a marker, be careful not to press too hard on thin paper because ink can bleed through.
Step 15: Color Your Fish
Color is where your fish develops personality. A goldfish can be orange, yellow, and white. A tropical fish can be blue, green, purple, pink, and yellow. A clownfish can have orange sections with white bands and dark outlines. A koi fish may include patches of red, orange, black, and cream. Add darker color near the bottom of the body and lighter color along the top or middle to create dimension.
Finish with bubbles, seaweed, sand, coral, or tiny background fish. A background turns a single fish drawing into a complete underwater scene. It also distracts viewers from any suspiciously uneven scales, which is a time-honored artist trick.
Helpful Tips for Making Your Fish Drawing Better
Use Simple Shapes First
Almost every successful fish drawing starts with simple construction. Think oval for the body, triangle for the tail, curved triangles for fins, circles for eyes, and small arcs for scales. This makes the drawing easier to control and less intimidating.
Keep the Fins Flowing
Fins should look flexible, not stiff. Curve the edges slightly and add inner lines that follow the fin shape. This creates the feeling of movement in water. Even a cartoon fish looks more alive when the fins seem to drift.
Do Not Overcrowd the Scales
Beginners often draw too many dark scales, which can make the fish look heavy. Instead, use lighter lines and leave breathing room. You can also place scales only on the body and keep the head smooth.
Add Highlights
A highlight on the eye, a lighter streak along the body, or a pale edge on the tail can make your fish look shiny. Fish often appear glossy because water reflects light, so small highlights work especially well.
Common Mistakes to Avoid
One common mistake is making the tail too large or too small compared with the body. A big dramatic tail can work for a fancy goldfish or betta fish, but a basic fish usually needs a balanced tail that supports the body shape. Another mistake is placing the eye too far back. The eye should sit in the head area, closer to the mouth than the tail.
Some beginners also draw fins as flat triangles without curves. Try softening the edges. Curves make the fish look natural and playful. Finally, avoid pressing hard with pencil at the beginning. Light sketching gives you freedom to adjust the design without leaving ghost lines all over the paper.
Easy Fish Drawing Variations
Cartoon Fish
For a cartoon fish, exaggerate the eye, smile, and tail. Use bright colors and fewer scales. Add bubbles and a silly expression. Cartoon fish are perfect for young artists and classroom projects.
Realistic Fish
For a realistic fish, study reference photos and pay attention to body proportions. The head, dorsal fin, pectoral fin, tail base, and scale direction matter more. Use shading instead of thick outlines, and keep the colors closer to natural fish patterns.
Koi Fish
Koi fish are beautiful for artists because they have graceful bodies and dramatic color patches. Draw the body as a long teardrop shape, make the fins flowing, and add irregular patches of orange, red, black, or gold.
Clownfish
For a clownfish, draw a rounded body and add three white bands: one behind the head, one in the middle, and one near the tail. Outline the bands with dark lines, then color the body orange. This style is instantly recognizable and fun for ocean-themed art.
How to Turn Your Fish Drawing Into a Complete Scene
A fish drawing becomes more interesting when it has a setting. Add curved seaweed rising from the bottom of the page. Draw small circles for bubbles. Use wavy lines to suggest water movement. Add rocks, shells, coral, or a treasure chest if you want a playful aquarium look.
For depth, draw some background fish smaller and lighter than the main fish. This creates the illusion that they are farther away. You can also shade the water darker at the top or bottom, depending on your style. Blue is the obvious choice for water, but green, teal, lavender, or even a sunset orange background can look creative.
of Experience: What Drawing a Fish Teaches You
Drawing a fish may seem like a small art exercise, but it teaches a surprisingly useful set of skills. The first lesson is confidence. Many people freeze when they hear the word “draw,” as if the pencil is about to judge them. A fish lowers the pressure. You begin with a simple oval, and within a few minutes, the page already looks like something recognizable. That early success matters. It encourages you to keep going.
The second lesson is observation. After drawing one basic fish, you start noticing how different fish really are. A goldfish has a rounder body and flowing fins. A trout looks slimmer and faster. An angelfish has tall triangular fins. A koi fish curves elegantly, almost like a ribbon in water. Once you notice those differences, your drawings improve because you stop drawing “a generic fish” and start drawing a fish with character.
The third lesson is patience with details. Scales can be tricky. At first, it is tempting to rush through them with random marks. But when you slow down and place curved rows carefully, the texture becomes beautiful. The same is true for fin rays, gills, highlights, and shading. A fish drawing rewards small improvements. One highlight in the eye can change the whole expression. A few curved lines in the tail can make it feel like it is moving.
Another helpful experience is learning when to stop. Beginners sometimes add more and more lines because they think detail automatically makes art better. Fish drawings prove otherwise. Too many heavy scales can make the body look crowded. Too many background bubbles can turn the ocean into a polka-dot wallpaper emergency. Good drawing is partly about choosing what to include and what to leave simple.
Coloring a fish also teaches creative decision-making. You can follow nature or invent your own species. Maybe your fish has a golden body with blue fins. Maybe it has rainbow scales. Maybe it looks like it escaped from a candy store with excellent swimming skills. Color lets you decide whether the drawing feels realistic, cute, tropical, magical, or funny.
For teachers and parents, fish drawings are especially useful because they fit many lesson themes. They connect with ocean life, aquariums, summer crafts, science units, storybooks, and environmental discussions. Students can draw one fish, a school of fish, or a full underwater habitat. The same basic 15 steps can be simplified for young children or expanded for older students with shading, patterns, and anatomy.
Most importantly, drawing a fish reminds you that art improves through repetition. Your first fish may look wobbly. Your second will look better. By the fifth, you will understand the body shape, tail placement, and fin rhythm much more naturally. That is how drawing works. You do not wait until you are “good enough” to begin. You begin, and the practice makes you better.
So keep the first attempt, even if it looks funny. Especially if it looks funny. That little fish is proof that you started. The next one will swim smoother.
Conclusion
Learning how to draw a fish in 15 steps is an easy, enjoyable way to build drawing skills while creating something colorful and full of personality. Start with simple shapes, refine the outline, place the fins thoughtfully, add expressive details, and finish with color. Whether you draw a cartoon fish, a realistic fish, a koi, or a tropical aquarium superstar, the process is the same: sketch lightly, observe carefully, and let the drawing develop one step at a time.
The beauty of fish drawing is that it welcomes creativity. Your fish can be realistic, silly, elegant, bold, tiny, enormous, spotted, striped, shiny, or completely imaginary. As long as it has a body, fins, and a little underwater attitude, it belongs on the page.
Note: This article is written in original wording for web publication and is designed to be copied directly into an HTML editor. Source links are intentionally not included in the article body.