A faux hawk is what happens when a mohawk gets a steady job, pays its bills, and still shows up to brunch with excellent hair. It has the attitude of a rebellious cut without the full “I joined a punk band overnight” commitment. Instead of shaving the sides completely bare and leaving one dramatic strip down the middle, a faux hawk keeps the sides shorter, blends them cleanly, and leaves enough length through the top to push, pinch, or sweep into a raised center shape.
The best part? Learning how to cut a faux hawk is very doable when you understand the shape. The secret is not simply “make the middle longer.” A good faux hawk haircut depends on balance: controlled side length, smooth blending, a defined but wearable ridge on top, and texture that helps the hair stand up without looking like it lost a fight with a bottle of gel.
This guide walks you through the tools, sectioning, cutting steps, blending tips, styling methods, and real-world mistakes to avoid. Whether you are trimming your own hair at home, helping a friend, or learning the basics before visiting a barber, this article will help you create a faux hawk that looks sharp, modern, and intentionally cool.
What Is a Faux Hawk Haircut?
A faux hawk, also called a fohawk, is a modern haircut inspired by the traditional mohawk. The difference is that a faux hawk is softer and more versatile. The sides are usually faded, tapered, or clipped short, while the top remains longer and is styled upward toward the center.
Unlike a classic mohawk, the faux hawk does not require shaved sides or an extreme strip of hair from forehead to neckline. It can be subtle enough for school, work, or a dinner with your in-laws, yet bold enough to say, “Yes, I do own hair product, and I know how to use it.”
Common Faux Hawk Variations
Before cutting, decide which version fits the person’s hair type, face shape, and comfort level. A short faux hawk is neat, athletic, and easy to style. A faux hawk fade has a cleaner, more barbershop-inspired finish. A textured faux hawk uses point cutting and layering to create movement. A curly faux hawk keeps natural curls through the middle while tapering the sides. A longer faux hawk gives more volume and drama, but it also requires stronger styling product and more maintenance.
Tools You Need to Cut a Faux Hawk
You do not need a Hollywood trailer full of grooming equipment, but you do need the right basics. Good tools make the difference between “fresh haircut” and “emergency hat season.”
- Hair clippers with guards, especially #1, #2, #3, and #4
- Detail trimmer for edges, neckline, and around the ears
- Haircutting scissors or shears
- Thinning shears or texturizing shears, optional but helpful
- Comb, preferably a barber comb
- Spray bottle with water
- Hair clips for sectioning longer hair
- Hand mirror or three-way mirror for checking the back
- Neck brush or towel
- Clipper disinfectant and clipper oil
- Styling product such as matte clay, pomade, wax, gel, or texture paste
Always start with clean tools. Brush hair from clipper blades, disinfect them properly, and oil the blades according to the manufacturer’s instructions. Clean tools cut more smoothly and are better for scalp hygiene.
Before You Start: Plan the Faux Hawk Shape
The biggest beginner mistake is cutting first and planning later. Hair is not a Google Doc; you cannot simply hit “undo.” Before turning on the clippers, look at the head shape, hair density, cowlicks, hairline, and how high the person wants the faux hawk to stand.
Choose the Top Length
For a short faux hawk, keep the top around 1.5 to 2 inches. This length is easy to spike and low maintenance. For a medium faux hawk, aim for 2 to 4 inches on top. This gives more styling options, including messy texture, brushed-up volume, or a soft quiff. For a longer faux hawk, leave 4 inches or more, but remember that longer hair may collapse without blow-drying and strong product.
Choose the Side Length
The sides determine how bold the faux hawk looks. A #3 or #4 guard creates a conservative taper. A #2 guard gives a cleaner, sportier look. A #1 or skin fade creates more contrast and a sharper faux hawk fade. If this is your first time, start longer. You can always go shorter, but you cannot politely ask the hair to grow back by dinner.
Find the Center Ridge
The faux hawk ridge should run from the front hairline toward the crown. It does not have to continue dramatically down the back like a traditional mohawk. For most modern faux hawks, the highest volume is at the front and middle, then it gradually softens toward the crown.
How to Cut a Faux Hawk Step by Step
Now for the fun part: cutting. Work slowly, check both sides often, and avoid making one side dramatically shorter than the other. Symmetry matters, unless your goal is “wind tunnel survivor.”
Step 1: Wash, Dry, and Comb the Hair
Start with clean, slightly damp hair. Damp hair is easier to control when sectioning and cutting with scissors. If you are using clippers on the sides, towel-dry the hair so it is not dripping wet. Comb everything into its natural growth direction. This helps reveal cowlicks, uneven areas, and the natural fall of the hair.
Step 2: Section the Top
Create a horseshoe-shaped section on top of the head. This is the longer area that will become the faux hawk. The section should begin near the recession points at the front hairline and curve around the crown. Clip this top section out of the way if the hair is long enough.
Do not make the top strip too narrow. A very narrow strip can look more like an accidental mohawk. For a wearable faux hawk, keep enough width on top so the style can be pushed toward the center without looking like a lonely island of hair.
Step 3: Cut the Sides with Clippers
Start with a longer guard than you think you need, such as a #3 or #4. Begin at the sideburn area and move upward in smooth, controlled strokes. Follow the curve of the head and flick the clipper outward as you approach the top section. This flicking motion prevents a harsh shelf between the sides and the longer top.
Repeat on the other side and check balance. The side length should look even from the front, sides, and back. If you want a tighter faux hawk fade, move down to a shorter guard near the lower sides and neckline.
Step 4: Create a Fade or Taper
For a clean fade, use shorter guards at the bottom and gradually increase length as you move upward. For example, use a #1 around the lower hairline, a #2 through the middle, and a #3 near the top. Blend the transition lines using a clipper-over-comb technique or by adjusting the clipper lever.
A low taper keeps the faux hawk subtle. A mid fade gives it a more modern barbershop shape. A high fade makes the center ridge stand out dramatically. Choose the fade based on lifestyle. A corporate office may appreciate a soft taper; a weekend concert may welcome the high fade with open arms and possibly a leather jacket.
Step 5: Blend the Sides into the Top
This is where the haircut starts to look professional. Use clipper-over-comb or scissor-over-comb to soften the area where the short sides meet the longer top. Lift the hair with the comb, cut only the ends that stick out, and keep the shape gradual.
Avoid cutting too far into the top section. The faux hawk needs enough length through the middle to stand up. If you remove too much from the upper corners, the shape can become flat or boxy.
Step 6: Cut the Top Length
Release the top section and comb it upward. Decide how much length to remove. For a classic faux hawk, the center should be slightly longer than the hair near the edges of the top. This creates a natural peak when styled.
Use scissors to cut the top in small sections. Hold the hair between your fingers and cut gradually. Work from the front toward the crown. Keep the front a little longer if you want height or a quiff effect. Shorten slightly toward the crown so the shape does not become too heavy in the back.
Step 7: Add Texture
Texture is the magic ingredient in a faux hawk. Without it, the top can look stiff, helmet-like, or suspiciously similar to a middle-school picture day disaster. Use point cutting by holding the scissors vertically and making small snips into the ends of the hair. This removes bulk and helps the hair separate naturally.
If the hair is very thick, use thinning shears sparingly through the densest areas. Do not overdo it. Too much thinning can create frizz, holes, or weak spots that refuse to style properly.
Step 8: Detail the Edges
Use a trimmer to clean the sideburns, neckline, and around the ears. Keep the neckline natural or softly tapered for a modern look. A sharp neckline can look crisp, but it grows out faster. Around the ears, use small careful movements and avoid pressing too hard.
For a more dramatic faux hawk fade, you can add a subtle line-up at the temples. However, keep it balanced. The faux hawk already has personality; it does not need twelve bonus special effects.
Step 9: Style the Faux Hawk
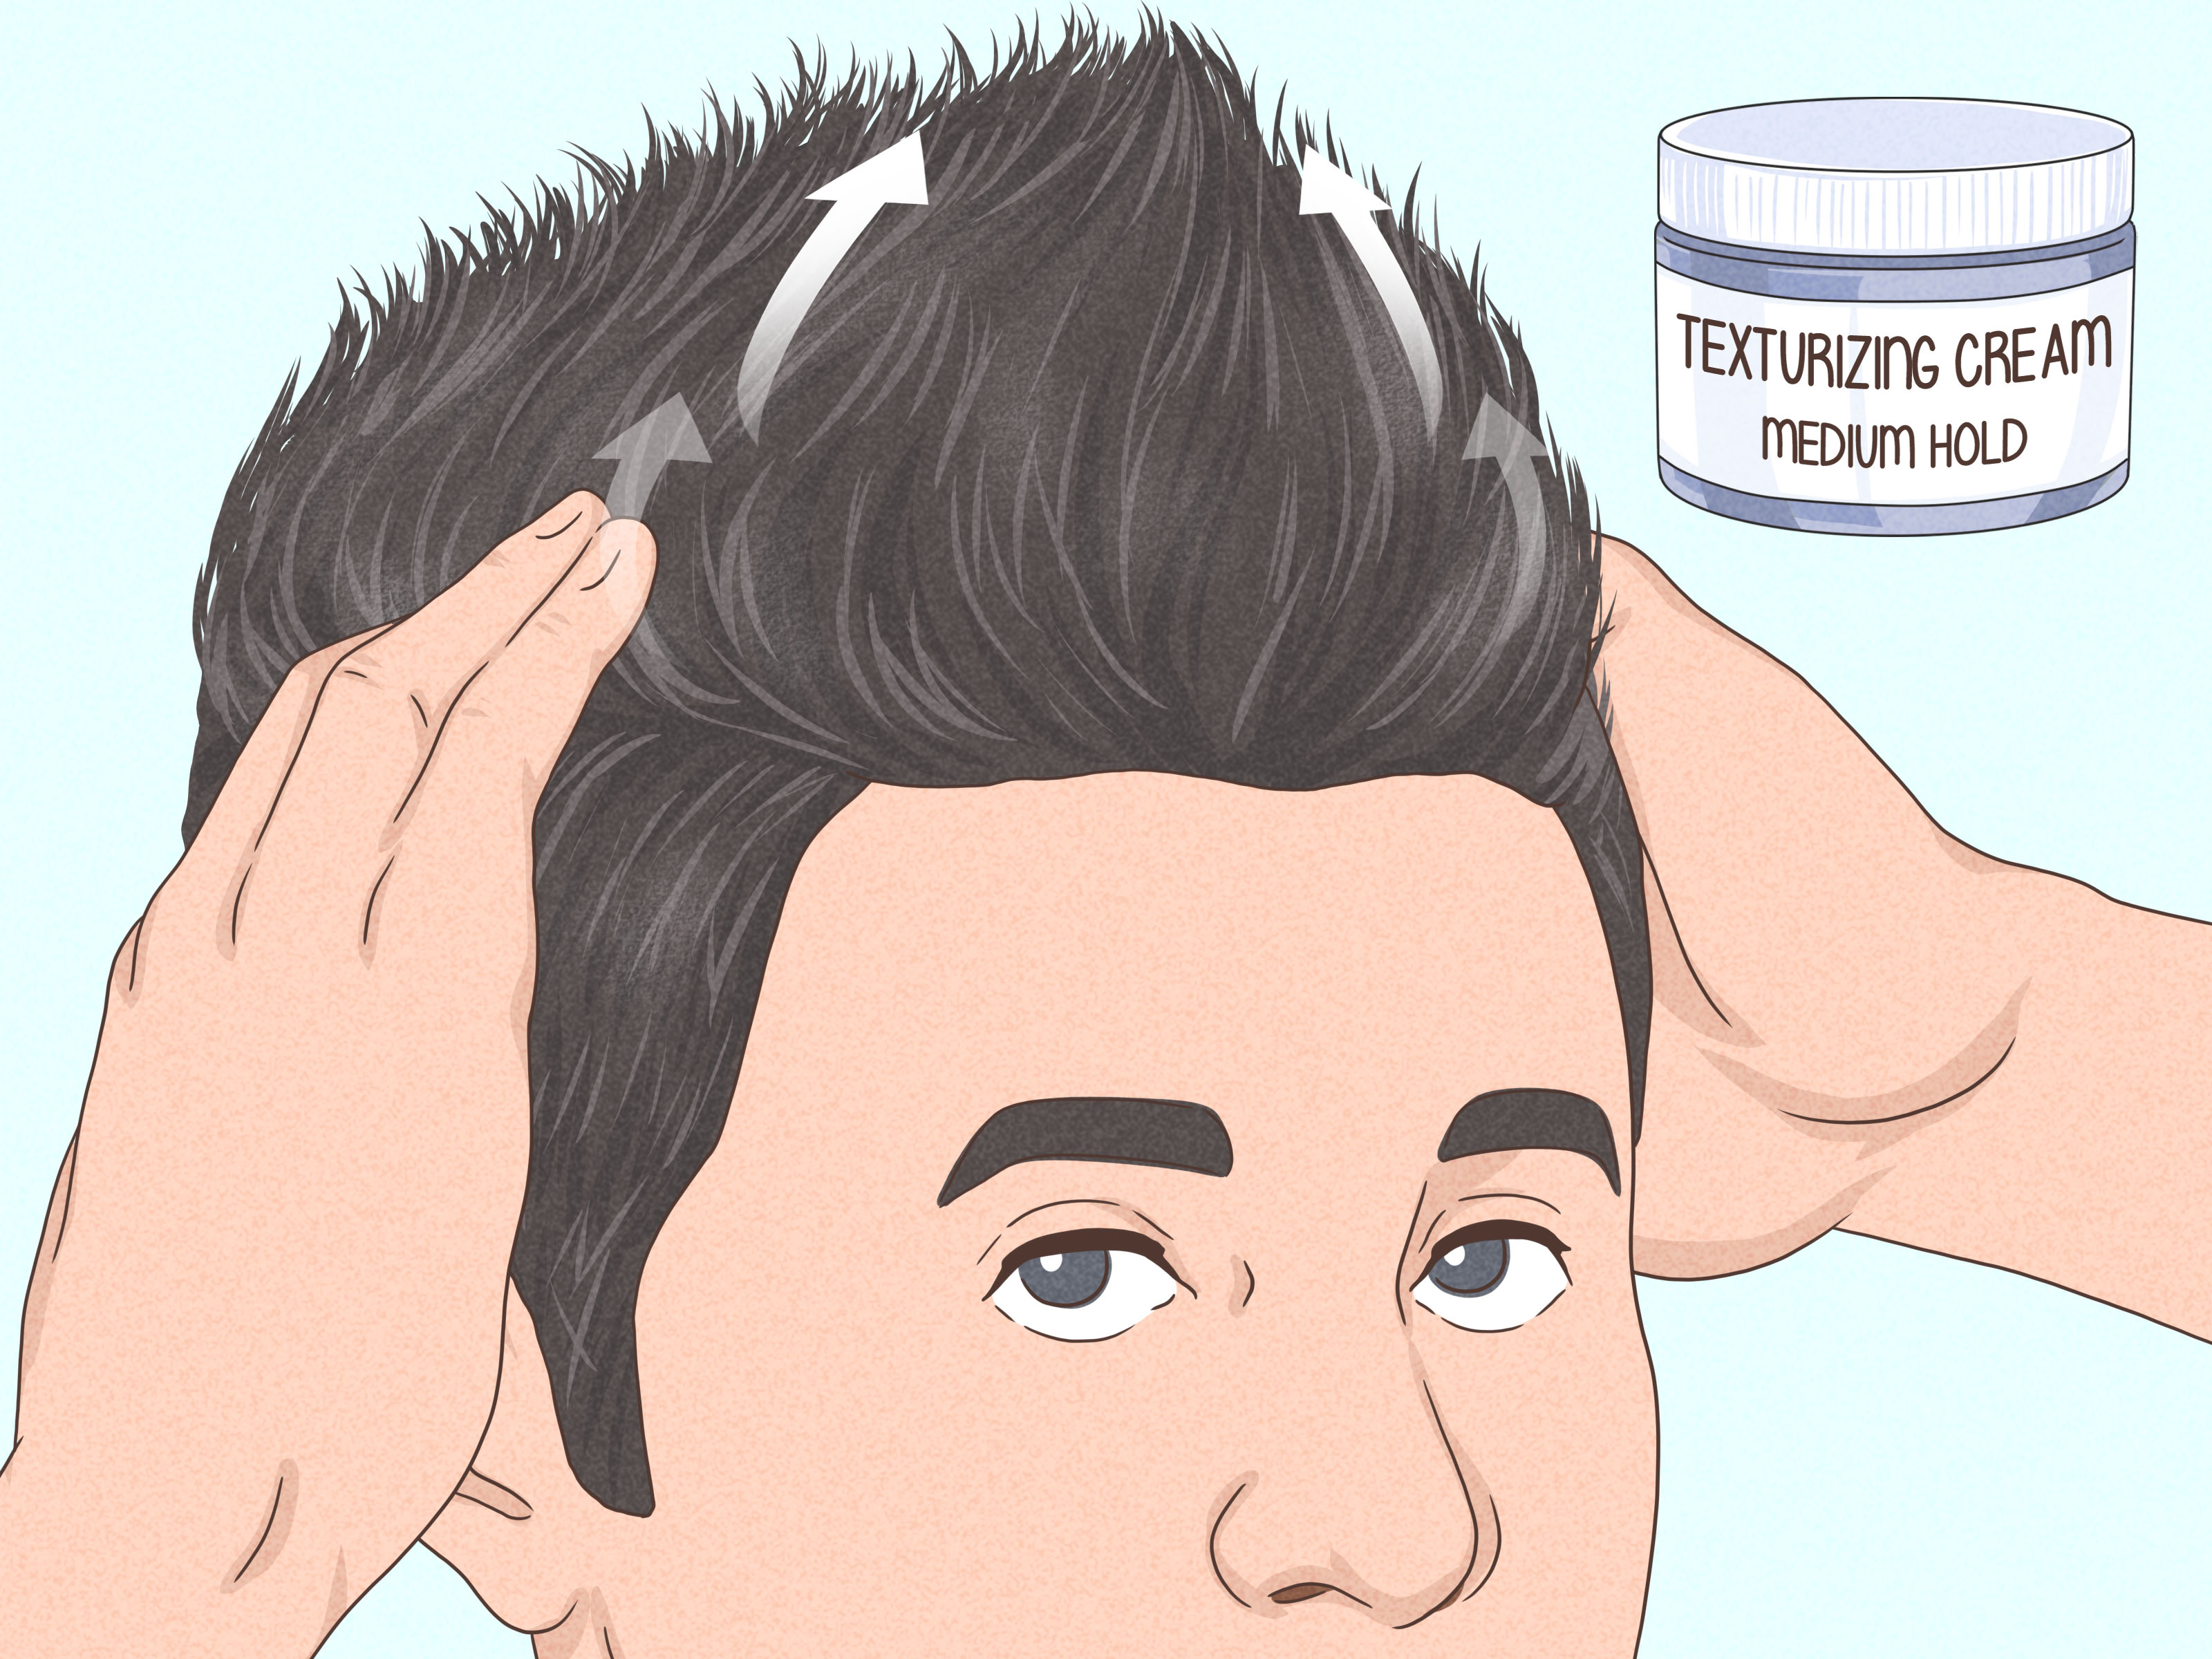
Dry the hair first. For more volume, use a blow dryer and direct the hair upward and toward the center. Use your fingers or a vent brush to lift the front. Once dry, apply a small amount of styling product. Matte clay works well for a natural textured faux hawk. Pomade gives shine and control. Wax provides flexible hold. Gel creates a stronger, sharper peak but can look crunchy if overused.
Rub the product between your palms until it warms up, then apply from back to front and root to tip. Push the sides of the top inward, lift the center, and pinch small sections for definition. The goal is height with movement, not a single frozen shark fin.
Best Faux Hawk Lengths by Hair Type
Straight Hair
Straight hair can create a sharp faux hawk with clean definition. It often needs texture so the top does not fall flat. Use point cutting and matte clay to create separation.
Thick Hair
Thick hair is great for volume, but it can become bulky. Blend the upper sides carefully and remove weight from the top with controlled texturizing. Keep the ridge shaped, not puffy.
Fine or Thin Hair
Fine hair benefits from shorter faux hawk styles. Keep the sides tight to make the top look fuller. Avoid heavy gels or greasy pomades because they can expose the scalp and weigh the hair down.
Curly or Wavy Hair
Curly faux hawks can look fantastic because natural texture adds height and personality. Keep the sides tapered and shape the top without cutting away too much curl. Use curl cream or lightweight styling paste to define the ridge.
Coily Hair
A coily faux hawk, sometimes called a frohawk when more dramatic, works beautifully with a fade or taper. Shape the sides cleanly and keep the top moisturized. A sponge, curl cream, or light styling butter can help define the texture.
How to Ask a Barber for a Faux Hawk
If you are not cutting it yourself, bring clear instructions to the barber. Say that you want a faux hawk, not a full mohawk. Explain how short you want the sides, how much length you want left on top, and whether you prefer a low taper, mid fade, high fade, or scissor-cut sides.
A useful request might sound like this: “I want a textured faux hawk with a mid fade on the sides, about three inches on top, longer in the front, and blended so it is not too extreme.” That sentence is much more helpful than walking in and saying, “Make me look cool,” although we respect the ambition.
Common Mistakes to Avoid
Cutting the Top Too Short
The faux hawk depends on top length. If the top is too short, there is nothing to lift or shape. Leave enough hair to create height, especially at the front.
Making the Center Strip Too Narrow
A narrow strip can look harsh and outdated. A modern faux hawk should blend naturally from the sides into the center.
Skipping the Blend
Harsh lines around the top can make the haircut look unfinished. Blend carefully so the style has shape without obvious steps.
Using Too Much Product
Product should support the haircut, not become the haircut. Start with a pea-sized amount and add more only if needed.
Ignoring the Back
The back of the head matters. Use a mirror to check the crown and neckline. A great front with a messy back is like wearing a tuxedo jacket with pajama pants.
How to Maintain a Faux Hawk
A faux hawk haircut usually needs a cleanup every two to four weeks, depending on how short the sides are. Skin fades grow out quickly, while tapered sides are more forgiving. The top can be trimmed every four to six weeks to maintain shape and remove heavy ends.
At home, keep the style fresh by washing regularly, avoiding product buildup, and using a blow dryer when you want more volume. If the hair starts falling flat, it may need texturizing or a lighter styling product.
of Real-Life Experience: What Cutting a Faux Hawk Teaches You
Cutting a faux hawk teaches one lesson very quickly: confidence is helpful, but patience is better. The first time many people attempt this haircut, they focus too much on the dramatic center and not enough on the blend. That is understandable. The top is the star of the show. It gets the height, the styling product, the compliments, and the occasional “Did you do something different?” But the sides are what make the faux hawk look intentional.
One practical experience is that starting with a longer guard saves a lot of stress. When you begin with a #4 or #3 on the sides, you have room to adjust. Starting with a #1 because you feel brave can turn the haircut into a negotiation with regret. The smartest approach is to remove hair gradually, check the shape, then go shorter only where needed. Haircutting rewards small decisions.
Another experience is that the front hairline deserves special attention. The front is usually what people notice first. If the fringe is too short, the faux hawk loses height. If it is too long and heavy, it flops forward like it has given up on life. Leaving the front slightly longer than the crown often creates the best shape. It allows the hair to lift, bend, and form that signature faux hawk peak without looking stiff.
Texture also matters more than beginners expect. A freshly cut top with blunt ends can be difficult to style because the hair moves as one solid block. Point cutting changes everything. Small vertical cuts into the ends help the hair separate, giving it that relaxed, modern finish. This is especially useful for thick straight hair, which can otherwise look bulky. For wavy or curly hair, the lesson is different: do not fight the natural texture. Shape it, guide it, and let it bring personality to the haircut.
Styling experience also reveals that less product usually looks better. Many people overload the faux hawk with gel because they want hold. The result can be shiny, crunchy, and oddly aerodynamic. A matte clay, paste, or wax often gives a more natural look. Warm the product in your hands, apply it evenly, then build the center shape with your fingers. A blow dryer before product can add lift that product alone cannot create.
The final lesson is that faux hawks are surprisingly flexible. On Monday, you can style it neatly with a soft center lift. On Friday, you can push it higher and messier. For a casual day, you can leave the top forward or slightly side-swept. That versatility is why the faux hawk has lasted. It gives you style without trapping you in one look. Cut well, blended properly, and styled with restraint, the faux hawk is not just a haircut. It is a small daily reminder that your hair can have a little fun, even when your calendar cannot.
Conclusion
Learning how to cut a faux hawk comes down to shape, balance, and texture. Keep the sides shorter, leave enough length through the top, blend the transition carefully, and style the center with controlled volume. A faux hawk can be bold or subtle, polished or messy, professional or playful. That is exactly why it remains one of the most versatile men’s haircuts.
If you are cutting at home, go slowly, start with longer guards, and check your work from every angle. If you are going to a barber, bring a clear description or reference photo. Either way, the goal is the same: a clean, confident faux hawk that looks sharp without looking like it is trying too hard.
Note: This article was written in original American English and synthesized from current barbering, grooming, clipper-care, and hair-styling guidance from reputable U.S.-focused hair care, barbering, and public health resources.