Notepad++ may look like a lightweight text editor, but pair it with a Java Development Kit and it becomes a surprisingly capable workspace for learning Java. It will not magically transform into a full integrated development environment, grow ten toolbars, and begin demanding several gigabytes of memory. Instead, it gives you a clean editor, syntax highlighting, customizable commands, and just enough automation to compile and run Java programs without getting in your way.
This guide explains how to install the necessary software, configure Windows environment variables, write your first Java file, compile it with javac, run it with java, and create convenient Notepad++ shortcuts. It also covers NppExec, packages, multiple source files, external libraries, and the errors that make beginners wonder whether the computer has developed a personal grudge.
Can You Compile Java Directly in Notepad++?
Notepad++ can edit Java source code, but it does not include a Java compiler. The actual compilation is performed by the Java Development Kit, usually called the JDK. Notepad++ simply sends commands to JDK tools installed on your computer.
The basic workflow has three parts:
- Write and save source code in a file ending with
.java. - Use
javacto compile that source file into Java bytecode. - Use
javato start the Java Virtual Machine and run the compiled class.
For example, compiling HelloWorld.java normally creates HelloWorld.class. The class file contains bytecode that the Java Virtual Machine can execute. Notepad++ is the desk, the JDK is the toolbox, and your code is the project that may or may not require three cups of coffee.
JDK Versus JRE
A Java Runtime Environment can run Java applications, but a complete JDK includes development tools such as the javac compiler. To compile Java programs, install a JDK rather than relying on an old standalone JRE.
You can use Oracle JDK or an OpenJDK distribution such as Eclipse Temurin, Microsoft Build of OpenJDK, Amazon Corretto, or Red Hat Build of OpenJDK. For ordinary beginner programs, the commands discussed in this guide work similarly across these distributions.
What You Need Before Getting Started
Prepare the following items on a Windows computer:
- A recent Java Development Kit
- Notepad++
- Permission to install applications or extract a portable JDK
- A folder for your Java projects
- Basic familiarity with Windows File Explorer and Command Prompt
For a simple learning environment, create a folder such as:
A short, uncomplicated path reduces quoting mistakes and makes command-line navigation easier. Java works perfectly well in folders with spaces, but beginners already have enough punctuation to negotiate.
Step 1: Install the Java Development Kit
Download a Windows JDK installer that matches your system architecture. Most modern Windows computers use a 64-bit x64 build. Run the installer and note the installation directory. Depending on the distribution and version, it may resemble one of these paths:
The exact version number is not important for the workflow. What matters is that the directory contains a bin folder with programs such as java.exe and javac.exe.
Configure JAVA_HOME
Setting JAVA_HOME is useful because many Java tools, including Maven and Gradle, use it to locate the JDK.
- Open the Windows Start menu.
- Search for Edit the system environment variables.
- Open the result and click Environment Variables.
- Under user or system variables, create a variable named
JAVA_HOME. - Set its value to the JDK directory, not the
binsubfolder.
Example:
Add Java to the Windows PATH
Edit the existing Path variable and add this entry:
Click OK to close the dialogs. Open a new Command Prompt afterward because terminals that were already open may still be using the previous environment settings.
Verify the Installation
Run these two commands:
Both should display version information. If java works but javac does not, Windows may be finding an old runtime installation before the new JDK. Check the order of entries in Path and confirm that %JAVA_HOME%\bin points to the correct directory.
Step 2: Install and Prepare Notepad++
Install Notepad++ using its standard Windows installer. Launch the program, create a new document, and select Language > J > Java if syntax highlighting is not detected automatically.
Once a document is saved with the .java extension, Notepad++ will usually recognize it as Java source code. Keywords, strings, comments, and numbers will receive different formatting, making errors easier to spot.
Use UTF-8 Encoding
Choose a UTF-8 encoding from the Encoding menu. UTF-8 is a practical default for source files containing international text. Using consistent encoding helps prevent mysterious symbols from appearing when a program prints accented characters or non-English text.
Enable Helpful Editor Features
Line numbers, indentation guides, bracket matching, and automatic indentation are useful for Java. They do not replace a debugger, but they can help you notice a missing brace before the compiler announces it with all the warmth of a parking ticket.
Step 3: Write Your First Java Program
Create a new document and enter the following code:
Save the file as:
The filename must match the public class name exactly, including capitalization. A public class named HelloWorld belongs in HelloWorld.java, not helloworld.java, Hello.java, or DefinitelyFinalVersion2.java.
Understanding the Main Method
The traditional entry point of a Java application is:
When you run the class, the Java launcher looks for this method and begins executing its statements. Although newer Java releases offer simplified source-file features for some programs, learning the traditional class structure remains valuable because it appears throughout established Java codebases, courses, and technical documentation.
Step 4: Compile and Run Java from Command Prompt
Before automating anything in Notepad++, test the standard commands manually. This separates Java configuration problems from editor configuration problems.
Open Command Prompt and move to the project directory:
The /d option allows the command to change both the drive and directory when necessary.
Compile the Source File
If the source code is valid, the command may finish without displaying a celebratory message. Silence usually means success. Look in the folder for:
Run the Compiled Class
The expected output is:
Do not type java HelloWorld.class. The Java launcher expects a class name, not the class filename. It is a small distinction with a surprisingly large ability to ruin an otherwise pleasant afternoon.
Run a Single Source File Without a Separate Compile Command
Modern Java versions support source-file mode for suitable programs:
Java compiles the source for that launch and runs it without leaving the normal class file in your project folder. This is convenient for demonstrations and small scripts. However, practicing the separate javac and java commands teaches you how traditional Java builds work and makes compiler errors easier to understand.
Step 5: Compile and Run Java Using the Notepad++ Run Menu
Notepad++ can launch external commands through its Run menu. It provides variables representing the current file, directory, and filename without extension.
Open Run > Run and enter:
This command performs four jobs:
cmd.exe /kopens Command Prompt and keeps it visible afterward.cd /d "$(CURRENT_DIRECTORY)"switches to the active file’s folder.javac "$(FILE_NAME)"compiles the active Java source file.java "$(NAME_PART)"runs the class matching the filename.
The quotation marks are important because they protect paths containing spaces. The && operators ensure that the next command runs only when the previous command succeeds.
Save the Command as a Shortcut
- Click Save in the Run dialog.
- Name the command Compile and Run Java.
- Assign an available keyboard shortcut.
- Save your Java file before using the command.
You can replace /k with /c if you want the Command Prompt window to close when execution ends. Keeping the window open is usually more useful while learning because it lets you read compiler messages and program output.
Important Limitation
This one-line command is designed for a simple class in the default package. A project that declares packages, uses several source folders, or depends on external libraries needs a more specific compilation command or a build tool.
Using NppExec to Run Java Inside Notepad++
NppExec is a Notepad++ plugin that adds an embedded console and supports reusable command scripts. It is convenient when you do not want a separate Command Prompt window opening every time you test a program.
Install NppExec
- Open Plugins > Plugins Admin.
- Search for NppExec.
- Select it and choose Install.
- Allow Notepad++ to restart if requested.
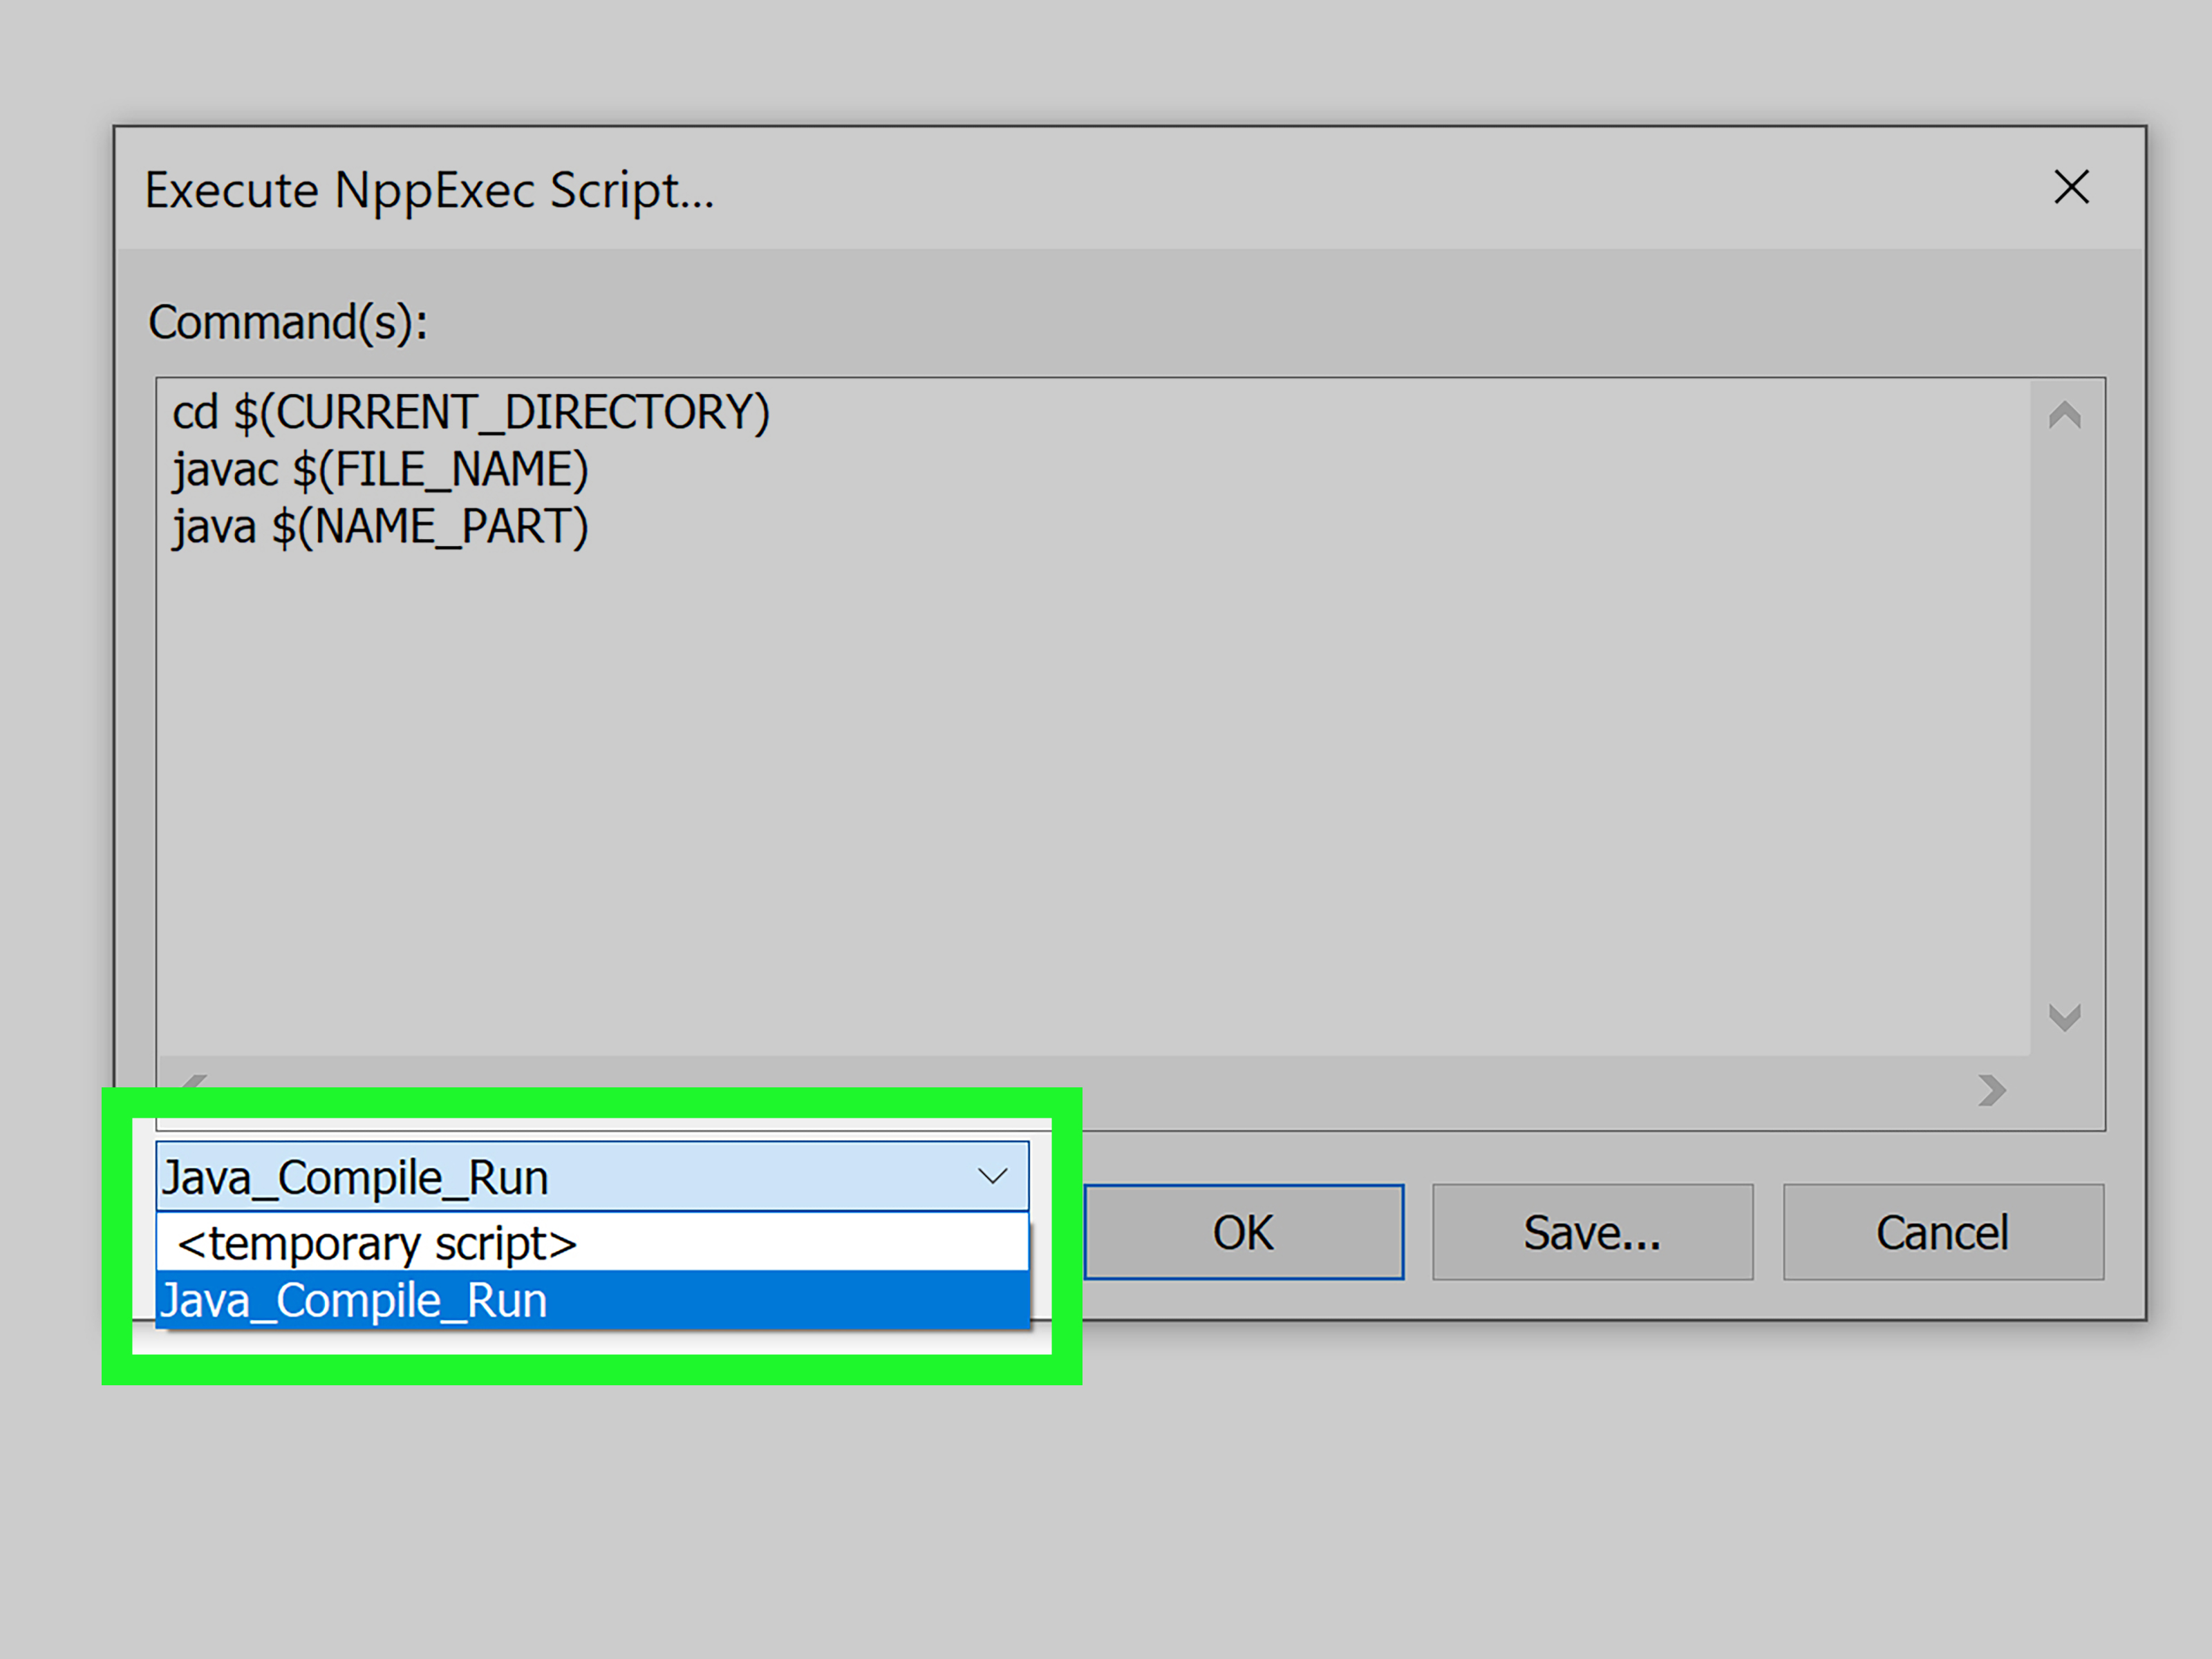
After installation, open Plugins > NppExec > Execute and enter:
NPP_SAVE saves the active document before compilation. The remaining commands change to the source directory, compile the file, and run the class. Save the script with a recognizable name such as Java Compile Run.
For more advanced error handling, consult NppExec’s built-in manual and command help. The plugin supports scripting features beyond this beginner example, but keeping the first script simple makes troubleshooting much easier.
Working with Packages and Multiple Java Files
Real Java applications usually organize classes into packages. Suppose your file contains:
The source file should be stored in a matching directory structure:
From C:\JavaProjects, compile it into a separate output directory:
Then run the fully qualified class name:
The -d out option tells the compiler where to place generated class files. Using a separate output folder keeps bytecode away from source files and mirrors the structure used by professional build systems.
Compile Multiple Source Files
For several files, you can list them together:
For larger projects, manually maintaining a long command becomes tedious. That is the point at which Maven or Gradle stops looking like unnecessary ceremony and starts looking like a rescue boat.
Add an External JAR to the Classpath
On Windows, separate classpath entries with a semicolon:
The library must normally be available during both compilation and execution. If it is supplied only to javac, the program may compile but fail at runtime because the JVM cannot find the required class.
Common Java and Notepad++ Errors
‘javac’ Is Not Recognized
Windows cannot locate the compiler. Confirm that a JDK is installed, verify JAVA_HOME, and make sure %JAVA_HOME%\bin appears in Path. Close and reopen Command Prompt and Notepad++ after changing environment variables.
Class Is Public and Should Be Declared in a Matching File
Rename the file so it exactly matches the public class. For example, public class Calculator must be stored in Calculator.java.
Could Not Find or Load Main Class
This error often means you are running the command from the wrong directory, using the wrong classpath, including .class in the command, or forgetting the package name. For packaged code, run the fully qualified name from the classpath root.
UnsupportedClassVersionError
The class was compiled with a newer Java version than the runtime used to launch it. Compare the output of javac -version and java -version. Multiple Java installations in Path are a common cause.
The Old Program Keeps Running
Save the source file before compiling. Also delete an obsolete class file if compilation failed and you suspect Java is launching bytecode from an earlier successful build.
Package Does Not Exist
Check the classpath, library filename, package declaration, and folder structure. A JAR sitting in the project directory is not automatically added to the classpath merely because it looks helpful.
Best Practices for Java Development in Notepad++
- Keep source files in a
srcdirectory and compiled files in anoutdirectory. - Use meaningful class and method names.
- Save files before every compile-and-run cycle.
- Quote paths that may contain spaces.
- Read the first compiler error before chasing the next twenty.
- Use
--releasewhen deliberately targeting an older Java platform. - Move to Maven, Gradle, or a Java IDE when project complexity justifies it.
Notepad++ is especially useful for learning command-line Java because it does not hide the compilation process. You see where class files go, how the classpath works, and why packages must match directories. Those lessons remain useful even after you move to IntelliJ IDEA, Eclipse, NetBeans, or another development environment.
Conclusion
To compile and run Java programs using Notepad++, install a JDK, add its bin directory to the Windows Path, save your source with the correct .java filename, compile it with javac, and launch the resulting class with java. Once the manual process works, automate it through the Notepad++ Run menu or NppExec.
This setup is lightweight, transparent, and excellent for small programs, classroom exercises, interview practice, and learning how Java actually moves from source code to executable bytecode. It does not replace a full IDE for large applications, but it teaches foundational skills that an IDE can easily hide behind a shiny green Run button.
Practical Experience: Lessons Learned from Running Java in Notepad++
The most valuable lesson from using Notepad++ for Java is that the simplest setup is usually the most reliable. Beginners often try to install several Java versions, paste complicated NppExec scripts, configure external JARs, and assign six keyboard shortcuts before successfully compiling one ordinary class. That approach produces an impressive collection of menus but very little working software.
A better experience begins at Command Prompt. Create one folder, write one class, and make these commands work:
Only after that test succeeds should you connect the commands to Notepad++. This order matters because it creates a clean troubleshooting boundary. When the commands fail in Command Prompt, the issue is probably the JDK, PATH, source code, filename, or working directory. When they work in Command Prompt but fail through Notepad++, the problem is probably the Run command, quoting, editor variables, or an unsaved document.
Another recurring lesson concerns filenames. Java treats capitalization seriously, while Windows File Explorer sometimes makes filenames look more forgiving than they really are. A class called BankAccount should be stored as BankAccount.java. Enabling visible file extensions in Windows also prevents the classic accident of creating BankAccount.java.txt, a file that looks correct until the compiler politely refuses to participate.
Working directories cause another large share of beginner confusion. The command java HelloWorld searches the active classpath, which normally includes the current directory. If the terminal is looking in a different folder, the class can exist and still appear invisible. Configuring the Notepad++ command to change into $(CURRENT_DIRECTORY) before compiling eliminates many of these failures.
It is also wise to keep compilation commands modest. A single-file shortcut is excellent for small exercises, but continually expanding it to support packages, resources, libraries, tests, modules, and twenty source directories eventually creates an unreadable line of punctuation. At that stage, a batch file can improve organization, and a build tool can provide repeatable project management.
NppExec offers a pleasant middle ground. Its embedded console keeps output beside the source code and makes repeated tests quick. However, the plugin should remain a convenience layer rather than a substitute for understanding the underlying commands. When a script behaves strangely, running the same command manually is still the fastest diagnostic technique.
Finally, compiler errors become less intimidating with practice. Java often reports several errors caused by one missing semicolon, brace, quotation mark, or import. Fix the earliest meaningful error, compile again, and allow the error list to refresh. Debugging every message simultaneously is like answering complaints from an entire crowd when the first person simply needs to close a door.
Using Notepad++ encourages this disciplined, visible workflow. You save, compile, inspect, correct, and run. The process may feel more manual than pressing an IDE button, but it builds a clearer mental model of Java compilation, class loading, packages, and environment configuration. That knowledge pays off later when automated tools fail and you need to understand what they were attempting to do on your behalf.
Note: Command examples in this article target Windows and assume a conventional Java class with a standard main method. Package-based projects and applications with third-party dependencies may require customized classpath or build-tool configuration.