You could build a normal bar top… sure. You could also order a plain cheese pizza and call it “culinary adventure.” But if you’re here, you want a reclaimed-wood bar top with glowing epoxysomething that looks like a hidden speakeasy meets a sci-fi movie prop. Good news: it’s totally doable with basic tools, patience, and a healthy respect for sticky chemistry.
This guide walks you through building a durable, high-gloss DIY epoxy bar top using reclaimed woodthen making the epoxy glow in the dark using photoluminescent pigment. We’ll cover planning, wood prep, sealing, pour technique, bubble control, sanding, final finishing, and the little “why is it doing that?” moments that every DIYer runs into.
Design Your Glow (Before You Mix Anything)
The easiest way to make a bar top “glow” is to pour glowing epoxy into voids: cracks, knot holes, gaps between boards, routed channels, or a “river” down the middle. The reclaimed wood brings character; the glow epoxy makes that character look like it has a nightlife.
Pick your glow style
- Glow “river”: A centered channel or gap filled with glow epoxy for a bright, dramatic stripe.
- Glow cracks & knots: Keep boards tight and highlight natural defects with glowing fills.
- Glow inlay channels: Rout a pattern (waves, geometric lines, constellations) and fill with glow epoxy.
- Glow edge band: A thin glowing border around the perimeter for subtle “floating” vibes.
Realistic expectations (aka “Will it light up my whole room?”)
Photoluminescent pigment glows after being “charged” by light (sunlight or strong indoor/UV light). It won’t replace your bar lighting, but it will absolutely make people say, “Wait… is your bar top glowing?”which is basically the whole point.
Materials & Tools Checklist
Wood + base
- Reclaimed wood boards (enough to cover your bar top area)
- Stable substrate (3/4″ plywood is common) if you’re building a laminated top
- Wood glue, screws, clamps
Epoxy + glow
- Bar-top/tabletop epoxy (self-leveling, clear finish)
- Glow-in-the-dark pigment (photoluminescent powder; choose color + particle size)
- Optional tint: mica powders or transparent dyes (use lightly; too much can reduce glow)
Pour control + surface prep
- Painter’s tape, Tyvek tape, or tuck tape (release-friendly taping for dams)
- Silicone caulk (for sealing dam corners)
- Notched spreader or plastic trowel, foam roller/brush (for seal coats)
- Mixing buckets, measuring cups, stir sticks
- Heat gun or propane torch (bubble removal)
- Orbital sander + sandpaper (80 through 2000 grit range, depending on finish level)
Safety gear (don’t skip this)
- Nitrile gloves (multiple pairs)
- Safety glasses
- Respirator rated for organic vapors (especially indoors)
- Good ventilation (fans + open air path)
Step 1: Prep Reclaimed Wood Like a Pro
1) Choose reclaimed wood you actually want to live with
Reclaimed wood is full of historyand occasionally, surprises. Look for boards that are structurally sound, not punky (soft/crumbly), and not soaked in mystery fluids from a century of “character building.” If you’re using pallet wood, be selective and cautious: it’s not all created equal.
2) Remove metal like your epoxy depends on it (because it does)
Pull nails, staples, screws, and embedded shrapnel. This protects your planer/jointer blades and prevents rust “ghosting” under clear epoxy. A metal detector is a wonderful luxury if you’re working with barn wood or anything that looks like it survived three renovations and a minor war.
3) Clean it, then clean it again (lightly)
Dirt and oils can interfere with epoxy bonding. Scrape off gunk, wash if needed, and let the wood dry thoroughly. Avoid soaking the boards for long periodswater and wood have a dramatic relationship.
4) Flatten and square the surface
Epoxy is self-leveling, not self-fixing. If the top is cupped, twisted, or uneven, you’ll either waste epoxy trying to “bury” the problem or end up with a surface that looks level but feels like a hiking trail.
- Best: Plane/joint boards, then sand flat.
- Good: Use a router sled flattening jig for big slabs.
- DIY-friendly: Sand and shim carefully, but accept you may need more finishing work later.
5) Dry-fit your layout (and plan the glow zones)
Lay boards out like a puzzle. Mark where the glow epoxy will go: gaps, routed channels, cracks, knot holes, or a river. If you’re building a “river,” keep the channel consistent so your glow looks intentionalnot like an accident you’re trying to rebrand as “rustic.”
Step 2: Build the Bar-Top Base + Pour Dam
Option A: Laminate reclaimed boards onto a plywood base
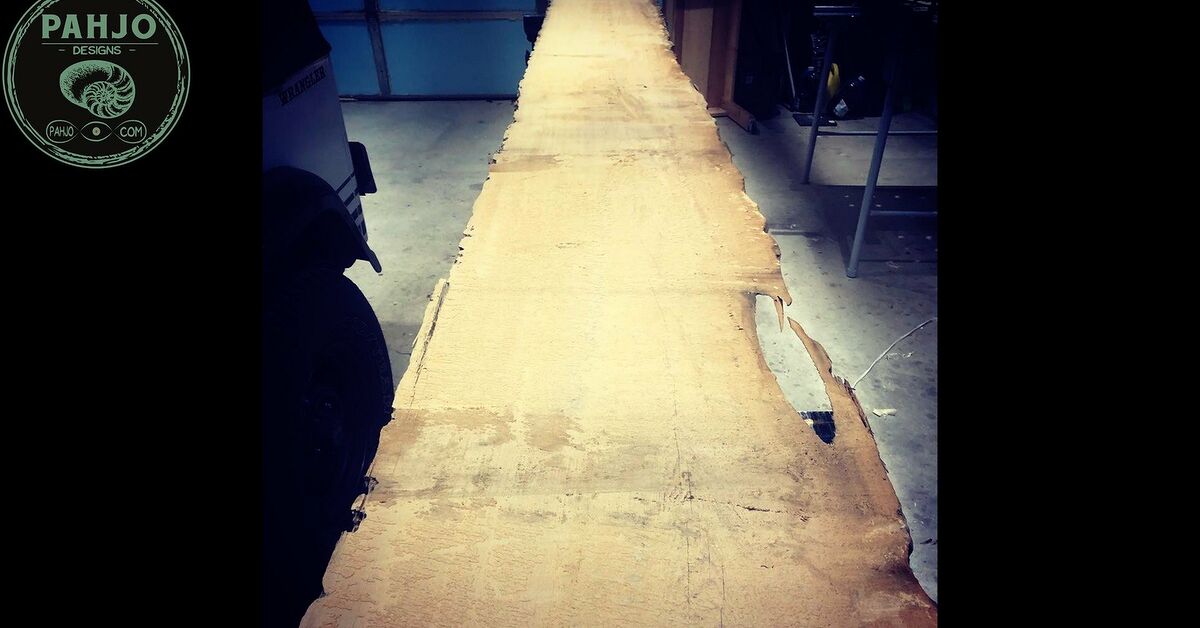
For many bar tops, the most stable approach is to glue/screw reclaimed boards to a plywood substrate. This reduces seasonal movement and gives you a predictable base to mount on cabinets or a bar frame.
- Cut plywood to final size (or slightly oversized, then trim after).
- Arrange boards; mark alignment.
- Glue boards down; clamp. Add screws from underneath if needed.
- Fill gaps or leave intentional “rivers” where glow epoxy will go.
Option B: Solid wood top (no plywood)
If you’re building a thick, solid-wood bar top, you’ll need strong joinery and an allowance for wood movement. Epoxy can handle normal movement, but your mounting method should not lock the wood in a way that forces cracking.
Build a pour dam to control drips and edges
Even if you’re doing a simple flood coat, epoxy will run off edges like it’s late for a meeting. Create a dam around the perimeter:
- Use straight boards or melamine strips as forms.
- Tape the inside faces with release-friendly tape so epoxy won’t bond permanently.
- Seal corners and seams with a thin bead of silicone caulk (let it cure).
- Level your entire setupfront-to-back and side-to-sidebefore any mixing begins.
Step 3: Seal Coat (The Bubble-Prevention Superpower)
Wood is porous. Air lives inside it. When epoxy hits woodespecially warm woodair can escape into the resin as bubbles (called outgassing). A thin seal coat fills pores and locks down air so your flood coat goes on smooth and clear.
How to apply a seal coat
- Sand the surface (commonly 80–120 grit), then vacuum thoroughly.
- Wipe with a lint-free cloth (avoid leaving fuzz behindepoxy loves fuzz).
- Mix a small batch of epoxy per manufacturer ratio.
- Roll/brush on a thin coat, working it into the grain and any cracks.
- Hit bubbles lightly with a heat gun or torch pass (quick and controlled).
- Let it cure until tacky or within the recoat window recommended by your epoxy.
Pro move: pour when your wood surface is cooling (late afternoon/evening in a stable shop), not warming up. Cooling wood contracts slightly, which reduces outgassing.
Step 4: Mix Glow Epoxy Without Panic
Choose the right pigment
Look for photoluminescent pigment (often strontium aluminate-based). It charges under light and glows for a long time. Bigger particles often glow brighter but can look more “sparkly/grainy.” Smaller particles can look smoother but may glow a bit less intensely.
How much glow powder to add
A common starting point is about 1 part glow powder to 4 parts mixed epoxy by weight. That’s bright. You can go lower for a subtler effect, but if you want a noticeable glow, don’t be shythis is not the time for minimalist interior design.
Mixing tips for clearer, stronger pours
- Measure precisely. Most bar-top epoxies are 1:1 by volume, but some products are not. Follow your label.
- Mix thoroughly. Scrape sides and bottom; then transfer to a clean cup and mix again (the “double cup” method).
- Avoid whipping air. Stir steadily instead of beating it like pancake batter.
- Add glow powder slowly. Sprinkle it in while mixing to reduce clumps.
Temperature matters (yes, epoxy has feelings)
Many tabletop epoxies behave best in a moderate range (often around the 70–80°F neighborhood). Too cold and it’s thick and bubbly. Too hot and it cures too fast, potentially overheating in the cup (and nobody wants “surprise volcano epoxy”).
Step 5: Flood Coat + Glow Pours (Smooth, Level, Glossy)
Plan your pour sequence
You have two common approaches:
- Approach 1: Fill glow channels/voids first, let them gel, then flood coat the whole surface for a seamless top.
- Approach 2: Seal coat, then do everything in one controlled session (requires speed and confidence).
Pour glow epoxy into voids
- Re-check your dam and seams for leaks.
- Pour glow epoxy slowly into gaps, cracks, knot holes, or routed channels.
- Use a stick to guide resin into corners and under edges.
- Pass a heat gun/torch quickly over the surface to release bubbles.
Flood coat the whole bar top
A flood coat creates that deep, glassy bar-top finish. Many brands recommend keeping each flood coat relatively thin (often around 1/8″ self-leveling, and commonly no more than 1/4″ thickness per pour) to avoid overheating and distortion.
- Mix enough epoxy for your surface area (don’t guess wildlymeasure and calculate).
- Pour in ribbons across the surface.
- Spread with a notched spreader or trowel, then let it self-level.
- Coat edges intentionally; don’t rely on drips to do it “eventually.”
- Remove bubbles with controlled heat passes. Don’t linger in one spot.
- Cover with a dust tent (plastic sheeting on supports) while it cures.
If you need multiple coats
If you want more depth or you need to correct minor issues, additional coats can be applied within the manufacturer’s recoat window for a chemical bond. If you miss that window, scuff sand (often around 120 grit) and clean thoroughly before recoating.
Edge strategy (so it looks intentional, not accidental)
- Drip edges: Let resin flow over and babysit drips for the first hour, scraping as needed.
- Dam edges: Keep the resin contained, then remove forms later and sand/polish edges.
- Hybrid: Seal coat edges first, then flood coat with controlled overflow.
Step 6: Sanding, Polishing, and Protective Topcoats
When to sand
Sand only after the epoxy is cured enough to dust (not gum up). If your surface is wavy, has nibs, or you want a satin finish, sanding is your friend. If your pour is flawless and you want maximum gloss, you may only need minimal touch-ups.
Common finishing paths
- High-gloss “glass” finish: Wet sand progressively (e.g., 400 → 800 → 1200 → 2000) and polish with a compound.
- Soft satin finish: Sand to 400–600 and stop. (Bonus: satin hides micro-scratches better.)
- Extra protection topcoat: Some builders add a compatible clear topcoat for scratch/UV resistance. Always confirm compatibility.
Fixing common issues
- Dust nibs: Light sand and polish or add another thin flood coat.
- Runs/drips on edges: Scrape with a sharp blade after gel, then sand smooth after cure.
- Cloudy spots: Often from moisture, improper mixing, or contamination; sand back and recoat if needed.
- Sticky areas: Usually incorrect ratio or poor mixing; remove uncured epoxy and recoat properly.
Care & Maintenance (So It Stays Gorgeous)
Your bar top is tough, but it’s not invincible. Treat it like a nice car: enjoy it daily, but don’t drag cinderblocks across it and act shocked when it looks sad.
- Use coasters and hot pads. Many epoxy finishes can soften with high heat.
- Clean gently. Mild soap + soft cloth beats harsh solvents and abrasive pads.
- Cut on a cutting board. Epoxy can scratch; knives also dull faster on hard surfaces.
- Recharge the glow. Bright light (or UV) makes the glow effect pop at night.
Experience-Based Tips (The “I Wish Someone Told Me” Section)
Below are the most common real-world experiences DIYers run into when building a glowing reclaimed-wood epoxy bar topshared in the spirit of saving you time, money, and at least one episode of “Why is my epoxy doing that?”
1) The project is 80% prep…and 20% trying not to touch the wet epoxy
People expect the “fun part” to be pouring resin (and it is). But reclaimed wood demands prep: pulling metal, flattening, filling defects, and cleaning dust out of every pore. The most successful builds treat prep like a separate mini-project. DIYers who rush prep often end up doing extra coats “to fix it,” which costs more epoxy than doing the prep right in the first place.
2) The first time you see bubbles, you’ll think you ruined everything (you didn’t)
Tiny bubbles are extremely commonespecially on the seal coatbecause wood naturally releases air. Most people learn quickly that the goal isn’t “zero bubbles instantly,” but rather “seal the wood so bubbles don’t keep rising forever.” A light, fast pass with a heat gun or torch can clear surface bubbles, and a good seal coat dramatically reduces bubbling in the flood coat. The “aha” moment usually comes when DIYers realize they don’t need to blast the epoxy with heat like they’re trying to cook itthey just need gentle, controlled warmth to pop bubbles at the surface.
3) Leveling matters more than talent
A surprising number of “my epoxy pooled on one side” stories are actually “my table wasn’t level” stories. People often level the bar frame and assume the top is level too (spoiler: it might not be). The experienced move is to level the actual pouring surface with shims, then check again after you add the weight of the top. When the setup is level, the epoxy’s self-leveling behavior becomes your best friend. When it isn’t, epoxy becomes an expensive liquid that aggressively points out gravity.
4) Glow pigment is weirdly heavyand that’s normal
DIYers commonly notice glow powder wanting to settle in the cup. That’s not a defect; it’s physics. Many people compensate by mixing thoroughly, pouring sooner, and keeping glow pours in channels/voids where the pigment concentration looks intentional. Another common experience: the glow looks mild in daylight but dramatic in a dark room after charging. Builders who are happiest with the final effect often test a small “sample puck” firstsame epoxy, same pigment ratio, cured overnightso they know exactly what to expect.
5) The dust tent feels silly until you see a bug fossilized in your bar top
Many DIYers swear their workshop is cleanright up until epoxy is curing and suddenly every dust particle within a five-mile radius decides to move in. A simple plastic-sheet dust tent (supported so it doesn’t touch the surface) is one of those low-effort steps that prevents high-effort sanding later. Bonus: it also discourages curious pets and children from “helping.”
6) You’ll probably do at least one “learning coat”and that’s okay
Even careful builders sometimes sand and recoat once, especially on a first bar-top project. The good news is that many epoxy systems are forgiving if you follow the rules: stay within the recoat window when possible, or scuff sand and clean thoroughly before the next coat. Most of the time, the final bar top looks better than the first pour because you get comfortable with timing, spreading, edge control, and heat passes. Consider it the DIY version of a warm-up lapexcept shinier.