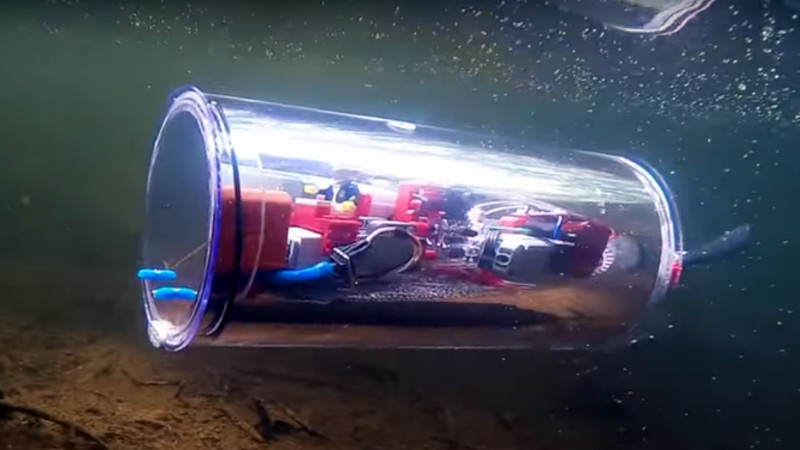
Becoming a Lego submariner sounds like a job listing posted by a very serious eight-year-old in a captain’s hat. But behind the playful name is a surprisingly rich hobby: building LEGO submarines, learning how underwater vehicles work, experimenting with buoyancy, designing ocean missions, and turning a pile of bricks into something that looks ready to explore a shipwreck under the coffee table.
A LEGO submariner is not an official naval rank, and no tiny plastic admiral will salute you from the bathtub. It is a creative builder who understands three things: how submarines are shaped, how underwater exploration works, and how to translate real engineering ideas into LEGO form. Whether you use LEGO City ocean sets, LEGO Technic parts, LEGO Education robotics kits, or a classic brick bin that has swallowed half your weekend, the goal is the same: build a convincing underwater explorer and tell a great story with it.
This guide shows you how to become a LEGO submariner step by step, from basic submarine design to advanced LEGO underwater robotics concepts. We will cover model planning, realistic details, STEM skills, safe testing, creative display ideas, and the kind of builder habits that separate a quick desk toy from a submarine that makes people say, “Wait, did you design that yourself?”
What Is a LEGO Submariner?
A LEGO submariner is a builder who specializes in LEGO submarines, underwater bases, ocean exploration vehicles, deep-sea research scenes, and related marine engineering themes. The title is playful, but the skill set is real. LEGO submarine building blends creative design, mechanical thinking, science, storytelling, and patience. Lots and lots of patience. The kind of patience required to find one dark gray hinge plate in a carpet that apparently has its own gravitational field.
Modern LEGO ocean themes often include research submarines, underwater drones, shipwrecks, sea creatures, diving suits, transparent cockpits, and science-lab details. These features are inspired by real underwater exploration tools such as remotely operated vehicles, autonomous underwater vehicles, submersibles, sonar equipment, research vessels, sample arms, and observation domes.
The fun part is that you do not need to start with a huge collection. A LEGO submariner can begin with a small mini-sub, a handful of slopes, a transparent canopy, and a good imagination. Over time, you can expand into Technic functions, movable propellers, robot arms, pressure-inspired hull shapes, and ocean dioramas with coral, vents, caves, or mysterious treasure that definitely belongs in a museum and not in a pirate’s snack drawer.
Step 1: Learn What Real Submarines and Underwater Robots Do
Before you build, study the real thing. Submarines and underwater robots are designed for specific missions. Some carry people. Some are controlled from the surface. Some operate independently using onboard computers. Some explore deep-ocean ecosystems where humans cannot safely go. A LEGO submarine becomes much more believable when it looks like it has a job.
Choose a mission for your model
Start by asking: what does this submarine do? A rescue submarine needs lights, grabber arms, emergency equipment, and a compact shape for tight spaces. A research submarine may need cameras, sensors, sample containers, and a lab module. A treasure-hunting submarine might have scanning equipment, storage crates, and a little dramatic flair. A military-style submarine can be built as a fictional vehicle, but for a family-friendly LEGO submariner project, ocean science and exploration usually offer more creative possibilities.
Real underwater vehicles often work in environments that are dark, cold, and difficult to reach. That means practical details matter. Add floodlights, reinforced windows, skids, ballast tanks, propellers, antennas, sonar dishes, manipulator arms, camera pods, and emergency beacons. These small choices make your LEGO submarine feel like a working machine instead of a smooth brick burrito with a window.
Step 2: Build Your First LEGO Submarine Shape
The easiest LEGO submarine starts with a strong center body. Real submarines often have rounded hulls because curves help handle water pressure and reduce drag. LEGO bricks are famously not round unless they are trying to roll under your desk, so your job is to suggest curves using slopes, wedges, curved bricks, arches, and cylindrical pieces.
Basic parts that help
Useful LEGO submarine pieces include transparent cockpit domes, curved slopes, wedge plates, round bricks, Technic pins, propeller elements, hinge plates, clips, bars, lightsaber hilts, small dishes, robot arms, and grille tiles. Do not worry if you do not own the perfect piece. LEGO building rewards substitution. A camera can be a round tile. A sonar unit can be a dish. A pressure hatch can be a printed tile from a completely unrelated set. Nobody needs to know your “oxygen regulator” came from a spaceship kitchen.
Try a simple formula for your first build: nose, cockpit, equipment bay, tail, and propeller. Keep the body balanced from front to back. Add fins or stabilizers on the sides. Place lights near the front. Use darker colors for the main hull and brighter colors for safety markings. Yellow, orange, white, dark blue, gray, and black are common choices for ocean exploration models because they look technical and easy to spot.
Step 3: Add LEGO Technic Functions
Once your submarine looks good, make it do something. LEGO Technic parts are excellent for adding movement and structure. You can build rotating propellers, opening cockpit hatches, extendable arms, adjustable fins, sliding equipment trays, and small cranes for sample collection.
Start with simple mechanisms
A beginner-friendly mechanism is a rotating rear propeller connected to an axle. Another easy feature is a hinged cockpit that opens for a minifigure pilot. A slightly more advanced idea is a manipulator arm with two or three joints using clips, ball joints, or Technic beams. These functions make the model feel interactive, which is important if you want your LEGO submarine to be more than shelf decoration.
For a larger build, create a modular submarine. The front module can be the cockpit, the middle module can hold tools or science equipment, and the rear module can contain engines. Modular construction makes it easier to redesign sections without destroying the whole model. It also makes you feel like a serious engineer, even if your engineering notebook currently says, “Need more cheese slopes.”
Step 4: Understand Buoyancy Without Flooding the Living Room
Submarines rise and sink by controlling buoyancy. In simple terms, buoyancy is the upward force that water applies to an object. Real submarines use ballast systems to change whether they float, sink, or stay at a chosen depth. LEGO models, however, are usually not watertight unless specially engineered with non-LEGO seals and waterproof containers.
That means most LEGO submariner projects should be treated as display models, dry STEM models, or carefully supervised experiments. Standard LEGO bricks can trap water, float unpredictably, and hide moisture inside small spaces. Electronic LEGO components should not be placed in water unless they are protected by a proper waterproof enclosure designed for that purpose.
Safe ways to test ideas
You can still explore buoyancy safely. Use a clear plastic tub, build a non-electronic test hull, and experiment with sealed containers, air pockets, and removable weights. Observe whether the model floats level, tips forward, or sinks like it suddenly remembered an unpaid bill. Keep the tests small, controlled, and dry-friendly. For younger builders, adult supervision is a smart idea because water and parts can create messes, choking risks for small children, or damaged electronics.
The best LEGO submariners learn from testing. If the nose dives, move weight backward. If the rear sinks, shift mass forward. If the model rolls sideways, widen the base or add side pods. These lessons connect LEGO building to real engineering principles such as density, displacement, stability, and center of mass.
Step 5: Build an Underwater World Around the Submarine
A submarine becomes more exciting when it has somewhere to go. Build a scene, not just a vehicle. Add a seabed, rock formations, coral, seaweed, vents, shipwreck pieces, treasure crates, research markers, or a mini underwater base. A plain submarine on a table says, “Nice model.” A submarine approaching a glowing cave guarded by a crab with suspicious confidence says, “Tell me everything.”
Use storytelling details
Place a diver outside repairing a cable. Add a small underwater drone scouting ahead. Put a sample container near a strange sea plant. Build a cracked shipwreck with a research flag. Use transparent blue pieces for bubbles or water effects. A LEGO submariner thinks like a set designer: every object should suggest a mission, a problem, or a discovery.
For photography, use a blue background, low lighting, and a desk lamp pointed from the side to mimic underwater shadows. A sheet of blue paper or fabric can make a simple model look like it is cruising through deep water. You can also place transparent pieces under the submarine to make it appear suspended above the ocean floor.
Step 6: Study LEGO Ocean Sets for Inspiration
Official LEGO ocean sets are useful teachers. LEGO City has featured ocean exploration submarines, underwater drones, shipwreck scenes, research ships, divers, sea creatures, and scientific equipment. LEGO Technic submarine models show how panels, gears, and mechanical details can create a more engineering-focused style. LEGO Education lessons use submarine themes to introduce young learners to motion, problem-solving, and design thinking.
Do not copy a set forever. Build it, study it, then modify it. Change the cockpit. Add a longer tail. Replace the drone bay. Create a new research tool. Turn a small sub into a deep-sea command vehicle. Modification is where you move from “I own a LEGO submarine” to “I am becoming a LEGO submariner.”
Step 7: Join Challenges and Build Like a Team Engineer
If you want a structured path, look into robotics and STEM programs that use LEGO systems. FIRST LEGO League has used ocean exploration themes, encouraging students to explore marine environments with LEGO technology, creative problem-solving, and teamwork. LEGO Education platforms such as SPIKE can also help builders learn movement, sensors, programming logic, and engineering design.
Skills that transfer from LEGO to real STEM
LEGO submarine building can introduce several real-world skills: mechanical design, rapid prototyping, documentation, testing, teamwork, physics, robotics, and visual communication. You learn to make a plan, build a prototype, test what fails, improve the design, and explain your choices. That is basically engineering, except with more colorful bricks and fewer emails.
Keep a build journal. Sketch your submarine before building. Record which parts worked. Take photos after every major change. Write down problems and fixes. This habit helps you improve faster and gives you material for blog posts, school projects, videos, or a portfolio if you later become interested in robotics, marine engineering, industrial design, animation, or product design.
Step 8: Create Your LEGO Submariner Toolkit
You do not need every rare piece in the LEGO universe. A practical LEGO submariner toolkit includes basic bricks, plates, slopes, curved elements, transparent cockpit pieces, Technic beams, axles, pins, hinges, clips, bars, small dishes, grille tiles, propellers, and minifigure accessories. Storage matters too. Sort by part type rather than color if you build often. Finding the right hinge quickly can save your creative mood from quietly sinking to the bottom of the bin.
Recommended build categories
Build at least four types of models over time: a micro submarine, a minifigure-scale research submarine, a Technic function submarine, and a full underwater scene. The micro submarine teaches shape. The minifigure-scale model teaches proportion. The Technic model teaches function. The underwater scene teaches storytelling. Together, they build the complete LEGO submariner skill set.
Step 9: Make Your Submarine Look Realistic
Realism comes from purposeful detail. Add inspection panels, warning stripes, lights, vents, tool racks, access hatches, ballast-inspired side tanks, and reinforced cockpit frames. Use repeated shapes to create design language. If the left side has a sensor pod, the right side might have a matching equipment pod. Symmetry makes the model look engineered, while a few asymmetrical tools make it look functional.
Scale also matters. If a minifigure is piloting the submarine, make the cockpit believable. Add controls, a seat, a display screen, and enough room for the pilot to sit without looking like they were folded into a lunchbox. For larger models, include an airlock, storage compartment, or science station. These interior details reward anyone who looks closely.
Step 10: Share Your LEGO Submarine Like a Pro
When your model is ready, photograph it clearly. Use a clean background, good lighting, and multiple angles. Show the front, side, rear, top, and any moving features. Include a short description of the mission, the main functions, and the design problem you solved. This makes your build more interesting to readers, viewers, and other LEGO fans.
For a blog or social post, use phrases people search for naturally: LEGO submarine, LEGO underwater vehicle, LEGO ocean exploration, LEGO submarine build, LEGO Technic submarine, LEGO STEM project, and LEGO underwater robotics. Use these keywords naturally in headings, captions, and descriptions. The goal is not to chant “LEGO submarine” until Google gets seasick. The goal is to explain the build clearly so people and search engines both understand it.
Common Mistakes New LEGO Submariners Make
The first common mistake is building too large too soon. Big submarines are exciting, but they can become fragile if the internal frame is weak. Start small, learn the shape, then scale up. The second mistake is ignoring balance. A submarine should look stable from every angle, not like it is about to roll over and file a complaint.
The third mistake is adding random details with no mission. A model covered in tools can look messy if none of them make sense. Choose details that match the purpose. A research sub needs sensors and sample gear. A rescue sub needs lights and arms. A cargo sub needs storage. Good design is not about adding everything; it is about adding the right things.
The fourth mistake is putting electronics near water without proper protection. Keep standard LEGO electronics dry. If you are exploring robotics, build dry demonstrations first. If you later move into real underwater ROV projects, use appropriate waterproof components, safe low-voltage systems, and adult or expert guidance.
Advanced Path: From LEGO Submariner to Underwater Robotics Fan
After mastering display models, you may want to explore robotics. Underwater robots such as ROVs are used in real ocean exploration because they can go places too deep, risky, or expensive for human divers. They may carry cameras, lights, sensors, thrusters, robotic arms, and sampling tools. LEGO robotics can help you understand the logic behind movement, control, and mission planning even if your LEGO model never enters water.
Try building a dry-land ROV simulator. Make a LEGO control station, a tether, a vehicle frame, and a mission board with obstacles. Program a LEGO robot to move across a blue mat, pick up “samples,” or inspect a “shipwreck.” This keeps the project safe while teaching ideas used in real underwater technology: navigation, tool control, mission objectives, and iteration.
Experience Section: What It Feels Like to Become a LEGO Submariner
The first experience every LEGO submariner has is the moment of overconfidence. You look at a small pile of pieces and think, “I will build a sleek deep-sea exploration submarine in twenty minutes.” Two hours later, the submarine has one beautiful side, one confusing side, and a rear propeller attached with the emotional stability of wet spaghetti. This is normal. In fact, this is where the hobby becomes interesting.
Building a LEGO submarine teaches you that imagination and engineering are best friends, but they do argue. Your imagination wants a giant glass cockpit, four robotic arms, six engines, a moon pool, a shark cage, and a coffee machine for the crew. Engineering asks, “Wonderful. How will that stay attached?” Every redesign becomes a small lesson. You learn why strong internal frames matter. You learn why slopes change the whole personality of a model. You learn why the perfect part is always in the last container you check.
One of the most satisfying experiences is creating a mission. A submarine without a mission is just a fancy tube. Once you decide that your sub is mapping a volcanic vent, rescuing a stranded diver, studying a glowing fish, or retrieving a lost research drone, the design becomes easier. Suddenly, every detail has a reason. The front lights are for dark trenches. The side arms are for samples. The detachable drone scouts narrow caves. The storage bay holds equipment. The model starts telling you what it needs.
Testing is another memorable part. Even if you are only testing on a table, you will notice things: the nose looks too heavy, the cockpit needs a better hinge, the arm cannot reach the sample crate, or the tail needs fins. Each fix makes the model better. This is the quiet magic of LEGO building. You are not just playing with bricks; you are practicing the design cycle used by real engineers: imagine, build, test, improve, and repeat until the submarine stops looking like a confused toaster.
Photography adds a new layer of fun. Place the submarine on a blue background, scatter a few rock pieces around it, add a diver, angle a lamp from the side, and suddenly the model looks like it is descending into the deep sea. You may find yourself adjusting one tiny light or bubble piece for ten minutes. That is not madness. That is craftsmanship wearing flippers.
The best experience, though, is sharing the build. Someone notices the moving propeller, the mini drone, or the cockpit detail, and you get to explain the whole mission. That explanation is part of becoming a LEGO submariner. You are not only building a model; you are building a world. And in that world, every brick has a job, every hatch hides a story, and every submarine is one rebuild away from greatness.
Conclusion: Your First Dive Starts With One Brick
Becoming a LEGO submariner is not about owning the biggest set or the rarest piece. It is about curiosity. Study real submarines and underwater robots. Build small, improve often, add believable functions, and give every model a mission. Use LEGO City for ocean adventure inspiration, LEGO Technic for mechanisms, LEGO Education-style thinking for STEM lessons, and your own imagination for everything that refuses to fit neatly into instructions.
The ocean is one of the greatest frontiers on Earth, and LEGO gives you a miniature way to explore it. Your first submarine may be simple. Your second will be stronger. Your third may have a drone, a lab, and a dramatic shipwreck scene. Before long, you will stop asking how to become a LEGO submariner and start asking the more dangerous question: how many submarines can one shelf hold before it becomes an underwater fleet?
Note: This article is written for safe creative building, educational play, and LEGO-inspired STEM learning. Standard LEGO electronics should be kept dry unless protected by proper waterproof equipment and supervised by someone knowledgeable.