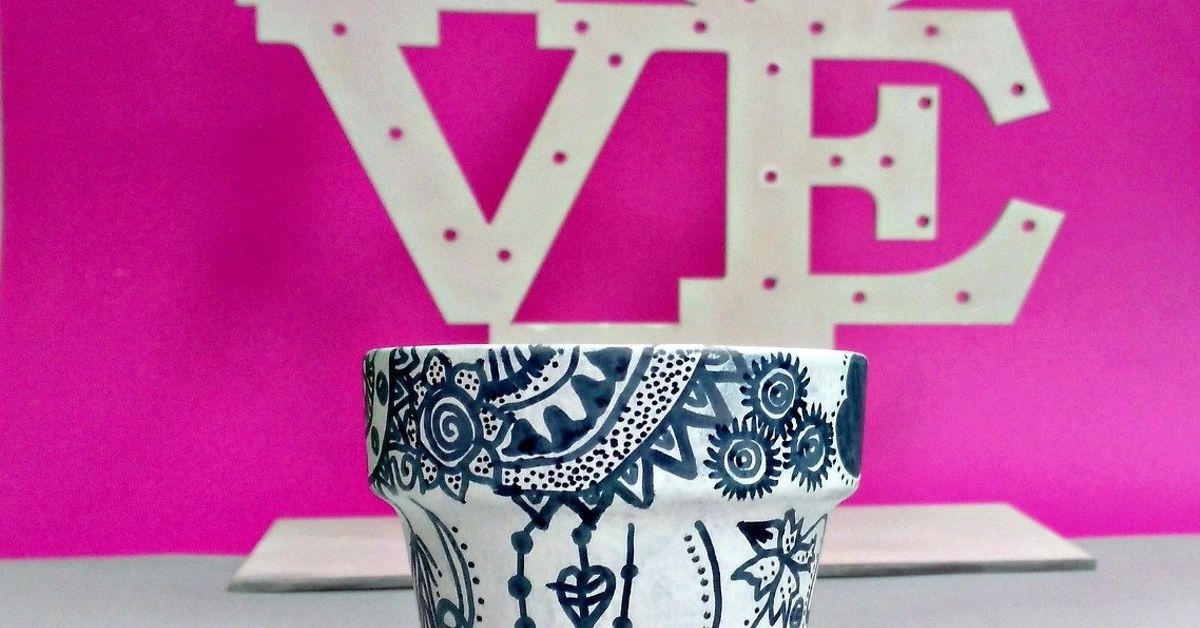
Terracotta pots are the blue jeans of the gardening world: affordable, sturdy, charming, and somehow better when they look a little lived-in. But plain clay pots can also feel, well, plain. That is where doodling comes in. With a few paint pens, a clean pot, and a willingness to draw imperfect little leaves, stars, squiggles, suns, or suspiciously potato-shaped flowers, you can turn basic garden containers into handmade decor with personality.
Doodling terracotta pots is one of those rare DIY projects that works for almost everyone. You do not need to be an artist. You do not need a studio. You do not even need a huge budget. A small pot, acrylic paint markers, a clear sealer, and an afternoon are enough to create something that looks cheerful on a windowsill, patio table, porch step, herb shelf, or gift basket. Even better, each pot becomes one of a kind. No two doodles are exactly the same, which is excellent news for anyone whose circles look more like startled eggs.
This guide walks through how to doodle terracotta pots the smart way: choosing supplies, preparing the clay, planning simple designs, sealing your work, matching pots with plants, and avoiding the common mistakes that make paint peel faster than a sunburned tourist in July.
Why Terracotta Pots Are Perfect for Doodling
Terracotta is made from fired natural clay, and its warm orange-brown color gives doodles an earthy, handmade background. Unlike glossy ceramic, unglazed terracotta has a porous surface. That texture helps many acrylic paints and paint markers grip better, especially when the pot is clean and dry. The slightly rough surface also gives doodles a charming, rustic look rather than a factory-perfect finish.
Gardeners love terracotta because it allows moisture and air to move through the pot walls. This breathability can help plants that prefer well-drained soil, including succulents, cacti, jade plants, rosemary, thyme, lavender, and many Mediterranean herbs. The trade-off is that terracotta dries out faster than plastic or glazed ceramic. That matters when you decorate it, because moisture can travel through the clay and affect paint if the pot is not properly sealed.
In other words, terracotta is a wonderful doodle canvas, but it is not a lazy canvas. Treat it right and it rewards you with character. Ignore the prep work and your cute mushroom border may start bubbling like it has gossip to share.
Best Supplies for Doodling Terracotta Pots
You can keep this project simple or turn your dining table into a miniature art supply store. For most beginners, the best supplies are practical, affordable, and easy to control.
Recommended Materials
- Unglazed terracotta pots with drainage holes
- Matching saucers, if the pots will sit indoors
- Mild dish soap and a soft brush or sponge
- Fine-grit sandpaper, optional for rough spots
- Acrylic paint pens or water-based paint markers
- Acrylic craft paint and small brushes, optional
- Pencil or chalk for sketching guidelines
- Painter’s tape for clean bands and borders
- Clear acrylic sealer or outdoor-safe spray sealant
- Drop cloth, cardboard, or newspaper for workspace protection
Acrylic paint pens are especially friendly for doodling because they work like markers but leave an opaque painted finish. Fine-tip pens are great for tiny dots, vines, lettering, stars, and outlines. Medium tips are better for bolder motifs like lemons, moons, rainbows, flowers, geometric borders, and abstract shapes. If you want a hand-painted folk-art look, combine paint pens with a small round brush.
How to Prepare Terracotta Pots Before Doodling
Preparation is the difference between a pot that looks handmade and a pot that looks like it lost a fight with humidity. Start by removing stickers, dust, and residue. Wash the pot with mild soapy water, rinse it well, and let it dry completely. Terracotta holds moisture, so “dry” does not mean “I wiped it with a towel and hoped for the best.” Give it several hours, or overnight if possible.
If the pot has rough patches, lightly sand them. Wipe away the dust with a dry cloth. For older pots, scrub off mineral deposits and soil residue. If a pot previously held a diseased plant, clean and disinfect it before reuse. Healthy plants are cute. Mystery pathogens are not part of the aesthetic.
Should You Seal Before or After Doodling?
For decorative pots, sealing after doodling is usually enough. For pots that will hold real plants and get watered regularly, sealing both the inside and outside can help protect your artwork from moisture movement. Terracotta absorbs water, and that water can push through the clay wall, causing paint to bubble, flake, or fade over time.
A practical approach is to apply a clear sealer inside the pot first, let it cure, doodle the outside, then seal the decorated exterior. Always follow the product label for ventilation, drying time, and curing time. Spray sealers should be used outdoors or in a very well-ventilated area. Your pot should look artistic, not smell like a hardware aisle for three days.
Simple Doodle Ideas That Look Surprisingly Good
The best doodled terracotta pots often rely on repetition rather than complicated drawing. You do not have to paint a botanical masterpiece. A repeated pattern can look polished even when each tiny shape is slightly different.
1. Botanical Line Drawings
Try thin white or black vines wrapping around the pot. Add simple leaves, dots, and tiny flowers. This style works beautifully on natural terracotta because the earthy background makes the lines feel organic. You can keep it minimal or fill the entire pot with a lively garden-sketch effect.
2. Mediterranean Herb Pot Labels
For an herb garden, doodle the plant name in casual script: basil, mint, rosemary, parsley, thyme, cilantro. Add matching icons, such as basil leaves, rosemary sprigs, mint stems, or little sunbursts. This is practical and pretty, which is the DIY equivalent of finding jeans with real pockets.
3. Celestial Patterns
Moons, stars, dots, suns, and constellations are beginner-friendly. Use gold, cream, white, navy, or black paint pens for a night-sky feel. A small cactus or snake plant in a celestial pot looks dramatic without being fussy.
4. Geometric Borders
Triangles, stripes, checkerboards, arches, scallops, and zigzags create a clean modern look. Use painter’s tape if you want straight borders. For a more handmade style, draw freehand and let the slight wobble become part of the charm. Wobbly lines say, “artisan.” At least, that is what we tell ourselves.
5. Cottagecore Mushrooms and Wildflowers
Small mushrooms, daisies, bees, strawberries, butterflies, and leafy stems give terracotta pots a whimsical garden feel. This style is perfect for porch herbs, windowsill flowers, or gifts for friends who use the phrase “just one more plant” as a legally binding lifestyle.
6. Black-and-White Minimalist Faces
Draw simple closed eyes, lashes, noses, and smile lines. Add a trailing plant like pothos, string of pearls, or ivy, and suddenly the plant becomes the hair. It is silly. It is stylish. It works.
Step-by-Step: How to Doodle Terracotta Pots
Step 1: Choose the Right Pot
Pick a pot with a smooth enough surface for drawing. Small and medium pots are easiest for beginners because you can rotate them as you work. Make sure the drainage hole is open if you plan to use the pot for live plants.
Step 2: Clean and Dry the Pot
Wash off dust and residue, then let the pot dry thoroughly. Paint markers perform better on clean, dry surfaces. Moist clay can weaken adhesion and make lines look patchy.
Step 3: Sketch a Loose Design
Use pencil or chalk to mark major lines. You do not need to draw every detail. A few guidelines for borders, labels, or large shapes will keep the design balanced.
Step 4: Start With the Main Shapes
Add large doodles first, such as flowers, suns, labels, or geometric blocks. Let them dry before adding smaller details. Acrylic paint pens often dry quickly, but thick areas may need extra time.
Step 5: Add Details and Repetition
Dots, dashes, tiny leaves, outlines, and small accents make the pot feel finished. Repeating one motif around the rim or base can tie the whole design together.
Step 6: Let the Artwork Cure
Do not seal immediately after drawing. Let the paint dry fully. Overnight drying is a safe habit, especially if you used multiple layers or filled-in shapes.
Step 7: Seal the Pot
Apply clear acrylic sealer in light, even coats. Several thin coats are better than one heavy coat. Seal the exterior and, if the pot will hold live plants, consider sealing the inside as well. Allow the sealer to cure according to label instructions before adding soil or water.
Best Plants for Doodled Terracotta Pots
Because terracotta dries faster than many other container materials, it pairs well with plants that dislike soggy roots. Succulents, cacti, jade plants, aloe, echeveria, haworthia, lavender, rosemary, oregano, thyme, and sage are strong choices. These plants generally appreciate good drainage and airflow around the root zone.
Moisture-loving plants may need more attention in terracotta. Ferns, peace lilies, calatheas, and some tropical houseplants prefer consistently moist soil, so they may dry out too quickly unless you water carefully. If you love the doodled look but want a thirstier plant, use the decorated terracotta pot as a cachepot. Place the plant in a plastic nursery pot inside it, then remove the inner pot for watering. That way, your artwork gets to be decorative without constantly battling moisture.
Design Tips for a Professional Look
Limit your color palette. Two or three colors often look more intentional than twelve colors having a meeting with no agenda. White, black, cream, sage, dusty blue, terracotta red, mustard, and soft pink all pair beautifully with clay tones.
Use the rim as a design anchor. A patterned rim can make even a simple pot look finished. Try dots, stripes, scallops, tiny leaves, or a repeated phrase. Around the base, add a second border to frame the design.
Leave some natural terracotta showing. Negative space helps the doodles breathe and keeps the pot from looking too busy. The clay color is part of the beauty, so let it do some of the work.
If you make a mistake, let it dry and paint over it. On porous surfaces, wet rubbing can smear the paint and create a bigger problem. Dry, cover, continue. This is also a useful life philosophy, but we are here for pots.
Common Mistakes to Avoid
Skipping the Drying Time
Terracotta may feel dry on the surface while still holding moisture inside. Give washed pots enough time to dry before decorating. Patience is cheaper than repainting.
Using the Wrong Paint
Watercolor is not ideal for terracotta pots because it lacks the opacity and durability needed for a handled, watered container. Acrylic paint, outdoor craft paint, and paint markers are better options.
Forgetting About Water
If the pot will hold live plants, water exposure is unavoidable. Seal the artwork and avoid soaking the decorated exterior when watering. A saucer helps protect indoor surfaces, but do not let the pot sit in standing water for long periods.
Putting Painted Pots Outside Too Soon
Outdoor pots face sun, rain, temperature changes, and enthusiastic squirrels with questionable boundaries. Let paint and sealer cure fully before outdoor use. In freezing climates, bring terracotta pots indoors or store them dry and protected, because absorbed moisture can expand and crack the clay.
Creative Ways to Use Doodled Terracotta Pots
Doodled terracotta pots are not just for houseplants. Use small pots as desk organizers for pens, makeup brushes, paintbrushes, or garden labels. Turn mini pots into party favors by adding tiny succulents. Make a set of matching herb pots for a kitchen windowsill. Create seasonal designs: pumpkins and leaves for fall, snowflakes for winter, lemons for summer, tulips for spring.
They also make excellent handmade gifts. A doodled pot with a small plant feels personal without being overly complicated. Add a plant care tag and you have a thoughtful present for housewarmings, birthdays, teacher gifts, Mother’s Day, or “I accidentally propagated too many pothos cuttings and now everyone I know is getting one” season.
How to Care for Doodled Terracotta Pots
Clean decorated pots with a soft damp cloth instead of abrasive scrubbers. Avoid harsh cleaners that can cloud the sealer or damage the design. Water the soil, not the pot exterior, whenever possible. If using outdoors, place pots in a sheltered area to reduce direct weather exposure. A covered porch, bright patio corner, or windowsill can extend the life of your design.
Expect natural aging. Even sealed pots may develop small marks, mineral deposits, or a weathered finish over time. That is not necessarily a flaw. Terracotta looks good with age, and doodles can become part of that lived-in garden story.
Experience Notes: What Doodling Terracotta Pots Teaches You
The first thing you learn when doodling terracotta pots is that the pot is not a flat piece of paper. It curves, it absorbs, and it refuses to sit still unless you hold it like a very fragile burrito. That curve changes how you draw. A vine that looks straight from one angle may slowly wander uphill as you rotate the pot. The solution is not perfection; it is rhythm. Small repeated marks are more forgiving than one giant detailed illustration. Dots, leaves, stars, and scallops can hide a multitude of artistic detours.
The second lesson is that simple designs often win. A tiny pot covered in white dots can look more elegant than a complicated scene with five flowers, three bees, a quote, and a sun wearing sunglasses. When working on terracotta, the natural clay color already adds warmth and texture. You do not have to cover every inch. In fact, leaving blank space makes the doodles feel intentional. The pot looks designed, not attacked.
Another useful experience is testing pens before committing. Some paint markers flow quickly on porous clay, while others need shaking, priming, and patience. Always try a small mark on the bottom of the pot or inside the rim. You will learn how opaque the color is, how fast it dries, and whether the tip catches on the surface. White paint pens are especially beautiful on terracotta, but some need two passes for a bold line.
Sealing is where many beginners get humbled. A beautiful doodled pot can look finished, but once watering begins, terracotta reminds you that it is porous. Moisture moves. Paint reacts. The safest habit is to seal with light coats and allow proper curing time. Rushing this step is like baking cookies and grabbing them off the tray with your bare hand because they “look done.” Regret arrives quickly.
Doodling pots also changes how you think about plants. Suddenly, you start matching personality to foliage. A spiky haworthia looks fantastic in a geometric pot. Basil feels right in a labeled kitchen pot with little leaves around the rim. A trailing pothos in a face pot becomes a tiny green-haired roommate. The container and plant begin to work together as a small design moment.
The best part is that doodled terracotta pots invite experimentation. You can make a polished set with matching borders, or you can let every pot have its own mood. One can be celestial, one botanical, one covered in tiny mushrooms, and one decorated with abstract lines that mean “I had coffee and confidence.” The project is low-risk, affordable, and surprisingly relaxing. By the end, you do not just have decorated planters. You have proof that ordinary objects can become joyful with a few thoughtful marks and a little patience.
Conclusion
Doodling terracotta pots is an easy, creative way to personalize your garden, patio, windowsill, or indoor plant collection. The project blends practical container gardening with relaxed handmade art. With clean pots, acrylic paint pens, simple patterns, and a protective sealer, you can create durable, charming planters that feel fresh without looking mass-produced.
Whether you draw vines, stars, herb labels, mushrooms, faces, or abstract patterns, the goal is not perfection. The goal is personality. Terracotta already brings warmth and texture; your doodles simply give it a voice. And if that voice says, “I turned a $3 clay pot into porch decor and now I feel unstoppable,” who are we to argue?
Note: This article is written as original, web-ready HTML body content based on real gardening and DIY craft best practices, with no source links or unnecessary reference tags included.