A wreath without a bow can still be lovely, of course. It can be green, fragrant, festive, and perfectly respectable. But add the right bow, and suddenly that wreath looks like it has plans, confidence, and maybe even its own holiday newsletter. Whether you are decorating a front door for Christmas, freshening up a spring grapevine wreath, or trying to make a fall wreath look less like “I found this in the garage,” learning how to make a bow for a wreath is one of the most useful DIY skills you can pick up.
The good news is that wreath bows do not require a professional florist license, a craft room the size of a small airport, or mysterious bow-making gadgets. Most beautiful bows start with a few basics: ribbon, sharp scissors, floral wire or chenille stems, and a willingness to fluff the loops until they stop looking shy. In this guide, you will learn three beginner-friendly ways to make a bow for a wreath: a classic two-loop bow, a full multi-loop bow, and a layered designer-style bow. Each method creates a different look, so you can choose the one that fits your wreath, season, and level of patience.
Before You Start: Choose the Right Ribbon
The ribbon you choose will decide whether your bow looks crisp and cheerful or sad and floppy. For most wreaths, wired ribbon is the easiest option because the edges can be shaped, lifted, and reshaped after storage. If your wreath hangs on a front door, a wired ribbon also helps the bow stand up to wind, humidity, and repeated door slams from people who apparently do not understand your craft masterpiece.
For a standard door wreath, ribbon that is 2 to 3 inches wide usually works well. Narrow ribbon, around 1 to 1.5 inches, is better for small wreaths, mini wreaths, or layered bows. Extra-wide ribbon, such as 4 inches, can create drama, but it needs larger loops and a sturdy wreath base so the bow does not overpower the whole design.
Supplies You Will Need
- Wired ribbon, satin ribbon, burlap ribbon, velvet ribbon, or grosgrain ribbon
- Sharp fabric scissors
- Floral wire, chenille stems, twist ties, or zip ties
- Wire cutters, if using floral wire
- A wreath base, such as grapevine, evergreen, foam, or wire
- Optional: ruler, hot glue gun, extra ribbon for tails, and decorative picks
A quick tip before you cut: leave yourself more ribbon than you think you need. Bow-making is a little like making pasta. Somehow the “perfect amount” always becomes “why is there not enough?” If you are unsure, work from the spool and trim at the end.
Way 1: Make a Classic Two-Loop Bow for a Wreath
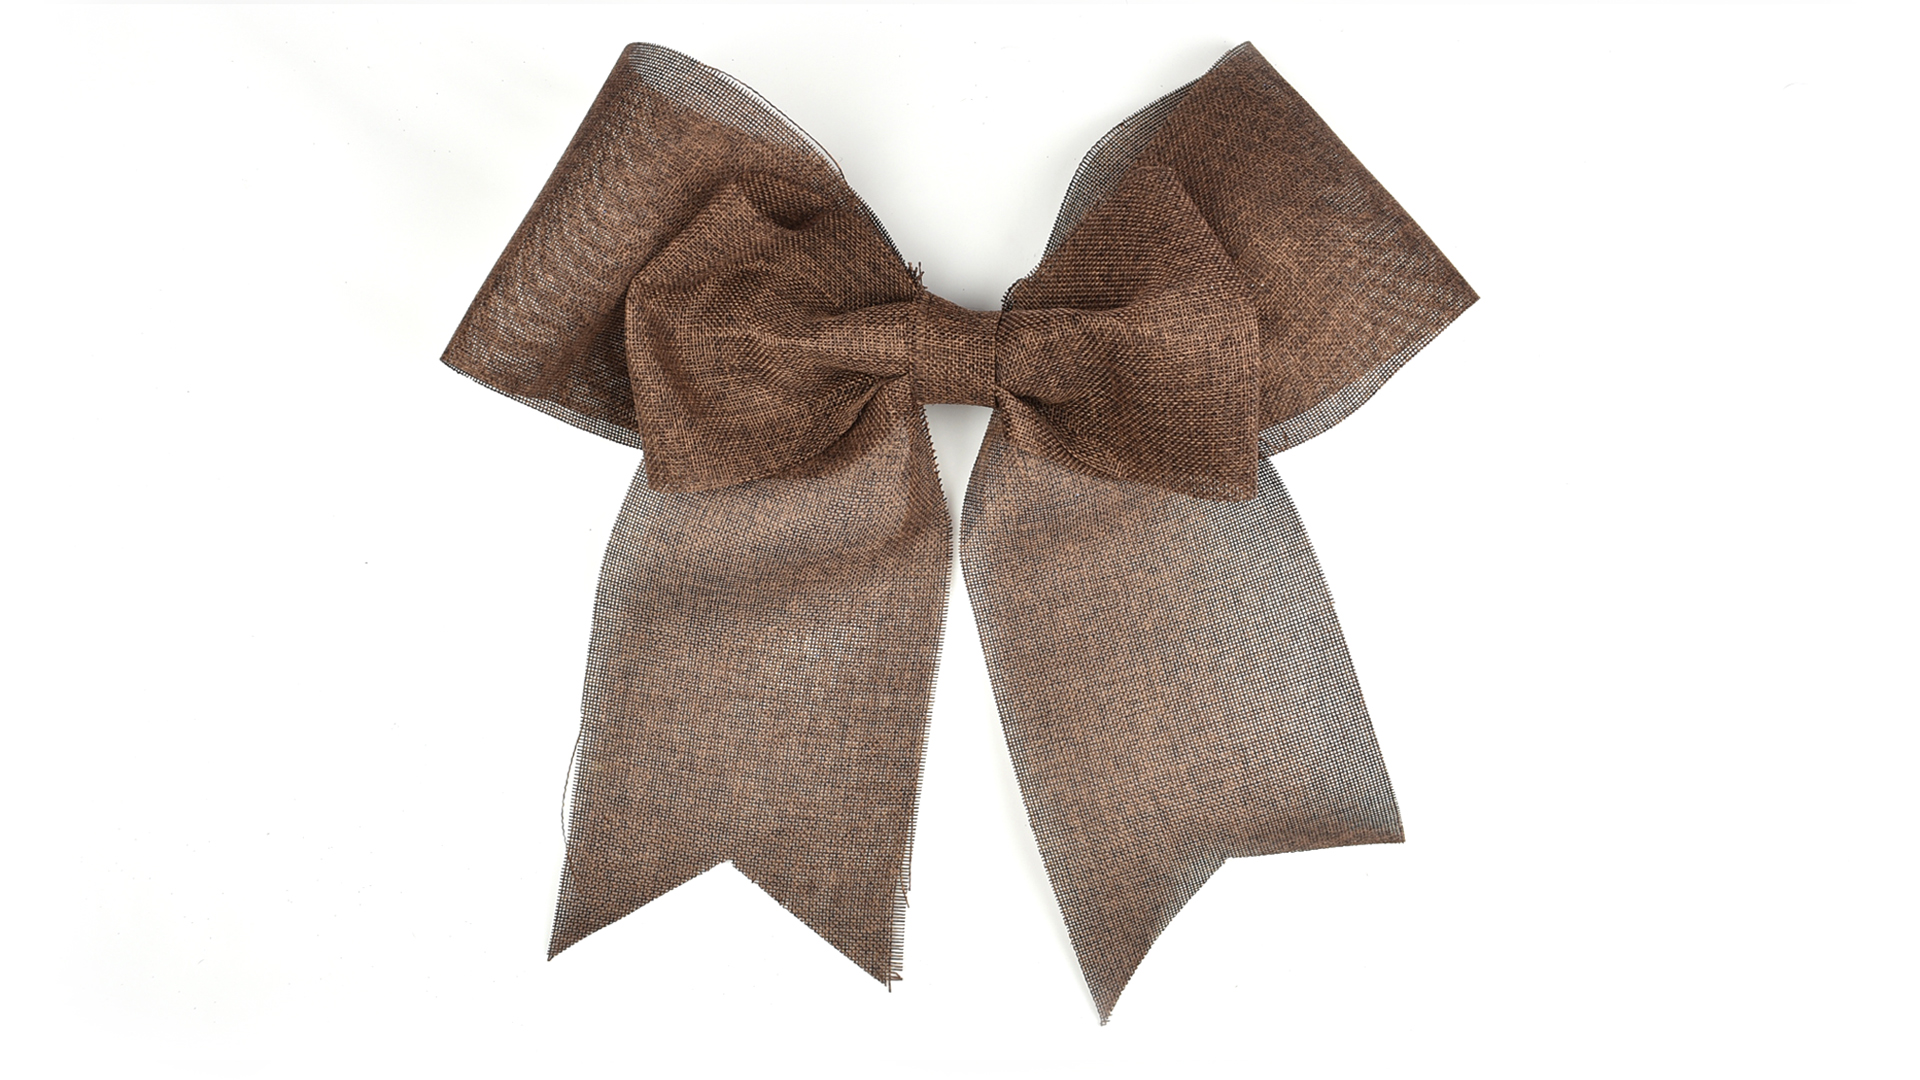
The classic two-loop bow is the bow most people picture first: two rounded loops, two hanging tails, and a neat center knot. It is simple, balanced, and perfect for farmhouse wreaths, traditional evergreen wreaths, Valentine’s Day wreaths, or a small accent on a larger arrangement.
Best For
This method is ideal for beginners, small wreaths, gift-style wreaths, and designs that need a clean finishing touch rather than a giant focal point. It also works beautifully with burlap ribbon, plaid ribbon, gingham ribbon, and velvet ribbon.
Step-by-Step Instructions
Step 1: Cut your ribbon. Start with about 30 to 36 inches of ribbon for a medium bow. For a larger wreath, use a longer piece. You can always trim the tails later, but you cannot magically add length once the ribbon is cut, unless your craft drawer contains wizardry.
Step 2: Make two loops. Hold the ribbon in both hands and form two equal loops, just like tying shoelaces. Try to keep the patterned side facing outward. If your ribbon has a front and back, twist gently at the center so the pretty side shows.
Step 3: Cross and tie. Cross the right loop over the left loop, then bring one loop underneath and through the opening. Pull gently until the center tightens. Do not yank too hard, especially with delicate ribbon, or the bow may wrinkle like it just received bad news.
Step 4: Adjust the loops. Tug each loop until both sides are even. Shape the wire edges with your fingers to make the loops look round and full. If one loop is larger, do not panic. Bow loops are like eyebrows: sisters, not always twins.
Step 5: Trim the tails. Cut the tails at an angle or fold each tail in half lengthwise and snip diagonally from the folded edge toward the outside edge to create a V-shaped notch. This small detail makes the bow look polished and intentional.
Step 6: Attach it to the wreath. Slide floral wire or a chenille stem through the back of the center knot. Wrap it around the wreath base and twist tightly in the back. Tuck the wire ends away so they do not scratch the door or poke your fingers later.
Classic Bow Styling Ideas
For a Christmas wreath, use red velvet ribbon or red-and-black buffalo check. For a spring wreath, try pastel gingham or soft floral ribbon. For fall, burlap, rust, mustard, olive, and plaid ribbons look warm and seasonal. If your wreath already has lots of ornaments, berries, pinecones, or faux flowers, a classic bow is often the best choice because it adds charm without creating visual chaos.
Way 2: Make a Full Multi-Loop Bow
The multi-loop bow is the big, fluffy, “yes, I own a glue gun” bow. It has several loops on each side and creates a full, professional-looking wreath topper. This is the style to use when you want the bow to be the star of the wreath instead of a polite little side character.
Best For
Use this method for Christmas wreaths, large front-door wreaths, patriotic wreaths, fall wreaths, and statement pieces. It works especially well with 2.5-inch wired ribbon because the ribbon holds its shape while still being easy to pinch and fluff.
Step-by-Step Instructions
Step 1: Leave a tail. Pull out 10 to 14 inches of ribbon from the spool. This will become one tail. Pinch the ribbon at the point where the tail ends and the loops begin.
Step 2: Make your first loop. Create a loop about 5 to 7 inches long, depending on the size of your wreath. Pinch the ribbon firmly at the center. If the ribbon has a one-sided pattern, twist the ribbon at the pinch point so the pattern faces outward.
Step 3: Make a matching loop on the other side. Form a second loop of the same size on the opposite side. Pinch it in the center with the first loop. You now have the beginning of a bow and possibly a cramp in your hand. This is normal.
Step 4: Continue adding loops. Repeat the process, alternating sides, until you have three to five loops on each side. For a very full bow, make each new loop slightly larger than the previous one. This helps the loops fan out instead of stacking in one awkward pile.
Step 5: Secure the center. Wrap floral wire, a chenille stem, or a zip tie around the pinched center. Twist tightly at the back. The center must be secure because this is what keeps the bow from falling apart after all your dramatic fluffing.
Step 6: Add the second tail. Cut the ribbon from the spool, leaving another tail about the same length as the first. If needed, wire a separate strip of ribbon to the back of the bow to create longer tails.
Step 7: Fluff the loops. Pull the loops apart one by one, alternating directions. Shape each loop with your fingers. Wired ribbon lets you curve the edges upward, widen the loops, and add volume. This step matters. A multi-loop bow before fluffing looks like a ribbon sandwich. After fluffing, it looks like door decor royalty.
How Big Should a Multi-Loop Bow Be?
For a 16- to 18-inch wreath, loops around 5 inches long usually look balanced. For a 20- to 24-inch wreath, try loops between 6 and 8 inches. The bow should enhance the wreath, not swallow it whole. If the wreath disappears behind the bow, you have made a ribbon octopus. A festive one, yes, but still an octopus.
Multi-Loop Bow Styling Ideas
For a holiday wreath, combine plaid wired ribbon with solid velvet tails. For a spring wreath, try a floral ribbon with a solid pastel ribbon. For Fourth of July wreaths, layer red, white, and blue ribbon in different widths. The secret is contrast: mix a pattern with a solid, a matte texture with a shiny one, or a bold color with a neutral.
Way 3: Make a Layered Designer Bow
A layered bow looks fancy, but it is surprisingly forgiving. Instead of making one complicated bow, you create separate ribbon layers and secure them together. This method is excellent when you want a boutique-style bow with multiple colors, textures, and patterns.
Best For
This bow is best for large seasonal wreaths, custom wreaths, front porch decor, wedding wreaths, and designs where you want a polished, high-end look. It is also helpful when you have leftover ribbon pieces from other projects and want to pretend that was the plan all along.
Step-by-Step Instructions
Step 1: Choose two or three ribbons. Select ribbons that coordinate but do not compete. A good formula is one patterned ribbon, one solid ribbon, and one textured ribbon. For example, use red plaid, solid red velvet, and natural burlap for a classic Christmas wreath.
Step 2: Cut the base layer. Cut a long strip of your widest ribbon, about 30 to 36 inches. Fold each end toward the center to create two large loops. Overlap the ends slightly in the middle and pinch.
Step 3: Add the second layer. Cut a slightly shorter strip of ribbon, about 24 to 30 inches. Fold it the same way and place it on top of the first layer. Pinch both layers together in the center.
Step 4: Add a small top layer. Cut a third ribbon strip, about 18 to 24 inches, and create smaller loops. Place this on top. The stacked layers should look like a bow with depth, movement, and a tiny bit of attitude.
Step 5: Secure the center. Wrap floral wire or a chenille stem around the pinched center and twist tightly in the back. If you are using thick ribbon, a zip tie can provide extra strength. Cover the center with a small strip of ribbon if you want a cleaner finish.
Step 6: Add tails. Cut two or four ribbon tails and wire them to the back of the bow. V-cut or angle-cut the ends. For a designer look, use tails in different lengths so they cascade naturally down the wreath.
Step 7: Shape and attach. Spread the loops apart, bend the wired edges, and arrange the tails. Attach the bow to the wreath with floral wire. Step back and check the proportions before tightening everything fully.
Layered Bow Styling Ideas
A layered designer bow is perfect for mixing textures. Try velvet with metallic ribbon for winter, linen with floral ribbon for spring, or burlap with plaid for fall. For a coastal wreath, combine navy ribbon, white grosgrain, and jute. For a modern wreath, use black-and-white stripe ribbon with a solid satin accent. Keep the colors connected to the wreath materials so the bow looks integrated instead of randomly invited.
Where to Place the Bow on a Wreath
Bow placement changes the personality of your wreath. A bow at the top feels classic and formal. A bow at the bottom feels traditional and balanced. A bow placed slightly to the side gives the wreath a more modern, designer look. For grapevine wreaths with flowers or greenery on one side, place the bow where the arrangement feels visually heavy to create balance.
If your wreath is very symmetrical, a centered bow works well. If the greenery, ornaments, or florals are arranged asymmetrically, an off-center bow may look more natural. Before wiring the bow permanently, hold it in different spots and take a quick photo. Photos make it easier to see whether the bow looks balanced because your eyes are less distracted by the fact that you are standing in the hallway holding ribbon like a very determined elf.
Common Wreath Bow Mistakes and How to Fix Them
The Bow Looks Flat
Use wired ribbon and fluff each loop individually. Slide your fingers inside the loops, curve the edges outward, and separate the layers. If the ribbon is too soft, add a second layer of wired ribbon behind it.
The Loops Are Uneven
Measure your first loop and use it as a guide. You do not need perfection, but the loops should look intentional. If one side is much larger, gently pull ribbon from the center before tightening the wire completely.
The Tails Hang Awkwardly
Trim the tails shorter, curl wired tails slightly, or cut them at different lengths for a cascading effect. If the tails are too stiff, bend them gently instead of forcing them flat.
The Bow Slides Around
Attach the bow with floral wire wrapped around the wreath frame, not just the greenery. If needed, add a second piece of wire at the back of the bow for extra stability.
Best Ribbon Types for Wreath Bows
Wired ribbon is the easiest and most reliable choice for wreath bows because it holds its shape. Velvet ribbon gives a rich, elegant look, especially for Christmas and winter wreaths. Burlap ribbon works well for farmhouse, rustic, and fall wreaths. Satin ribbon is smooth and shiny but can be slippery, so it may need extra wire support. Grosgrain ribbon has a ribbed texture and is great for cheerful, casual wreaths.
For outdoor wreaths, look for ribbon labeled for indoor-outdoor use or choose sturdy wired ribbon that can handle weather better than delicate fabric ribbon. If your front door gets direct sun, very dark or bright ribbon may fade faster, so consider seasonal replacement or shaded placement.
Extra Experience: What I Learned Making Wreath Bows the Hard Way
After making more wreath bows than I care to admit, I have learned that the first bow is rarely the final bow. The first one is usually the “practice pancake” of craft projects. It tells you what the ribbon wants to do, how large the loops should be, and whether your scissors are sharp enough or secretly decorative. The biggest lesson is not to tighten the center too soon. When you secure the bow before adjusting the loops, you trap every mistake in place. It is much easier to loosely hold the center, check the shape, and then tighten the wire once everything looks balanced.
I have also learned that wired ribbon is worth it, especially for wreaths. Non-wired ribbon can look pretty on a gift, but on a front door it often droops after a few days. Wired ribbon lets you revive the bow by reshaping the loops with your fingers. This is especially useful after storage. If you pull a wreath out of a bin and the bow looks like it lost a wrestling match, do not throw it away. Fluff the loops, curl the tails, and gently bend the edges back into shape.
Another experience-based tip: do not choose ribbon only because it is cute on the spool. Ribbon can look very different once it is folded into loops. Large patterns may disappear, tiny patterns may look busy, and glitter ribbon may leave evidence on every surface in your home. Before committing, make one test loop and hold it against the wreath. If the color disappears into the greenery, choose more contrast. If the pattern fights with the ornaments, go simpler.
Scale is another lesson that comes with practice. A tiny bow on a large wreath can look accidental, while a massive bow on a small wreath can look like the ribbon is holding the greenery hostage. For most front-door wreaths, the bow should feel like an accent or focal point, not a total takeover. When in doubt, make the loops slightly smaller and the tails slightly longer. Long tails can add movement without making the bow look bulky.
Finally, the best bows often come from small adjustments rather than complicated techniques. A cleaner center wrap, sharper tail cuts, fuller loop shaping, and better placement can make a simple bow look expensive. You do not need to master every bow style at once. Start with the classic two-loop bow, move to the multi-loop bow when you want volume, and try a layered bow when you are ready to mix ribbons. Once you understand those three methods, you can decorate wreaths for every season without buying premade bows that cost more than the wreath itself.
Conclusion
Learning how to make a bow for a wreath gives you creative control over your seasonal decor. You can choose the ribbon, adjust the size, match your color palette, and create a custom look for Christmas, fall, spring, summer, weddings, birthdays, or everyday front-door charm. The classic two-loop bow is quick and timeless, the multi-loop bow adds fullness and drama, and the layered designer bow gives your wreath a polished, boutique-style finish.
The real secret is simple: use the right ribbon, secure the center tightly, fluff with confidence, and do not be afraid to adjust. A wreath bow is not supposed to be perfect straight from your hands. It becomes beautiful in the shaping. So grab your ribbon, cut a little extra, and prepare to give your wreath the kind of bow that makes the neighbors slow down just a little.