Hanging a TV on the wall sounds simple until you are standing in the living room with a drill in one hand, a stud finder in the other, and a very expensive screen staring at you like it has trust issues. The good news? Learning how to hang a TV on the wall is absolutely doable for many homeowners, renters with permission, and brave weekend warriors who understand one important rule: gravity is undefeated.
A properly mounted TV can make a room feel cleaner, bigger, safer, and more modern. It frees up floor space, reduces furniture clutter, and helps keep the screen away from pets, kids, and that one friend who gestures too dramatically during football season. But a bad TV mounting job can lead to crooked screens, damaged drywall, hidden cable headaches, or the dreaded midnight crash that makes everyone in the house sit straight up like a horror movie just started.
This guide walks you through the full process: choosing the right wall, finding studs, picking a mount, measuring height, drilling pilot holes, securing the bracket, managing wires, and avoiding the most common mistakes. By the end, you will know how to hang a TV securely, neatly, and without turning your wall into Swiss cheese.
Why Wall Mounting a TV Is Worth It
Wall mounting a TV is not just about making your room look like a glossy home-theater catalog. It solves several real-life problems. First, it saves space. A mounted TV eliminates the need for a bulky entertainment stand, which is especially helpful in apartments, bedrooms, offices, and small living rooms.
Second, it improves safety. A TV sitting on furniture can tip forward if bumped, climbed on, or pulled. Wall mounting, when done correctly into studs or an appropriate masonry surface, keeps the TV more secure. This is especially important in homes with children or pets.
Third, it improves viewing comfort. When the TV is positioned at the right height and angle, you can avoid neck strain, screen glare, and the classic “why does my couch feel like a dentist chair?” viewing posture.
Before You Start: Know Your TV, Wall, and Mount
Before drilling anything, collect the basic facts. You need to know your TV size, TV weight, VESA pattern, wall type, stud location, and mount rating. Skipping this step is like assembling furniture without reading the instructions, except the furniture costs $800 and can fall on your soundbar.
Check the TV Weight
Every TV mount has a maximum weight rating. Your TV must be under that limit, and it is smart to leave a safety margin. Do not assume a large mount can hold every large TV. Some 65-inch TVs are surprisingly light, while older or specialty screens may weigh more than expected. Check the TV manual, manufacturer website, or product label for the actual weight.
Check the VESA Pattern
VESA is the standard spacing pattern for the mounting holes on the back of many TVs. It is usually listed in millimeters, such as 200×200, 300×300, 400×400, or 600×400. Your wall mount must support your TV’s VESA pattern. If the holes do not line up, the mount is not compatible, no matter how confidently the box smiles at you from the shelf.
Know Your Wall Type
Most TV mounting projects involve drywall over wood studs. That is the classic setup. However, some homes have metal studs, plaster, brick, concrete, stone, or tile. Each surface requires different hardware and sometimes professional installation. Drywall alone is not enough for a standard TV mount unless you are using a mount system specifically designed and rated for that type of wall.
Tools and Materials You Will Need
Having the right tools makes the job cleaner, safer, and less likely to turn into a three-hour family debate. Gather everything before you begin.
- TV wall mount rated for your TV size and weight
- Stud finder
- Measuring tape
- Pencil or painter’s tape
- Level
- Drill and drill bits
- Socket wrench or ratchet
- Screwdriver
- Mounting hardware included with the bracket
- Two people for lifting the TV
- Cable raceway or in-wall rated cable kit, if hiding wires
One tool deserves special attention: the stud finder. A basic electronic stud finder can save your wall, your TV, and your weekend. For extra confidence, verify stud locations by measuring from nearby outlets or using a small finishing nail in an area that will be covered by the mount.
Step 1: Choose the Best Wall for the TV
The best wall for a TV is not always the biggest wall. Look at viewing distance, glare, seating position, outlet location, wall structure, and room flow. You want the TV to feel natural, not like it was installed by someone who lost a bet.
Avoid mounting the TV where direct sunlight hits the screen for long periods. Glare can make the picture hard to see, and heat is not friendly to electronics. Also think twice before mounting over a fireplace. It may look dramatic, but fireplaces can place the TV too high and expose it to heat. If you must mount above a fireplace, check temperature conditions, use a tilting mount, and make sure the viewing angle will not punish your neck.
Step 2: Pick the Right TV Wall Mount
There are three common mount types: fixed, tilting, and full-motion. Each has a purpose.
Fixed TV Mount
A fixed mount keeps the TV close to the wall. It is usually affordable, slim, and clean-looking. Choose this if your seating is directly in front of the TV and you do not need angle adjustments.
Tilting TV Mount
A tilting mount lets you angle the TV downward. This is useful if the screen is mounted slightly above eye level, such as in a bedroom or over a low mantel. It can also help reduce glare.
Full-Motion TV Mount
A full-motion mount can extend, swivel, and tilt. It is excellent for open rooms, corner viewing, kitchens, multi-seat living rooms, and anyone who wants flexibility. The tradeoff is that full-motion mounts place more leverage on the wall, so correct installation into studs or masonry is extra important.
Step 3: Decide the Correct TV Height
The most comfortable TV height usually places the center of the screen near eye level when you are seated. For many living rooms, that means the center of the TV is roughly 42 inches from the floor, but this is not a universal law carved into stone by the Home Theater Council of Couch Potatoes.
Measure your actual seating height. Sit where you normally watch TV, look straight ahead, and mark that line on the wall. That is your comfort zone. If the TV must be mounted higher, choose a tilting mount to angle the screen downward.
For bedrooms, the TV is often mounted higher because viewers are reclining. In that case, test the angle from the bed before drilling. A cardboard template or painter’s tape outline can help you visualize the screen position.
Step 4: Find and Mark the Studs
For drywall installations, the mount should usually be anchored into wall studs. Use a stud finder to locate the edges of each stud, then mark the center. Most wood studs in U.S. homes are spaced 16 inches apart, though 24-inch spacing is also common.
Do not rely on luck, vibes, or the “tap the wall and listen” method alone. Tapping can help confirm what you found, but a stud finder and careful measuring are better. Once you identify the studs, hold the wall bracket up and confirm that its mounting holes line up with the stud centers.
Step 5: Attach the Mounting Arms to the TV
Place the TV screen-side down on a soft blanket, clean rug, or padded surface. Never lay it on a hard surface. Attach the vertical mounting arms to the back of the TV using the correct screws, washers, and spacers provided with the mount.
This is where the manual matters. Screws that are too short may not hold properly. Screws that are too long can damage the inside of the TV. Use the screw length recommended for your model and VESA depth. If spacers are included, they may be needed for curved backs, recessed holes, or cable clearance.
Step 6: Position and Level the Wall Plate
Hold the wall plate against the wall at the planned height. Use a level to make sure it is straight. Mark the pilot hole locations with a pencil. If the mount includes a paper template, use it. Templates are basically cheat codes for people who enjoy straight lines.
Before drilling, step back and check the position from the room’s main seating area. Make sure the TV will be centered with the couch, console, bed, or focal point. A technically level TV that is visually off-center can bother you forever. Or at least until you move.
Step 7: Drill Pilot Holes
Drill pilot holes into the marked stud centers using the bit size recommended in the mount instructions. Pilot holes help prevent splitting wood studs and make lag bolts easier to drive. They also help confirm that you are drilling into solid wood, not empty drywall.
If the drill suddenly pushes through with no resistance, stop. You may have missed the stud. Recheck your marks before continuing. Do not “just send it.” That phrase is great for ski videos, not TV mounting.
Step 8: Secure the Wall Plate
Place the wall plate over the pilot holes and drive the lag bolts into the studs. Tighten them firmly with a socket wrench, but do not overtighten to the point of crushing drywall or stripping hardware. The mount should sit flat, secure, and level.
After fastening, pull gently on the mount to test for movement. It should not shift, wobble, or make suspicious sounds. If something feels loose, fix it before hanging the TV.
Step 9: Hang the TV on the Mount
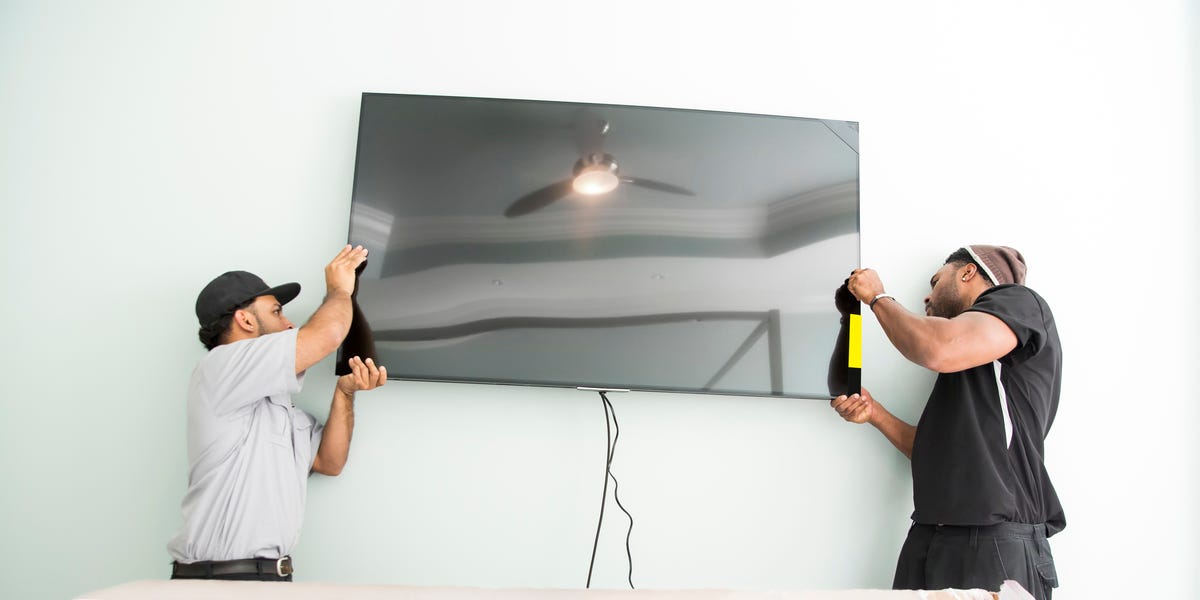
This is a two-person step. Even lightweight TVs are awkward because they are wide, thin, and easy to bump. One person should guide each side of the TV while lifting it onto the wall bracket. Follow the mount’s locking system exactly. Some mounts hook onto the wall plate; others slide or click into place.
Once the TV is seated, secure the safety screws, locking tabs, or pull cords required by the mount. Do not skip this step. Those small locks help keep the TV from being lifted off the bracket accidentally.
Step 10: Manage the Cables Safely
Cable management is where a good installation becomes a great installation. You have three common options: visible cable bundling, surface raceways, or in-wall cable management.
Surface raceways are the easiest. They stick or screw to the wall and cover the cords neatly. You can often paint them to match the wall. This is a great choice for renters or anyone who wants a clean look without cutting drywall.
For in-wall cable management, use cables rated for in-wall use, such as properly rated HDMI or low-voltage cables. Do not run a standard TV power cord or extension cord inside the wall. For power, use a code-compliant in-wall power relocation kit or have an electrician install an outlet behind the TV.
Common Mistakes When Hanging a TV
Mounting Too High
The most common mistake is hanging the TV too high. A TV should not feel like it is supervising the room from a watchtower. Unless you are mounting in a bedroom or above a fireplace, keep the screen center close to seated eye level.
Using the Wrong Anchors
Drywall anchors are not a magic solution for every TV. Standard hollow-wall anchors are not appropriate for many TV mounts. Heavy TVs and full-motion mounts need solid structural support. When in doubt, mount into studs, masonry, or consult a professional.
Ignoring Cable Access
Ultra-slim mounts look beautiful, but they can make HDMI ports difficult to reach. If your TV has rear-facing ports, consider plugging in cables before hanging the screen or choosing a mount that allows easier access.
Forgetting About Future Devices
Today you may only have a streaming stick. Tomorrow you may add a game console, soundbar, antenna, or media box. Plan extra HDMI cable length and accessible ports so you do not have to unmount the TV every time your entertainment setup evolves.
How to Hang a TV Without Studs
Mounting a TV without studs is possible only with the right hardware, the right wall, and the right expectations. Some specialty mounts are designed for no-stud drywall installation and use multiple fasteners to distribute weight. Heavy-duty toggle bolts may work in certain cases, but they are not automatically safe for every TV or every mount.
The key is to follow the mount manufacturer’s instructions exactly. Check the rated TV size, weight limit, wall compatibility, and installation method. If you are mounting a large TV, a full-motion bracket, or anything on questionable drywall, hire a professional. The cost of installation is much cheaper than replacing a TV and repairing a wall that gave up dramatically.
How to Mount a TV on Brick or Concrete
Brick and concrete can provide excellent support, but they require masonry anchors, masonry drill bits, and careful drilling. Do not use standard wood screws. Use hardware rated for masonry and compatible with the mount.
For brick walls, drill into the brick rather than the mortar when possible, unless the mount instructions state otherwise. Mortar can be weaker and more likely to crumble. For concrete, use the correct anchor depth and keep the holes clean before inserting anchors.
Should You Hire a Professional?
A DIY TV mounting project is reasonable if you have standard drywall over wood studs, the right tools, and a manageable TV size. However, professional installation is a smart choice if the TV is very large, the wall is brick or stone, the studs are metal, the wiring needs to be moved, or you want a hidden power outlet installed.
Also consider hiring help if you are unsure about what is inside the wall. Plumbing, electrical wiring, and HVAC lines can all hide behind drywall. Drilling blindly is a fantastic way to create a problem that starts with “uh-oh” and ends with an invoice.
TV Wall Mounting Checklist
- Confirm TV weight and VESA pattern.
- Choose a mount rated for your TV size and weight.
- Decide between fixed, tilting, or full-motion.
- Pick a wall with good viewing angles and minimal glare.
- Find and mark stud centers.
- Measure the ideal viewing height.
- Attach mounting arms to the TV.
- Level and mark the wall plate.
- Drill pilot holes into studs.
- Secure the wall plate with proper hardware.
- Lift the TV with a helper.
- Lock the TV onto the mount.
- Manage cables safely.
- Test viewing angle, tilt, and stability.
Real-World Experience: What People Learn After Hanging a TV
Most people begin a TV mounting project thinking the hard part will be lifting the TV. In reality, the hardest part is usually planning. The best installations often happen before the drill ever touches the wall. The homeowners who get the cleanest results are the ones who spend extra time measuring, checking studs, testing height, and thinking through cable access.
One common experience is realizing that “centered on the wall” and “centered for viewing” are not always the same thing. A TV may look mathematically centered on a blank wall but feel off when viewed from the couch. In living rooms, the better reference point is often the seating area, not the wall itself. A TV should serve the people watching it, not the drywall.
Another lesson is that cable planning matters more than expected. Many people mount the TV beautifully, step back proudly, and then notice four cables hanging down like electronic spaghetti. A simple raceway can fix the look quickly, but planning ahead gives better results. Plug in HDMI cables before hanging the TV, label them, and leave enough slack so ports are not under stress.
Height is another classic learning moment. A TV that looks perfect while you are standing may feel too high when you sit down. This is why painter’s tape is such a helpful trick. Tape the outline of the TV on the wall, sit in your normal spot, and watch the imaginary screen for a minute. If your chin tilts up like you are watching fireworks, lower it.
People also learn that full-motion mounts are wonderful but demanding. A full-motion mount gives flexibility, especially in open spaces, but it also creates more force on the wall when extended. That makes strong anchoring essential. For big screens, a full-motion bracket should feel rock solid before the TV goes anywhere near it.
Another real-world tip: keep the mount instructions. Tape them inside a cabinet or save a photo on your phone. Months later, when you need to remove the TV, adjust the tilt, or tighten something, those instructions will suddenly become more interesting than any streaming series.
Finally, the best experience comes from patience. Rushing leads to crooked marks, missed studs, scratched walls, and arguments over whether the TV is “a little tilted” or “obviously leaning like a ship in a storm.” Take your time, use a level, ask for help lifting, and double-check every measurement. A wall-mounted TV should feel invisible in the best way: secure, straight, comfortable, and ready for movie night.
Conclusion
Learning how to hang a TV on the wall is one of those home projects that delivers a big visual upgrade without requiring a full renovation. The secret is not brute force. It is preparation. Choose the right mount, confirm the VESA pattern, anchor into studs or the proper wall structure, place the screen at a comfortable height, and manage cables safely.
A mounted TV can make your space feel cleaner, more open, and more polished. It can also help protect your screen from bumps, tip-overs, and furniture clutter. Whether you are creating a cozy bedroom setup, a family movie zone, or a living room that finally looks like adults live there, the process is manageable when you respect the wall, the hardware, and gravity’s impressive resume.