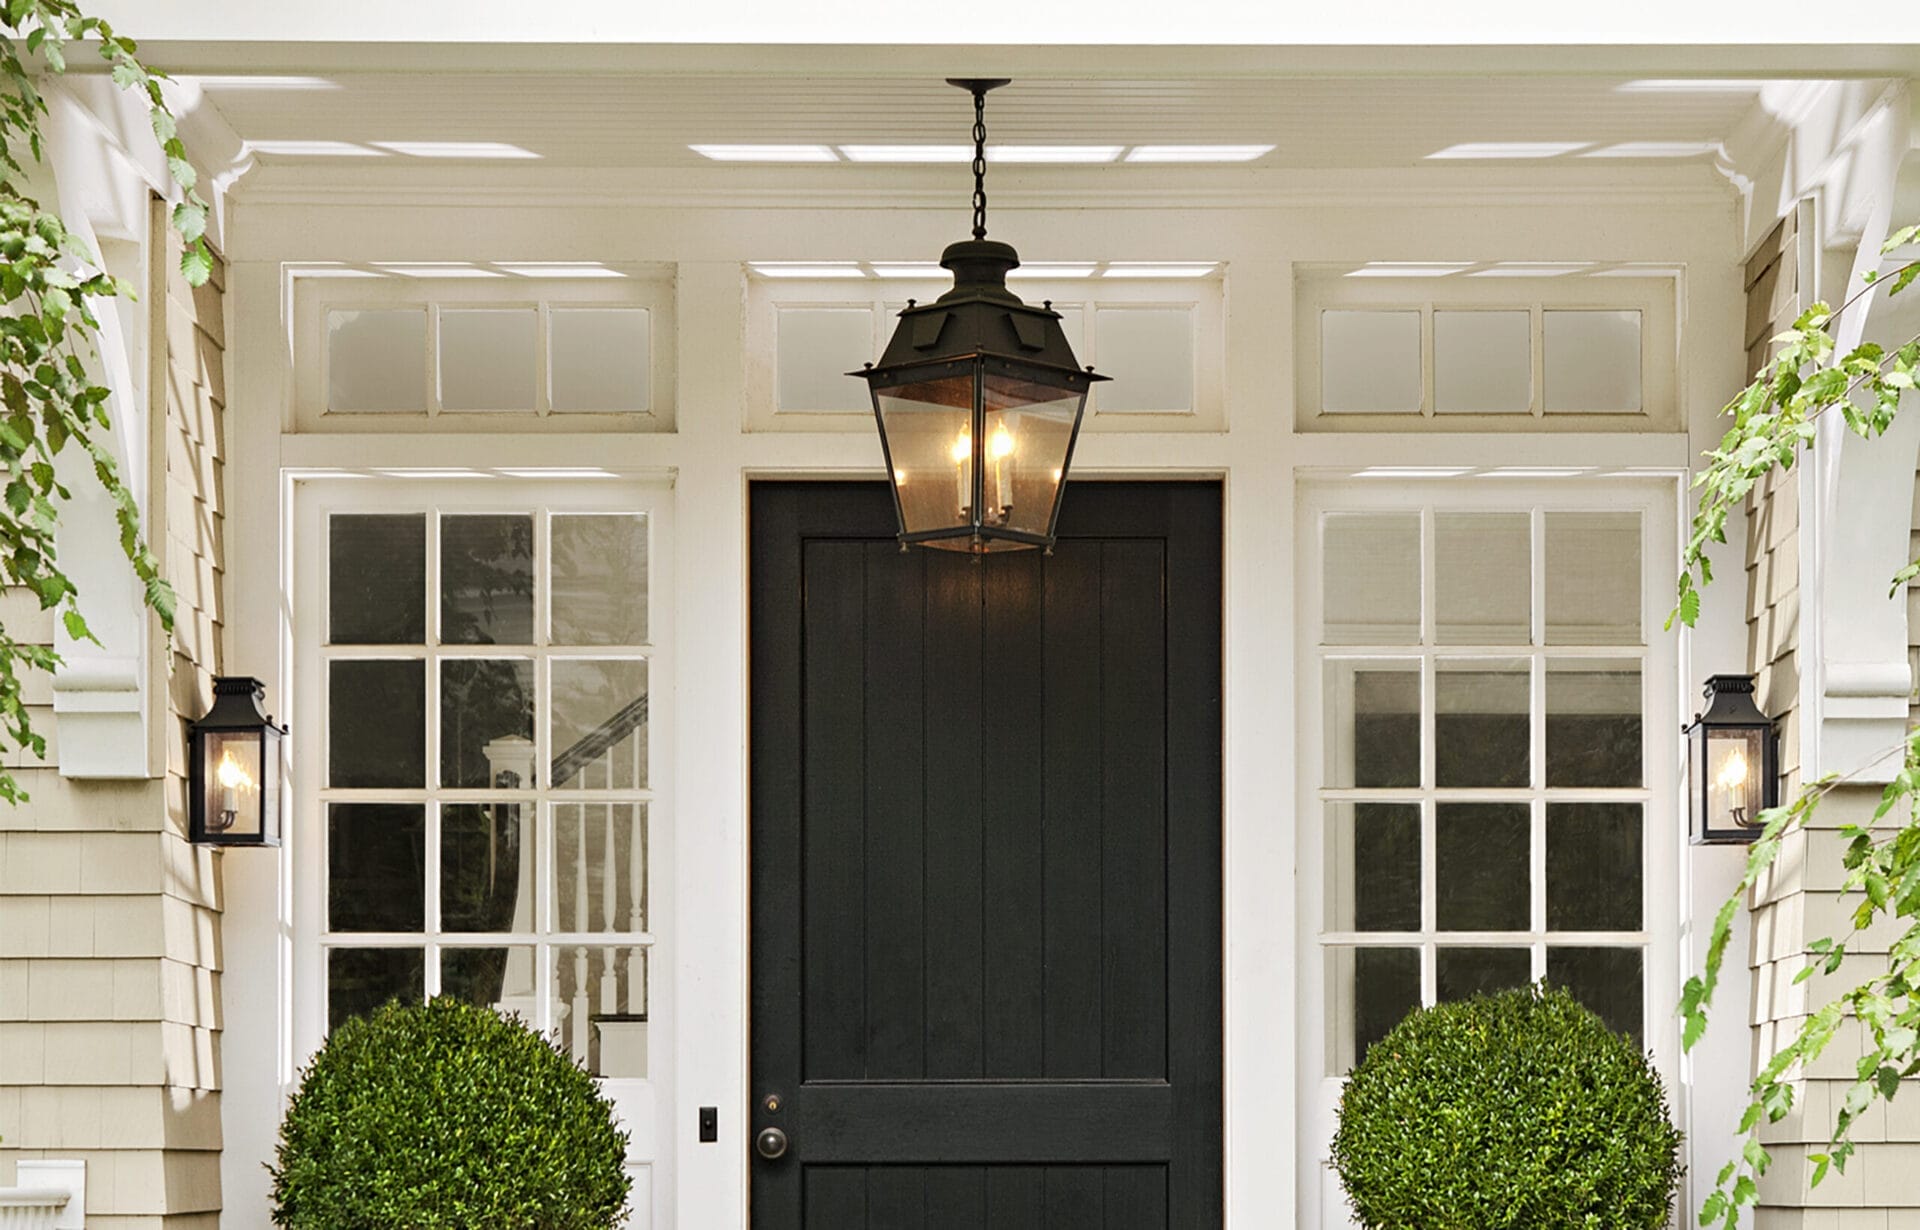
Exterior light fixtures do far more than keep you from introducing your shin to a porch step after sunset. They shape curb appeal, make entrances feel welcoming, improve visibility, and help define a home’s architectural personality. The right fixture can make an ordinary doorway look thoughtfully designed; the wrong one can resemble a tiny plastic earring attached to a very large house.
Choosing outdoor lighting requires more than falling in love with a pretty lantern. You need to consider fixture type, scale, finish, weather resistance, brightness, color temperature, placement, and maintenance. This guide explains how to bring those decisions together so your lights look stylish during the day and perform beautifully at night.
Begin With the Job Each Exterior Light Must Do
Before comparing black, bronze, brass, or stainless steel, decide what you expect the fixture to accomplish. Outdoor lighting generally serves three overlapping purposes: safety, security, and atmosphere.
Safety Lighting
Safety lighting helps people navigate steps, paths, driveways, gates, and changes in elevation. It should reveal obstacles without shining directly into anyone’s eyes. Low-level path lights, step lights, recessed deck lights, and carefully aimed wall fixtures work well here.
More brightness is not automatically safer. Excessive glare can reduce visibility by creating harsh contrast between bright and dark areas. A softly illuminated stair tread is usually more helpful than a miniature stadium light pointed at the person climbing it.
Security Lighting
Security lighting covers entrances, garage doors, side yards, and other areas where clear visibility matters. Floodlights, motion-activated fixtures, and dusk-to-dawn lights are common choices. Motion sensors are especially useful because they provide light when activity is detected rather than keeping the property fully illuminated all night.
Ambient and Accent Lighting
Ambient lighting creates a comfortable glow for porches, decks, patios, and outdoor kitchens. Accent lighting highlights stonework, trees, columns, address numbers, or other architectural features. The best exterior lighting plans combine ambient, task, and accent light instead of forcing one heroic fixture to do everything.
Match Exterior Light Fixtures to Your Home’s Style
Your fixtures do not need to be exact replicas of your home’s architectural details. They should, however, speak roughly the same design language. A sleek rectangular sconce can complement a traditional house when its proportions and finish are restrained, while an ornate carriage lantern may look oddly dressed up on a minimalist concrete facade.
Traditional and Colonial Lighting
Traditional exterior light fixtures often feature lantern shapes, curved arms, decorative finials, seeded glass, and symmetrical proportions. Black, antique brass, copper, and bronze finishes reinforce their classic character.
These fixtures suit Colonial, Georgian, Federal, and other historically influenced homes. Choose clear or lightly textured glass when you want a brighter appearance. Heavily seeded or frosted glass produces a softer glow but may reduce visible light output.
Craftsman and Mission Style
Craftsman lighting favors strong horizontal and vertical lines, broad roof-like tops, warm metals, and amber or textured glass. The fixtures often feel substantial and handcrafted rather than delicate.
Oil-rubbed bronze, aged copper, and dark iron finishes coordinate naturally with stone, stained wood, earth-toned siding, and exposed structural details. This style is a strong choice for bungalows, cabins, and homes with rustic landscaping.
Modern and Contemporary Fixtures
Modern exterior lighting typically uses simple geometric forms, concealed hardware, integrated LEDs, and clean finishes. Cylinders, narrow rectangles, cubes, and minimalist up-and-down sconces are common.
Matte black creates graphic contrast, while stainless steel and brushed aluminum feel crisp and technical. For a warmer modern look, consider aged brass, dark bronze, or fixtures combining metal with natural-looking materials.
Farmhouse and Industrial Lighting
Farmhouse fixtures borrow from barns, workshops, and utility buildings. Look for wide metal shades, gooseneck arms, cages, and uncomplicated silhouettes. Industrial fixtures may use exposed fasteners, heavier proportions, or dark weathered finishes.
Galvanized metal and matte black remain popular, but they are not the only choices. Bronze or warm brass can prevent a farmhouse exterior from becoming a black-and-white costume party.
Coastal Lighting
Coastal style can range from relaxed cottage lanterns to streamlined nautical fixtures. Clear glass, cage details, rounded bulkhead forms, and simple silhouettes fit the theme without requiring decorative anchors or tiny metal sailboats.
Material selection is crucial near saltwater. Marine-grade stainless steel, solid brass, quality copper, and corrosion-resistant composite fixtures generally perform better than thin, poorly coated metals in salty air.
Transitional Lighting
Transitional fixtures blend traditional shapes with simplified detailing. A classic lantern might lose its scrollwork and gain a clean rectangular frame. This makes transitional lighting flexible enough for renovated older homes, suburban architecture, and exteriors that mix several design influences.
How to Choose the Best Exterior Light Finish
A finish affects both appearance and long-term upkeep. Think about the house color, roofing, door hardware, climate, and how much natural aging you are willing to accept.
Matte Black
Matte black is versatile, bold, and easy to coordinate with windows, doors, railings, and modern hardware. It works with white siding, brick, stucco, wood, and many mixed-material exteriors.
The drawback is visibility of dust, pollen, mineral residue, and fading on lower-quality coatings. Look for durable powder-coated finishes and follow the manufacturer’s cleaning instructions.
Bronze and Oil-Rubbed Bronze
Bronze finishes offer warmth without demanding attention. They blend comfortably with brick, stone, cedar, beige siding, and traditional architecture. Because “oil-rubbed bronze” describes an appearance rather than one universal color, it can range from nearly black to medium brown with copper highlights.
Compare actual samples when coordinating several brands. Otherwise, your matching bronze collection may arrive looking like distant cousins who met for the first time at installation.
Brass and Aged Brass
Brass brings warmth and a tailored appearance to traditional, transitional, and modern homes. Polished brass feels formal, while aged or weathered brass appears softer and more relaxed.
Solid, unlacquered brass may develop a natural patina. Some homeowners love that evolving finish; others prefer a consistent factory appearance. Confirm whether a fixture is solid brass, brass-plated, or simply painted a brass color before purchasing.
Copper
Copper is prized for its rich color and natural aging. Over time, untreated copper may shift from bright orange-brown to deeper brown and eventually develop green-blue patina in certain environments.
It works especially well with stone, wood, shingles, and established landscaping. Copper is usually more expensive than painted aluminum, but its appearance can become more interesting with age rather than merely looking old.
Stainless Steel and Brushed Nickel
Stainless steel suits contemporary and coastal exteriors, particularly when the architecture already includes metal railings, gray siding, concrete, or large glass surfaces. Choose outdoor-grade stainless steel suited to your climate, since not every stainless alloy offers identical corrosion resistance.
Brushed finishes usually conceal fingerprints and small water spots better than highly polished ones.
Galvanized and Zinc-Tone Finishes
Galvanized metal delivers a practical farmhouse or industrial look. It pairs naturally with barn lights, gooseneck fixtures, and simple shades. Some products use genuine galvanized steel, while others imitate the appearance with paint, so check the material specifications if durability matters.
White and Colored Fixtures
White fixtures can disappear against pale siding or create a fresh coastal effect. Deep green, navy, red, and other colored finishes can emphasize an entrance or coordinate with shutters and trim.
Color is most successful when repeated somewhere else on the exterior. One bright fixture surrounded by unrelated finishes may look less like a design decision and more like a shipping error.
Choose Materials for Your Climate
The finish is what you see; the underlying material is what survives the weather. Common fixture materials include aluminum, steel, stainless steel, brass, copper, and engineered composites.
- Powder-coated aluminum is lightweight, widely available, and reasonably corrosion resistant when the coating remains intact.
- Steel is strong but requires effective protective coatings to reduce rust.
- Stainless steel offers a clean look and good durability, although grade and maintenance matter near saltwater.
- Solid brass and copper are long-lasting premium choices that can develop attractive patina.
- Composite fixtures can resist corrosion and may be useful in humid or coastal areas.
Retail lighting guidance commonly identifies brass, stainless steel, powder-coated aluminum, and purpose-built composites as practical outdoor materials, with stainless steel and solid brass often favored for demanding coastal exposure.
In snowy regions, consider freeze-thaw cycles and road salt. In hot, sunny climates, UV resistance and finish fading become major concerns. Near the coast, salt spray can attack fasteners, screws, seams, and mounting plates even when the visible fixture body appears durable.
Understand Wet-Rated and Damp-Rated Fixtures
An attractive fixture is not automatically suitable for every outdoor location. Check its environmental rating before installation.
A damp-location-rated fixture is intended for places that experience moisture or condensation but are partially protected from direct water. Examples can include deeply covered porches and sheltered entry ceilings.
A wet-location-rated fixture is designed for locations where rain, dripping water, splashing, or flowing water may contact the equipment. UL guidance distinguishes damp locations from wet locations and states that fixtures used where water may drip, splash, or flow against them should be marked suitable for wet locations.
Do not assume that an overhang provides complete protection. Wind-driven rain has a remarkable talent for reaching places that looked perfectly dry during the planning meeting.
Get the Fixture Size and Placement Right
Scale is one of the most common exterior lighting mistakes. Fixtures often look larger in a showroom or product photograph than they do when mounted on a two-story facade.
Lights Beside a Front Door
When using one wall light, a common guideline is to choose a fixture roughly one-third the height of the door. With two fixtures, each may be closer to one-quarter the door height. These are starting points rather than strict laws; tall ceilings, wide trim, transoms, and viewing distance may justify larger fixtures. Home Depot’s outdoor sizing guidance similarly recommends using approximately a one-quarter to one-third proportion when selecting wall lights.
Mount sconces so the light source does not shine directly into eye level. The center of many entry fixtures lands around 66 to 72 inches above the floor, but actual placement should respond to fixture shape, door height, and surrounding architecture.
Garage Lighting
A single-car garage may use one fixture on each side or one centered above the door. A double garage often looks balanced with fixtures at the outer edges and, when space allows, one between the doors.
Do not squeeze oversized lanterns into narrow strips of siding. Measure the fixture width, backplate, projection from the wall, and clearance around trim before ordering.
Porch Pendants and Ceiling Lights
A pendant can make a covered porch feel like an outdoor room. Confirm ceiling height, door swing, and head clearance. In lower spaces, a flush-mount or semi-flush fixture usually works better than a hanging lantern.
Path and Landscape Lights
Path lights should reveal the route without creating a runway effect. Staggering fixtures on alternate sides often looks more natural than placing them in perfectly matched rows.
Low-voltage landscape systems are popular because they can illuminate paths and focal points with relatively flexible installation. Planning should include fixture locations, cable runs, transformer capacity, and total wattage.
Select Brightness and Color Temperature
Brightness is measured in lumens, not watts. Wattage describes energy use, while lumens describe visible light output.
Exact needs vary by fixture optics, mounting height, surface color, and purpose. As practical starting ranges, many residential path lights fall around 100 to 200 lumens, wall lights around 400 to 600 lumens, and security floodlights around 700 to 1,300 lumens or more.
Color temperature is measured in kelvins. For residential exteriors, warm white light around 2700K to 3000K usually feels welcoming and complements wood, brick, stone, and warm paint colors. Cooler light may suit certain modern or task-oriented settings, but it can appear harsh when overused.
DarkSky recommends directing light only where needed, limiting brightness, using controls, and choosing warmer-colored light where possible. Fully shielded fixtures help reduce glare and unnecessary upward light.
Use Controls to Improve Convenience
Exterior lighting controls can reduce wasted energy and make the system easier to live with.
- Photocells turn lights on at dusk and off at dawn.
- Timers operate fixtures during scheduled hours.
- Motion sensors activate lighting when movement is detected.
- Smart switches and plugs allow scheduling, remote control, and coordinated lighting scenes.
- Dimmers adjust brightness when compatible fixtures and bulbs are used.
A useful strategy is to keep entry and path lights at a comfortable low level, then use motion activation for brighter garage or side-yard lighting. This provides visibility without turning the property into an all-night lighthouse.
Coordinate Fixtures Without Making Everything Identical
Exterior lighting should feel connected, but every fixture does not need to come from one matching collection. Repeating two or three design elements is usually enough.
You might use matte black fixtures throughout the property while varying their shapes by function. Another approach is to repeat clear glass and simple square frames but use larger lanterns at the entrance, compact sconces by the garage, and understated path lights in the landscape.
Coordinate lighting finishes with permanent architectural elements before small accessories. Window frames, roofing, masonry, railings, and the front door have more visual influence than a replaceable doorknob.
Common Exterior Lighting Mistakes
- Choosing fixtures that are too small for the facade.
- Installing indoor-rated lights outdoors.
- Ignoring wet- and damp-location requirements.
- Using extremely bright, cool-white bulbs at every entrance.
- Mixing several unrelated metal finishes without repetition.
- Allowing bulbs to remain directly visible at eye level.
- Buying coastal fixtures based on color alone rather than material.
- Forgetting to measure door swing, trim, shutters, and mounting clearance.
- Placing landscape lights in rigid rows or aiming them into windows.
- Installing fixtures that are difficult to open, clean, or relamp.
Experience-Based Lessons From Real Exterior Lighting Projects
Homeowners often discover that exterior light fixtures behave very differently after installation than they did on a product page. The first recurring lesson is that scale must be judged from the street, not from three feet away. A 12-inch lantern can look substantial while sitting on a kitchen table, then practically vanish beside an eight-foot entry door. Taping a cardboard outline of the proposed fixture to the wall is a wonderfully low-tech test. Step back to the sidewalk, look from the driveway, and check it again after dark.
Another common experience is that brighter bulbs do not necessarily produce a better-looking entrance. One renovation might replace two dim porch lanterns with high-output daylight LEDs, only to make the siding look washed out and the doorway feel like a loading dock. Switching to warm 2700K or 3000K bulbs with lower lumen output often improves both comfort and visibility. The softer light allows people to see faces, steps, and keys without squinting.
Finish durability also becomes much more important after the first season. A budget black fixture may look excellent in spring but begin fading, chalking, or rusting around the screws after months of sun and rain. Coastal homeowners learn this lesson especially quickly. Salt does not politely attack only the visible frame; it works into mounting hardware, seams, sockets, and decorative fasteners. Selecting corrosion-resistant materials and rinsing fixtures periodically can prevent premature deterioration.
Glass choice creates another surprise. Clear glass looks elegant and provides strong illumination, but it proudly displays every insect, water spot, and dusty bulb inside the fixture. Seeded or lightly textured glass hides debris better and softens glare, although it may not suit a highly minimalist exterior. Open-bottom lanterns are easier to clean and change bulbs in, but they can also welcome moths with the enthusiasm of a tiny illuminated hotel.
Placement matters just as much as fixture design. A beautiful sconce mounted too high may light the porch ceiling instead of the lock. One installed too low can shine directly into visitors’ eyes. Fixtures beside garage doors should also be checked against vehicle mirrors, raised doors, basketball hoops, and nearby trim. These conflicts are much easier to solve with a tape measure than with a return shipment and a collection of newly drilled holes.
Landscape lighting projects reveal the value of temporary testing. Before permanently burying cable or anchoring fixtures, place the lights in their proposed positions and observe them from several angles. A spotlight that beautifully uplights a tree from the patio may glare into a bedroom from the second floor. A path light may illuminate flowers attractively but leave the actual step in shadow. Small adjustments in aim and spacing can make the system feel professionally designed.
Finally, successful projects usually prioritize a few meaningful lighting moments instead of illuminating every square foot. A welcoming front door, visible address numbers, softly defined steps, and one highlighted tree can produce more depth than a yard filled with equally bright fixtures. Darkness is not the enemy of good exterior lighting; it is the contrast that allows the best features to stand out.
Final Thoughts
The best exterior light fixtures balance architecture, weather resistance, scale, and useful illumination. Begin with the purpose of each light, choose a style that supports the home rather than competes with it, and select a finish suited to local conditions. Then pay close attention to ratings, lumens, color temperature, placement, and controls.
A thoughtful lighting plan does not need to be complicated. A few properly sized fixtures, warm bulbs, shielded light sources, and durable materials can transform a dark exterior into a safer and more welcoming space. Your porch will look polished, your pathways will be easier to navigate, and your shins may finally enjoy a peaceful retirement.