A DIY tree branch centerpiece is proof that some of the best home decor is already lying around outside, quietly being mistaken for yard debris. With a few well-shaped branches, a sturdy vase, and a little styling confidence, you can create a table centerpiece that looks rustic, elegant, modern, seasonal, or delightfully enchanted.
Unlike a bouquet that may wilt before the guests finish the dip, a tree branch centerpiece has staying power. It adds height, texture, and a natural sculptural element without demanding constant attention. Better yet, it can be made for a holiday dinner, wedding reception, birthday table, baby shower, outdoor brunch, or a Tuesday evening when your dining table needs to feel less like a paperwork landing zone.
This guide walks through how to choose branches, prepare them, build a stable centerpiece, and customize the finished look for almost any occasion. You do not need professional florist skills. You just need a few materials, a little patience, and the ability to avoid choosing a branch that resembles a small haunted forest.
Why a DIY Tree Branch Centerpiece Works So Well
Tree branches naturally create visual drama because they have movement. Their curves, forks, texture, and irregular shapes make them more interesting than many store-bought decorations. A plain glass vase filled with branches can look intentional and expensive, even when the “shopping trip” involved a walk through your backyard.
Branches are also incredibly flexible from a design perspective. Bare branches suit minimalist interiors, painted branches work for parties, flowering branches feel fresh and romantic, and evergreen branches instantly create a winter or holiday mood. Add lights, dried flowers, moss, ribbons, ornaments, or paper decorations, and the same basic branch arrangement becomes a completely different centerpiece.
Another advantage is budget. Instead of buying multiple floral arrangements, you can use a few branches as the main structural element and add inexpensive accents around the base. A handful of pinecones, battery-operated fairy lights, seasonal fruit, or small candles can transform the arrangement without turning your centerpiece into a financial event.
Choose the Right Branches Before You Start
Look for Shape, Not Just Size
The best branches for a DIY tree branch centerpiece are not always the biggest ones. Look for branches with interesting silhouettes: gentle curves, small offshoots, forked tips, or a balanced spread. Thin, branching twigs often look more elegant than one thick, heavy limb that appears ready to apply for a construction permit.
For a dining table centerpiece, choose branches that feel proportional to the table. A small round table may only need a few delicate stems in a narrow vase. A long rectangular table can handle a larger branch arrangement or several smaller vessels spaced along the center.
Collect Responsibly
Use branches from your own yard, from a friend who gives permission, or from a legal source such as a floral market or craft store. Avoid snapping living branches from public parks, nature trails, or private property. Fallen branches, pruned twigs, and naturally shed limbs are usually the easiest starting point.
Skip branches that are visibly moldy, crumbly, soaked, heavily damaged, or covered with insects. If you are unsure what type of plant you have found, do not use it around food, children, or pets. Decorative branches should make your table feel charming, not turn dinner into a surprise wildlife documentary.
Fresh, Dried, or Artificial?
Fresh branches can look beautiful, especially when they have leaves, berries, buds, or blossoms. They may need water and occasional trimming, depending on the variety. Dried branches are easier to maintain and work especially well for rustic, bohemian, neutral, and modern decor.
Artificial branches are useful when you want a reusable centerpiece with no concerns about insects, dropped leaves, or seasonal availability. They are also ideal for painted designs, themed events, and tables where guests may accidentally bump into the arrangement every twelve minutes.
Supplies for a DIY Tree Branch Centerpiece
- Tree branches, twigs, flowering branches, or artificial stems
- A heavy vase, ceramic crock, clear cylinder vase, pitcher, or decorative urn
- River rocks, sand, marbles, floral foam, or decorative stones for stability
- Pruning shears or sturdy scissors
- Soft cloth or small brush for cleaning
- Optional paint, spray paint, stain, or craft sealant
- Optional battery-operated fairy lights
- Optional moss, pinecones, dried flowers, ribbons, ornaments, or faux berries
- Optional tray, wood slice, runner, or mirror to define the centerpiece area
How to Make a DIY Tree Branch Centerpiece
Step 1: Clean and Inspect the Branches
Begin by gently shaking the branches outdoors to remove loose leaves, dust, and any tiny passengers who did not RSVP. Wipe the wood with a dry or slightly damp cloth, then allow it to dry completely. A small soft brush can help remove dirt trapped in bark crevices.
If the branches are freshly cut and will be displayed in water, trim the ends at an angle before placing them in the vase. If you are using dry branches, make sure they are fully dry before painting or adding lights.
Step 2: Choose a Stable Base
Your container matters more than you may think. Branches are top-heavy, and a pretty but lightweight vase can become a tiny disaster waiting for a passing elbow. Choose a vessel with a wide base or add weight inside it.
Fill the bottom of the vase with rocks, sand, glass marbles, or decorative stones. For larger arrangements, use floral foam or a weighted base hidden beneath moss. The goal is simple: the centerpiece should remain upright even if someone reaches across the table for the bread basket with unnecessary enthusiasm.
Step 3: Build the Main Structure
Place the tallest or most visually interesting branch into the vase first. Angle it slightly instead of forcing it to stand perfectly straight. Natural asymmetry often looks more polished than a rigid, overly balanced arrangement.
Add two or three supporting branches around the main stem. Rotate the vase as you work and check the arrangement from all sides. A centerpiece should look intentional from every seat, not only from the exact angle where you were standing while holding the branch.
Step 4: Edit the Shape
Once the branches are in place, step back several feet. Look for awkward sections, crowded twigs, or one branch that appears to be trying to escape the arrangement. Trim carefully to create a cleaner outline.
A good tree branch centerpiece should feel airy. Leave open space between branches so the eye can appreciate their shape. Overfilling the vase can make the arrangement look less like art and more like a squirrel’s emergency storage plan.
Step 5: Add Decorative Layers
Now comes the fun part. You can leave the branches bare for a modern, sculptural look, or add accents that match the season or event. Wrap fine battery-operated lights around the branches for evening gatherings. Hang small ornaments for winter holidays. Add paper butterflies for spring, mini photos for a family celebration, or dried orange slices for a warm autumn table.
Keep embellishments light. The branches should remain the star of the centerpiece. If every twig carries a ribbon, ornament, light, flower, charm, and tiny ceramic bird, the arrangement may begin to resemble a craft store having an emotional breakdown.
Design Rules That Make a Branch Centerpiece Look Professional
Keep Guest Sightlines Clear
A centerpiece can be tall, but it should not block conversation. For dinner tables, use either low arrangements or tall, narrow designs that leave plenty of open space at eye level. Guests should be able to see one another without leaning left and right like they are watching a tennis match.
Repeat Colors and Textures
Choose two or three accent colors and repeat them throughout the table. For example, a fall branch centerpiece might include brown branches, cream candles, amber glass, and muted orange fruit. A winter centerpiece could combine bare white branches, silver ornaments, and clear glass candleholders.
Repeating colors makes the design feel cohesive without becoming overly matched. You want “beautifully coordinated,” not “every item was purchased in the same aisle during a panic.”
Use Odd Numbers for Accents
Small groups of three or five often look more natural than perfectly paired decorations. Try three candles, five pinecones, or a cluster of three small bud vases around your main branch arrangement. Uneven groupings create movement and help the centerpiece feel relaxed rather than overly staged.
Balance Height With a Low Base
If your branches are tall, keep the surrounding details low. Use tea lights, short candles, moss, fruit, or small bowls around the base. This gives the centerpiece height without making the whole table feel crowded.
Four Easy DIY Tree Branch Centerpiece Styles
Rustic Woodland Centerpiece
Use natural branches in a stoneware crock or clear vase filled with river rocks. Add moss, pinecones, wooden beads, and a few flameless candles on a tray. This style works beautifully for fall dinners, cabin decor, outdoor weddings, and farmhouse tables.
Modern Minimalist Centerpiece
Choose one or two clean branches with an interesting shape. Place them in a tall white ceramic vase, matte black vessel, or simple clear cylinder. Keep the rest of the table quiet with neutral linens and one small candle cluster. The result is simple, graphic, and very good at pretending you have your life organized.
Winter Wonderland Centerpiece
Paint dry branches white, silver, or soft champagne in a well-ventilated outdoor area. Once dry, place them in a tall vase and add warm white battery lights, clear ornaments, faux snow, or metallic ribbon. For a more natural variation, combine bare branches with evergreen clippings and pinecones.
Spring Garden Centerpiece
Use flowering branches, faux cherry blossoms, or slender green stems in a glass vase. Add pastel candles, small bud vases, and a few fresh lemons or pears around the base. This style feels light, cheerful, and much less complicated than trying to keep a full floral arrangement alive for a week.
Creative Ways to Customize Your Centerpiece
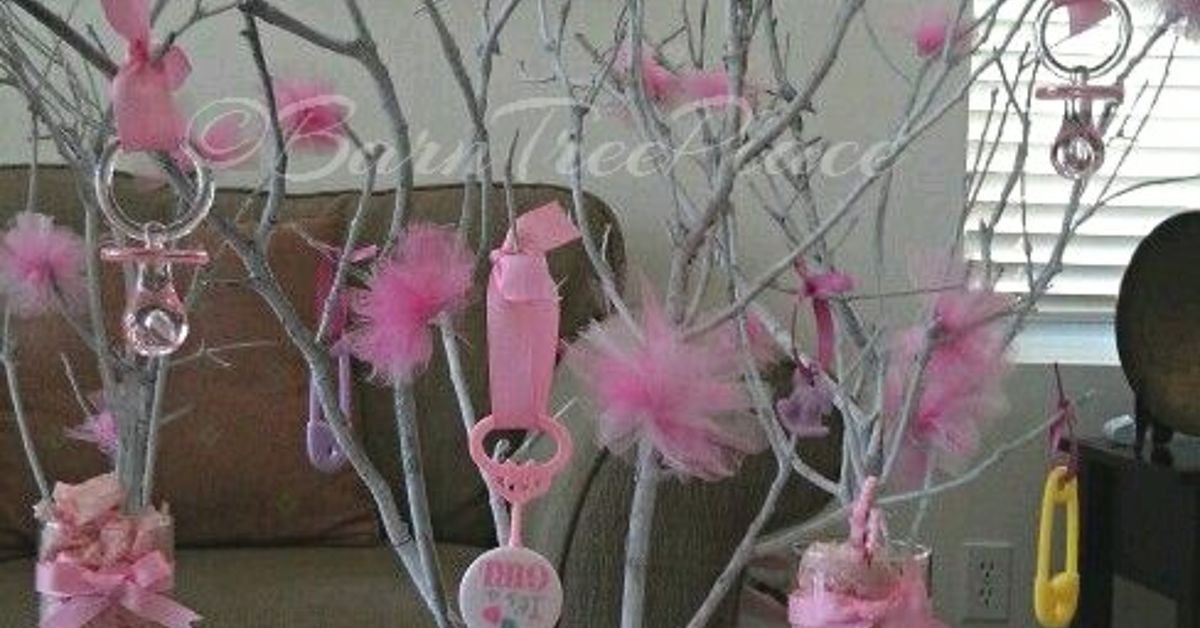
A DIY tree branch centerpiece can easily become part of a specific event theme. For a wedding, hang subtle place cards, small flowers, or battery lights from tall branches. For a baby shower, add paper stars, felt clouds, or tiny animal ornaments. For a birthday party, use colorful ribbons or lightweight paper decorations that match the party palette.
For everyday home decor, consider adding a seasonal swap system. Keep the same vase and branch structure, then change the accents throughout the year. Use dried flowers in late summer, mini pumpkins in fall, ornaments in winter, faux nests in spring, and citrus slices or shells in summer. This makes one simple project work harder than most of us do before coffee.
Common DIY Tree Branch Centerpiece Mistakes to Avoid
- Using a lightweight vase without adding stabilizing weight
- Choosing branches that are too wide for the table
- Blocking guests’ views across the table
- Adding too many decorations and losing the branch silhouette
- Using real flames too close to dry wood, leaves, paper, or ribbons
- Forgetting to inspect natural branches before bringing them indoors
- Mixing too many colors, finishes, and themes in one arrangement
- Making the centerpiece so large that there is no space left for food
Practical Experience Notes: What DIYers Commonly Learn
One of the first lessons people learn when making a DIY tree branch centerpiece is that the branch itself usually looks less impressive before it is styled. A branch lying on the ground may seem ordinary, crooked, or slightly suspicious. Put that same branch into a tall vase, add a few warm lights, and suddenly it becomes “organic modern decor.” Context is doing a lot of work here, but that is also true of throw pillows and expensive sparkling water.
Another common experience is discovering that less really is more. Many first-time makers start with a simple arrangement, then add moss, ribbon, ornaments, flowers, beads, lights, berries, miniature birds, and possibly a decorative ladder. At some point, the centerpiece stops looking elegant and begins looking like it has a backstory involving a craft fair and a strong espresso. The best arrangements usually use one major decorative idea and one or two supporting details.
Stability is another lesson that tends to arrive quickly. A tall branch arrangement may look perfect until someone opens a window, bumps the table, or places a heavy serving dish nearby. Adding weight to the vase is not glamorous, but it is one of the most useful steps in the entire project. Decorative stones, sand, or a heavy base can save you from watching your carefully styled centerpiece perform an unexpected slow-motion dive into the mashed potatoes.
People also learn that lighting changes everything. During the day, bare branches may feel minimal and sculptural. In the evening, a few tiny battery lights can make the same arrangement feel warm, dramatic, and event-ready. The key is using lights sparingly and hiding the battery pack near the base. A visible battery box can ruin the illusion faster than a price sticker on a wedding centerpiece.
Seasonal decorating is where tree branch centerpieces become especially useful. Instead of buying a new centerpiece for every holiday, many DIY decorators reuse the same vase and branches, then refresh the surrounding details. Pinecones and amber glass can create an autumn look. Metallic ornaments and evergreen clippings can create a winter table. Citrus, fresh herbs, or light-colored flowers can shift the arrangement toward spring and summer.
Finally, many people find that a handmade branch centerpiece gets more compliments than expected because it looks personal. Guests notice the unusual shape of the branches, the small decorative details, and the fact that the arrangement does not look identical to every other table they have seen online. That is the real charm of this project: it does not need to be perfect. A slightly uneven branch, a handmade ribbon, or a mismatched vase can make the centerpiece feel more welcoming, more memorable, and far less like it was assembled by a showroom robot.
Conclusion
A DIY tree branch centerpiece is one of the easiest ways to turn natural materials into memorable table decor. With a stable vase, thoughtfully chosen branches, and a few simple accents, you can create a centerpiece that feels rustic, elegant, seasonal, or modern without spending much money.
Start with a clear idea, keep the arrangement balanced, and do not be afraid to edit as you go. The most beautiful branch centerpieces leave room for the natural form of the wood to show through. Whether you style it for a dinner party, wedding, holiday table, or everyday home decor, a branch arrangement can make your table look intentional, inviting, and just a little bit magical.
Note: Collect branches only from property where you have permission, inspect them carefully before bringing them indoors, and keep dry branches, paper accents, ribbons, and other flammable materials away from open flames.