Most people remember the original Nintendo Game Boy for its pea-soup screen, chunky gray shell, and the heroic ability to survive being dropped, shoved in a backpack, and generally treated like a lunchbox with buttons. But for musicians, hardware hackers, and retro-gaming obsessives, the real magic often comes from something far smaller: the audio circuitry hiding inside.
When we talk about comparing bare silicon on two Game Boy audio chips, we are not just admiring pretty microscope photos. We are looking at why two machines that run much of the same software can sound noticeably different. The original Game Boy, often called the DMG, has a reputation for a warm, bass-heavy, slightly gritty sound. The Game Boy Color, while more advanced in screen and system features, is often described as thinner, brighter, and sometimes noisier. That difference is not imaginary. It is written into silicon.
The two chips at the center of this comparison are the original Game Boy audio amplifier chip, commonly associated with the DMG-AMP IR3R40, and the later amplifier used in the Game Boy Color family, associated with the AMP-MGB or IR3R53 design. Both chips help turn the Game Boy’s generated sound into something strong enough to drive headphones or the tiny internal speaker. But under a microscope, they reveal two different design philosophies. It is like discovering that two identical-looking kitchen blenders contain completely different enginesone built like a reliable pickup truck, the other like a clever little sports coupe that forgot people enjoy bass.
First, What Does the Game Boy Actually Use for Sound?
The Game Boy’s sound system is often called “8-bit audio,” but that phrase can be a little slippery. The Game Boy does not play music like a modern phone streaming a polished audio file. Instead, it generates sound through simple, specialized hardware channels. The classic Game Boy audio processing unit, or APU, provides four main sound channels: two pulse-wave channels, one programmable wave channel, and one noise channel.
The two pulse channels create the familiar square-wave tones that make Game Boy melodies so instantly recognizable. One of them includes a frequency sweep feature, which is useful for laser zaps, coin-like pings, and other sound effects that seem to say, “Yes, this monster has been defeated by math.” The wave channel can play small custom 4-bit waveform patterns, giving composers a little more flexibility. The noise channel uses a linear feedback shift register, or LFSR, to create percussion-like sounds, explosions, static, and other crunchy textures.
Those four channels are mixed, routed left or right, adjusted for volume, and then sent onward. That is where the amplifier chip becomes important. The APU generates the signals; the amplifier helps make them audible through the speaker or headphone jack. In other words, the APU is the band, and the amplifier is the cranky sound engineer deciding how much low-end the audience gets to enjoy.
The Bare-Silicon Approach: Why Decapping Matters
Looking at bare silicon means removing the chip package so the actual semiconductor die can be photographed and studied. This process is called decapsulation, or “decapping” if you want to sound like the sort of person who owns both a microscope and a very tiny screwdriver.
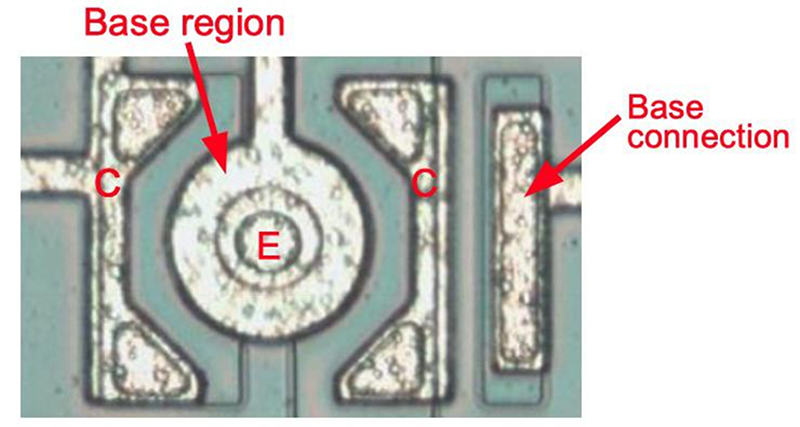
Once the die is visible, large structures start to tell a story. Power transistors appear as big blocks because they must handle more current. Resistors may snake across the die in long, winding paths. Capacitors can show up as broad plates of metal separated from the silicon by a thin oxide layer. Repeated circuit structures can reveal stereo channels, control logic, current mirrors, differential pairs, and output stages.
For the Game Boy audio chips, die photos make it possible to trace the circuit and understand how the chips work at the transistor level. This matters because the audible difference between a DMG and a Game Boy Color is not only about nostalgia or aging capacitors. It is also about circuit topology: feedback, filtering, output stages, transistor sizing, and power-saving logic.
The Original Game Boy Audio Amplifier: Big, Warm, and Practical
The original Game Boy’s amplifier chip contains three major amplifier sections: two for stereo headphone output and one more powerful mono amplifier for the internal speaker. This layout makes sense because the speaker is mono, while the headphone jack can output left and right audio. The chip also includes control circuitry to switch behavior depending on whether headphones are plugged in, helping conserve battery life.
The DMG amplifier design has been compared to the LM380-style power audio amplifier, a classic kind of integrated amplifier with fixed gain and internal feedback. In plain English, that means the original Game Boy’s amplifier is relatively direct, sturdy, and purpose-built. It does not behave like a generic modern op-amp dropped into a circuit. It has its own internal structure, feedback network, and output stage designed to drive the tiny world of Game Boy sound.
One particularly interesting feature is the way the DMG chip uses internal feedback to control gain. Internal feedback makes the circuit self-contained and predictable. It also helps explain why the original Game Boy often sounds fuller. Its output tends to preserve more of the low-frequency energy that chiptune musicians love. The result is not hi-fi in the modern audiophile sense. Nobody is mistaking a 1989 Game Boy for a studio-grade DAC. But the sound has body, character, and a satisfying thump.
Why the DMG Became a Chiptune Favorite
The original Game Boy became a favorite among chiptune artists because its limitations are musical rather than merely annoying. Its pulse waves are bold. Its noise channel can punch through a mix like a tiny digital snare drum. Its wave channel can create basses, leads, and weird little robotic vowels if programmed creatively. And the amplifier gives the output a weight that performers often describe as warmer than later models.
That does not mean every DMG sounds identical. Units are now decades old. Capacitors age, headphone jacks oxidize, speakers wear out, and previous owners may have performed “mods” using tools that should have remained in a kitchen drawer. Still, the basic DMG audio character is real enough that musicians continue to seek out original hardware for live sets and recordings.
The Game Boy Color Amplifier: Similar Job, Different Silicon Personality
The Game Boy Color arrived in 1998 with a better screen, more memory, optional double-speed CPU operation, and backward compatibility with much of the Game Boy library. From a gaming perspective, it was a smart evolution. From an audio perspective, however, it changed more than many casual players realized.
The Game Boy Color amplifier chip also provides amplification for headphones and the internal speaker. At a high level, the floor plan of the die looks familiar: speaker-driving circuitry, headphone sections, and control logic. But the actual circuit implementation is significantly different from the original DMG amplifier. Instead of the LM380-like design used in the original Game Boy, the Game Boy Color amplifier behaves more like a set of power op-amps with more complex feedback behavior.
The biggest difference is filtering. The Game Boy Color design uses external feedback elements, including a capacitor, that make the amplifier act partly like a high-pass filter. A high-pass filter allows higher frequencies to pass more easily while reducing lower-frequency content. That can make the output sound clearer in some contexts, but it can also remove the bass weight that gives the DMG its famous thickness.
This is why the Game Boy Color can feel thinner or sharper when compared directly with an original DMG. It is not simply that the Color is “worse.” It is that the circuit makes different trade-offs. More compact hardware, different power goals, different board layout, and a newer design all contributed to an audio output that does not behave exactly like the earlier machine.
DMG vs Game Boy Color: What the Silicon Reveals
At the bare-silicon level, both chips show the same broad mission: amplify Game Boy audio for a speaker and stereo headphones while conserving power. But the internal routes they take are not the same. The original Game Boy chip leans on an LM380-like amplifier structure with internal feedback. The Game Boy Color chip uses a more op-amp-like design with feedback that contributes to high-pass filtering.
The practical effect is easy to describe: the DMG tends to preserve more bass and produces a thicker waveform, while the Game Boy Color tends to emphasize higher-frequency components and can lose some low-end power. If the DMG sounds like a tiny nightclub in a plastic brick, the Game Boy Color can sound more like the same nightclub after someone politely asked the bass player to go home.
Another difference appears in the output behavior. The original Game Boy’s waveform tends to remain closer to a square-wave shape, although capacitors and speaker circuitry still affect the signal. The Game Boy Color’s high-pass behavior can turn certain waveforms into sharper, spike-like shapes. That difference matters for music because Game Boy tones rely heavily on waveform shape. A square wave with strong bass energy feels different from a filtered version with reduced low-end.
Why Resistors, Capacitors, and Transistors Matter So Much
On a chip die, individual components are not little plastic parts soldered in place. They are patterns in silicon and metal. A resistor may be a long region of doped material. A transistor may be a carefully arranged set of N-type and P-type semiconductor regions. A capacitor may be made from overlapping conductive layers separated by insulating oxide.
These structures are not perfect. Resistors on integrated circuits can vary significantly in absolute value, so designers often rely on ratios or feedback rather than assuming every resistor will be exact. Capacitor ratios, however, can be very accurate when the capacitors are formed close together on the same chip. That is one reason analog integrated-circuit design is both elegant and maddening. It is part electrical engineering, part geometry, and part “please let this not oscillate.”
In the Game Boy audio chips, capacitors help stabilize amplifiers and shape frequency response. Transistors handle amplification and output drive. Current mirrors and differential stages help control gain and biasing. The larger output transistors are easy to spot because they must deliver enough current to move a speaker. In die photos, these sections are the heavy liftersthe silicon equivalent of the people who actually carry the couch when everyone else is “supervising.”
What This Means for Emulation
Game Boy emulators often focus on accurately reproducing CPU timing, graphics behavior, memory quirks, and the APU’s digital sound generation. But the amplifier stage adds another layer of complexity. Even if an emulator perfectly generates the four audio channels, the final sound may differ from real hardware if it does not model filtering, DC offset, high-pass behavior, speaker response, headphone output, and analog imperfections.
That is why two emulators can feel different even when both are technically strong. It is also why recordings from real hardware still matter. A clean digital model of the APU may sound mathematically correct, yet less like the plastic box that millions of people heard in the 1990s. The Game Boy’s charm lives partly in the analog aftermath.
What This Means for Modders and Musicians
For hardware modders, the amplifier comparison is more than trivia. Many Game Boy audio mods attempt to improve volume, reduce noise, or route a cleaner signal to an external jack. The popular “Pro Sound” approach, for example, bypasses or reroutes parts of the original audio path to capture a cleaner signal. Results vary depending on model, board revision, capacitor condition, wiring, grounding, and the quality of the modification.
The lesson from bare-silicon comparison is simple: there is no single “Game Boy sound.” There is the APU, the amplifier chip, the board, the capacitors, the speaker, the headphone circuit, the power supply, and the condition of the unit. A DMG with tired capacitors may sound dull or noisy. A Game Boy Color with a carefully designed audio mod may sound stronger than expected. A poorly installed amp may simply make bad noises louder, which is less “studio upgrade” and more “angry mosquito with a microphone.”
For musicians, the best choice depends on the goal. If the goal is thick bass and classic chiptune character, the original DMG remains a beloved option. If the goal is portability, color display, and compatibility with certain workflows, the Game Boy Color can still be useful, especially with thoughtful audio treatment. The right tool is the one that supports the sound you actually want.
Why the Game Boy Color Did Not Simply Copy the DMG Amplifier
It is tempting to ask why Nintendo did not just keep the original amplifier design. After all, if the DMG sounded good, why change the recipe? The answer is probably a mix of engineering realities. The Game Boy Color had different power requirements, a smaller and revised hardware platform, newer manufacturing assumptions, and different board-level constraints. Engineers often redesign subsystems not because the old ones failed, but because the total product changed around them.
The Game Boy Color also had to balance backward compatibility with new hardware features. It supported older games while adding a color display and expanded memory. Audio may not have been the top priority compared with battery life, cost, size, and reliability. For most players, the difference between “warm bass” and “slightly thinner high-pass-filtered output” was not a purchase-deciding crisis. For chiptune artists, however, it became a whole personality test.
Specific Example: A Bass Line on DMG vs Game Boy Color
Imagine a simple bass line built from the first pulse channel. On an original DMG, the note may feel rounder and more physical, especially through the headphone output or a good recording interface. The square wave keeps enough low-frequency strength to feel like a bass instrument, not just a pitch indicator.
On a Game Boy Color, the same pattern can feel leaner. The attack may still be clear, and the melody remains recognizable, but the bottom end can feel reduced. If the track depends heavily on bass pressure, the Color may need external EQ, a mod, or mixing compensation. If the track is bright, fast, and percussion-heavy, the Color’s sharper quality may be less of a drawback.
This is why hardware choice matters in chiptune production. The song data may be identical, but the analog output is not. Bare-silicon analysis gives us a physical reason for what musicians have been hearing for years.
Experience Notes: Living With the Sound of Two Game Boys
Spending time with both the original Game Boy and the Game Boy Color is a little like comparing two old radios that happen to know the same songs. On paper, the differences may look small. Both are Game Boy-family systems. Both can produce those familiar pulse waves, tiny wave-channel textures, and crunchy noise-channel drums. But once you record them, play them through headphones, or use them in a mix, the personalities separate quickly.
The first experience most people notice with the DMG is the weight of the sound. Even simple menu bleeps feel a little bigger than they have any right to be. A bass patch made in a tracker such as Little Sound DJ can feel surprisingly solid, especially when routed into an interface and monitored through decent speakers. The DMG does not sound clean in a sterile way. It has a faint roughness, a little electronic haze, and a pleasing thickness that makes simple waveforms feel alive. It is not perfect, but it is extremely charming.
The Game Boy Color experience is different. It is more convenient in some ways, and the color screen makes navigation more pleasant, but the sound can feel slimmer. When switching between machines, the Color may seem like it has lost some chest resonance. The high end can feel more exposed, and background noise may become more noticeable during quiet passages. This does not make it useless. In fact, some tracks benefit from a tighter and brighter sound. But if a song relies on big pulse-wave bass, the Color often needs help from EQ or hardware modification.
One practical lesson is that comparisons should be made fairly. Use the same cartridge, the same song file, the same volume setting as closely as possible, and the same recording chain. Do not compare a freshly serviced DMG with a dusty Game Boy Color that spent twelve years in a drawer next to batteries that were plotting revenge. Capacitor condition, dirty volume wheels, oxidized headphone jacks, and weak speakers can all affect the result.
Another lesson is that “better” depends on context. For nostalgic listening, the DMG often wins because it delivers the sound many people associate with classic Game Boy music. For composing, the preferred system may depend on screen comfort, workflow, and reliability. For live performance, noise floor, output level, and mod quality can matter more than model reputation. A well-maintained Game Boy Color with a thoughtful audio setup can beat a neglected DMG that crackles every time you breathe near the volume wheel.
The most enjoyable part of comparing these chips is realizing that the Game Boy sound is not only software. It is physical. It comes from silicon shapes, feedback paths, capacitors, transistors, aging components, and the stubborn little speaker inside the shell. The bare die photos make the invisible visible. They show that the difference between “warm” and “thin” is not just a forum argument. It is engineering, frozen into microscopic architecture.
Conclusion
Comparing bare silicon on two Game Boy audio chips reveals why the original Game Boy and the Game Boy Color can sound so different despite sharing the same family identity. The DMG amplifier uses a more LM380-like internal-feedback design that helps preserve the thick, warm character associated with classic Game Boy audio. The Game Boy Color amplifier uses a more complex op-amp-style approach with feedback behavior that can reduce low-frequency energy, contributing to a thinner sound.
For retro gamers, this explains why memories of “the Game Boy sound” often point back to the original gray brick. For chiptune musicians, it confirms that hardware model choice matters. For electronics fans, it is a beautiful reminder that even a humble handheld console contains elegant analog engineering. And for everyone else, it is proof that yes, people really can spend thousands of words discussing why one plastic rectangle beeps with more bass than another. Honestly, that is civilization at its finest.