A broken light bulb has a special talent for turning a simple chore into a tiny household thriller. One minute you are changing a bulb like a responsible adult. The next, you are staring at a jagged metal base stuck in the socket and wondering whether the potato in your pantry has been training for this moment.
The good news: removing a broken light bulb is usually simple when you slow down, protect your hands and eyes, and cut power before touching anything. The bad news: doing it carelessly can lead to cuts, electric shock, damaged fixtures, or a socket that looks like it lost a fight with a raccoon. This guide explains how to remove a broken light bulb safely using six practical methods, from needle-nose pliers to a commercial broken bulb extractor.
Before we get heroic, remember this: electricity is not impressed by confidence. Whether the bulb broke in a table lamp, ceiling fixture, recessed can, bathroom vanity, outdoor porch light, or chandelier, your first job is to make the socket safe.
Before You Start: Safety Comes First
Removing a broken bulb is not difficult, but it does involve exposed glass, thin metal, and a socket that may still be connected to power. Do not skip the safety steps. They are not “extra.” They are the difference between a five-minute fix and a story your family tells every Thanksgiving.
Turn Off the Power
If the broken bulb is in a lamp, unplug the lamp from the wall. If the bulb is in a ceiling light, wall sconce, vanity fixture, or hardwired outdoor light, turn off the correct circuit breaker at the electrical panel. Turning off only the wall switch is better than nothing, but the breaker is safer, especially when the bulb base is broken and the inner contacts may be exposed.
After turning off the breaker, test the fixture. Flip the light switch, use a non-contact voltage tester if you have one, and make sure nobody in the house turns the breaker back on while you are working. A piece of painter’s tape over the breaker with a note such as “Do not turn on” is a simple, non-dramatic way to prevent drama.
Let the Bulb Cool
Incandescent and halogen bulbs can get extremely hot. If the bulb broke while it was on, give the fixture time to cool before reaching near it. Hot glass and hot metal do not care that you are in a hurry.
Wear Gloves and Eye Protection
Put on thick work gloves or leather gloves. Add safety glasses if you have them. Broken bulbs often leave tiny glass shards around the rim of the socket, and those little glittery villains are excellent at finding fingers.
Clean Up Loose Glass Carefully
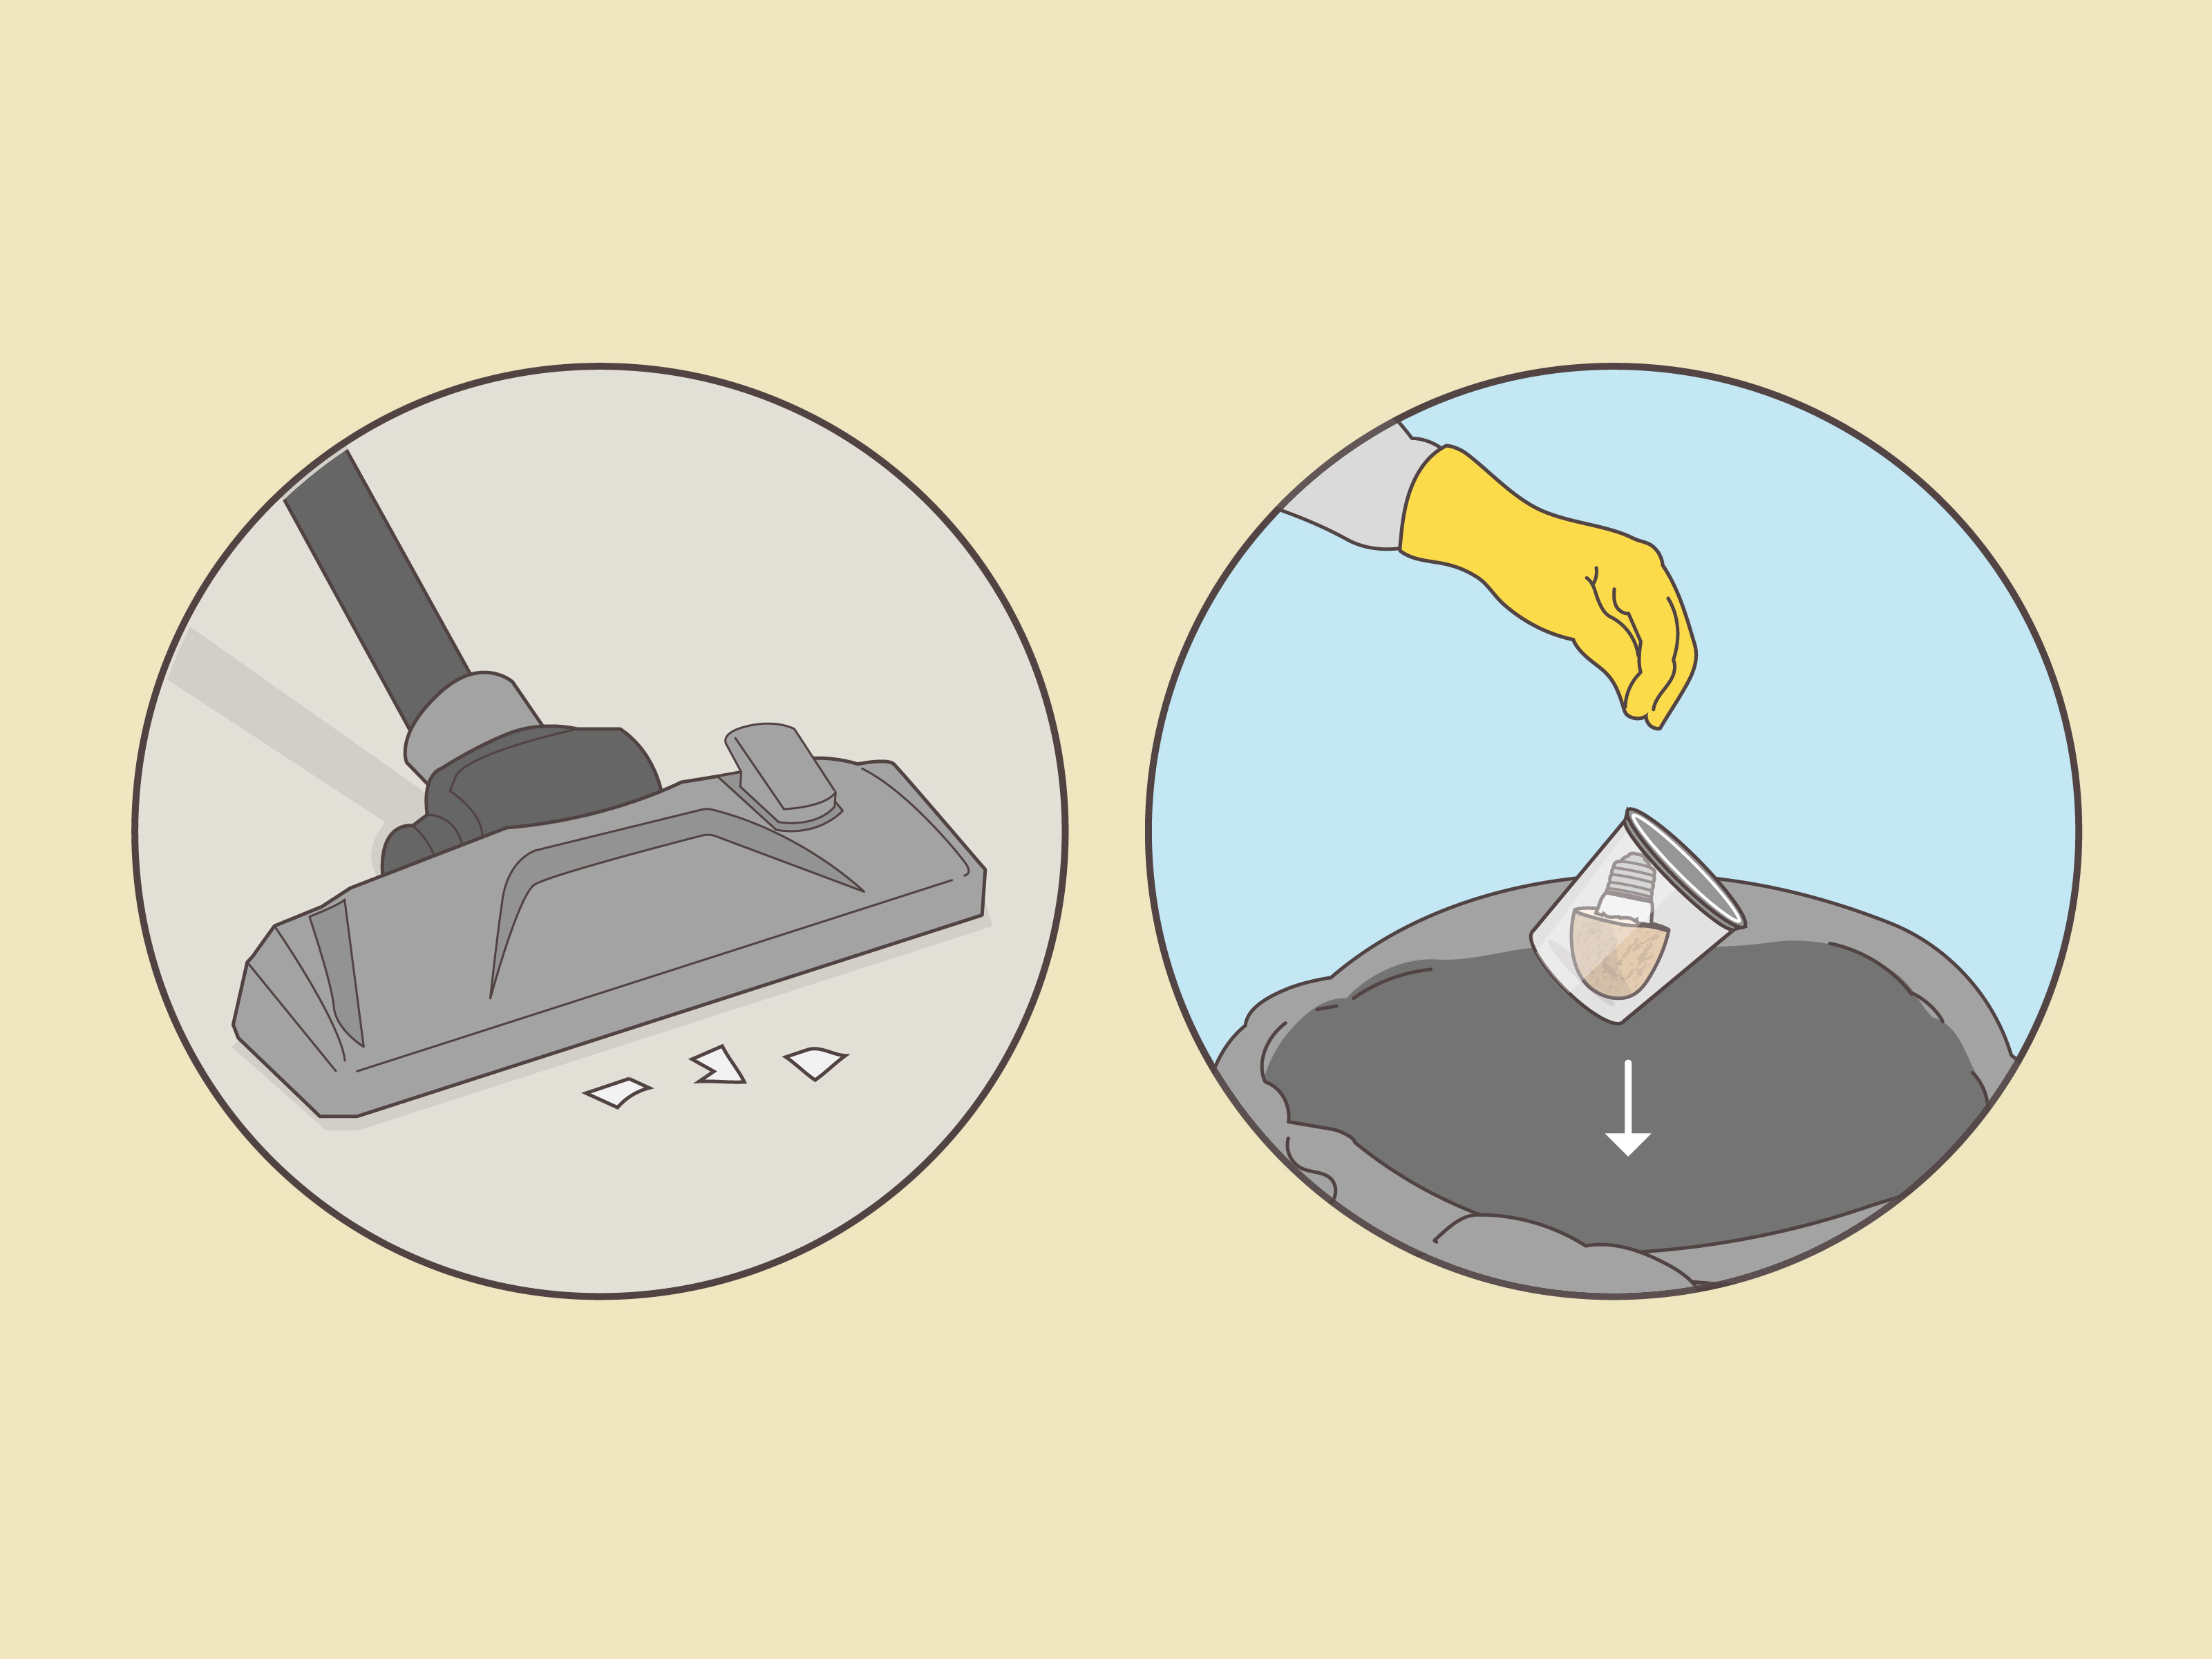
Before trying to unscrew the base, pick up large glass pieces with gloved hands or stiff cardboard. Use tape to lift smaller shards from the floor or fixture area. Avoid pressing your bare fingers into the socket. That sentence should not need to be said, but the internet has seen things.
Special Warning for CFL and Fluorescent Bulbs
If the broken bulb is a compact fluorescent lamp, also known as a CFL, handle cleanup differently because CFLs contain a small amount of mercury. Have people and pets leave the room, open a window or door, turn off forced-air heating or air conditioning if possible, and wait several minutes before cleanup. Do not immediately vacuum the debris, because vacuuming can spread fine particles. Use stiff paper, cardboard, tape, damp disposable towels, and a sealable container or bag for cleanup materials. For LED and incandescent bulbs, mercury cleanup rules usually do not apply, but glass safety still does.
Tools You May Need
- Thick work gloves or leather gloves
- Safety glasses
- Needle-nose pliers with insulated or rubber grips
- A raw potato
- A bar of dry soap or a rubber eraser
- Commercial broken bulb extractor
- Wooden dowel, cork, or sturdy stick
- Hot glue or quick-setting epoxy
- Stiff cardboard, tape, and a trash bag
- Non-contact voltage tester, if available
How to Remove a Broken Light Bulb: 6 Ways
Start with the simplest method that fits your situation. If the metal rim of the bulb base is easy to grab, pliers may be all you need. If the socket is high, narrow, or recessed, a broken bulb extractor may be safer. If the bulb base is mangled, corroded, or glued in place by age and heat, you may need patience, not brute force.
1. Use Needle-Nose Pliers
This is the most common method for removing a broken light bulb from a socket. It works well when the glass globe has shattered but the metal screw base remains visible.
- Confirm the power is off at the plug or breaker.
- Put on gloves and safety glasses.
- Use needle-nose pliers to grip the metal rim of the broken bulb base.
- Bend the rim slightly inward if you need a better grip.
- Turn the base counterclockwise slowly.
- Remove the base and dispose of it safely.
The trick is to work gently. Do not crush the socket. The socket is the part you want to keep; the broken bulb is the guest who has overstayed its welcome. If the metal base tears apart, remove it in small pieces. As long as the power is off and you protect your hands, slow removal is usually fine.
Needle-nose pliers are especially useful for standard screw-base bulbs in table lamps, ceiling fixtures, and porch lights. They are less ideal for very deep recessed lights unless you can reach comfortably and see what you are doing.
2. Try the Raw Potato Method
Yes, the famous potato trick is real. No, it is not magic. A raw potato can grip the jagged remains of the broken bulb and give you a temporary handle. This method works best when sharp glass or the center support is still attached to the metal base.
- Cut a medium raw potato in half.
- Blot the cut side with a paper towel so it is not dripping wet.
- Press the cut side firmly into the broken bulb base.
- Push just hard enough for the glass and metal edges to bite into the potato.
- Turn counterclockwise until the base loosens.
- Throw away both the potato and the broken bulb pieces.
The potato method is popular because it is cheap, available, and mildly hilarious. However, do not use it on an energized socket, and do not leave moisture behind. After removing the bulb base, wipe the fixture area dry before installing a new bulb. Your light fixture is not a stew pot.
This method is handy when you do not have pliers nearby, but it is not always the best choice for tight fixtures, decorative sockets, or situations where the bulb base is badly stuck. If the potato slips, stop and move to another method.
3. Use a Commercial Broken Bulb Extractor
A broken bulb extractor is the grown-up version of the potato method. It is a simple tool designed to grip the inside of the broken bulb base and twist it out. Many hardware stores sell them, and some attach to extension poles for high ceilings.
- Turn off power and verify the socket is safe.
- Insert the rubber or expanding tip of the extractor into the broken bulb base.
- Apply steady pressure so the tool grips the inside of the base.
- Turn counterclockwise until the base unscrews.
- Remove the extractor and dispose of the broken bulb safely.
This is one of the safest options for high or hard-to-reach fixtures because it keeps your hands farther away from the broken glass. It is also useful for property managers, landlords, maintenance workers, and homeowners with multiple recessed lights. If your house has tall ceilings, buying one is cheaper than inventing a ladder-based circus act.
A broken bulb extractor is especially helpful for recessed lights, track lighting, garage fixtures, and outdoor floodlights. It may not work well if the base is crushed flat or rusted into the socket, but it should be one of your first choices when reach is the problem.
4. Use a Bar of Soap or Rubber Eraser
If you do not have a potato, a dry bar of soap or a large rubber eraser can sometimes do the same job. The idea is simple: press a firm material into the broken base so it grips the edges, then twist.
- Make sure the power is off.
- Choose a dry bar of soap or a large eraser that fits the socket opening.
- Press it firmly into the broken bulb base.
- Turn counterclockwise with slow, even pressure.
- Remove the loosened base and clean away residue.
A bar of soap can work nicely because it is firm enough to catch jagged edges but soft enough to mold slightly. A rubber eraser can work for smaller bulbs or tight lamp sockets. Keep the soap dry. Wet soap near an electrical fixture is not the kind of creativity we are celebrating today.
This method is best for mildly stuck bulbs where the base is still mostly intact. If the base is deeply corroded, crushed, or spinning without unscrewing, use pliers or call a professional.
5. Use Hot Glue, Epoxy, and a Wooden Dowel
This method is useful when the broken base sits too deep to grab easily. It takes more time, but it can save a fixture when other methods slip.
- Turn off power at the breaker or unplug the lamp.
- Remove loose glass carefully.
- Apply hot glue or quick-setting epoxy to the end of a wooden dowel, cork, or sturdy stick.
- Press the glued end into the broken metal base without touching the socket threads.
- Let the glue or epoxy set fully.
- Turn the dowel counterclockwise to remove the bulb base.
The key here is patience. If you twist before the adhesive sets, you will simply create a sticky mess with a dowel sticking out of it like a tiny flag of defeat. Hot glue works faster, while epoxy may grip more strongly. Avoid letting adhesive run into the socket itself. If glue gets into the socket, the repair may become more complicated.
This method is not the first one to try, but it is a clever backup for decorative fixtures, narrow shades, or lamp sockets where pliers cannot get a firm angle.
6. Remove the Socket or Fixture Cover for Better Access
Sometimes the problem is not the broken bulb; it is the awkward fixture around it. Ceiling globes, recessed trims, sconces, and vanity lights can block your hand and tool angle. If the bulb base will not move, removing the fixture cover or trim may give you the access you need.
- Turn off the power at the breaker.
- Remove the shade, globe, trim ring, or cover according to the fixture design.
- Use pliers or a bulb extractor with improved visibility.
- Inspect the socket for scorching, corrosion, loose parts, or cracked insulation.
- Reassemble the fixture only after the socket is clean, dry, and undamaged.
This is the method to choose when you cannot see what you are doing. Good access prevents cracked sockets and scraped knuckles. If the socket itself turns, crumbles, smells burned, shows black marks, or feels loose, stop. The fixture may need repair or replacement by a licensed electrician.
What Not to Do When Removing a Broken Light Bulb
Some broken bulb advice floating around online is less “helpful household hack” and more “audition for urgent care.” Avoid these mistakes.
Do Not Use Your Bare Fingers
Never push your fingers into a broken socket. Even with the power off, broken glass and torn metal can cut deeply. Gloves are not optional decoration; they are armor.
Do Not Force the Bulb Base
If the base does not move, do not keep twisting harder until something breaks. You may damage the socket, crack a ceramic holder, or loosen fixture wiring. Use penetrating patience, not brute force.
Do Not Vacuum a Broken CFL Immediately
For compact fluorescent bulbs, follow mercury cleanup guidance. Ventilate first, collect debris with stiff paper and tape, and avoid spreading fine material through the room.
Do Not Work from an Unstable Chair
If the broken bulb is overhead, use a stable ladder. A dining chair with one wobbly leg is not a ladder; it is furniture with ambition.
How to Prevent Broken Bulbs in the Future
Once the broken base is out, take a minute to prevent round two. First, inspect the socket. If it is dirty, corroded, or scorched, do not install a new bulb until the issue is addressed. A damaged socket can cause flickering, overheating, poor contact, or another stuck bulb later.
Second, choose the right replacement bulb. Match the bulb base size and stay within the fixture’s wattage rating. LED bulbs are cooler and more energy-efficient than old incandescent bulbs, but they still need to fit the fixture and be rated for enclosed fixtures if the fixture is enclosed.
Third, do not overtighten the new bulb. Screw it in until it is snug and makes contact. Cranking it down like a pickle jar lid can deform the metal base or make future removal harder. A snug bulb is good. A bulb installed with superhero torque is a future problem wearing glass.
Finally, avoid changing bulbs when they are hot. Heat can make glass fragile and metal expand. Let bulbs cool first, especially halogen and incandescent bulbs.
When to Call an Electrician
Most broken light bulbs can be removed by a careful homeowner. Still, there are times when the safest DIY move is to stop. Call a licensed electrician if the socket is burned, melted, cracked, loose, wet, rusted, or sparking. Also call if the breaker trips repeatedly, the light flickers after a new bulb is installed, the fixture smells like burning plastic, or your voltage tester still detects power after you think the circuit is off.
Outdoor fixtures deserve extra caution because moisture and corrosion can make the bulb base seize inside the socket. Bathroom and kitchen fixtures also need care because water and electricity are not exactly best friends. If you feel unsure, step away. Paying for a safe repair is cheaper than replacing a fixture, repairing drywall, or explaining to your doctor why there is a potato involved.
Real-World Experience: Lessons From Broken Bulbs, Stubborn Sockets, and One Very Brave Potato
Anyone who has handled home repairs for long enough eventually meets the broken light bulb. It usually happens at the most inconvenient time: right before guests arrive, during a late-night bathroom bulb change, or while standing on a ladder in the garage wondering why the previous homeowner installed every fixture at “professional basketball player” height.
One of the most useful lessons is that the first thirty seconds matter. People tend to react fast when glass breaks. They reach, grab, twist, or try to “just get it out.” That instinct is understandable, but it is also how small injuries happen. The better habit is to freeze for a moment. Turn off power. Put on gloves. Get a bag or container for broken pieces. Clear pets and kids away. Once the scene is calm, the job becomes much easier.
In practice, needle-nose pliers solve many broken bulb problems. They offer control, they are precise, and they let you bend the thin metal rim inward without touching the socket contacts. The best approach is not to attack the base from one spot. Grip, bend slightly, twist gently, and if it does not move, shift to another point on the rim. Little movements add up. The metal base often loosens after two or three careful adjustments.
The potato method is memorable because it sounds ridiculous. It also works often enough to deserve its reputation. Still, it is not my first choice for every situation. A potato is excellent when the broken glass can bite into it and the base is not badly stuck. It is less helpful when the fixture is overhead, the socket is narrow, or the potato starts crumbling. The secret is to blot the potato first and push it straight in. If it slips after one or two tries, retire the vegetable with dignity and reach for pliers or an extractor.
Commercial bulb extractors are underrated. Many homeowners buy one only after they have already fought a recessed light for twenty minutes. For high ceilings, garage fixtures, and outdoor floodlights, the tool pays for itself quickly. It also reduces the temptation to stand on the top step of a ladder, which is where good decisions go to retire.
Another lesson: stuck bulbs are often a symptom. If a bulb base breaks during removal, ask why. Was the bulb overtightened? Was it exposed to moisture? Is the socket corroded? Is the fixture old and overheating? A clean, healthy socket should release a bulb with reasonable pressure. If every bulb in a fixture feels welded in place, the fixture may need maintenance or replacement.
Outdoor porch lights are especially notorious. Rain, humidity, temperature swings, insects, and dust can all contribute to corrosion. A bulb that has been sitting outside for years may break before it unscrews. In that case, patience is your best tool. Shut off the breaker, remove the fixture cover if possible, and use pliers slowly. If the socket is rusted or the fixture looks compromised, replacing the fixture may be wiser than forcing it.
For landlords, Airbnb hosts, and busy homeowners, it is worth keeping a small “bulb rescue kit” in a drawer: gloves, safety glasses, needle-nose pliers, tape, a non-contact voltage tester, and a broken bulb extractor. That kit turns a surprise problem into a routine fix. It also prevents the classic household scavenger hunt where someone is holding a flashlight while another person asks, “Do we own pliers?”
The biggest takeaway is simple: broken bulbs are manageable, but they reward calm preparation. The safest method is not always the cleverest one. Use the tool that gives you the best grip, the best visibility, and the least contact with broken glass. And if the fixture shows signs of electrical damage, do not negotiate with it. Call a pro.
Conclusion
Removing a broken light bulb is one of those home maintenance tasks that looks scary until you know the steps. Turn off the power, protect your hands and eyes, clean up loose glass, and choose the method that fits the situation. Needle-nose pliers are the reliable classic. A raw potato can work in a pinch. A broken bulb extractor is excellent for hard-to-reach fixtures. Soap, erasers, adhesive-and-dowel tricks, and better fixture access can all help when the base refuses to cooperate.
The real secret is not a tool; it is patience. Do not rush, do not force the socket, and do not work on a live fixture. Once the broken base is out, inspect the socket and replace the bulb with the correct type and wattage. A careful five-minute fix can save your fixture, your fingers, and your dignity. The potato, unfortunately, cannot be saved.
Note: This article is for general household guidance. If a socket is damaged, wet, burned, loose, corroded, or still energized after the breaker is off, stop and contact a licensed electrician.