A plumbing snake is one of those tools you are thrilled to own and deeply annoyed to need. It sits quietly in the garage, pretending to be a harmless coil of metal, until your shower drain turns into a tiny indoor pond or your kitchen sink starts bubbling like it is auditioning for a swamp documentary. Then, suddenly, that humble drain auger becomes the hero of the day.
But here is the part many homeowners forget: a plumbing snake needs cleaning and maintenance too. After all, this tool travels into the places soap scum, grease, hair, food sludge, and mysterious drain goblins call home. If you shove it back into storage dirty, wet, rusty, or kinked, it may not be ready the next time a clog decides to ruin your Saturday.
Whether you use a hand-crank drain snake, a toilet auger, a drum auger, or a powered drain cleaning machine, proper care keeps the cable flexible, reduces rust, prevents bad smells, and extends the life of the tool. Even better, a well-maintained plumbing snake works more smoothly, which means less wrestling, less mess, and fewer moments where you question all your life choices while crouched under a sink.
This guide covers five practical tips for cleaning and maintaining your plumbing snake, plus real-world experience-based advice for storing, inspecting, and using it safely. Grab your gloves. Preferably the ones you do not use for gardening, grilling, or touching anything you love.
Why Plumbing Snake Maintenance Matters
A plumbing snake, also called a drain snake, plumber’s snake, drain auger, or cable auger, works by pushing a flexible cable into a drain line to break up or pull out a clog. The cable may encounter hair, soap residue, grease, mineral buildup, food particles, tree roots, wipes, and other debris. In short, it has a rough workday.
When you do not clean the cable after use, drain residue can dry on the metal, trap moisture, cause corrosion, and create a smell strong enough to make your garage file a complaint. If the cable is stored while bent or wet, it may rust, kink, weaken, or become harder to feed through bends and traps. On powered machines, dirty drums and neglected feed mechanisms can also make operation rougher and less reliable.
Good maintenance does not have to be complicated. Most of it comes down to cleaning, drying, protecting, inspecting, and storing the tool correctly. Think of it as a quick post-game shower for your snake. It just fought a clog. It deserves better than being tossed into a bucket of shame.
Tip 1: Clean the Cable Immediately After Every Use
The best time to clean a plumbing snake is right after you pull it back from the drain. Waiting until later allows gunk to dry onto the cable, and dried drain sludge has the personality of concrete with a bad attitude.
Wipe as You Retract
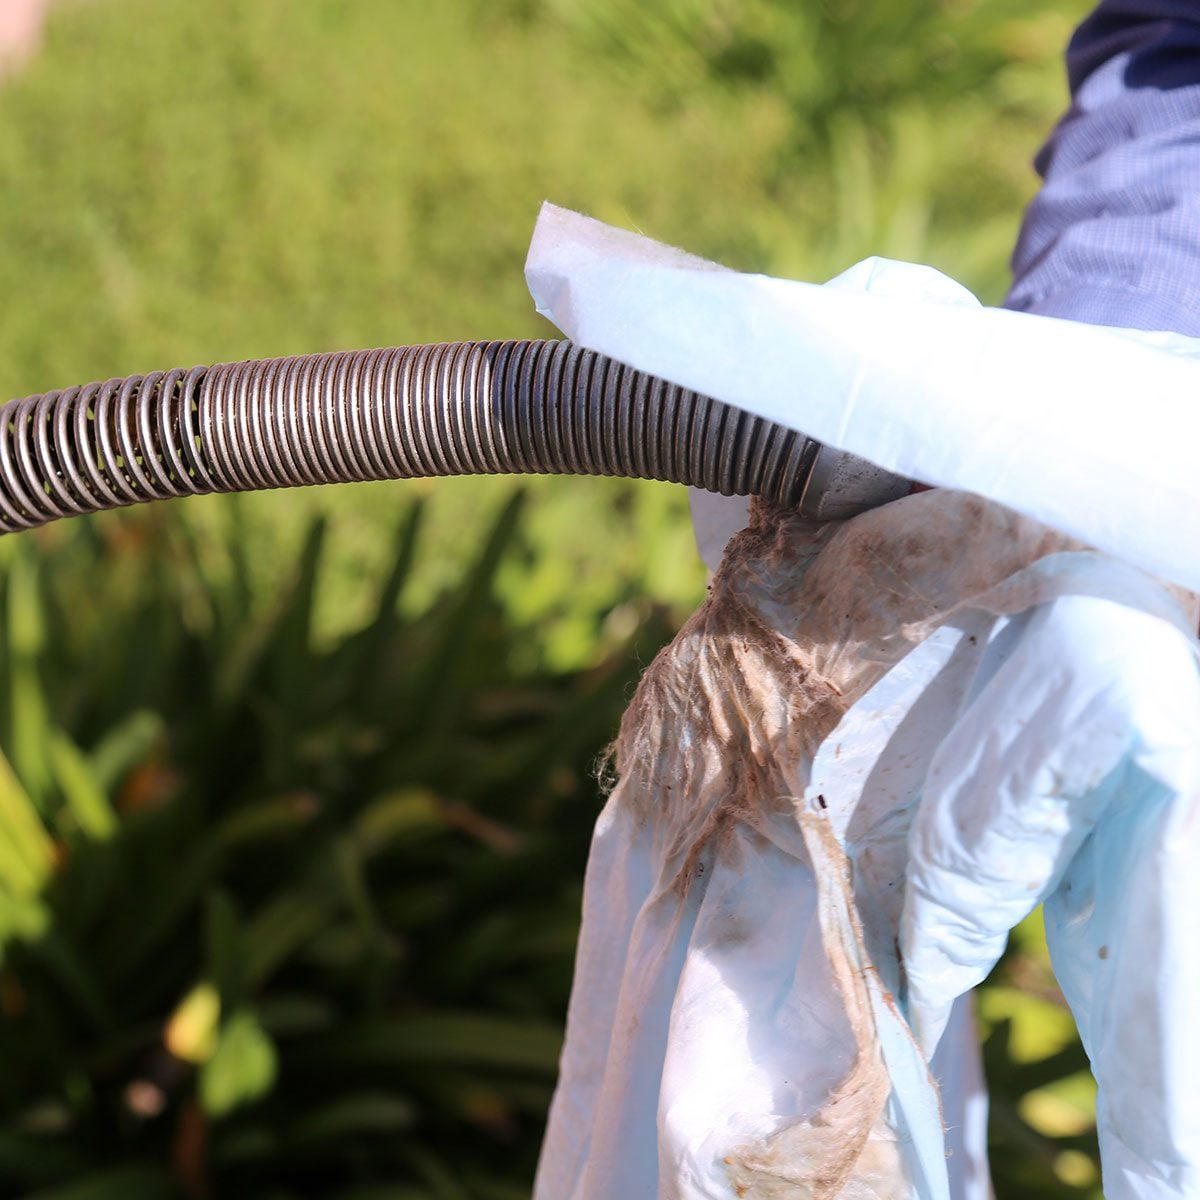
As you retract the cable, wipe it down with disposable rags, heavy-duty paper towels, or old shop cloths. Keep a trash bag nearby so you can drop dirty wipes directly into it. This simple habit removes much of the hair, grease, soap scum, and black drain residue before it reaches the drum or storage area.
If you are using a hand snake, pull the cable back slowly and wipe each section before feeding it into the drum or coil. If you are using a powered drum machine, follow the manufacturer’s safety instructions and keep hands clear of moving parts. Tight-fitting work gloves are useful, but loose gloves around rotating equipment are dangerous because they can catch. Treat the cable with respect; it may be flexible, but it is not friendly.
Wash the Cable With Warm, Soapy Water
After the heavy debris is removed, wash the cable with warm water and mild dish soap. A bucket works well for manual snakes. For longer cables, extend manageable sections at a time, scrub with a stiff nylon brush, rinse, and continue until the entire cable is clean. Avoid aggressive wire brushing unless the manufacturer allows it, because you do not want to damage protective coatings or create rough spots that collect more debris later.
For cable heads, bulb augers, cutter attachments, and retrieval hooks, remove any wrapped hair or stringy debris. A small screwdriver, pliers, or disposable pick can help. Do not use your bare fingers unless you enjoy surprises. Drain debris can contain sharp fragments, glass, metal, or other unpleasant little treasures.
Do Not Forget the Drum or Handle
The cable is the star of the show, but the handle, drum, housing, crank, trigger, feed guide, and storage case also get dirty. Wipe exterior surfaces with a damp cloth and mild cleaner. For open-drum tools, clean accessible interior areas where water and sludge can collect. For enclosed drums, do not flood the housing unless the manual says it is safe. Water trapped inside a drum can turn into rust soup.
Tip 2: Disinfect Safely Without Damaging the Tool
Cleaning removes grime. Disinfecting helps reduce germs. A plumbing snake that has been inside a drain line is not something you want rubbing against shelves, towels, extension cords, or anything that later touches your hands. However, disinfecting should be done carefully because strong chemicals can damage metal, coatings, plastic parts, rubber grips, and your lungs if used incorrectly.
Use the Right Disinfectant for the Job
For many homeowners, a properly diluted household disinfectant or a bleach solution can be used on hard, nonporous parts of the tool, but always read the product label first. Follow directions for dilution, surface contact time, ventilation, and protective gear. If the label says the surface must stay wet for several minutes, a quick mist-and-wipe does not count. Disinfectants are not magic spells; they need time to work.
Never mix bleach with ammonia, vinegar, drain cleaners, toilet bowl cleaner, or other household chemicals. Mixing cleaners can create dangerous fumes. This is especially important if chemical drain cleaner was used before snaking the drain. In that case, wear eye protection, gloves, and avoid splashing. If you are not sure what was poured into the drain, assume the situation is spicy and proceed carefully.
Rinse After Disinfecting When Appropriate
Some disinfectants can leave residues that may encourage corrosion or make the cable sticky. After the required contact time, rinse the cable and attachments if the disinfectant label allows or recommends it. Then dry everything thoroughly. The goal is a clean tool, not a damp chemical burrito wrapped in rust potential.
Protect Yourself During Cleanup
Wear rubber or nitrile gloves, eye protection, and old clothes. If you are cleaning a large cable or powered machine, consider working outside or in a well-ventilated utility area. Keep children and pets away from the cleaning zone. A freshly used drain snake may look fascinating to a dog, but dogs also think socks are cuisine, so their judgment is not the standard here.
Tip 3: Dry the Cable Completely to Prevent Rust
Water is the enemy of most plumbing snake cables. Even cables advertised as rust-resistant can last longer when stored dry. Rust weakens metal, creates rough areas that snag inside pipes, and can make the cable harder to feed and retract. It can also stain floors, walls, storage bins, and the inside of your vehicle if you transport tools.
Use Rags, Airflow, and Patience
After washing and rinsing, wipe the cable with dry rags. Extend the cable in sections and let it air-dry before winding it back into the drum or storage coil. If weather allows, dry it outdoors in a shaded area. Avoid leaving the cable in direct rain or on damp concrete. Concrete can hold moisture, and your cable does not need a second bath.
For drum augers, keep the drum open or partially open if the design allows safe ventilation. Some professional-grade tools are designed with open drums or removable inner drums to make cleaning and drying easier. If your tool has an enclosed drum, extend the cable, dry it section by section, and avoid retracting it while wet.
Pay Attention to Hidden Moisture
Moisture likes to hide in coils, cable heads, connectors, and drum interiors. Shake out excess water from attachments and dry around set screws, couplings, and springs. For powered drain cleaning machines, wipe feed mechanisms and guide tubes according to the manual. Do not spray water into motors, switches, batteries, or electrical components. Electricity and puddles have never been a charming couple.
Tip 4: Protect the Cable With Lubrication or Rust Inhibitor
Once your plumbing snake is clean and dry, protect the cable. Many drain auger cables are made from spring steel, and while some modern cables use coatings, inner cores, or rust-resistant plating, they still benefit from proper care. A light protective coating can reduce corrosion and help the cable move more smoothly.
Use a Manufacturer-Approved Cable Oil or Rust Inhibitor
The safest choice is a cable lubricant, machine oil, or rust inhibitor recommended by the tool manufacturer. Apply a thin coat as directed. More is not better. A cable dripping with oil will attract dust, stain storage areas, and make the next job feel like handling a mechanical eel.
For hand snakes, place a small amount of oil on a cloth and wipe the cable as you feed it back into the drum. For larger drum machines, follow the manufacturer’s maintenance instructions for cable treatment. Some tools are specifically designed to allow rust inhibitor application while the cable is stored in the drum.
Avoid Heavy Grease Unless Recommended
Heavy grease may seem like strong protection, but it can trap grit, hair, and debris. It can also make the cable slippery in an unsafe way. Use a light product intended for metal protection or drain cable care. If your cable has a special coating or rust-resistant plating, check the manual before applying anything aggressive.
Do Not Use Cooking Oil
Yes, cooking oil is technically oil. No, it is not a good cable protectant. Vegetable oils can become sticky, rancid, and unpleasant. Your plumbing snake already has enough odor-based personality. Use a real lubricant made for tools or metal protection.
Tip 5: Inspect, Coil, and Store the Plumbing Snake Properly
Maintenance is not only about cleaning. It is also about knowing when the tool is still safe and effective. Before storing your plumbing snake, inspect it carefully. Before using it again, inspect it again. This may sound repetitive, but so is dealing with the same clog because your cable kinked halfway down the pipe.
Look for Kinks, Rust, Frays, and Weak Spots
Run the cable slowly through a gloved hand or cloth and look for damaged areas. Watch for sharp bends, flattened sections, broken strands, excessive rust, loose couplings, cracked handles, worn feed mechanisms, and damaged cutter heads. A kinked cable is more likely to bind, twist, or fail. A frayed cable can scratch hands and pipes. A severely corroded cable may snap under load, which is exactly the kind of drama no drain needs.
If the tool has interchangeable heads, check that each attachment locks securely. Cutter blades should be intact, not bent into abstract sculpture. Screws, pins, and connectors should be tight. If a part looks questionable, replace it before the next job.
Coil the Cable Without Forcing It
Store the cable in its drum or coil it in broad loops. Do not force tight bends. Do not tie it into knots. Do not jam it into a toolbox under a circular saw and a bag of mystery screws. Plumbing snake cable is springy for a reason, and forcing it into an unnatural shape can create memory bends that make it harder to use later.
Store It in a Dry, Ventilated Place
Keep your drain snake in a dry area away from standing water, rain, fertilizer, pool chemicals, and corrosive cleaners. A garage shelf, utility cabinet, or dedicated storage bin works well. If you store it in a plastic bin, make sure the tool is completely dry first. A sealed container with a wet cable inside becomes a tiny rust greenhouse.
Label attachments and keep them together. Small cutter heads and screws have a magical ability to vanish right before you need them. A simple zip pouch, divided box, or labeled container can save time and frustration.
Bonus Maintenance Tips for Different Types of Plumbing Snakes
Hand-Crank Drain Snakes
Hand-crank drain snakes are common for sinks, tubs, and showers. They are affordable, compact, and easy to store. After use, fully extend as much cable as practical, wipe it clean, rinse it, dry it, and apply a light protective coating. Check the thumbscrew or locking mechanism, because a loose lock can prevent the cable from rotating properly.
Toilet Augers
Toilet augers have a protective sleeve designed to help prevent scratching porcelain. Clean the cable and the sleeve after every use. Pay special attention to the curved end, where debris can hide. Disinfect surfaces that may have touched the toilet bowl, then rinse and dry thoroughly. Store the auger upright or in a dedicated container so it does not contact other tools.
Powered Drum Machines
Powered drain cleaning machines require extra care. Always unplug corded machines or remove batteries before cleaning or maintenance. Wipe the cable, drum, feed system, wheels, frame, and guards. Check belts, switches, foot pedals, feed guides, and cable connectors according to the manual. Never pressure-wash electrical components. If the machine has an AUTOFEED-style mechanism, keep it clean so it grips the cable correctly.
Sectional Drain Machines
Sectional cables are used in separate lengths and often see heavier work. Clean each section before storage, inspect connectors, and keep sections organized by size. Damaged sections should be repaired or replaced. Professionals often maintain a routine after every job because neglected cable can slow down work and increase replacement costs.
Common Mistakes That Shorten the Life of a Plumbing Snake
Putting It Away Wet
This is the big one. A wet cable stored in a drum can rust quietly for weeks. By the time you notice, the cable may be stiff, rough, or weakened. Always dry before storage.
Using the Wrong Snake for the Drain
A small hand snake is not meant for every clog, and a large powered auger is not suitable for delicate fixtures. Using the wrong cable size can damage pipes, scratch surfaces, or fail to clear the clog. Match the tool to the drain line and clog type.
Forcing the Cable
If the snake will not move, do not simply push harder. Rotate, retract slightly, and try again. Forcing the cable can create kinks or damage pipes. If the clog does not clear, the problem may be deeper, harder, or located beyond the tool’s reach.
Ignoring Chemical Drain Cleaner Risks
If chemical cleaner is sitting in a clogged drain, snaking can splash it back. Wear goggles and gloves, avoid mixing cleaners, and tell a plumber what products were used if you call for help. Chemical surprises are not the fun kind of surprises.
Skipping Inspection
A cable may look fine at a glance but have a weak spot, loose head, or developing kink. Inspect before and after use. It takes a minute and can prevent a broken cable from becoming part of your plumbing system’s permanent collection.
How Often Should You Maintain a Plumbing Snake?
Clean your plumbing snake after every use. No exceptions. Even a quick job can leave moisture and residue on the cable. Dry and protect it after cleaning. Inspect it before storage and again before the next use.
If you use the tool only a few times a year, check it every few months for rust or stiffness. If you use it professionally or frequently, create a routine maintenance checklist. Cables, attachments, drums, feed mechanisms, and safety features should be checked regularly. The more often the tool enters drains, the more often it deserves attention.
When to Replace a Plumbing Snake Cable
Replace the cable if it has severe rust, multiple kinks, broken strands, a damaged end, or a loose connector that cannot be repaired safely. A cable that no longer feeds smoothly may waste time and increase the chance of pipe damage. If replacement parts are available from the manufacturer, use parts that match your tool model and cable size.
For inexpensive hand snakes, replacing the whole tool may be more practical than replacing the cable. For professional drum machines, cable replacement is part of normal ownership. Either way, do not keep using a cable that looks like it survived a sword fight with a garbage disposal.
Practical Experience: Lessons Learned From Cleaning and Maintaining a Plumbing Snake
The first lesson many people learn about plumbing snake maintenance is that the cleanup takes almost as much discipline as the unclogging. When a drain finally opens and water starts moving again, the natural instinct is to celebrate, rinse the sink, and pretend the tool no longer exists. That is exactly when maintenance matters most. If you put the snake away dirty, the next job starts with a rusty cable, a bad smell, and instant regret.
A good habit is to prepare the cleanup area before using the snake. Set out gloves, goggles, rags, a bucket, a trash bag, and a disinfectant before you open the drain. This way, when the cable comes back coated in hair and sludge, you are not sprinting across the room looking for paper towels while trying not to drip on the floor. Plumbing rewards preparation. It punishes optimism.
Another useful experience is wiping the cable during retrieval instead of waiting until the entire job is finished. This one habit dramatically reduces mess. Hold a rag around the cable with a gloved hand and retract slowly. The rag catches black residue, soap scum, hair, and grease before the cable enters the drum. If you let all that debris wind into the drum, you have created a hidden mess that will smell later and be harder to clean.
It also helps to know the difference between normal resistance and a cable problem. A drain snake should bend and move, but it should not feel like it is grinding, snagging, or folding onto itself. If the cable starts twisting into loops outside the drain, stop and reset. Forcing it can create kinks. Once a cable kinks badly, it rarely behaves the same again. That kink will keep returning like a villain in a low-budget sequel.
For homeowners, one of the smartest storage tricks is to keep the plumbing snake in its own labeled container. Do not toss it beside clean tools, paint supplies, or holiday decorations. A drain snake has been places. Give it boundaries. A plastic bin with ventilation holes, absorbent shop towels, and a small pouch for attachments works well. Just make sure the cable is fully dry before closing the lid.
Over time, you may notice that a lightly oiled cable feeds more smoothly than a neglected one. The difference is obvious when working through a P-trap or tight bend. A clean, dry, protected cable slides better, retracts better, and is less likely to fight you. Maintenance does not make drain cleaning glamorous, but it does make it less miserable, which is a respectable victory.
Finally, experience teaches when to stop. If a snake repeatedly fails to clear the clog, if multiple drains are backing up, if sewage is involved, or if the cable keeps hitting a hard obstruction, it may be time to call a plumber. Maintenance keeps your tool ready, but it does not turn every homeowner into a sewer-line specialist. Sometimes the bravest DIY move is putting the snake down, washing your hands, and calling someone with a camera inspection system.
Conclusion
Cleaning and maintaining your plumbing snake is not glamorous, but neither is discovering a rusty, smelly, kinked cable when your bathtub refuses to drain. A few minutes of care after each use can extend the life of the tool, improve performance, reduce odors, and make future drain cleaning jobs cleaner and safer.
Remember the five essentials: clean the cable immediately, disinfect safely, dry it completely, protect it with the right lubricant or rust inhibitor, and inspect and store it properly. Treat your plumbing snake like a real tool instead of a one-time emergency gadget, and it will be ready when your drain decides to act dramatic again.
Note: This article is based on practical plumbing tool care, manufacturer-style maintenance guidance, home improvement best practices, and general cleaning and safety recommendations. Always follow the specific instructions in your plumbing snake’s user manual, especially for powered drain cleaning machines.