Your Mac’s IP address is a little like a return address on an envelopeexcept the envelope is every website, app, game server, printer, smart TV, and cloud service you talk to online. Most of the time, you do not need to think about it. Your Mac joins Wi-Fi, the internet works, and everyone goes on with life. Beautiful. Peaceful. Slightly suspicious.
But sometimes you do need to change your IP address on a Mac. Maybe a website is not loading correctly. Maybe your office printer refuses to acknowledge your existence. Maybe your router gave your Mac an address that conflicts with another device. Or maybe you want more privacy while browsing on public Wi-Fi at an airport, hotel, library, or coffee shop where the espresso machine has better security than the network.
This guide explains four practical ways to change your IP address on a Mac, including when to use each method, what it actually changes, and how to avoid turning a five-minute fix into a “why is the internet gone?” afternoon.
First, Know Which IP Address You Want to Change
Before you start clicking around in macOS Network settings, it helps to understand one important difference: your Mac can have a private IP address and a public IP address.
Private IP Address
Your private IP address is used inside your local network. It usually looks something like 192.168.1.25, 10.0.0.14, or 172.16.x.x. This is the address your router uses to identify your Mac at home, school, or work. Changing this can help with local network problems, printer issues, file sharing conflicts, or router assignments.
Public IP Address
Your public IP address is what websites and online services see when your Mac reaches the internet. In many homes, your routernot your Mac directlygets this address from your internet service provider. If your goal is to appear online from a different address, improve privacy, or troubleshoot website blocks, you are usually trying to change or mask your public IP address.
Here is the simple version: changing your Mac’s local network settings usually changes your private IP. Using a VPN, switching networks, or reconnecting through a different internet source usually changes what the outside world sees as your public IP.
Method 1: Renew the DHCP Lease on Your Mac
The easiest way to change your IP address on a Mac is to renew the DHCP lease. DHCP stands for Dynamic Host Configuration Protocol, which is a fancy way of saying, “Your router automatically hands out network addresses so you do not have to.” It is the networking equivalent of a restaurant host saying, “You sit at table 12.”
When you renew your DHCP lease, your Mac asks the router for network details again. Sometimes the router gives your Mac the same private IP address. Other times, it assigns a new one. This method is safe, quick, and usually the first thing to try when your Mac has connection problems.
How to Renew Your DHCP Lease on macOS
- Click the Apple menu in the top-left corner.
- Open System Settings.
- Click Network in the sidebar.
- Select your active connection, such as Wi-Fi or Ethernet.
- Click Details.
- Choose TCP/IP.
- Click Renew DHCP Lease.
- Click OK if prompted.
When This Method Works Best
Renewing the DHCP lease is ideal when your Mac says it is connected to Wi-Fi but the internet acts like it has gone on vacation. It can also help if your Mac has a self-assigned IP address, if local devices cannot see your Mac, or if you recently changed router settings.
However, this method usually changes only your private IP address. If you search “what is my IP” before and after renewing DHCP, your public IP may look exactly the same. That is normal. Your router is still using the same internet connection from your ISP.
Method 2: Manually Set a New Private IP Address
If you want more control, you can manually assign a private IP address to your Mac. This is useful when you need your Mac to keep a predictable address on your local network. For example, you might use a static IP for file sharing, screen sharing, development servers, smart home tools, or a network printer that behaves like it was trained by a cat.
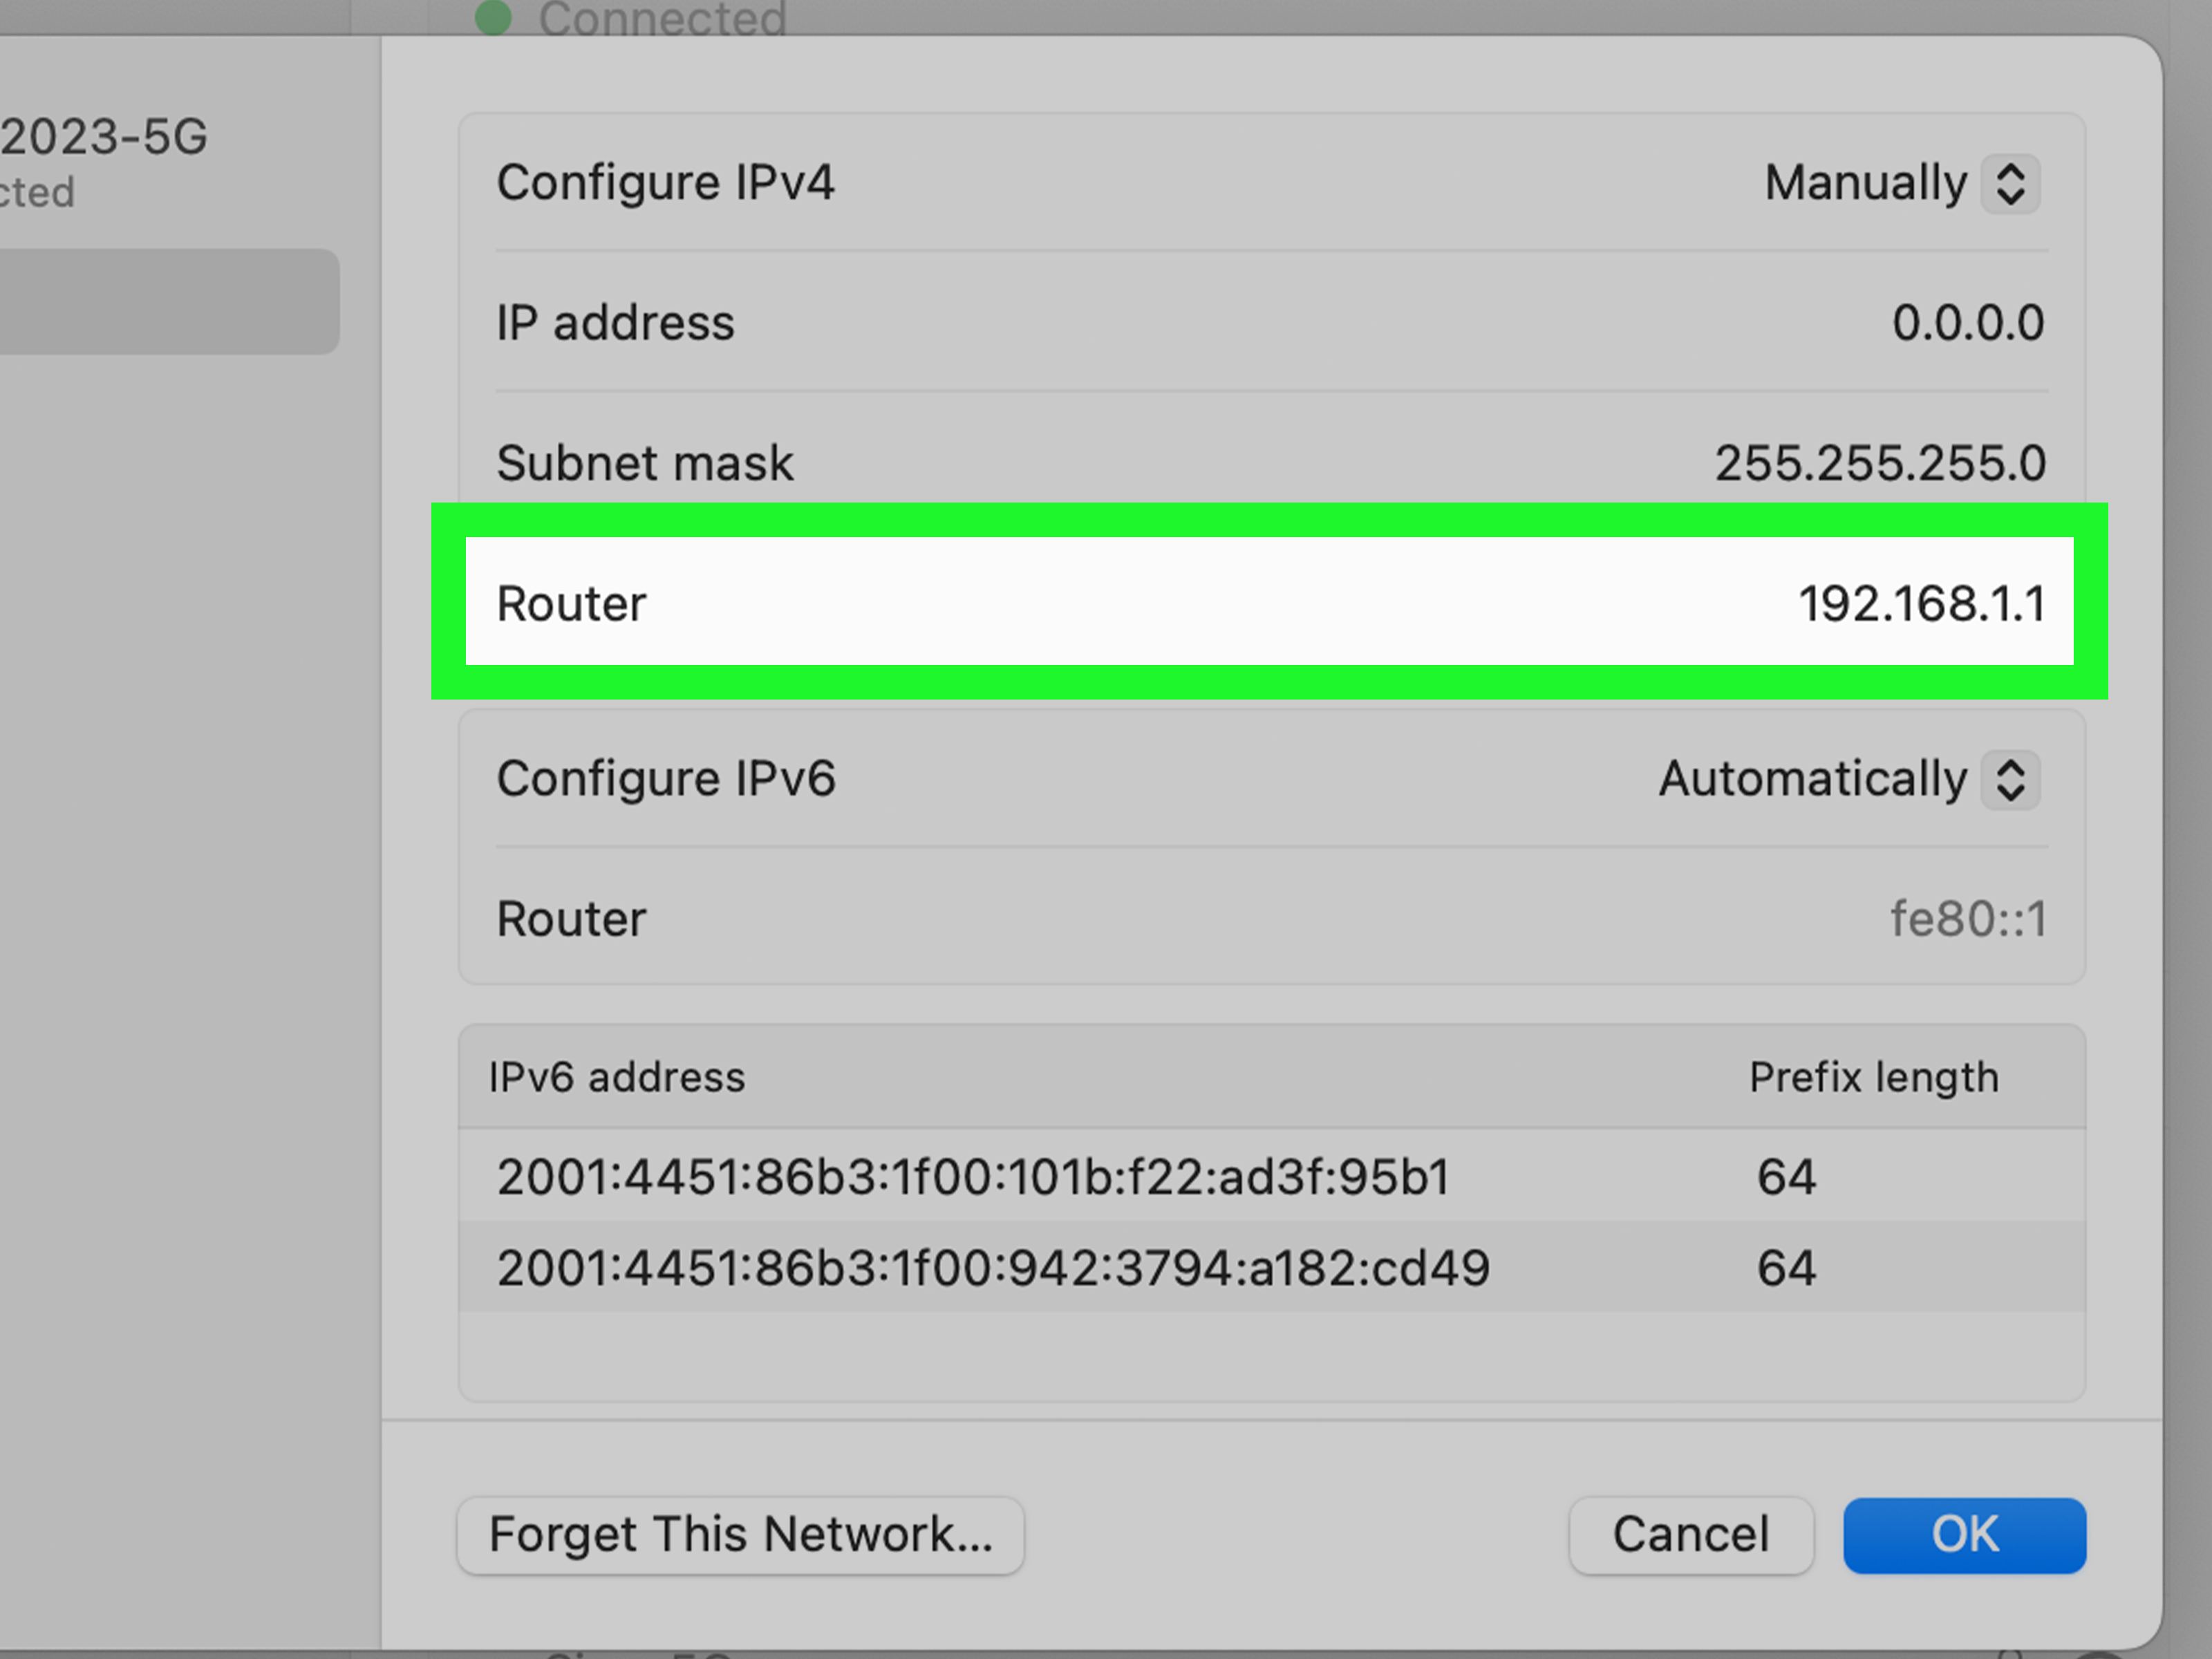
The key is choosing an address that fits your network and does not conflict with another device. If your router uses addresses like 192.168.1.x, you should stay in that same range. If your router is 192.168.1.1, an address such as 192.168.1.50 may work, assuming no other device is already using it.
How to Set a Manual IP Address on a Mac
- Open the Apple menu.
- Go to System Settings.
- Click Network.
- Select Wi-Fi or Ethernet.
- Click Details.
- Open the TCP/IP section.
- Next to Configure IPv4, choose Using DHCP with Manual Address or Manually.
- Enter the IP address you want to use.
- Confirm the subnet mask and router address if macOS asks for them.
- Click OK or Apply.
Example of a Safe Manual IP Setup
Imagine your router address is 192.168.1.1, and your Mac currently has 192.168.1.23. You might manually set your Mac to 192.168.1.80. The subnet mask is often 255.255.255.0, and the router address remains 192.168.1.1.
Do not randomly invent an IP address from another range, such as 10.0.0.88, unless your router actually uses that range. Your Mac may look confident, but the network will not be impressed.
When This Method Works Best
Manual IP assignment is best for local network stability. It is not the best choice for online privacy because it does not hide your public IP address from websites. Think of it as rearranging your house number inside a gated neighborhood. The outside world still sees the neighborhood’s front gate.
Method 3: Use a VPN to Mask Your Public IP Address
If your goal is to change the IP address that websites see, a VPN is one of the most common options. A VPN, or virtual private network, routes your internet traffic through a remote server. Websites see the VPN server’s IP address instead of your regular public IP address.
This can be helpful when you are using public Wi-Fi, traveling, researching search results from another region, or trying to reduce how easily websites connect your browsing activity to your home network. It is not magic invisibility, though. A VPN does not make you anonymous in every possible way, and it does not give anyone permission to break website rules, bypass laws, or access restricted systems.
How to Change Your IP Address with a VPN on Mac
- Choose a trustworthy VPN provider with clear privacy policies.
- Install the VPN app from the provider’s official website or the Mac App Store.
- Open the app and sign in.
- Select a server location.
- Click Connect.
- Check your public IP address in a browser to confirm it changed.
Using Built-In VPN Settings on macOS
Some schools, companies, and organizations provide VPN configuration details. In that case, you may not need a separate consumer VPN app. You can go to System Settings > VPN or System Settings > Network and add a VPN configuration using the details your administrator gives you.
For personal privacy, however, most users choose a dedicated VPN app because setup is easier and server switching is usually faster.
What to Look for in a VPN
A good VPN should have a clear privacy policy, strong encryption, modern protocols, reliable Mac support, and a reputation that does not require detective work. Be careful with random free VPN apps. If a service costs nothing, it may still be paid for somehowsometimes through ads, tracking, limited speeds, or unclear data practices.
Also remember that a VPN shifts trust. Your internet service provider sees less of your browsing traffic, but your VPN provider may be able to see connection metadata depending on how the service is designed. Choose carefully. The cheapest app with a cartoon shield icon is not automatically your digital bodyguard.
Method 4: Switch Networks or Use a Personal Hotspot
Another simple way to change your public IP address is to connect your Mac to a different network. When you move from home Wi-Fi to a phone hotspot, office network, hotel Wi-Fi, or another internet connection, your Mac usually appears online from a different public IP address.
This method is practical because it does not require advanced configuration. You are not convincing your current network to give you a new identity. You are simply walking into a different digital building.
How to Use an iPhone Personal Hotspot with a Mac
- On your iPhone, open Settings.
- Tap Personal Hotspot or go to Cellular > Personal Hotspot.
- Turn on Allow Others to Join.
- On your Mac, open System Settings.
- Click Wi-Fi.
- Select your iPhone from the available networks or Personal Hotspots.
- Enter the hotspot password if needed.
Once connected, your Mac uses your phone’s cellular connection. Websites will usually see an IP address associated with your mobile carrier instead of your home or office network.
Other Network-Switching Options
You can also connect to a different Wi-Fi network, use Ethernet through another router, or restart your modem and router. Restarting the router may or may not change your public IP address. Some internet providers keep the same address assigned for a long time, while others rotate addresses more often. If your ISP gives you a static public IP, restarting your equipment probably will not change it.
When This Method Works Best
Switching networks is best when you need a quick public IP change for troubleshooting. For example, if a website loads on your phone hotspot but not on home Wi-Fi, the issue may involve your home network, ISP routing, DNS, firewall rules, or a temporary block affecting your current public IP.
Bonus Tip: A Private Wi-Fi Address Is Not the Same as Changing Your IP
Modern Apple devices include Private Wi-Fi Address features that help reduce tracking by Wi-Fi network operators. This changes or rotates the hardware address your Mac presents to a Wi-Fi network. That can improve privacy on Wi-Fi, but it is not the same thing as changing your public IP address.
In plain English: Private Wi-Fi Address helps networks recognize your device less consistently. A VPN or different internet connection changes what websites may see as your public IP. Both can be useful, but they solve different privacy problems.
How to Check Whether Your IP Address Changed
After using any of the four methods above, check whether the change worked.
To Check Your Private IP Address on Mac
- Open System Settings.
- Go to Network.
- Select your active connection.
- Click Details.
- Look under TCP/IP for your IP address.
To Check Your Public IP Address
Open a browser and search for “what is my IP address.” Compare the result before and after using a VPN, hotspot, or another network. If the public IP changes, the outside world is seeing a different address.
Common Problems When Changing an IP Address on a Mac
The Internet Stops Working After Manual Setup
This usually means the IP address, subnet mask, router address, or DNS settings are incorrect. Switch Configure IPv4 back to Using DHCP, apply the change, and reconnect.
The Public IP Does Not Change After Renewing DHCP
That is expected. Renewing DHCP on your Mac usually affects your local private IP, not the public IP assigned to your router by your ISP.
The VPN Connects, But Websites Still Show the Old Location
Disconnect and reconnect to a different VPN server. Also clear browser location permissions, check whether the browser is using saved location data, and make sure the VPN app is protecting the connection you are actually using.
The Mac Keeps Getting the Same Private IP
Your router may be remembering your Mac and assigning the same address. Many routers do this to keep networks stable. If you truly need a new private IP, set one manually or adjust the DHCP reservation settings in the router.
Which Method Should You Use?
Use Renew DHCP Lease when your Mac has a local network issue and you want the quickest fix. Use Manual IP when your Mac needs a stable private address for local services. Use a VPN when you want websites to see a different public IP address. Use a Personal Hotspot or different network when you want a quick public IP change without changing many settings.
The best method depends on your goal. Changing an IP address is not one single trick. It is more like choosing the right screwdriver from a drawer full of suspiciously similar screwdrivers. The Phillips head is greatunless you need a flathead.
Real-World Experiences: What Actually Happens When You Change Your IP Address on a Mac
Changing your IP address on a Mac sounds technical, but in real life it often starts with a very ordinary problem: something refuses to load. A streaming site buffers forever. A printer disappears. A game server complains. A workplace dashboard says access denied. The Mac looks innocent. The router blinks like it knows too much.
In my experience, the first mistake many people make is assuming every IP issue is a privacy issue. Sometimes the problem is much simpler. For example, if your Mac cannot connect to a printer on the same Wi-Fi network, using a VPN will not help. The printer is not judging your public IP address. It probably needs your Mac to have a proper local address in the same network range. In that situation, renewing DHCP or setting a careful manual private IP is the better move.
Another common experience is expecting “Renew DHCP Lease” to create a brand-new public IP address. It usually does not. People click the button, check their public IP online, and feel betrayed. But the button is doing its job: it is talking to the local router, not negotiating a dramatic new identity with the internet provider. If your goal is to change what websites see, a VPN or hotspot is usually more effective.
A phone hotspot is often the fastest troubleshooting tool. When a website refuses to load on home Wi-Fi but works instantly through an iPhone hotspot, you have learned something useful. The issue may be your ISP, router, DNS settings, parental controls, firewall rules, or a temporary block connected to the home network’s public IP. The hotspot test is like asking a second witness. It does not solve every case, but it gives you clues.
VPNs are helpful, too, but they come with trade-offs. A VPN can make your public IP appear different, and it can add privacy on public Wi-Fi. But some websites become suspicious when they see VPN traffic. You may get more CAPTCHA tests, bank login checks, or “new device” warnings. That does not mean your Mac is broken. It means the website noticed your traffic is coming from a shared VPN server. Privacy sometimes walks into the room wearing sunglasses, and websites ask questions.
Manual IP addresses are powerful but should be used carefully. The biggest risk is picking an address already used by another device. When two devices claim the same private IP, the network can behave strangely. One minute your Mac works; the next minute your smart TV steals the address like a tiny streaming goblin. To avoid this, choose an address outside the router’s automatic DHCP range if you know how, or create a DHCP reservation in the router instead.
For everyday users, the safest workflow is simple: renew DHCP first, restart Wi-Fi if needed, test another network, and use a reputable VPN only when the goal is public IP privacy. Keep notes if you manually change settings, especially router address, subnet mask, DNS servers, and the original configuration. Future you will be grateful. Future you has enough problems already.
Conclusion
Learning how to change your IP address on a Mac is really about learning which address you need to change. For local network problems, renew your DHCP lease or set a manual private IP. For public-facing changes, use a trusted VPN or switch to another network such as a Personal Hotspot. The process is not difficult once you understand the difference.
Most Mac users should start with the least disruptive option: renew the DHCP lease. If that does not solve the problem, decide whether you are troubleshooting your local network or changing how websites see you online. That one decision can save time, prevent broken settings, and keep you from yelling at a router that is, admittedly, trying its best.