Wood trim is the picture frame of a room. Baseboards, crown molding, window casing, chair rail, and door trim quietly define the space, hide the gaps, and make a plain wall look intentional. But when the finish is blotchy, dusty, sticky, streaky, or oddly orange, trim becomes less “architectural detail” and more “crime scene with polyurethane.”
The good news is that learning how to finish wood trim is not mysterious. It is mostly preparation, patience, and refusing to rush the part where the can says “allow to dry.” Whether you are staining new oak casing, refreshing pine baseboards, or painting old varnished trim, the process comes down to the same big idea: make the wood smooth, clean, evenly sealed, and protected.
This in-depth guide covers 11 practical tips for finishing wood trim like a pro, plus real-world experience notes at the end for avoiding the little disasters that do not show up on the product label. Grab your sandpaper, your lint-free cloths, and your emotional support coffee. We are making trim look expensive.
Why Finishing Wood Trim Matters
Wood trim takes more abuse than most people realize. Baseboards get kicked, door casing gets bumped, window trim collects dust and condensation, and chair rail lives dangerously close to backpacks, pets, and furniture corners. A proper finish does three jobs: it improves the appearance of the wood, protects it from wear, and makes future cleaning easier.
Unfinished or poorly finished trim absorbs moisture, dirt, oils, and stains unevenly. It can also show every scratch, mill mark, nail hole, and sanding swirl. A good finish, whether stain and clear coat or primer and paint, gives the surface a durable skin while letting the detail of the molding shine.
11 Tips on How to Finish Wood Trim
1. Decide Early: Stain or Paint?
Before touching sandpaper, decide whether the final look will be stained wood or painted trim. Stain highlights the natural wood grain, which is beautiful on oak, maple, cherry, walnut, and high-quality pine. Paint creates a clean, modern, uniform appearance and is often better for lower-grade trim, mixed wood species, old repaired molding, or rooms where the trim needs to match doors and walls.
If the trim has attractive grain, staining can make it feel warm and custom. If the wood has knots, patches, dents, or mismatched boards, paint may be the smarter option. Think of stain as a spotlight and paint as a very polite cover story. Stain reveals; paint forgives.
For traditional homes, stained wood trim can add depth and character. For modern interiors, painted trim in satin, semi-gloss, or gloss is easier to coordinate and clean. The key is choosing before prep begins, because staining and painting require different fillers, primers, sanding expectations, and finishing products.
2. Finish Before Installation When Possible
If you are working with new trim, finishing before installation can save time and frustration. Long boards are easier to sand, stain, and clear coat on sawhorses than when they are already nailed to the wall. You can work at a comfortable height instead of crawling along the floor like a home-improvement goblin.
Pre-finishing also helps reduce lap marks because you can apply stain or topcoat continuously along the entire length of the board. After installation, you only need to touch up nail holes, cut ends, seams, and corners.
However, do not completely ignore the final touch-up stage. Cut ends, miter joints, nail holes, and small installation scratches still need attention. A smart workflow is to sand and apply most of the finish before installation, install carefully, then do a final light touch-up coat or detail pass afterward.
3. Sand Smooth, but Do Not Over-Sand
Sanding is the foundation of a professional wood trim finish. It removes mill marks, scratches, dents, raised fibers, and surface grime. For new trim, start with a grit coarse enough to remove visible flaws, often around 120 grit. Then move to 150 or 180 grit for staining, or up to 220 grit for a very smooth painted or clear-coated surface.
Always sand with the grain, not across it. Cross-grain scratches may look harmless on raw wood, but stain will darken them like a highlighter. On flat trim, use a sanding block to keep the surface even. For curves, profiles, and small decorative grooves, use sanding sponges or folded sandpaper.
Do not sand so aggressively that you round over crisp edges or flatten decorative profiles. Trim depends on shadow lines. Once those little details disappear, the molding starts to look tired, even if the finish is shiny enough to signal aircraft.
4. Remove Every Bit of Dust
Dust is the tiny villain of wood finishing. After sanding, vacuum the trim, the workbench, the floor, and nearby surfaces. Then wipe the wood with a clean, lint-free cloth or tack cloth. If you skip this step, dust nibs can get trapped under stain, primer, paint, or polyurethane, leaving a gritty finish that feels like the trim spent spring break at the beach.
For water-based finishes, avoid oily cloths or residue-heavy tack cloths unless the manufacturer says they are compatible. A slightly damp microfiber cloth can work well, but the wood must be fully dry before finishing. For oil-based products, mineral spirits may be used in some prep situations, but always follow the finish manufacturer’s label.
Cleanliness also means cleaning the room. Turn off fans that blow dust directly onto wet finish, but keep safe ventilation. Sweep or vacuum before opening the can. Wet finish is basically a dust magnet with ambition.
5. Use Wood Conditioner on Blotch-Prone Wood
Softwoods such as pine, fir, and aspen can absorb stain unevenly, creating dark patches and cloudy areas. Some hardwoods, including maple and birch, can also stain unpredictably. A pre-stain wood conditioner helps the wood absorb stain more evenly and reduces blotching.
Apply conditioner according to the product directions, let it penetrate, wipe off the excess if required, and stain within the recommended time window. This step is especially helpful for trim because long boards and detailed profiles make blotches very noticeable.
Think of wood conditioner as primer for stain. It does not replace good sanding, and it will not magically turn construction-grade pine into heirloom cherry, but it can make the difference between “warm rustic character” and “why is my baseboard leopard-print?”
6. Test Stain on Scrap First
Never judge stain color by the label on the can. The printed sample is a suggestion, not a legally binding contract. Stain color changes depending on the wood species, sanding grit, conditioner, number of coats, drying time, lighting, and topcoat.
Use a scrap piece from the same trim batch whenever possible. Sand it the same way you sanded the actual trim, apply conditioner if you plan to use it, stain it, let it dry, and add the topcoat. Clear finishes can warm, darken, amber, or slightly shift the final color, especially oil-based polyurethane.
Testing also helps you decide how long to leave the stain on before wiping. A longer penetration time usually deepens color, but leaving excess stain on the surface can cause sticky spots and uneven sheen. The sample board is where mistakes should happen. Let the scrap wood be the drama queen so your living room does not have to be.
7. Apply Stain Generously, Then Wipe It Back
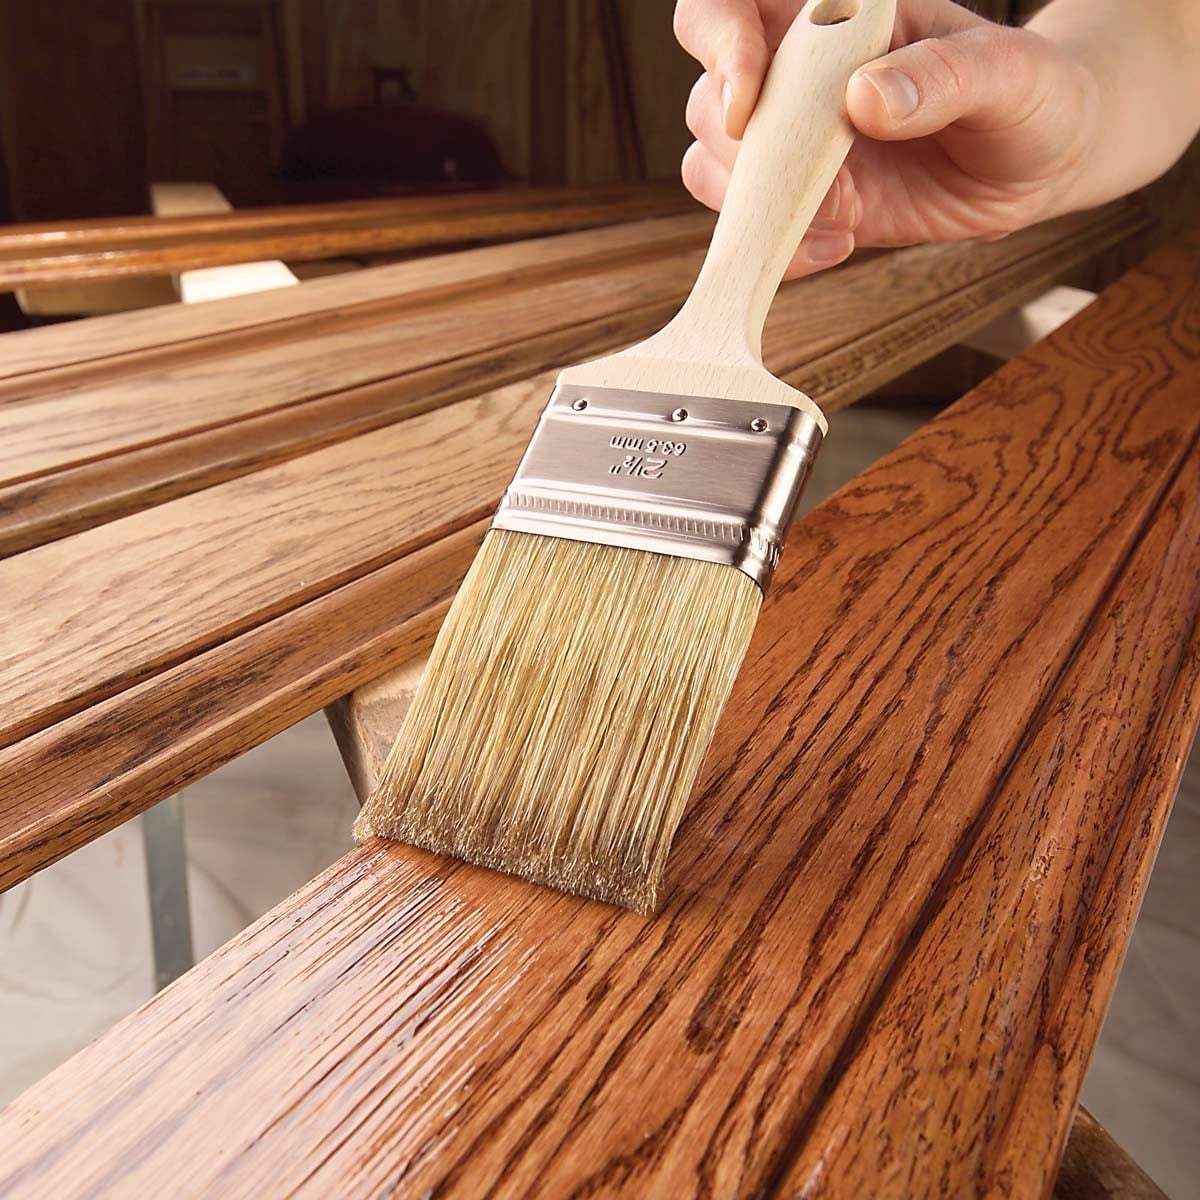
For stained wood trim, apply stain with a brush, cloth, or sponge, working along the grain. Make sure the surface is evenly wet, especially in profiles, grooves, and edges. Then wipe off the excess with clean cotton rags in the same order you applied it. This keeps the color consistent from one section to the next.
Do not treat stain like paint. It is not supposed to sit in a thick layer on top of the wood. Most penetrating stains need to soak into the fibers and then be wiped back. If you leave too much on the surface, it may dry slowly, feel tacky, or create a muddy look that hides the grain.
For detailed trim, keep a small dry brush nearby to pull stain out of corners where it puddles. Puddles become dark spots. Dark spots become regrets. Regrets become internet searches at 1:00 a.m.
8. Seal Stained Trim With a Durable Clear Coat
Stain adds color, but it does not provide enough protection by itself. Most stained interior trim needs a clear topcoat such as polyurethane, water-based polycrylic, varnish, lacquer, or another compatible finish. The best choice depends on the look, durability needs, odor tolerance, drying time, and product compatibility.
Oil-based polyurethane gives a warm amber tone and strong durability. Water-based polyurethane dries faster, has less ambering, and is a good choice when you want the color to stay clearer. Wipe-on polyurethane is excellent for detailed trim because it reduces brush marks and is easy to control on profiles, although it usually requires more coats because each coat is thinner.
Apply multiple thin coats rather than one heavy coat. A heavy coat may sag, bubble, drip, or dry unevenly. Sand lightly between coats after the finish dries, using fine sandpaper such as 220, 280, or finer depending on the product directions. Remove dust before the next coat.
9. Choose the Right Sheen
Sheen affects both appearance and maintenance. Satin gives wood trim a soft, elegant glow and hides minor imperfections better than glossier finishes. Semi-gloss is durable, cleanable, and common for painted trim. Gloss creates a crisp, formal look but shows flaws, brush marks, dents, and dust more easily.
For most interior trim, satin or semi-gloss is the sweet spot. In busy areas such as hallways, bathrooms, kitchens, mudrooms, and kids’ rooms, semi-gloss paint or a durable clear coat can make cleaning easier. For historic homes or high-end stained trim, satin often looks richer and less plastic-like.
Match sheen to the room’s style. A farmhouse bedroom may look better with satin painted trim, while a formal dining room can handle glossier crown molding. The goal is not maximum shine. The goal is trim that looks intentional, durable, and not like it was dipped in pancake syrup.
10. For Painted Trim, Prime First and Use Trim Paint
If you are painting wood trim, primer is not optional on bare wood, patched areas, or glossy old finishes. Primer helps paint adhere, blocks stains and tannins, and creates an even surface. For old varnished trim, sanding or deglossing is especially important so the primer can grip.
Fill nail holes, cracks, and dents before priming. Sand repairs smooth. Caulk gaps between trim and wall after priming if the product instructions recommend it, then paint with a quality trim enamel. Semi-gloss and gloss paints are popular for trim because they are durable and easier to wipe clean.
Use a high-quality angled sash brush for profiles and edges. Apply paint in long, smooth strokes, and avoid overloading the brush. Two thinner coats usually look better and last longer than one thick coat. Thick paint on trim is like too much frosting on a cupcake: exciting for three seconds, then structurally questionable.
11. Respect Dry Times, Ventilation, and Safety
Dry time is not decorative text on a label. It affects adhesion, hardness, sanding quality, odor, and durability. Stain must be dry before topcoat. Primer must be dry before paint. Polyurethane must be dry enough before sanding or recoating. Temperature, humidity, airflow, and coat thickness can all change drying time.
Ventilation matters, especially with oil-based stains, solvent-based finishes, and paint products that release strong fumes. Work with open windows, safe airflow, and protective equipment recommended on the product label. Avoid open flames, smoking, and sparks around flammable finishes.
Also, handle oily rags carefully. Rags wet with oil-based stain, finish, or solvent can heat up and ignite if crumpled together. Lay them flat outdoors to dry in a safe area or place them in a proper metal container according to local disposal rules. This is the least glamorous part of finishing wood trim, but it is also the part that prevents your project from becoming a fire department anecdote.
Common Mistakes When Finishing Wood Trim
Skipping Surface Prep
The most common mistake is expecting stain, paint, or clear finish to hide poor preparation. It will not. Finishing products usually exaggerate scratches, dents, dust, glue spots, and uneven sanding. Prep is where the professional look is created.
Using the Wrong Filler
For stained trim, use a stainable wood filler that matches the wood or accepts stain well. For painted trim, use paintable filler or spackle suitable for trim. Regular filler may flash through paint or reject stain, leaving pale dots where nail holes should have disappeared.
Applying Coats Too Thick
Thick coats lead to drips, sags, bubbles, and long drying times. Trim has edges and profiles where extra product collects easily. Thin, controlled coats are slower at first but faster in the end because you spend less time fixing mistakes.
Ignoring Lighting
Finish under strong side lighting if possible. Raking light reveals sanding scratches, missed spots, dust nibs, and drips before they dry permanently. A portable work light can save you from discovering a giant run in the polyurethane after guests arrive.
Best Products for Finishing Wood Trim
The best product depends on the trim material and final look, but most projects use some combination of sandpaper, wood filler, pre-stain conditioner, stain, primer, paint, and clear topcoat. For stained trim, a classic system is conditioner, stain, and polyurethane. For painted trim, the system is filler, sanding, primer, caulk, and trim enamel.
Water-based products dry quickly and have lower odor, which is helpful indoors. Oil-based products often provide rich color and strong leveling but require more ventilation and careful cleanup. Gel stain can be useful on vertical or detailed trim because it is thicker and easier to control. Wipe-on poly is beginner-friendly for ornate molding because it minimizes brush marks.
Always check product compatibility. Not every stain pairs well with every topcoat, and dry time between systems matters. When in doubt, test the full finishing schedule on scrap wood first.
Experience Notes: What Actually Helps in Real Wood Trim Projects
After enough trim projects, you start to learn that the difference between “pretty good” and “professionally finished” often comes from tiny habits. The first habit is labeling boards before finishing. If you pre-finish casing or baseboards, mark the back lightly so you know where each piece goes. Nothing ruins the mood like holding a perfectly stained board and realizing it belongs to the window in the other room.
Another experience-based tip is to finish extra trim. Buy and finish about 10 percent more than you think you need, especially with stain-grade molding. Mistakes happen. Cuts go wrong. A board splits. A miter looks like it lost an argument. Having matching finished material nearby is far better than trying to recreate the same stain color two weekends later under different weather, lighting, and caffeine levels.
Work in batches, but do not create an assembly line so big that you lose control. For example, staining six or eight boards at once is manageable. Staining twenty boards at once can become a panic workout. Since stain color depends partly on how long it sits before wiping, you need a rhythm: apply, wait, wipe, inspect. If you cannot wipe everything consistently, reduce the batch size.
For baseboards, pay extra attention to the top edge. That narrow ledge catches dust forever, and if the finish is rough, it becomes hard to clean. A smooth satin or semi-gloss surface on the top edge makes maintenance easier. For door casing, inspect the inside edges where hands often touch. These areas benefit from a durable topcoat or quality enamel.
When painting trim already installed on the wall, use painter’s tape strategically but do not depend on tape alone. Press the edge down firmly, avoid flooding paint against the tape, and remove it at the right time according to the tape manufacturer’s guidance. A quality angled brush and steady hand still matter. Tape is a helper, not a magical force field.
For stained trim, keep a small artist’s brush nearby during installation touch-ups. It is perfect for coloring cut ends, nail holes, and tiny scratches. After the stain dries, dab on clear finish with the same careful approach. The goal is to blend touch-ups, not create shiny polka dots.
Humidity is another real-world issue. On humid days, finishes can dry slowly and stay tacky longer. Rushing the next coat can trap moisture or solvents and lead to cloudy or soft finishes. If the room feels like a swamp with furniture, give the finish more time.
Finally, do not judge the project while it is half done. First coats often look disappointing. Primer can look patchy. Stain may seem too flat before clear coat. Polyurethane may look uneven until it levels and dries. Stay patient, follow the process, and inspect at the end. Wood trim finishing rewards calm people. It punishes hurry like a tiny, glossy courtroom.
Conclusion
Learning how to finish wood trim is about building a reliable system: choose the look, prep the wood, sand with care, remove dust, test your stain, apply thin coats, protect the surface, and respect drying time. The work is not difficult, but it does require patience. Trim is full of edges, profiles, corners, and small details, so rushing almost always leaves evidence.
For stained trim, focus on even sanding, pre-stain conditioner when needed, controlled stain application, and a durable clear topcoat. For painted trim, spend more time on filling, priming, caulking, and brushing smooth coats of trim enamel. In both cases, good lighting, clean surfaces, and safe ventilation make the job easier and the result better.
Done right, finished wood trim adds warmth, polish, and long-term durability to a room. It makes walls look sharper, doors look cleaner, and the whole house feel more complete. Best of all, once you know the process, every baseboard and casing in the house starts looking less intimidating. Slightly judgmental, perhaps, but less intimidating.