There comes a moment in every home’s life when the shutters look less “classic cottage charm” and more “forgotten plastic sunglasses left on the dashboard since 2009.” The good news? You do not need to replace them, apologize to the neighbors, or pretend faded shutters are part of a rustic design movement. With the right prep, exterior paint, and a confident shade of blue, you can bring them back with one satisfying weekend project.
This painting shutters tutorial focuses on blue shutters because blue is the color equivalent of a deep breath. Navy feels polished, slate blue feels calm, powder blue feels friendly, and bright coastal blue says, “Yes, I own a garden hose and I know how to use it.” Whether your shutters are wood, vinyl, plastic, or metal, the process is simple: remove, clean, repair, prime when needed, paint in thin coats, let everything cure, and reinstall with the smug happiness of a person who just upgraded curb appeal without renovating the whole house.
Why Paint Shutters Blue?
Blue shutters work because they balance personality with restraint. They can be cheerful without shouting, elegant without looking stiff, and fresh without turning your exterior into a theme park. Blue also pairs beautifully with common American home colors: white siding, gray brick, tan stucco, cream trim, red brick, yellow cottages, and natural wood accents.
If your home exterior already has a strong color, choose a blue that supports it rather than competes with it. A white house can handle navy, cobalt, or sky blue. A red brick home usually looks best with deeper blue-gray, colonial blue, or muted navy. A beige or greige house comes alive with slate blue, denim blue, or a dusty coastal shade. The goal is not to make your shutters famous. The goal is to make the whole house look like it finally got eight hours of sleep.
Tools and Materials You Will Need
Before you begin, gather everything so you are not halfway through the project holding a wet shutter and wondering whether a butter knife can remove screws. It cannot, at least not gracefully.
- Exterior paint suitable for your shutter material
- Primer for bare wood, metal, or non-paintable plastic/vinyl when required
- 2-inch to 2.5-inch synthetic brush
- Small foam roller or paint sprayer
- Drop cloths or plastic sheeting
- Painter’s tape
- Screwdriver or drill
- Mild detergent, bucket, sponge, and garden hose
- Fine-grit sanding sponge or sandpaper
- Rags or tack cloth
- Exterior caulk or wood filler for repairs
- Safety glasses, gloves, and a mask if spraying
Step 1: Decide Whether to Remove the Shutters
For the cleanest finish, remove the shutters from the house. Painting them flat on sawhorses or a worktable helps prevent drips, gives better access to edges, and keeps paint off your siding. If the shutters are high, fragile, or attached in a way that makes removal risky, you can paint them in place, but be generous with painter’s tape and drop cloths.
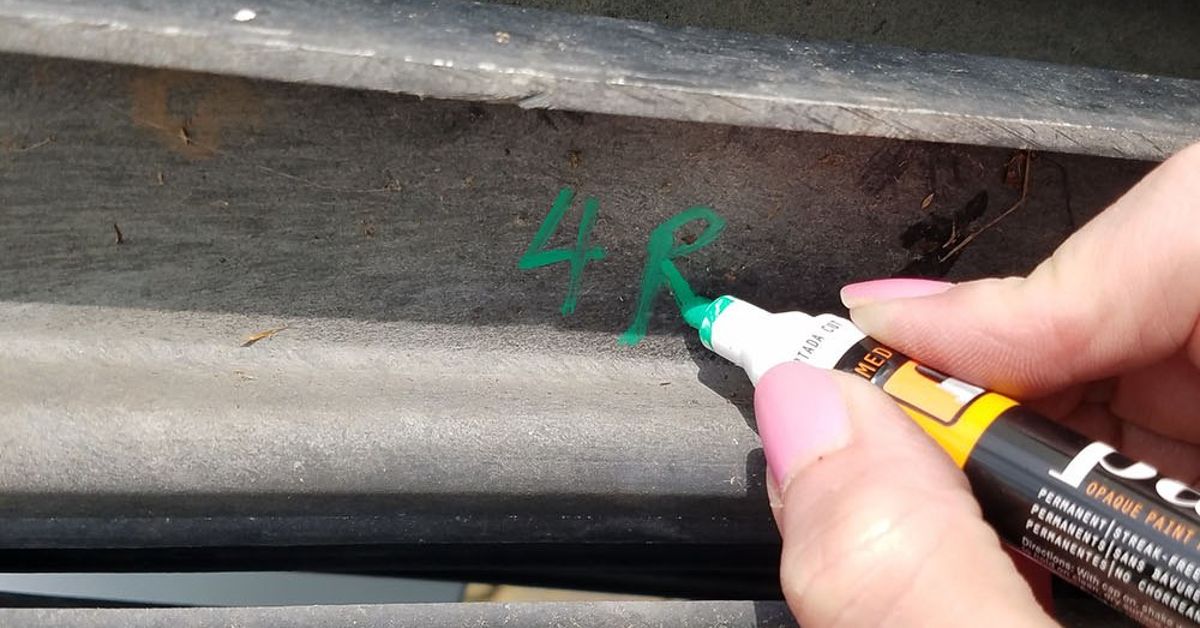
Label each shutter as you remove it. A small piece of tape on the back marked “front left” or “kitchen right” can save you from the classic DIY puzzle known as “why does nothing fit anymore?” Keep screws and fasteners in labeled bags. If any fasteners are rusted, cracked, or warped, replace them before reinstalling.
Step 2: Clean Like the Paint Depends on It
Paint does not bond well to dirt, chalky oxidation, pollen, mildew, or the mysterious outdoor film that appears on everything eventually. Wash the shutters with mild detergent and warm water. Scrub gently with a sponge or soft brush, then rinse thoroughly with a hose. Avoid harsh chemicals unless your paint manufacturer specifically recommends them.
If mildew is present, use an appropriate mildew-removing cleaner and rinse completely. Let the shutters dry fully before sanding or priming. This is not the step to rush. Painting over damp shutters is like putting socks on wet feet: technically possible, emotionally regrettable, and guaranteed to cause problems.
Step 3: Sand, Scuff, and Repair
Wood shutters may have rough spots, peeling paint, or small cracks. Sand the surface smooth, remove loose paint, and fill damaged areas with exterior-grade wood filler. For vinyl or plastic shutters, do not sand aggressively. A light scuff may help adhesion, but the real goal is to dull a glossy surface without gouging it.
Metal shutters need special attention if rust is present. Remove loose rust with a wire brush or sanding sponge, wipe away dust, and use a rust-inhibiting primer before painting. Any shutter with movable louvers should be adjusted during painting so the paint does not glue the moving parts together. A shutter should frame a window, not become a decorative fossil.
Step 4: Choose the Right Blue Paint
The best paint for exterior shutters depends on the material. For wood, a high-quality exterior acrylic latex paint is a smart choice because it resists weather, expands and contracts with temperature changes, and cleans up with water. For vinyl and plastic, use paint labeled for that surface or a compatible bonding primer followed by exterior paint. Some vinyl-safe paint systems limit color choices because very dark colors can absorb heat and may cause warping on vinyl.
For sheen, satin, semi-gloss, or gloss usually works better than flat. A slightly reflective finish sheds dirt more easily and highlights architectural details. Gloss can look sharp, but it also reveals dents and surface flaws. Satin or semi-gloss is the friendly middle ground: polished enough for curb appeal, forgiving enough for real life.
Popular Blue Shutter Color Ideas
- Navy blue: Best for white, gray, cream, and brick homes.
- Slate blue: Great for beige, stone, greige, and farmhouse-style exteriors.
- Powder blue: Charming on cottages, Cape Cod homes, and soft yellow siding.
- Denim blue: Casual, relaxed, and easy to pair with white trim.
- Blue-black: Dramatic, elegant, and ideal for a modern traditional look.
- Coastal blue: Bright and breezy, especially near water or on vacation-style homes.
Step 5: Prime When Needed
Primer is not glamorous. Nobody walks outside and says, “Wow, what a beautifully primed neighborhood.” But primer is the quiet hero that helps paint stick, improves color coverage, and blocks stains or uneven surfaces.
Use primer on bare wood, patched areas, metal, stained surfaces, and slick plastic or vinyl when your paint requires it. If you are covering a very dark shutter with a lighter blue, primer also reduces the number of paint coats needed. Let the primer dry according to the label. Paint timing matters because some primers need a specific recoat window for best adhesion.
Step 6: Brush, Roll, or Spray?
You can paint shutters with a brush, a small roller, or a sprayer. The best option depends on the shutter style and your comfort level.
Using a Brush
A brush gives excellent control around louvers, edges, grooves, and screw holes. Use a quality synthetic brush and paint in long, even strokes. Work from top to bottom, and do not overload the brush. Thick paint creates ridges and drips, especially on louvered shutters.
Using a Small Roller
A small foam roller is useful for raised panels and flat board-and-batten shutters. Roll the larger surfaces first, then use a brush to smooth edges and reach corners. This method is quick and beginner-friendly.
Using a Sprayer or Spray Paint
Spraying gives the smoothest finish, especially on louvered vinyl shutters. Work outdoors or in a very well-ventilated area, protect everything nearby, and apply multiple light coats. Keep the can or sprayer moving in steady passes and overlap slightly. Start spraying just before the shutter edge and release after passing the opposite edge to avoid heavy spots.
Step 7: Paint in Thin, Patient Coats
Thin coats are the secret to a professional-looking finish. One thick coat may feel efficient, but it often leads to drips, tackiness, and uneven sheen. Apply the first coat lightly and evenly, let it dry, then inspect for missed spots. Most shutters need two coats; some color changes may need three.
Paint the sides and edges, not just the front. For wood shutters, coating all sides helps reduce moisture problems. For louvered shutters, angle your brush or sprayer upward and downward to reach under each slat. If you are painting movable louvers, move them gently after painting so they do not stick.
Step 8: Let the Paint Cure Before Reinstalling
Dry paint is not always cured paint. A shutter may feel dry to the touch but still be soft underneath. Follow the paint label for drying and recoat times, and give the finish extra time before stacking, leaning, or reinstalling. If you reinstall too soon, fasteners can bite into soft paint and leave marks.
When reinstalling vinyl or composite shutters, leave room for expansion if the manufacturer recommends it. Shutters exposed to heat and cold can expand and contract, and overly tight installation can cause buckling. Use a level, step back often, and check alignment before tightening everything down.
Common Mistakes to Avoid
Painting in Direct Sunlight
Direct sunlight can make paint dry too quickly, causing lap marks and poor adhesion. Choose a mild day with moderate humidity, and work in shade whenever possible. Morning or late afternoon is often better than noon, when your shutters may be hot enough to fry an egg, which is not recommended unless breakfast is part of the project.
Skipping Surface Prep
Paint failure usually begins before the paint can is opened. Dirty, glossy, damp, or peeling surfaces will not hold a finish for long. Cleaning and sanding may feel boring, but they are cheaper than repainting everything next month while muttering dramatic things under your breath.
Choosing the Wrong Paint for Vinyl
Vinyl shutters need compatible paint. Very dark colors may absorb too much heat on certain vinyl materials, so choose a vinyl-safe formula or ask the paint retailer for guidance. When in doubt, test a small area or follow the shutter manufacturer’s recommendations.
Forgetting the Screw Heads
After reinstalling, touch up screw heads or fasteners with a small artist brush. This tiny detail makes the whole job look intentional instead of “almost finished, but emotionally unavailable.”
How Blue Shutters Change Curb Appeal
Blue shutters create a focal point without overwhelming the exterior. On a white house, navy blue adds crisp contrast. On gray siding, denim blue adds warmth. On red brick, blue-gray softens the look and brings out the mortar tones. On yellow siding, powder blue feels cheerful and vintage. The beauty of blue is that it can be tailored to your home’s personality.
If you are unsure, paint a large sample board and hold it near the shutters at different times of day. Exterior colors shift in morning light, harsh afternoon sun, and cloudy weather. A blue that looks perfect indoors may turn electric outside. Testing first prevents your shutters from accidentally becoming the brightest object on the block, visible from orbit.
Maintenance Tips for Freshly Painted Shutters
Once your shutters are painted, keep them clean with gentle washing once or twice a year. Remove spiderwebs, dust, pollen, and mildew before they settle into the finish. Inspect edges, screw holes, and louvers for chips or peeling. Touch up small problems early so they do not become full repainting projects.
Wood shutters may need more frequent maintenance than vinyl or plastic, especially in wet climates. Metal shutters should be checked for rust. Vinyl shutters should be watched for warping if they are painted dark. A little attention each season keeps your blue shutters looking intentional, not abandoned.
Experience Notes: What Painting Blue Shutters Actually Feels Like
The first experience most people have with painting shutters is confidence. This confidence usually arrives five minutes after buying the paint and leaves immediately upon realizing there are sixteen shutters, not eight, because each window has two. Still, the project is manageable when you treat it like a small assembly line rather than a heroic battle.
Removing the shutters feels like progress right away. Suddenly the house looks oddly naked, like it lost its eyebrows, but that temporary awkwardness is motivating. Once the shutters are lined up on sawhorses, the work becomes calming. Wash, rinse, dry, sand, wipe, prime, paint. There is a rhythm to it. You start noticing details you never saw before: a cracked corner, a missing fastener, a spider who has very strong opinions about eviction.
The color decision is the emotional center of the project. Blue sounds simple until you meet all the blues. Navy, nautical navy, storm navy, historical navy, nearly black navy, blue that is secretly gray, gray that is secretly blue, and one alarming shade that belongs only on a children’s bounce house. The best advice from experience is to test the color outside. Paint a sample board, walk it around the house, and look at it in sunlight and shade. Your future self will thank you, possibly with snacks.
Spraying is satisfying but requires discipline. The first instinct is to cover everything immediately. Resist. Light coats win. Heavy coats drip, and drips on shutters travel into grooves like tiny blue rivers of regret. If brushing, keep the brush moving and check corners often. Paint likes to collect in louver edges, raised panel seams, and screw holes. A quick pass with a dry brush can prevent blobs before they become permanent features.
Another real-life lesson: do not rush drying time. Fresh blue shutters look so good that you will want to reinstall them instantly and admire your home like a proud museum curator. Wait anyway. Soft paint can scratch, stick, or dent during installation. Letting the finish cure longer makes the final result cleaner and more durable.
The best moment comes when the shutters go back up. The house suddenly looks sharper, brighter, and more loved. Blue shutters have a way of making old trim look cleaner and landscaping look greener. Even the mailbox may seem more professional, despite having done nothing to deserve credit. Neighbors may notice. Someone may ask what color you used. You may become temporarily unbearable, and honestly, that is part of the reward.
Painting shutters blue is not just about paint. It is about choosing a visible detail and making it feel personal. It is a small project with a big visual payoff. You learn patience, prep, color confidence, and the sacred truth that every DIY project takes at least one extra trip to the hardware store. But when the final shutter is straight, the screw heads are touched up, and the blue looks exactly right, the whole house seems to say, “Yes. That was the color all along.”
Conclusion
A blue shutter makeover is one of the simplest ways to refresh a home exterior without committing to a full repaint. The formula is straightforward: choose the right blue, match your paint to the shutter material, clean thoroughly, sand or scuff where needed, prime when required, apply thin coats, and reinstall carefully. Done well, painted shutters can make your home look cleaner, more finished, and more personal in a single weekend.
So, to thine own self be blue. Pick the shade that fits your home, prep like a responsible adult, paint like a patient artist, and enjoy the curb appeal upgrade. Your shutters may be small, but once they are freshly painted, they can change the whole personality of the house. Not bad for a few panels, a brush, and a can of blue ambition.