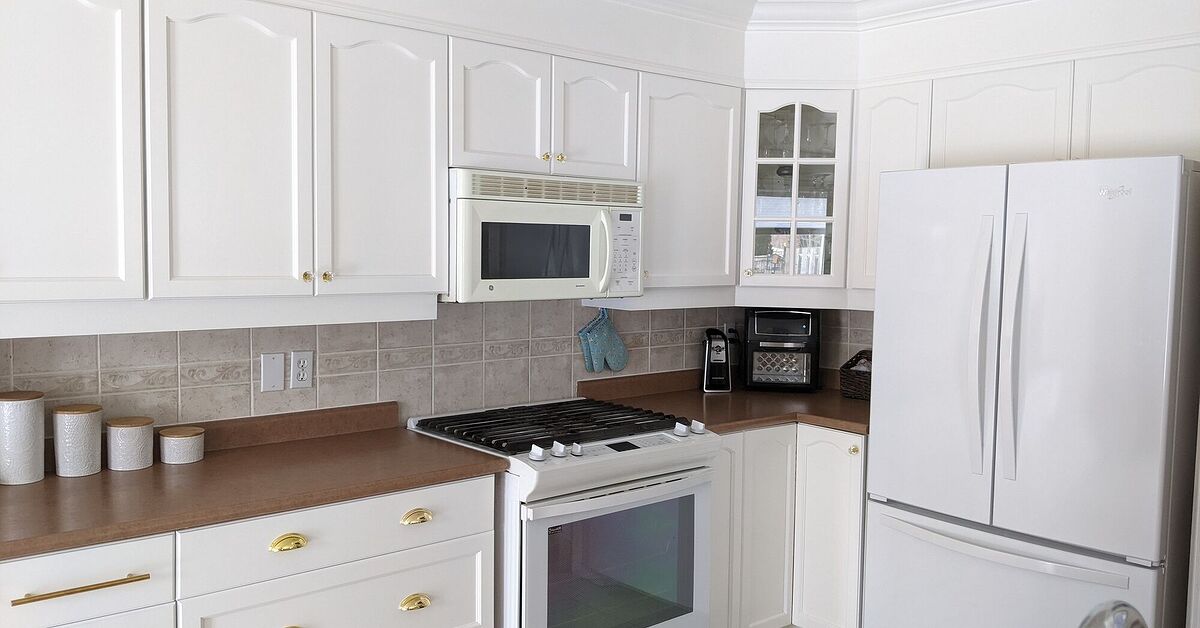
Painting cabinets with an HVLP spray system is one of those DIY projects that sounds wildly sophisticated until you realize the main ingredients are patience, masking tape, clean surfaces, and the emotional strength to not rush the final coat. HVLP stands for “high volume, low pressure,” which means the sprayer uses a large amount of air at lower pressure to atomize paint into a fine mist. In plain homeowner English: it can create a smooth, factory-style cabinet finish without the brush marks that make doors look like they were painted during a mild earthquake.
A good HVLP cabinet painting project can transform a tired kitchen, bathroom vanity, laundry room, or built-in storage wall for far less than a full cabinet replacement. But the sprayer is not magic. It will not hide grease, repair dents, or forgive lazy sanding. In fact, HVLP spraying is a little like high-definition television: it makes everything look clearer, including your mistakes. The secret to success is not spraying faster; it is preparing better.
This step-by-step guide explains how to paint cabinets using an HVLP spray system, from cleaning and sanding to priming, spraying, drying, curing, and reassembly. You will also find practical tips, common mistakes, and real-world experience notes at the end so your cabinet makeover looks polished instead of “weekend chaos with hinges.”
Why Use an HVLP Spray System for Cabinets?
Cabinets are one of the best projects for HVLP spraying because they have flat panels, edges, frames, and details that benefit from a fine, controlled finish. Compared with a brush or roller, an HVLP sprayer can lay down thin, even coats with fewer texture marks. The result is especially noticeable on cabinet doors, drawer fronts, trim details, and inset panels.
HVLP systems are popular for furniture and cabinet refinishing because they generally produce less overspray than many high-pressure methods, while still delivering a smooth finish when the paint is properly prepared. That said, “less overspray” does not mean “no overspray.” Paint mist has a talent for traveling into places you never emotionally approved, including floors, appliances, countertops, and your favorite coffee mug. Masking and ventilation are not optional.
Best Cabinet Surfaces for HVLP Spraying
HVLP spraying works well on solid wood, plywood, MDF, previously painted cabinets, and many laminate or veneer surfaces when the correct bonding primer is used. The key is adhesion. Paint needs a clean, dull, stable surface to grip. Glossy laminate, greasy wood, and peeling old paint are not surfaces; they are invitations for failure.
Tools and Materials You Will Need
Before you begin, gather everything in one place. Cabinet painting becomes frustrating when you are holding a wet door and suddenly need a missing screwdriver, a clean filter, or a place to set the door that is not “the floor, but with regret.”
- HVLP spray system with appropriate nozzle or needle set
- Cabinet-grade paint, enamel, urethane enamel, or waterborne alkyd paint
- Bonding primer or stain-blocking primer suitable for your cabinet material
- Degreaser or grease-cutting cleaner
- Clean microfiber cloths and tack cloths
- Sandpaper in 150-, 180-, 220-, and 320-grit ranges
- Orbital sander and sanding sponges
- Painter’s tape, masking paper, plastic sheeting, and drop cloths
- Paint strainers and mixing cups
- Respirator rated for paint spraying, eye protection, and gloves
- Sawhorses, drying racks, painter’s pyramids, or hanging hooks
- Labels, marker, bags, and a simple cabinet map
Step 1: Plan the Project Like a Calm Adult
Cabinet painting is not a one-afternoon project unless your cabinets are in a dollhouse. A typical kitchen can take several days to a week because of cleaning, sanding, priming, drying, spraying multiple coats, curing, and reassembly. Choose a time when you can keep doors and drawers out of action without turning dinner into a scavenger hunt.
Also consider temperature and humidity. Paint levels best in moderate conditions. If the room is too hot, paint can dry too quickly and leave texture. If it is too humid or cold, drying and curing can slow down. Always follow the paint manufacturer’s recommended temperature and humidity range.
Step 2: Remove Doors, Drawers, and Hardware
Do not try to paint cabinet doors while they are still hanging. Technically, you can do it. Technically, you can also eat soup with a fork. Remove every cabinet door, drawer front, hinge, pull, knob, bumper, and removable shelf. This gives you better access, fewer drips, and a much cleaner finish.
Label everything as you go. Write a small code on painter’s tape, place hardware in labeled bags, and make a quick cabinet map. Cabinet doors can look identical until you try to reinstall them and discover that Door 7 only loves Frame 3. Labeling saves time and prevents the thrilling game of “Why is this gap weird?”
Step 3: Clean Before Sanding
Cleaning is the most important step most beginners want to skip. Kitchen cabinets collect cooking oil, fingerprints, steam residue, dust, and mystery grime that has been quietly building a civilization near the stove. If you sand first, you can grind that contamination deeper into the surface and weaken adhesion.
Use a grease-cutting cleaner or cabinet-safe degreaser. Scrub around pulls, edges, corners, and profiles where hands touch most often. Rinse or wipe according to the cleaner instructions, then let the cabinets dry completely. A surface can look clean and still hold residue, so be thorough. Paint rewards boring prep. It is rude that way.
Step 4: Repair Damage and Fill Imperfections
Inspect each door, drawer front, and cabinet frame. Fill dents, old hardware holes, scratches, and open grain if needed. Use a wood filler or grain filler appropriate for your surface. If you are changing from knobs to pulls, measure carefully and fill old holes before priming.
After the filler dries, sand it smooth so the repair blends into the surrounding surface. Run your hand across the repair. If you can feel a ridge, the sprayer will probably reveal it. HVLP finishes are smooth, which is wonderful until they become tiny spotlight operators for every flaw.
Step 5: Sand the Cabinet Surfaces
Sanding does not always mean stripping cabinets down to bare wood. In most cabinet painting projects, the goal is to dull the existing finish and create a surface that primer can grip. Use 150- to 220-grit sandpaper depending on the condition of the cabinets. For detailed profiles, use sanding sponges or hand sanding to avoid flattening decorative edges.
Vacuum the dust thoroughly, then wipe with a damp microfiber cloth or tack cloth. Dust left behind can create bumps in the finish. If you want cabinet doors that feel smooth instead of like they lost a fight with beach sand, dust control matters.
Step 6: Set Up a Safe Spray Area
For cabinet doors and drawer fronts, a garage, workshop, or temporary spray booth works well. Cover floors, walls, nearby tools, appliances, and anything you do not want decorated in cabinet paint. Use plastic sheeting and masking paper to create a contained zone. Good lighting is essential because it helps you see wet edges, missed spots, and uneven spray patterns.
Ventilation is critical. Paint mist and fumes should not be inhaled. Use a proper respirator, eye protection, and gloves. If your home was built before 1978, be cautious about disturbing old paint because it may contain lead. When in doubt, test first and follow lead-safe practices. Safety gear may not look glamorous, but neither does coughing primer for three days.
Step 7: Choose the Right Primer
Primer is not just “paint’s shy cousin.” It is the bridge between your cabinet surface and the finish coat. For bare wood or stained cabinets, a stain-blocking primer can help prevent tannins and discoloration from bleeding through. For laminate, veneer, melamine, or glossy surfaces, use a high-quality bonding primer designed for hard-to-stick materials.
Apply primer in thin, even coats. Thick primer can sag, clog details, and extend drying time. After the primer dries, sand lightly with very fine sandpaper, usually around 220 to 320 grit, to remove dust nibs and create a smooth base for paint. Wipe clean before moving on.
Step 8: Prepare Paint for the HVLP Sprayer
Not every paint sprays well straight from the can. Some cabinet paints and enamels may need thinning for HVLP use, while others are designed to spray with minimal adjustment. Always check the paint label and sprayer manual before adding water or conditioner. Over-thinning can weaken coverage and durability; under-thinning can create orange peel, spitting, or a chunky spray pattern that looks like the sprayer sneezed.
Strain the paint before it goes into the cup. This simple step catches dried bits, lumps, and debris that can clog the nozzle. Mix thoroughly, but avoid whipping air into the paint. Bubbles in the cup can become defects on the door, and cabinet doors do not appreciate carbonated enamel.
Common HVLP Nozzle Choices
Exact nozzle size depends on your sprayer and coating. Many waterborne cabinet paints require a larger needle/nozzle than thin stains or clear finishes. Fine finishes may need a smaller setup, while thicker latex or enamel coatings often require a larger one and careful thinning. The best answer is always the combination recommended by your sprayer manual and paint manufacturer.
Step 9: Test the Spray Pattern
Before spraying cabinets, test on cardboard, scrap plywood, or a practice panel. Adjust the fan width, material flow, and air control until you get a smooth, even pattern. A good spray pattern should be consistent from top to bottom, without heavy edges, sputtering, dry spray, or blotches.
Hold the gun perpendicular to the surface and keep your wrist steady. Move your whole arm instead of arcing your wrist. Arcing creates uneven coverage because the gun gets closer in the middle of the pass and farther away at the ends. Your wrist may want to freestyle. Do not let it.
Step 10: Spray the Cabinet Doors and Drawer Fronts
Lay doors flat on supports or hang them in a spray setup. Flat spraying can reduce runs, while hanging lets you spray both sides more efficiently if you have the right space. Start with the backs of the doors so your final visible side gets the benefit of your improved rhythm.
Begin moving the gun before pulling the trigger, then release the trigger before stopping the pass. Overlap each pass by about half for even coverage. Keep a consistent distance from the surface, commonly around 6 to 10 inches for many HVLP systems, though your sprayer may recommend a different range. Apply light coats. A thin coat that needs another pass is better than a heavy coat that slides down the door like it has somewhere else to be.
Spraying Order for Cabinet Doors
For paneled doors, spray edges first, then profiles, then the center panel, and finally the outer rails and stiles. Watch for paint buildup in corners. On slab doors, spray in smooth overlapping passes from one side to the other. Keep a wet edge, but do not flood the surface.
Step 11: Spray the Cabinet Frames
Cabinet frames can be sprayed in place, but they require serious masking. Cover walls, counters, floors, backsplash, appliances, sink, ceiling edges, and cabinet interiors if you are not painting inside. Use masking paper near spray edges because it stays flatter than lightweight plastic. Plastic is useful for large coverage areas, but it can flutter if air moves through the room.
Spray frames in manageable sections. Work from inside edges outward, and keep the gun square to the surface. Avoid blasting paint into corners. If the HVLP gun cannot reach a tight area cleanly, use a high-quality brush for that small spot and then spray the larger visible areas.
Step 12: Sand Between Coats
After the first coat dries according to the paint instructions, inspect the surface. Lightly sand with 320-grit sandpaper or a fine sanding pad to remove dust nibs or slight texture. Do not sand aggressively. You are smoothing, not excavating.
Vacuum and wipe the surface before the next coat. This between-coat sanding is one of the differences between a decent DIY finish and a finish that makes visitors ask, “Wait, did you buy new cabinets?” Try not to answer too smugly. Actually, answer a little smugly. You earned it.
Step 13: Apply the Final Coat
The final coat should be smooth, thin, and even. Resist the urge to “just add a little more” to one area unless it truly needs it. Overworking the final coat can create sags, texture, or uneven sheen. With HVLP spraying, confidence comes from steady movement and consistent overlap.
After spraying, leave the doors and drawers undisturbed. Dust, bugs, pet hair, and curious fingers are the natural enemies of fresh cabinet paint. Create a drying area where pieces can sit safely. If you have a dog, assume the dog will inspect your work with its entire body unless prevented.
Step 14: Let the Finish Cure
Dry time and cure time are not the same. Paint may feel dry to the touch within hours, but it can take days or even weeks to fully cure and reach maximum hardness. Reinstalling too early can cause sticking, fingerprints, dents, or marks around hardware.
Follow the coating manufacturer’s cure guidance. If possible, give cabinet doors extra time before heavy use. Once reinstalled, close doors gently for the first few days. Avoid aggressive cleaning until the finish has cured. Your cabinets are not fragile forever, but in the beginning, treat them like fresh cookies: tempting, beautiful, and not ready for rough handling.
Step 15: Reinstall Doors, Drawers, and Hardware
Once the finish has dried enough for handling, reinstall hinges, doors, drawer fronts, pulls, knobs, and bumpers. This is when your labeling system pays off. Adjust hinges for even gaps. Add new soft-close bumpers if the old ones are worn or painted over.
Step back and inspect the overall look. A properly sprayed cabinet finish should appear smooth, even, and consistent in sheen. Minor imperfections can often be polished, touched up, or gently sanded and resprayed, depending on the coating. Do not panic over one tiny flaw. Every handmade project has a fingerprint somewhere; the goal is professional-looking, not manufactured by robots in a moon laboratory.
Common HVLP Cabinet Painting Mistakes
Skipping the Degreasing Step
Grease is the enemy of adhesion. If paint peels around handles or near the stove, poor cleaning is often the reason. Clean first, then sand.
Spraying Too Heavy
Heavy coats cause runs, sags, slow drying, and soft finishes. Cabinets need multiple thin coats, not one heroic paint avalanche.
Ignoring the Test Pattern
Testing your HVLP spray pattern takes minutes and can save hours of sanding. Cardboard is cheaper than cabinet doors. Practice there.
Using the Wrong Primer
Laminate, glossy finishes, raw wood, and stained cabinets can require different primers. Match the primer to the surface and the topcoat.
Reassembling Too Soon
Fresh paint can dent or stick before it cures. Give the finish time to harden before returning cabinets to full family combat duty.
Pro Tips for a Smooth Cabinet Finish
Use a dedicated spray area with filtered airflow if possible. Strain every cup of paint. Keep your spray gun clean between coats. Maintain a steady distance and speed. Spray sample boards before spraying the actual cabinets. Most importantly, write down your successful settings. If your test pattern looks perfect at a certain thinning ratio, fan width, and flow setting, document it before your brain replaces that information with song lyrics from 2008.
For darker colors, pay attention to lighting and coverage. Deep blues, greens, blacks, and charcoal shades can look stunning, but uneven spray patterns may show more clearly under angled light. For white and off-white cabinets, stain-blocking primer is especially important if the old finish has tannins, knots, or yellowing.
Maintenance After Painting Cabinets
After curing, clean painted cabinets with mild soap and water or a cleaner recommended for the coating. Avoid abrasive pads, harsh solvents, and aggressive scrubbing. Around knobs and pulls, wipe gently and regularly to prevent oils from building up. A durable cabinet paint can handle normal use, but no finish enjoys being attacked by a scouring pad like it owes someone money.
Keep a small labeled jar of leftover paint for touch-ups. Store it tightly sealed in a temperature-stable area. Also save your paint color, sheen, brand, primer, and sprayer settings. Future you will be grateful, especially when one drawer front meets a chair, toy, pan, or mysterious household event that nobody admits causing.
Experience Notes: What Cabinet Painting with an HVLP Sprayer Really Teaches You
The biggest lesson from painting cabinets with an HVLP spray system is that spraying is the glamorous part, but prep is the boss. Many first-time DIYers imagine the sprayer as the hero of the story. In reality, the sprayer is more like a talented actor: it performs beautifully only after the script, lighting, makeup, and stage crew have done their jobs. If the cabinets are greasy, dusty, glossy, or poorly primed, the HVLP system will not rescue the finish. It will simply apply your mistake very evenly.
One practical experience is to organize doors and drawers more carefully than you think is necessary. Label the hinge side, the cabinet opening, and the hardware bag. Take photos before removing anything. Cabinet layouts can become confusing fast, especially when several doors are similar but not identical. Reinstallation is much easier when each part has a clear home.
Another important lesson is to practice with the sprayer before touching the cabinets. Every coating behaves differently. A primer may spray beautifully with one setting, while the topcoat needs more thinning, less material flow, or a wider fan. A few practice passes on cardboard can reveal orange peel, dry spray, spitting, or too much paint at the edges of the fan. Adjusting on scrap is calm. Adjusting on a freshly sanded cabinet door is a tiny personal crisis.
Lighting also matters more than beginners expect. A surface can look perfect from straight on and uneven from the side. Use bright, angled light to check wet coverage as you spray. This helps you see missed edges, rough texture, and heavy areas before they dry. Move around the piece while inspecting it, but avoid leaning over wet paint unless you want to donate a sleeve fiber to the finish.
Drying racks are another underrated upgrade. Cabinet doors take up a surprising amount of room, and stacking them too soon can ruin the finish. Painter’s pyramids, hanging systems, or simple horizontal racks help keep the project moving. If space is limited, spray in batches rather than crowding the area. Crowded drying zones lead to accidental fingerprints, bumped corners, and language unsuitable for a family renovation blog.
Finally, patience is the difference between a cabinet finish that lasts and one that chips before the celebration pizza arrives. Let primer dry. Sand between coats. Let paint cure. Reinstall gently. The cabinets may look finished before they are ready for daily use, but the coating still needs time to harden. Treat the first week as a soft-opening event, not a full-contact kitchen tournament.
Note: This guide is for educational DIY planning. Always follow the instructions on your specific HVLP spray system, primer, paint, respirator, and safety equipment. If your cabinets may contain lead-based paint or you are unsure about ventilation, coatings, or surface compatibility, consult a qualified professional before sanding or spraying.
Conclusion
Painting cabinets using an HVLP spray system is one of the most rewarding ways to upgrade a kitchen or built-in storage area without replacing the entire cabinet system. The process takes planning, patience, and careful prep, but the payoff can be a smooth, durable, professional-looking finish that changes the entire room.
The winning formula is simple: remove and label everything, clean thoroughly, sand correctly, choose the right primer, test your HVLP spray pattern, apply thin coats, sand between coats, and let the finish cure before heavy use. The sprayer helps create the beautiful finish, but the preparation creates the conditions for that finish to last. In cabinet painting, boring steps are secretly the expensive-looking steps.