A solder pot from the kitchen sounds like the kind of phrase that should be followed by, “and that’s why we can’t have nice things.” Yet in the maker world, odd tool ideas often begin exactly there: with a cheap hot plate, a sturdy metal vessel, a bench full of wires, and a person thinking, “Surely I can tin these faster than this.”
The basic concept is simple. A solder pot is a heated container that keeps solder molten so wires, component leads, terminals, or small metal parts can be dipped quickly and evenly. In electronics work, it is most often used for tinning stranded wire, preparing connector pins, dip-soldering small assemblies, and sometimes desoldering multi-pin parts. Commercial solder pots are built for this job, with temperature control, replaceable pots, stable housings, and safer handling features. A “kitchen” solder pot is the DIY cousin: improvised, clever, budget-minded, and absolutely not something that should ever return to food service. Once a pan meets solder, it has retired from omelets forever.
This article explores what a kitchen-inspired solder pot is, why hobbyists make them, what it can do well, where it can go wrong, and how to think about safety before inviting molten metal onto your workbench. The goal is not to encourage careless improvisation. The goal is to understand the idea clearly enough to respect it. Molten solder is useful; it is also hot, messy, oxidizing, fume-producing, and very uninterested in forgiving poor decisions.
What Is a Solder Pot?
A solder pot is essentially a small bath of molten solder. Instead of feeding solder wire into a joint with a soldering iron, the operator dips a prepared part into liquid solder. The molten alloy coats the exposed metal quickly, creating a uniform solder layer. This process is called tinning, and it helps protect copper from oxidation, keeps stranded wire together, improves solderability, and makes later assembly faster.
In a professional setup, a solder pot may be used for wire harness production, transformer leads, connector pins, through-hole component leads, small batch assembly, repair work, and dip soldering. A bench technician who needs to tin two wires can use an iron. A technician who needs to tin two hundred wires starts looking at the solder pot the way a tired office worker looks at coffee.
The appeal is speed and consistency. A correctly prepared wire can be fluxed, dipped, withdrawn, and cooled in seconds. The result is a neat, shiny solder coating that reaches between the strands without requiring the operator to chase the wire with an iron tip. For repetitive work, that is a major improvement.
Why Would Anyone Make One From Kitchen Gear?
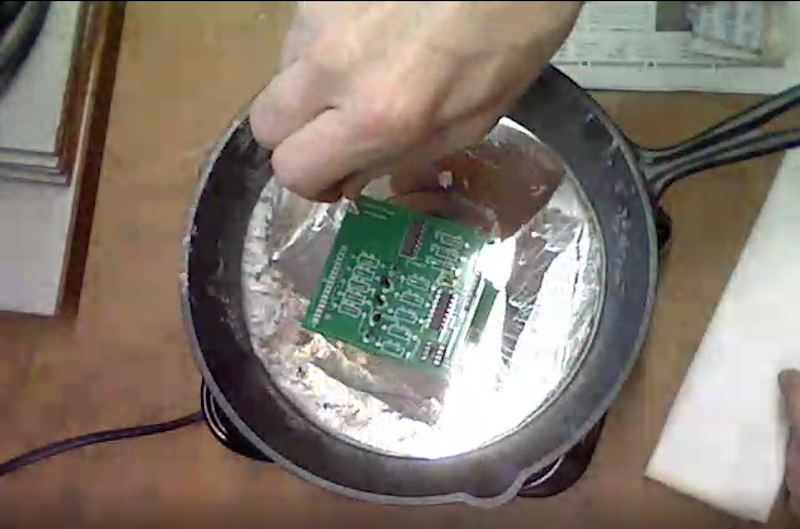
The kitchen version exists because makers are resourceful, commercial tools cost money, and many household appliances are already designed to heat metal containers. A small hot plate and a cast iron or steel vessel can, in theory, melt solder. That does not make it automatically safe, precise, or recommended, but it does explain the temptation.
Kitchen-inspired solder pots usually come from a practical need: someone has a pile of wires to tin, a one-off project, or a curiosity about old-school shop techniques. A commercial solder pot may feel excessive for occasional work, especially when a hobbyist only needs a shallow molten bath for enamel wire, battery leads, stained-glass-style terminals, or small electronics jobs.
The famous charm of the idea is its simplicity. The recipe is not complicated: heat source, compatible metal container, solder alloy, flux, and a steady hand. Unfortunately, that simplicity is also where the danger hides. A solder pot is not a soup warmer. A pot of molten metal can splash, oxidize, smoke, contaminate surfaces, burn skin instantly, and ruin a workspace faster than you can say, “I probably should have clamped that.”
How a Kitchen-Style Solder Pot Works
A DIY kitchen solder pot works by transferring heat from an electric hot plate or similar heater into a metal container holding solder. As the solder reaches its melting range, it becomes a shiny liquid bath. The user skims oxide residue, applies flux to the workpiece, dips the part briefly, and withdraws it smoothly.
Traditional tin-lead solders such as 63/37 or 60/40 melt at lower temperatures than most lead-free solder alloys. Common lead-free alloys such as SAC305 generally require higher operating temperatures. That means a heat source that barely melts one alloy may struggle with another, and a setup without temperature control can wander from “not hot enough” to “why does the bench smell angry?”
Temperature stability matters. If the solder is too cool, it becomes sluggish and fails to wet the metal properly. If it is too hot, oxidation increases, dross forms faster, flux burns aggressively, and the risk of splatter rises. This is one reason commercial solder pots exist: they are not glamorous, but they maintain a controlled molten bath better than a mystery hot plate from the back of a cabinet.
Best Uses for a Solder Pot
1. Tinning Stranded Wire
This is the solder pot’s greatest hit. Strip the wire, apply suitable flux, dip the end into the solder bath, and remove it once the strands are wetted. The result should be smooth and even, not a lumpy silver corn dog. Proper tinning keeps strands together and makes future soldering easier.
2. Preparing Connector Leads
Connector pins, terminals, and small metal tabs can be pre-tinned before final assembly. This improves wetting during later soldering and can reduce the time spent heating delicate parts.
3. Working With Enamel Wire
Some hobbyists use solder pots to remove enamel insulation and tin magnet wire in one step. This can work well when the wire coating, flux, solder alloy, and temperature are compatible. It can also create smoke and residue, so ventilation is not optional.
4. Small Batch Production
If you are building cable assemblies, LED projects, guitar pedals, robotics wiring, or model railroad electronics, a solder pot can turn repetitive tinning into a calmer process. Your wrist may even send you a thank-you card.
What a Kitchen Solder Pot Is Not Good For
A kitchen-style solder pot is not a precision reflow station, not a wave soldering machine, not a safe toy, and not a beginner’s first soldering tool. It is also not a substitute for learning proper soldering fundamentals. If you cannot already make clean joints with an iron, a pot of molten alloy will not magically upgrade your technique. It will simply make the mistakes warmer.
It is also not ideal for mixed, unknown, or contaminated metals. Dirty wire, oxidized terminals, greasy parts, old insulation residue, or random scrap can contaminate the solder bath. Once the pot is contaminated, wetting suffers and dross increases. Good soldering starts with clean metal, correct flux, and appropriate heat. The pot is only one member of the band.
Safety First: The Kitchen Is Only the Origin Story
The most important rule is simple: never use food equipment for food again after it has been used for soldering. A pan, spoon, hot plate, tray, or tool used around solder should become dedicated shop equipment. Lead-bearing solder creates contamination risks through particles and residue. Even lead-free solder is not seasoning. Do not cook with it, do not store food near it, and do not let the family spatula moonlight as a dross skimmer.
Use a stable, heat-resistant work surface. A solder bath is dense and heavy. A shallow skillet may seem convenient, but a wide, open container can be easier to splash and harder to guard. The setup should resist tipping, sliding, cord-pulling, and accidental elbow attacks. If your bench looks like a cable octopus fighting a storage drawer, clean it before heating anything.
Wear eye protection. Solder and flux can spit. Moisture is especially dangerous around molten solder because water can flash into steam and throw hot metal. Keep damp parts, wet sponges, water cups, and mystery liquids away from the pot. Heat-resistant gloves can help during setup and maintenance, but they do not make hands invincible. Treat the pot as if it wants to bite.
Ventilation matters because soldering fumes usually come from flux, not just the metal alloy. Rosin-based flux fumes can irritate the eyes, throat, and lungs, and repeated exposure is associated with respiratory sensitization in occupational guidance. Use local fume extraction, work in a well-ventilated space, and keep your face out of the smoke plume. The correct soldering posture is not “dragon inhaling treasure vapor.”
Lead-Free vs. Leaded Solder in a Pot
Leaded solder is popular among many electronics hobbyists because it melts at lower temperatures and wets easily. Lead-free solder is used widely for environmental and regulatory reasons, especially in commercial electronics. In a solder pot, the choice affects melting range, working temperature, oxidation, dross formation, and flux selection.
Lead-free alloys typically require higher temperatures, which may mean more oxidation and more demand on the heater. They may also require flux designed for lead-free soldering. Using the wrong flux can produce poor wetting, burned residue, and joints that look like they lost an argument. Leaded solder, meanwhile, requires strict hygiene. Wash hands after handling it, keep the area clean, and never eat or drink in the soldering zone.
For a home shop, the best choice depends on the project, your safety practices, and whether the final assembly must meet lead-free requirements. Whatever alloy you choose, label the pot clearly. Do not mix alloys casually. A solder bath is not a smoothie.
Flux: The Tiny Chemical That Does the Heavy Lifting
Flux removes oxides and helps molten solder wet the metal. Without flux, solder may bead up and refuse to bond, much like a cat refusing a new bed you spent money on. For wire tinning, the part is usually dipped into liquid flux before entering the solder bath. Only apply flux where you want solder to travel, because excess flux can wick up the wire and leave corrosive residue beyond the joint area.
Different jobs call for different fluxes. Rosin flux, no-clean flux, water-soluble flux, and specialty fluxes all behave differently. Some residues should be cleaned; some are designed to remain; some are too aggressive for electronics if left behind. Read the product documentation and choose flux for the alloy, temperature, and material being soldered.
Dross: The Crust on the Molten Pond
Dross is the oxidized material that forms on the surface of molten solder. A little dross is normal. Excessive dross may indicate overheating, too much agitation, contamination, or unsuitable alloy handling. Skimming dross is part of solder pot maintenance, but it should be done gently with a dedicated tool.
Do not stir the pot like soup. Stirring introduces oxygen and can increase oxidation. Keep the temperature only as high as needed. Cover the pot when appropriate and safe. Keep contaminants out. A clean solder bath gives better results and wastes less solder.
Practical Workflow for Tinning Wires
First, prepare the workspace. Set the pot on a stable, heat-resistant surface with good ventilation and clear space around it. Put on safety glasses. Keep solder, flux, dross tools, pliers, scrap wire, and a safe cooling area within easy reach. Remove food, drinks, paper clutter, pets, children, and anything that can catch fire or ask distracting questions.
Next, prepare the wire. Strip the insulation cleanly without nicking the conductor. Twist stranded wire lightly if needed. Apply flux only to the exposed copper. When the solder bath is ready and clean, dip the wire end into the molten solder for a brief moment. Withdraw smoothly and let it cool without shaking it like a thermometer from 1978.
A good tinned wire should look smooth and continuous. You should still see the outline of the strands; it should not become a stiff, oversized blob. If solder wicks too far under the insulation, reduce dwell time, adjust flux amount, or review temperature. Excessive wicking can create a stiff transition point that may break under vibration.
Common Mistakes to Avoid
Using a Food Pan Again
Once used for solder, the pan is shop equipment forever. Do not wash it and return it to the kitchen. That is not cleaning; that is denial with bubbles.
Skipping Ventilation
If you can smell flux strongly, your lungs are participating in the project. Use fume extraction and keep smoke away from your breathing zone.
Overheating the Bath
More heat is not always better. Too much heat increases oxidation, burns flux, and can damage wires or components.
Dipping Dirty Parts
Old oxidation, oil, adhesive, and unknown coatings can ruin wetting and contaminate the solder. Clean first, dip second.
Using the Wrong Container
The container must tolerate soldering temperatures and chemical exposure. Avoid mystery coatings, thin unstable vessels, and anything that can melt, flake, crack, tip, or react badly with solder.
Is a Kitchen Solder Pot Worth It?
For a one-time experiment, a kitchen-style solder pot may seem attractive. For regular electronics work, a commercial solder pot is usually the better answer. Purpose-built solder pots offer improved stability, temperature control, safer pot geometry, and replacement parts. They are designed for the job instead of being recruited from pancake duty.
That said, the kitchen solder pot idea has educational value. It teaches heat transfer, solder alloy behavior, flux chemistry, wetting, dross formation, and workshop risk management. It also reminds makers that clever does not always mean safe. The best DIY tools are not merely cheap; they are controlled, repeatable, and appropriate for the task.
Experience Notes: What Working With a Kitchen-Style Solder Pot Feels Like
The first surprise is how slowly the setup becomes useful. A soldering iron feels immediate by comparison: switch on, wait a little, touch the joint. A solder pot asks for patience. The solder softens, slumps, shines at the edges, forms little islands, and then finally becomes a smooth reflective pool. At that moment, the bench suddenly feels more serious. A soldering iron is a pencil. A solder pot is a tiny industrial pond.
The second surprise is how much preparation matters. When the wires are stripped cleanly, the flux is fresh, and the bath is at the right temperature, tinning feels almost magical. Dip, lift, inspect, done. The wire looks professional, the strands stay together, and the next solder joint is easier. When the wire is old, oxidized, or under-fluxed, the process becomes comedy without applause. The solder beads, refuses to flow, or creates a rough gray coating. The pot gets blamed, but the real culprit is usually surface preparation.
A kitchen-style setup also teaches respect for stability. A small hot plate on a crowded bench may look harmless when cold. Once it holds molten solder, every cord, sleeve, notebook, and screwdriver becomes a possible villain. Good operators slow down. They route cords away from the front of the bench. They create a landing zone for finished parts. They keep the flux bottle closed. They stop multitasking. Nobody needs to answer a text while standing over liquid metal.
The smell of flux is another memorable lesson. Even with good technique, dipping fluxed wires produces fumes. A small fume extractor or local ventilation changes the experience completely. Without it, the workspace feels dirty and irritating. With it, the job feels controlled. This is one of those upgrades that seems optional until you use it, after which you wonder why you ever tried to “just open a window and hope.”
There is also a rhythm to using a solder pot. Skim the surface gently. Flux a small batch. Dip one wire at a time. Inspect the shine and coverage. Adjust if the solder is climbing too far. Stop when dross builds or when concentration fades. The pot rewards calm repetition and punishes rushing. It is not dramatic work, but it is satisfying in the same way sharpening a pencil perfectly is satisfying: small, neat, and oddly heroic.
The biggest experience-based takeaway is this: a kitchen solder pot can be clever, but it should never feel casual. The moment it feels casual is the moment it becomes risky. A dedicated commercial unit is often worth the money for repeat use. If you experiment with a DIY version, treat it as a controlled shop tool, not a hacky shortcut. Label everything. Retire all kitchen gear from kitchen life. Keep the work clean. Use ventilation. Wear eye protection. Let the setup cool fully before moving it. And remember that the best maker projects are the ones that end with a working tool, a clean bench, and zero exciting stories for the emergency room staff.
Conclusion
A solder pot from the kitchen is a wonderfully maker-ish idea: practical, slightly ridiculous, and full of lessons. It can tin wires quickly, prepare leads neatly, and make repetitive electronics work more efficient. It can also create hazards if treated like a harmless craft trick. The difference between a smart shop tool and a bad afternoon is preparation.
Use the right alloy, the right flux, a stable setup, good ventilation, eye protection, and dedicated non-food equipment. Keep the solder bath clean, avoid overheating, and respect dross, fumes, and contamination. If you do this work often, buy a real solder pot. If you study the kitchen version as a DIY concept, let it teach you the central rule of electronics fabrication: heat is useful, chemistry matters, and molten metal does not care how confident you felt five minutes ago.
Note: This article is for educational and informational purposes. A DIY solder pot can be hazardous. Use purpose-built equipment when possible, follow manufacturer safety guidance, and never reuse solder-contaminated kitchen tools for food.