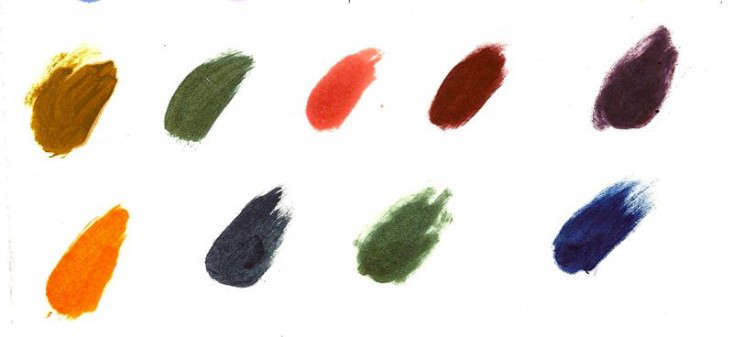
Candle-making is basically kitchen chemistry with better smells and fewer pop quizzes. And if you’ve ever tried to get a “soft sage green” only to pour something that screams “radioactive pistachio,” you already know the truth: color is the drama queen of the candle world.
This guide breaks down what liquid eco friendly candle dye really means, how liquid dyes behave in different waxes, how to use them without wrecking your burn, and how to choose options that are friendlier to humans and the planetwithout falling for vague “green” marketing. Expect practical steps, nerdy-but-useful science, and a few jokes, because wax is expensive and we deserve joy.
What Is Liquid Candle Dye, Exactly?
Liquid candle dye is a concentrated colorant formulated to dissolve into wax (not sit there like glitter in a snow globe). Unlike pigment-heavy colorants, true candle dyes are designed to melt in smoothly so the color looks even throughout the candle.
Liquid dye vs. blocks, chips, and “random stuff from your pantry”
- Liquid dye: Fast to blend, easy to adjust drop-by-drop, great for repeatable batches (especially if you measure by weight for larger runs).
- Dye blocks/chips: Solid formats that can work beautifully but may take longer to melt fully. They’re often easier for deep colors in certain waxes, depending on formulation.
- Pigments/micas: Pretty shimmer, but particles can interfere with wicks in candles meant to burn. Many makers reserve mica for wax melts or wickless projects.
- Food coloring: Usually water-based, and wax is famously not into water-based relationships. (They never “mix,” and it ends badly.)
What “Eco Friendly” Should Mean (and What It Often Doesn’t)
“Eco friendly” isn’t a single ingredientit’s a set of choices. With candle dyes, the most realistic, useful way to think about eco-friendliness is: lower hazard, lower waste, and higher transparency.
A practical definition for eco-friendly liquid candle dye
Look for dyes that check most of these boxes:
- Designed for candles: Wax-soluble dye formulated to burn cleanly without clogging the wick or leaving gritty residue.
- Transparent documentation: The supplier provides a Safety Data Sheet (SDS) and clear usage rates.
- Lower-toxicity profile: Avoids heavy metals and known high-hazard solvents where possible; minimal hazard statements on the SDS is a good sign (but always read it).
- Highly concentrated: You use less product per candle (less shipping weight, less packaging over time).
- Responsible packaging: Recyclable bottles, refill sizes, or reduced-plastic options.
Greenwashing red flags
- “Natural dye” with no SDS, no usage guidance, and no explanation of compatibility with wax.
- Botanicals “for color” near the wick. Pretty on Instagram; risky in real life.
- Vague claims like “non-toxic” without any documentation or testing notes.
How Liquid Dye Behaves in Different Waxes
Here’s the part everyone learns the hard way: wax has opinions. The same dye can look pastel in one wax and bold in another. That doesn’t mean you did something wrongyour wax is just being itself.
Soy wax
Soy often produces softer, more muted shades. Deep, saturated colors (especially true reds and blacks) can be harder to achieve without pushing dye load high enough to affect burn performance. Soy can also show “frosting” more easily, and darker colors may make frosting more obvious.
Paraffin and paraffin blends
Paraffin typically throws color more strongly and can reach deeper shades with less dye. Many makers use paraffin blends when they want vibrant color and consistent results.
Coconut and specialty blends
Coconut blends can take color nicely, but they’re often softer waxesso you’ll want to test for stability, sweating, and wick performance when you increase dye load.
Beeswax
Beeswax has a natural yellow tone that will “warm” whatever color you add. Blues can drift toward green; whites become creamy; pastels become “vintage postcard.” If you want crisp, cool tones, beeswax may fight youpolitely, but firmly.
How to Use Liquid Candle Dye (Without the Usual Chaos)
Liquid dye is wonderfully forgiving if you treat it like hot sauce: start small, taste later (a.k.a. test burn), and don’t dump half the bottle in because you’re feeling bold.
Step-by-step process
- Melt your wax fully and bring it to a typical dye-mixing temperature range (often around the same range used for adding fragrance, depending on wax type).
- Add dye gradually (drops for small batches; weight-based measurement for larger batches).
- Stir thoroughlynot for two lazy swirls, but long enough that the color is uniform with no streaks.
- Check color the smart way: drip a tiny bit onto a white plate or spoon and let it cool. The melted color can lie to you; cooled wax is the truth.
- Add fragrance (if using) and stir again. Some fragrances can slightly shift perceived color or clarity.
- Pour and cure as your wax requires, then test burn. A candle is not “done” until it burns well.
How much liquid dye should you use?
Usage depends on wax, dye strength, and desired shade. Many suppliers recommend starting around 1–3 drops per pound for light shades, 3–5 for medium, and 5–8 for darker shadesthen adjusting based on results. For some dyes and waxes, you’ll see guidance like 3 drops per pound for lighter tones and 6 drops per pound for deeper tones.
For bigger batches, consider switching from “drops” to grams (or another weight-based system). Drops vary by bottle tip, viscosity, and your impatience levelnone of which are ISO-certified measurement tools.
Eco-Friendly Color Strategy: Get the Shade with Less Dye
If your goal is eco-friendlier candles, one of the best tricks is to hit your color target with the lowest effective dye load. Less dye generally means less chance of wick clogging, less chance of odd odors, and fewer raw materials per candle.
Use “optical tricks” before you increase dye load
- Choose containers wisely: Amber glass makes colors appear warmer and richer; frosted jars soften tones.
- Lean into the wax’s natural tone: Beeswax wants cozy colors; soy wants soft minimalism. Work with it.
- Blend colors (e.g., deepen red with a tiny touch of brown) instead of using a single dye aggressively.
- Test in the final jar size: A color that looks “meh” in a thin sample can look perfect in a full vessel.
Common Problems (and Fixes That Actually Work)
1) “My color looks different after it cools”
Normal. Hot wax is transparent-ish and reflective; cooled wax is more opaque. Always judge color after cooling, preferably after a full cure.
2) “My candle has a weird chemical smell”
Over-dyeing is a common culprit, especially at high dye loads. Reduce dye concentration and test again. Also confirm your dye is formulated for candle wax (not multipurpose craft dye).
3) “My wick is struggling / mushrooming / self-extinguishing”
Too much dye (or pigment particles) can interfere with capillary action and combustion. Dial back dye load, avoid particulate colorants in wicked candles, and re-test wick size. When you change color depth significantly, wick testing is not optionalit’s the price of pretty.
4) “My soy candle frosts more when I use dark dye”
Darker colors can make frosting more visible, and some soy waxes are simply prone to it. Consider lighter shades, adjust cooling conditions, or choose a wax/blend that better matches your aesthetic goals.
5) “My color is blotchy or streaky”
This usually means the dye wasn’t fully incorporated or the wax cooled too quickly during mixing. Increase stirring time, ensure wax is fully melted, and add dye at an appropriate temperature for your wax and dye to blend smoothly.
Safety and Compliance Basics (Because You’re Making Fire On Purpose)
Eco-friendly and safe often overlap. A cleaner formula is great, but safe candle design is the whole system: wax + wick + fragrance + dye + container + labeling + testing.
Use the SDS like a grown-up (even if you’re making pastel pink)
Reputable suppliers provide a Safety Data Sheet. The SDS helps you understand hazards, handling, and disposal guidance and it’s especially important when you’re buying concentrated liquids in bulk.
Avoid flammable “decor” in the wax near the flame
Dried botanicals and similar embedded materials can become a fire hazard when placed near the wick. If your brand aesthetic needs flowers, put them outside the jarlike on the label. Your insurance company will sleep better.
Test burn like you mean it
Any time you change dye load, fragrance, wick, wax, or vessel, do another test burn. Colorants can subtly change how a candle behaves, and the only way to be confident is to test under realistic conditions.
How to Choose a Truly Better Liquid Dye: A Quick Checklist
- Compatibility: Confirm it’s made for your wax type (soy, paraffin, blends, beeswax).
- Documentation: SDS available, clear usage rates, basic handling guidance.
- Concentration: Higher concentration often means less packaging used per candle.
- Supplier transparency: Consistent batch info, realistic claims, and testing notes.
- Performance at low load: Good color payoff without pushing the upper limits.
- Packaging: Recyclable or refill-friendly options when available.
Conclusion
A liquid eco friendly candle dye isn’t just “green because the label says so.” The best choice is the one that gives you the color you want at a low effective dose, comes with transparent documentation, and keeps your candle burning safely and consistently.
If you remember only three things, make them these: start light, measure consistently (drops for small batches, grams for big ones), and test burn every meaningful change. Beautiful color is fun. A candle that burns like a tiny, controlled sun? That’s the real flex.
Bonus: of Real-World Experiences (a.k.a. “The Dye Diaries”)
Candle makers tend to have the same origin story: you start with a “simple” goallike a clean, modern muted bluethen you realize color has feelings. The first surprise is how tiny the dose can be. One drop looks like nothing in hot wax, so you add three more. Still nothing. You add five more. Suddenly your “muted blue” is now “deep-sea dramatic,” and your kitchen smells faintly like regret.
The second surprise is the cooling effect. Hot wax is a liar with great lighting. A color that looks perfect in the pouring pitcher can cool down two shades lighterespecially in soy. Many makers learn to do the “plate test”: a quick drip on a white ceramic plate, cool it for a minute, and judge the real result. This tiny habit prevents about 60% of candle-making heartbreak and 90% of “how did I end up with baby puke green?” incidents.
Then there’s the “same recipe, different day” phenomenon. You swear you used the same dye drops and the same wax, but the candle looks slightly different. Often it’s not a conspiracy; it’s consistency. Drop size varies by bottle tip and how aggressively you squeeze (we’ve all panic-squeezed). That’s why experienced makers graduate from counting drops to weighing dye for larger batches. It feels overly seriousuntil you realize it’s the difference between a cohesive product line and a craft fair table that looks like it was curated by a whimsical raccoon.
Another common experience: pushing for very dark shades can reveal burn issues you never saw with pastels. A wick that was perfectly behaved in a creamy, undyed candle might start acting like it drank three espressosmushrooming, smoking, or struggling if the dye load (or particulate colorant) changes the melt pool dynamics. This is where eco-friendly thinking helps: instead of forcing a “black hole” candle by dumping dye, many makers choose smarter pathstinted vessels, deeper-toned wax blends, or design palettes that look intentional without maxing out additives.
Finally, you learn that “eco-friendly” is a whole-system vibe. Makers often feel best about their color choices when the dye is concentrated (so they use less), the supplier provides clear documentation, and the final candle performs reliably. The funny twist is that these “responsible” choices also happen to produce the most professional-looking candles. Turns out sustainability and quality make a great scent throw togethereven without a fragrance calculator.