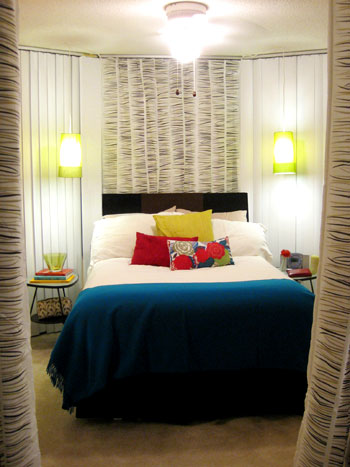
Some DIY projects whisper, “I am tasteful and budget-conscious.” This one kicks down the bedroom door and yells it in a Swedish accent. If you want a cheap headboard that looks custom, feels clever, and gives your bed a little architectural attitude, using three IKEA LACK tables is one of the smartest hacks around.
The beauty of this project is that it takes a humble, lightweight side table and turns it into something far more expensive-looking. Instead of spending hundreds on a store-bought headboard, you can build a minimalist, low-profile version with three square tops, a few brackets, and some wood legs. It is equal parts budget decor, renter-friendly thinking, and “wait, that used to be tables?” energy.
Even better, this is not one of those internet projects that sounds easy until it somehow requires a table saw, a workshop, and a cousin named Dan who “does cabinetry.” The original three-LACK approach is refreshingly simple. You remove the legs, connect the tabletops, add support legs on the back, and stand the finished piece behind the bed or secure it properly to the wall or frame. Done. Fancy enough to impress visitors, simple enough to finish before your motivation wanders off.
Why the 3-LACK headboard hack works so well
The IKEA LACK side table has a square top that measures about 21 5/8 inches by 21 5/8 inches, with a height of roughly 17 3/4 inches when used as a table. Line up three tops side by side and you get a headboard face that spans about 64 7/8 inches wide. That makes this hack especially good for a queen bed, which is 60 inches wide. It can also work for a full bed if you like a little extra overhang on the sides.
That proportion is the magic trick. The finished headboard looks intentional, not accidental. It has the clean geometry people love in Scandinavian design, and because LACK pieces are lightweight, the build is manageable for one or two people without turning your bedroom into a CrossFit event.
The other reason this IKEA headboard hack survives the trend cycle is style flexibility. Leave it plain and it reads modern. Paint it and it leans custom. Wrap it in batting and fabric and suddenly it looks like something you ordered from a boutique furniture brand after drinking coffee and making “grown-up bedroom goals” lists.
Before you start: size, tools, and a few reality checks
Best bed sizes for this hack
A queen bed is the sweet spot. Three LACK tabletops create a width that frames a queen nicely without looking skimpy or oversized. A full bed can wear it too, especially if you want the headboard to feel slightly more dramatic. A twin or twin XL usually ends up looking too wide, while a king will make the hack look too short unless you redesign it with more pieces.
In plain English: queen is the obvious winner, full is the stylish rebel choice, twin is awkward, and king needs a different plan.
What you will need
- 3 IKEA LACK side tables
- Heavy-duty flat metal brackets or mending plates
- Screws sized appropriately for brackets and engineered furniture
- 3 wood support legs, often made from 2×4 boards cut to your preferred height
- Right-angle L-brackets
- Optional 1×3 back brace for extra reinforcement
- Manual screwdriver or drill/driver
- Measuring tape
- Level
- Stud finder if wall mounting
- Optional primer, paint, fabric, foam, batting, or trim for customization
A note on materials
LACK tables are light partly because IKEA uses an engineered construction with a honeycomb paper filling inside the top. That is great for affordability and easy handling, but it also means you should not treat the tabletop like a chunky slab of hardwood. Use the right screw length, drill carefully, and do not go full action-movie on the hardware. Slow and steady wins the stylish bed.
Safety first, because your headboard should not become a personality test
If your bed sits snugly in an alcove, the finished piece may stay put neatly behind the mattress. But in a typical bedroom, anchoring matters. For the most secure result, attach the headboard into wall studs or connect it properly to the bed frame. Stud mounting is usually the most stable option for heavier or wider DIY pieces. Drywall anchors can help in some cases, but direct stud attachment is the gold standard.
Also keep your expectations honest: this hack is ideal as a decorative and functional backstop for pillows, not as a jungle gym, ladder, or launch platform for dramatic movie-style flops into bed.
How to build a headboard with 3 IKEA LACK tables
Step 1: Take the tables apart
Unscrew the legs from all three tables. Set the legs aside for a moment. You only need the square tabletop sections to create the face of the headboard. Lay the tops upside down on a soft surface so you do not scratch the finish.
Arrange them in a row with the best-looking top surfaces all facing the same direction. This is your chance to decide whether you want matching colors for a seamless look or one contrasting center panel for a more designer-ish effect.
Step 2: Connect the three tabletops
Use heavy-duty flat metal brackets or mending plates across the seams on the back side. At minimum, place two brackets between each tabletop section, though more reinforcement is better. This is where the structure begins to feel like one piece instead of three former coffee companions trying to cooperate.
If you want to make the build sturdier, add a horizontal 1×3 across the back. This extra brace helps distribute tension and reduces wobble. It is not mandatory for every setup, but it is a smart move if you plan to move the headboard later, mount it, or just enjoy sleeping without mystery creaks.
Step 3: Create the support legs
Cut three support legs from 2×4 lumber. Many people use pieces around 26 inches long, but you can adjust depending on mattress height and the final look you want. If you love the sleek, low-profile vibe, keep them shorter. If you want the headboard to sit taller above the mattress, go longer.
Attach the support legs vertically to the back using right-angle L-brackets. Place one at each outer edge and one in the center. You can reinforce further with additional brackets if you want belt-and-suspenders security. Nothing wrong with overachieving when the result sits behind your head every night.
Step 4: Test the height behind the bed
Stand the finished headboard behind your bed and check how much of it shows above the mattress. As a general design guideline, lower headboards create a clean modern look, while taller ones are better if you like sitting up to read or want a more traditional focal point.
If the reveal feels too short, do not panic. That does not mean the project failed. It just means your mattress is taller than your ambition allowed for. Raise the support legs, mount the piece a bit higher, or add an upholstered topper.
Step 5: Anchor it securely
For a freestanding look in a tight nook, the bed and wall may help keep the piece in position. For a standard bedroom, secure it. Mark the wall, locate studs, level the headboard, and fasten it with appropriate hardware. If your bed frame allows it, you can also attach the piece to the frame brackets, though wall mounting often gives you better control over finished height.
If you are renting, check your lease and choose the least invasive method that is still safe. A few patchable wall holes are a lot less annoying than a shifting headboard that bonks the wall every time you turn over.
How to make it look less like three tables and more like a custom headboard
Paint it for a built-in look
If you want the hack to blend with your room, paint is your best friend. Since LACK has a finished surface, prep matters. Clean it, lightly scuff the surface, prime for adhesion, and then apply thin, even coats of paint. A matte black finish looks sophisticated, a warm greige feels calm, and a deep olive makes the whole bed look like it has opinions about design magazines.
Wrap it in fabric
For a softer feel, add foam or egg-crate cushioning, cover with batting, and stretch fabric over the front. This works especially well if you read in bed or want a hotel-style look. Linen, canvas, bouclé, or performance fabric can completely change the vibe. Suddenly your humble IKEA hack is serving boutique bedroom energy on a snack budget.
Add trim for panel detail
Want something a little more architectural? Apply thin wood trim in a grid or frame pattern. This hides seam lines and makes the piece feel deliberate. Paint everything one color afterward, and the result can pass for a much pricier paneled headboard.
Turn the top into a slim ledge
Some DIYers use extra brackets, shelves, or even leftover table components to create a shallow ledge. That is handy for a phone, a tiny lamp, or the book you swear you are reading for personal growth but mostly use as a nighttime face shield.
Common mistakes to avoid
- Using weak decorative brackets: Pretty hardware is not always structural hardware.
- Skipping reinforcement: Three sections joined together need support, especially if you plan to move the headboard.
- Ignoring screw length: LACK is engineered and lightweight, so overlong screws are a bad idea.
- Guessing on bed size: Measure your mattress and frame before buying anything.
- Forgetting wall safety: If it can tip, slide, or shift, anchor it.
- Painting without prep: Smooth furniture surfaces need cleaning, scuffing, and proper primer.
How much does this DIY headboard cost?
The exact total depends on current IKEA pricing and whether you already own tools, but this is still a very budget-friendly headboard project. The original appeal of the hack was that it delivered a custom look for far less than a traditional wood or upholstered headboard. Even after adding brackets, screws, lumber, and optional finishing materials, it often lands well below the price of a store-bought statement headboard.
That is the charm of the whole thing. You are not just saving money. You are redirecting it. Instead of paying for markup, you can spend a little on better bedding, a wall sconce, or those ridiculously nice sheets that make you feel like you accidentally became organized.
Styling ideas for the finished look
Pair a black or walnut-toned version with crisp white bedding for contrast. If your room leans soft and airy, paint the headboard to match the wall color so it feels built in. Add sconces, a lumbar pillow, and one oversized art piece above it if you want more vertical drama.
This hack also plays nicely with small bedrooms because the profile can stay relatively slim. You get definition at the head of the bed without dragging in a bulky furniture piece that eats up precious space. It is a useful trick in apartments, guest rooms, and odd little bedrooms that always seem one bad furniture choice away from becoming a maze.
Is using 3 IKEA LACK tables for a headboard actually worth it?
Yes, especially if you love budget decorating, simple lines, and a project that feels achievable. The three-LACK headboard hack is one of those rare DIY ideas that is creative without being chaotic. It gives a bed a focal point, solves the no-headboard problem cleanly, and leaves a lot of room for customization.
It is not the right choice for every bed size, and it does need proper reinforcement and safe installation. But for a queen bed in particular, this hack is still a standout. It is affordable, flexible, and weirdly elegant for something that began life holding remote controls and coffee mugs.
In other words, it is peak IKEA hack energy: simple pieces, smart proportions, and just enough ambition to make your bedroom look far more expensive than it has any legal right to.
Experiences and lessons from actually living with this kind of headboard
The most interesting thing about a 3-IKEA-LACK headboard is not the build day. It is what happens after the project is done and you live with it for a while. That is when you realize this hack does more than fill a blank wall. It changes how the whole bed feels in the room. A bed without a headboard can look unfinished, like you moved in, got tired, and declared the job emotionally complete. Once the LACK headboard is in place, the bed suddenly looks intentional. Even if the rest of the room is still waiting for art, curtains, or matching nightstands, the space starts reading like a real bedroom instead of a temporary sleeping arrangement.
One practical lesson many people notice right away is pillow control. Before adding a headboard, pillows tend to slide, slump, or disappear into weird gaps between the bed and the wall. Afterward, they stay where they belong. That sounds minor until you have spent three months waking up with a pillow folded behind your shoulder like a passive-aggressive burrito.
Another common experience is that the hack makes you want to keep improving the room. The moment the headboard goes in, the rest of the bedroom suddenly starts making requests. The lamp wants an upgrade. The bedding wants better texture. The wall color starts looking suspicious. This is not a flaw in the project. It is proof that the headboard does its job so well that everything around it wants to rise to the occasion.
People also learn quickly that small finishing touches matter. The basic build looks good, but the personalized version looks great. Painting it the same color as the trim, adding felt pads where it touches the wall, covering it in fabric, or installing sconces nearby can make the project feel completely custom. Those details are what move it from “clever IKEA hack” to “Where did you buy that?” territory.
The biggest lesson, though, is about proportion. When the width matches the bed well, the project looks polished. When the height is thoughtfully chosen, it feels balanced. That is why queen beds usually get the best results. The scale feels natural. With a full bed, the headboard can still look fantastic, but it becomes more of a bold design choice. With a king, the project can feel visually undersized unless you expand the design. The room tells you very quickly whether the proportions are working, even before your first night’s sleep.
And then there is the satisfaction factor, which is honestly half the reason people love projects like this in the first place. There is something deeply enjoyable about turning a few affordable flat-pack pieces into a useful focal point. You stop seeing the bedroom as a place where furniture merely lands and start seeing it as a place you can shape. That confidence tends to spill into other projects too. One minute you built a headboard. The next minute you are standing in the hardware aisle evaluating trim like you host a design show.
So yes, the hack is cheap, stylish, and smart. But the best part may be that it makes a room feel more finished, more personal, and more like home. That is a pretty good return for three little tables that used to mind their own business.