Soldering electrical wires can transform a loose, unreliable connection into a compact joint that conducts electricity for years. It can also transform a perfectly good wire into a smoky blob of insulation if the iron is handled like a miniature branding tool.
The good news is that learning how to solder electrical wires is not especially difficult. The secret is to prepare the conductors correctly, heat the wire rather than merely melting solder on top of it, protect the finished splice, and know when soldering is not the appropriate connection method.
This guide explains the complete process for low-voltage electronics, hobby projects, appliance leads, lighting, audio equipment, and similar repairs. It also covers tools, temperatures, inspection, testing, common mistakes, and practical workbench lessons.
Before You Begin: Know Where Soldering Is Appropriate
Soldering works well for many low-voltage electrical and electronic connections. Examples include repairing a broken speaker wire, installing LED strips, attaching leads to a small motor, replacing a battery connector, or joining wires inside a hobby project.
However, a soldered splice is not automatically suitable for every electrical system. Household branch-circuit wiring, service conductors, extension cords, high-current cables, automotive safety systems, and wiring exposed to severe vibration may require listed crimp connectors, terminal blocks, wire connectors, or other application-specific hardware.
Never improvise a hidden soldered splice inside a wall. Building-wiring connections generally belong in an approved enclosure and must use methods permitted by applicable electrical codes. When working on mains voltage or unfamiliar wiring, use an appropriately rated connector or call a qualified electrician.
Tools and Materials You Will Need
Temperature-Controlled Soldering Iron
A temperature-controlled soldering station is easier to use than a basic plug-in iron because it maintains consistent heat. For ordinary hookup wire, a medium chisel tip usually transfers heat more effectively than a needle-shaped tip. The tiny tip may look precise, but it often lacks enough contact area to heat the conductor quickly.
Electronics-Grade Solder
Use rosin-core or electronics-grade flux-core solder. Leaded 60/40 or 63/37 solder flows easily at relatively low temperatures, but it contains lead and requires careful hygiene. Lead-free solder avoids lead content but usually needs more heat and slightly better technique.
Do not use acid-core plumbing solder or plumbing flux on electrical wiring. Acid residues can corrode copper conductors and create future electrical problems long after the repair initially appears successful.
Wire Strippers and Cutters
Use a stripper sized for the wire gauge. The correct slot removes insulation without cutting strands or deeply scoring solid copper. Side cutters are useful for removing damaged wire ends and trimming sharp protrusions.
Flux
Flux removes surface oxides and helps molten solder wet the copper. Flux-core solder supplies some automatically, but an additional electronics-compatible flux pen or small amount of paste flux can help with old, oxidized, or difficult wire.
Heat-Shrink Tubing
Heat-shrink tubing electrically insulates the joint and provides limited mechanical protection. Choose tubing that slides over the unsoldered wire but shrinks tightly around the finished splice. Adhesive-lined tubing is useful where moisture resistance and stronger strain relief are needed.
Supporting Equipment
Helpful extras include a soldering-iron stand, brass-wool tip cleaner, damp cellulose sponge, helping hands, silicone work mat, safety glasses, fume extractor, heat gun, and digital multimeter. The helping hands are especially valuable because human beings were unfortunately issued only two hands, while soldering frequently demands four.
Essential Soldering Safety
- Disconnect the power source and remove batteries before cutting or soldering wires.
- Verify that the circuit is de-energized rather than trusting a switch or label.
- Work in a well-ventilated area and keep solder smoke away from your breathing zone.
- Use local fume extraction when soldering frequently or for long periods.
- Wear safety glasses to protect against clipped wire ends and solder splatter.
- Keep the iron in its stand whenever it is not touching the work.
- Wash your hands after handling leaded solder, and never eat or drink at the workbench.
- Keep flammable paper, solvents, fabrics, and cables away from the hot tip.
Most visible smoke during electronics soldering comes from heated flux. Even when using lead-free solder, that smoke can irritate the eyes and respiratory system. Ventilation still matters; “lead-free” does not mean “breathe deeply and enjoy the aroma.”
How to Solder Two Electrical Wires Together
Step 1: Disconnect and Inspect the Circuit
Remove all power. Examine the wires for burned insulation, green corrosion, blackened copper, broken strands, or previous overheating. If the damage extends along the cable, replacing the cable may be safer than repairing one visible section.
Cut each conductor back until clean, bright copper is visible. Solder does not bond reliably to dirt, heavy oxidation, oil, or charred wire.
Step 2: Slide on the Heat-Shrink Tubing
Cut a piece of heat-shrink tubing long enough to cover the bare joint and overlap the original insulation on both sides. Slide it several inches down one wire before joining the conductors.
This step is easy to forget. Discovering the tubing still on the table after creating a beautiful splice is a traditional soldering initiation ceremony, but it does not need to become yours.
Step 3: Strip the Wire Ends
Strip approximately 1/2 to 3/4 inch of insulation from each wire, adjusting the length for the conductor size and splice style. Avoid nicking the copper. A few cut strands can significantly weaken a small flexible wire.
For stranded wire, gently twist the strands in their original direction so they remain organized. Do not twist them so tightly that they form a rigid needle.
Step 4: Create a Mechanical Connection
For a strong inline splice, cross the stripped conductors at their centers. Wrap each free end around the opposite conductor several times. The finished joint should be straight, compact, and able to hold together before solder is added.
Another option is to overlap the conductors and twist them together. This is easier but usually creates a bulkier splice. Whichever method you choose, avoid a large twisted knot. Excessive bulk requires more heat and can make insulation difficult.
Solder should support an already stable connection rather than functioning as metallic glue between two loose wire ends.
Step 5: Secure the Wires
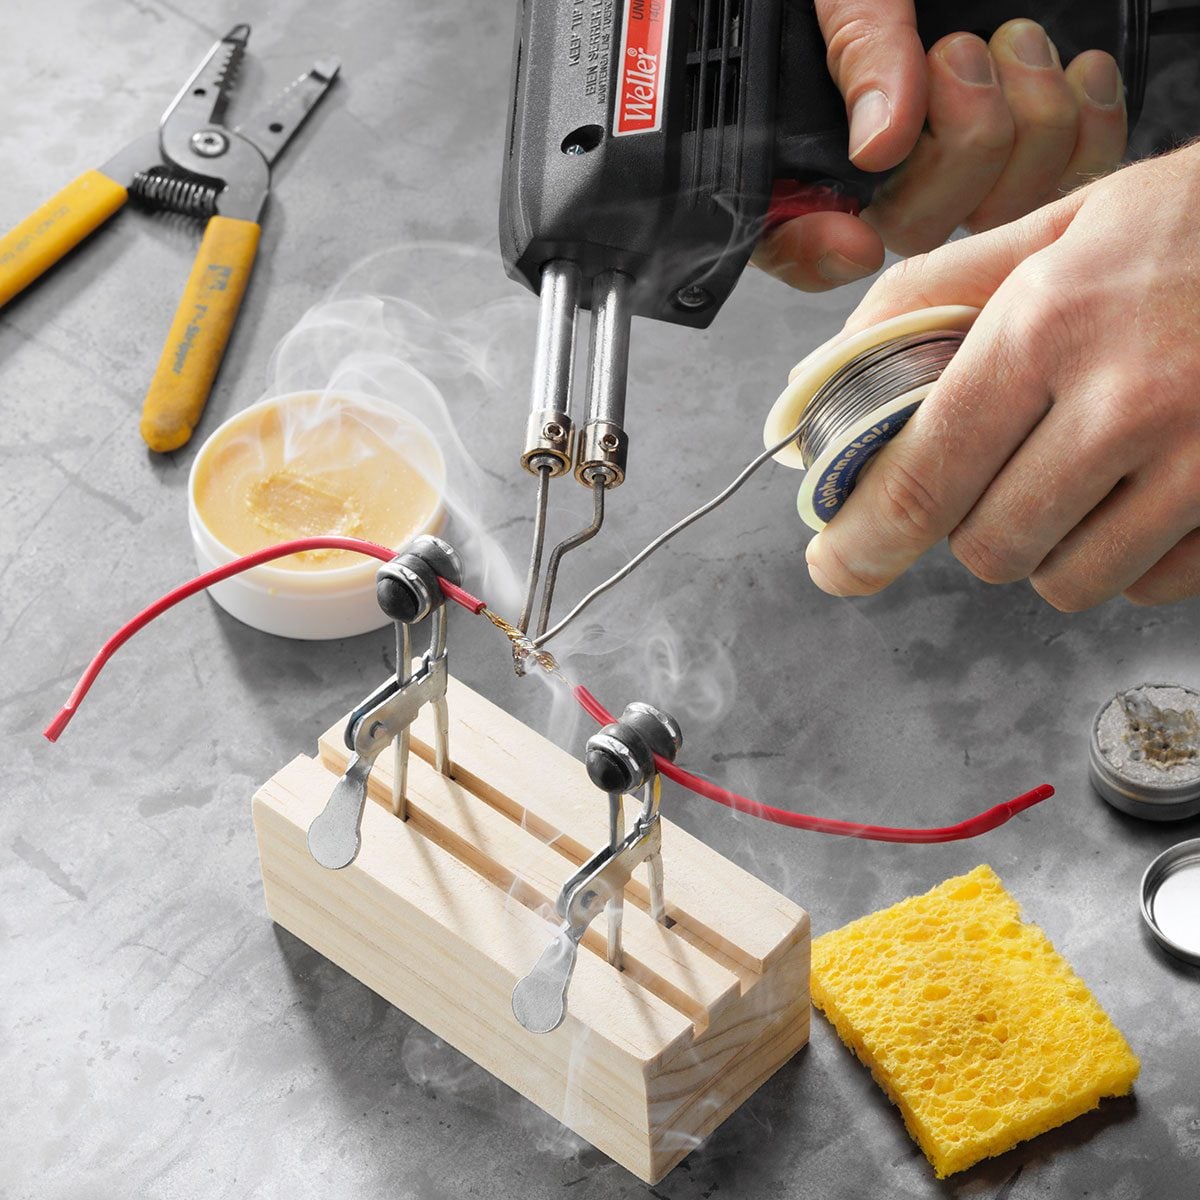
Clamp the wires in helping hands, a soldering fixture, or a heat-resistant holder. Position the joint so it cannot shift while the solder cools. Do not hold the conductor close to the joint with bare fingers; copper moves heat surprisingly well and has no concern for your weekend plans.
Step 6: Set the Soldering Temperature
For leaded electronics solder, a starting temperature around 600°F to 650°F is often effective. Lead-free solder commonly requires approximately 700°F to 750°F. Wire size, tip size, solder alloy, connector mass, and iron performance can change the ideal setting.
Use enough heat to complete the joint quickly, but do not automatically select the station’s maximum temperature. Excessive heat accelerates tip oxidation, damages insulation, burns flux, and can make soldering less effective rather than more effective.
Step 7: Clean and Tin the Iron Tip
Wipe the hot tip in brass wool or briefly on a damp soldering sponge. Immediately apply a small amount of fresh solder to coat the working surface. This thin coating is called tinning.
A properly tinned tip transfers heat efficiently. A dry, black, oxidized tip may be extremely hot while still struggling to melt solder at the joint.
Step 8: Heat the Conductors
Place the broad surface of the iron tip against the underside or side of the splice. Touch a tiny amount of solder between the tip and copper to form a thermal bridge. This small molten contact area improves heat transfer.
After a second or two, touch the solder wire to the opposite side of the heated conductorsnot directly to the iron. If the copper is hot enough, solder will melt against it and flow between the strands.
Step 9: Feed Only Enough Solder
Allow the solder to wick through the splice, then remove the solder wire. The conductor outline should remain visible. You want the strands bonded together, not buried inside a silver football.
Remove the iron after the solder has spread across the joint. Prolonged heating can melt insulation and draw solder too far under the jacket, creating an unnecessarily rigid section.
Step 10: Let the Joint Cool Without Movement
Hold the wires completely still for several seconds. Blowing on the connection is unnecessary and may introduce contamination. Moving the splice while the solder solidifies can produce a rough, weak, or cracked joint.
Never touch the joint immediately. Solder may solidify while the conductor remains hot enough to burn skin.
Step 11: Inspect and Clean the Splice
A good soldered wire joint should be compact, evenly wetted, and free of loose strands, sharp points, cracks, or burned insulation. Depending on the alloy, the surface may appear shiny or slightly matte, so appearance alone does not determine quality.
If the flux requires cleaning, let the joint cool and remove the residue with high-purity isopropyl alcohol and a suitable brush or lint-free swab. Follow the flux manufacturer’s cleaning instructions.
Step 12: Insulate the Connection
Center the heat-shrink tubing over the joint. Use a heat gun to shrink it evenly, moving the hot air around the tubing rather than concentrating on one spot. Stop when the tubing fits snugly and conforms to the wire.
Avoid shrinking tubing with the side of the soldering iron. It leaves uneven results, contaminates the tip, and creates an excellent opportunity to melt the insulation you just repaired.
Step 13: Test the Repair
Perform a gentle pull test after the splice cools. The joint should not slide, rotate, or separate. With the circuit still de-energized, use a multimeter in continuity mode to confirm a complete electrical path.
For multi-conductor cables, also verify that adjacent conductors are not shorted together. Restore power only after the splice has passed inspection and testing.
How to Recognize a Good Solder Joint
A reliable wire splice normally has the following characteristics:
- Solder has flowed into and around the conductor strands.
- The joint is smooth and reasonably compact.
- The wires remained aligned during cooling.
- No copper strands protrude through the insulation.
- The original wire insulation is not charred, split, or badly melted.
- The heat-shrink tubing covers all exposed conductor.
- The splice passes both a gentle pull test and a continuity test.
Common Soldering Problems and Their Solutions
The Solder Forms a Ball and Will Not Flow
The copper may be dirty, oxidized, or insufficiently heated. Cut back to clean conductor, apply compatible flux, clean and tin the iron tip, and heat the wire before feeding solder.
The Insulation Melts Before the Solder Flows
The tip may be too small, badly oxidized, or making poor contact. Use a wider chisel tip and complete the joint more quickly. A moderately hot iron with effective heat transfer often causes less insulation damage than a cooler iron held in place for a long time.
The Joint Looks Grainy or Cracked
The wires may have moved while cooling, or the solder may not have wetted the conductors. Reapply flux, reheat the entire joint, allow the solder to flow, and hold everything still until solid.
The Splice Is Huge and Stiff
Too much solder was added, or the conductors were twisted into an oversized knot. Remove excess solder with desoldering braid if practical, or remake the splice with a slimmer mechanical joint.
The Iron Will Not Melt Solder Properly
Inspect the tip. A black or crusty surface usually indicates oxidation. Clean and re-tin it using the manufacturer’s recommended method. Raising the temperature repeatedly will often make oxidation worse.
When Crimping May Be Better Than Soldering
Soldering is useful, but it is not the universal champion of wire joining. Properly installed crimp connectors can be faster, more repeatable, and more resistant to vibration. They are widely used in vehicles, appliances, industrial equipment, and wire harnesses.
Solder can wick under the insulation and turn flexible stranded wire into a rigid section. Repeated bending may then concentrate at the point where the rigid soldered area meets the flexible conductor. In vibration-heavy environments, a correctly sized crimp with proper strain relief may therefore be the better choice.
Use connectors approved for the wire type, gauge, voltage, current, temperature, moisture exposure, and installation environment. The quality of a connection depends as much on choosing the right method as on performing that method well.
Practical Workbench Experiences and Lessons
The most common beginner mistake is assuming that solder should be melted with the iron and then painted onto the wire. This usually creates a shiny coating on the outside while the center of the splice remains poorly bonded. The improvement is immediate once the operator starts heating the copper and allowing the copper to melt the solder.
Another recurring lesson involves tip selection. Beginners often reach for the finest available tip because the work looks delicate. Yet a medium chisel tip typically completes wire splices faster because it places more heated surface against the copper. Less contact time means less opportunity to soften insulation. Precision is not always about using the smallest tool; sometimes it means delivering heat exactly where it is needed and leaving quickly.
Heat-shrink tubing also teaches memorable lessons. It must be installed before the wires are joined, moved far enough away that it does not shrink prematurely, and sized for both the conductor and the finished splice. Tubing that is too narrow will not pass over the joint. Tubing that is too large may shrink without gripping the cable. A small assortment of sizes saves far more frustration than it costs.
Old copper wire deserves special attention. A conductor may appear usable while its strands are dark, brittle, or contaminated beneath the insulation. Adding more flux and more heat is not always the answer. Often, cutting back another inch reveals clean copper that solders immediately. When solder stubbornly refuses to wet a conductor, suspect the wire before declaring war on the soldering station.
Supporting the work is another difference between an awkward repair and a clean one. When wires hang in the air, they tend to spring apart at exactly the moment the solder becomes liquid. A simple helping-hands fixture, silicone holder, or temporary tape arrangement removes that problem. Stability improves the electrical joint and prevents the hot iron from chasing a moving target across the bench.
Experienced repairers also learn not to judge a connection solely by its shine. Traditional leaded solder often creates a bright surface, while some lead-free alloys naturally cool with a duller finish. More meaningful clues include complete wetting, visible conductor shape, smooth transitions, secure mechanical engagement, undamaged insulation, and successful electrical testing.
Testing catches problems that appearance misses. A splice may look perfect but contain a partially broken conductor. Another may conduct when stationary yet fail when the cable is flexed. Checking continuity while gently moving the wire can expose an intermittent connection before the equipment is reassembled. Finding the fault on an open workbench is far more pleasant than rediscovering it after replacing fourteen screws and one decorative panel that refuses to line up.
Finally, good soldering comes from consistent preparation rather than dramatic hand skills. Clean copper, compatible flux, a tinned tip, enough thermal contact, stable wires, controlled solder quantity, complete insulation, and basic testing produce dependable results. Once those habits become automatic, soldering stops feeling like a battle with molten metal and starts becoming a predictable repair process.
Conclusion
Learning how to solder electrical wires is mainly about controlling heat and preparing the connection correctly. Start with clean copper, create a stable mechanical splice, use electronics-grade flux and solder, heat both conductors, and feed solder into the hot wire rather than directly onto the iron.
Protect the completed joint with properly sized heat-shrink tubing, inspect it carefully, and test it before restoring power. Just as importantly, recognize situations in which an approved crimp connector, terminal, or professional electrical repair is safer than soldering.
Note: This guide is intended primarily for low-voltage electronics and similar projects. Follow product instructions, electrical codes, and workplace safety requirements for every application.