Snake plants can survive dim corners, missed waterings, and owners who treat plant care as a quarterlen roots crowd the container, rhizomes press against the sides, or the pot starts wobbling like a badly designed tower, repotting provides fresh soil, reliable drainage, and space for new growth.
Also called mother-in-law’s tongue, the snake plant is botanically known as Dracaena trifasciata, although its former name, Sansevieria trifasciata, remains common. Its thick leaves and underground rhizomes store moisture, explaining both its drought tolerance and its dislike of soggy soil. Here is how to repot a snake plant in six easy steps without turning a simple upgrade into a root-rot convention.
When Does a Snake Plant Need Repotting?
Snake plants prefer being slightly root-bound and may stay in the same pot for several years. Repot according to the plant’s condition rather than a rigid schedule.
- Roots are growing through the drainage holes.
- The nursery pot is bulging, splitting, or misshapen.
- Rhizomes are pushing against the sides or lifting the plant.
- The plant is top-heavy and tips over easily.
- Water rushes through because roots fill most of the container.
- The soil is compacted, crusty, sour-smelling, or slow to drain.
Spring and early summer are ideal because active growth supports recovery. However, repot immediately if you discover root rot, a broken pot, or severely degraded soil. Plant emergencies rarely respect your preferred weekend schedule.
Supplies and the Right Potting Setup
- A clean pot with at least one drainage hole
- Cactus or succulent mix, plus perlite or pumice if needed
- Clean pruning shears or a sharp knife
- Gloves and a covered work surface
- A saucer or decorative cachepot that will not hold standing water
Choose a Slightly Larger Pot
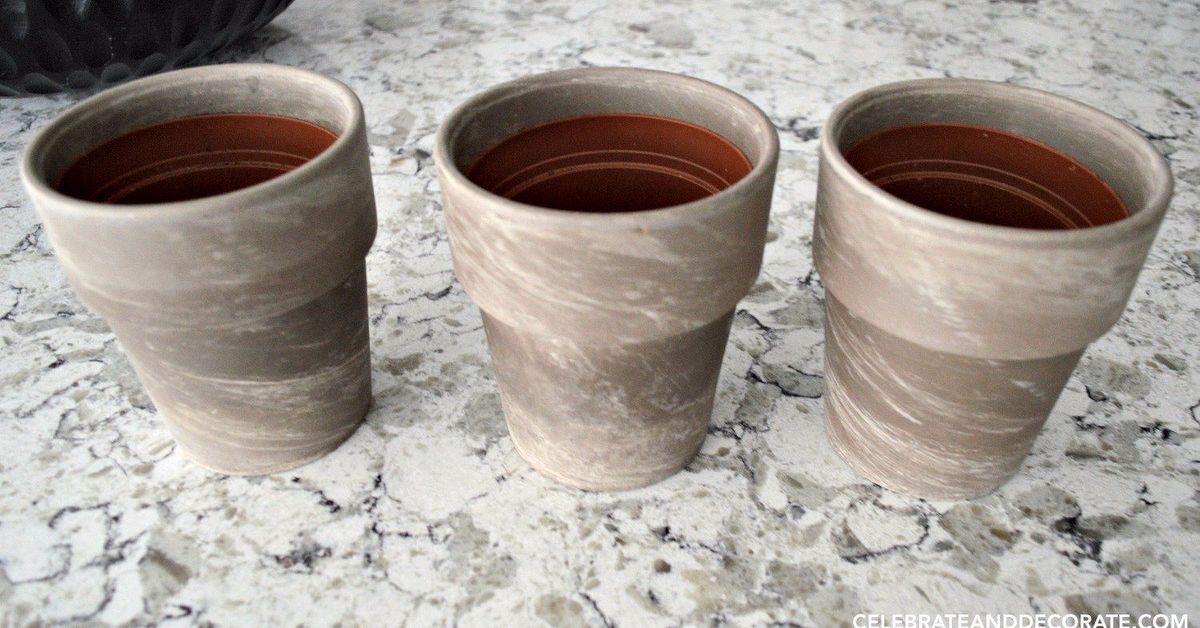
Select a container about 1 to 2 inches wider than the current one. A huge pot contains more wet soil than the roots can use, increasing the chance of rot. Broad, stable containers suit tall varieties. Terra-cotta is helpful for habitual overwaterers because its porous walls allow moisture to evaporate faster.
Use Fast-Draining Snake Plant Soil
A quality cactus or succulent mix is the easiest option. Alternatively, combine roughly two parts indoor potting mix with one part perlite or pumice. A little fine orchid bark can add structure. Avoid dense garden soil, which compacts in pots and limits air around the roots.
How to Repot a Snake Plant in 6 Easy Steps
Step 1: Prepare the Pot and Soil
Clean a reused pot and confirm that its drainage hole is open. Cover an unusually large hole with mesh or a curved pottery shard, but do not seal it. Skip the gravel layer; it reduces root space and cannot substitute for drainage.
Add enough dry or barely moist mix so the plant will sit at its previous depth. Leave about an inch below the rim to make future watering less messy.
Step 2: Remove the Plant Gently
Lay the container on its side and support the leaves near their base. Squeeze a flexible nursery pot, tap the sides, or run a clean blunt knife around the inner edge. Never yank the plant by a few leaves.
Work roots out of the drainage holes carefully. Cut a plastic pot only when necessary. Saving the root system matters more than winning an argument with a stubborn container.
Step 3: Inspect the Roots and Divide if Needed
Brush away loose soil and inspect the roots and rhizomes. Healthy tissue feels firm and may be pale tan, cream, yellow, or orange. Rotten roots are usually dark, mushy, hollow, or foul-smelling. Remove damaged portions with sterilized shears.
To divide a crowded snake plant, identify natural clumps connected by thick rhizomes. Cut between them with a clean knife, leaving roots and at least one healthy leaf cluster on each division. Division also preserves variegated leaf patterns more reliably than propagation from leaf sections.
Step 4: Position the Plant at Its Original Depth
Center the root ball and spread loose roots outward without forcing them flat. Keep the crown and leaf bases at the same level they occupied before. Planting too deeply traps moisture around the foliage and can encourage rot.
Rotate a tall plant until its weight is balanced. A minute spent checking the angle now can prevent months of watching it lean toward the floor like it has heard disappointing news.
Step 5: Backfill Without Compacting
Add fresh mix around the roots in small amounts. Tap the pot gently so soil settles into gaps, then firm it lightly with your fingers. Do not press it into a brick; roots require oxygen as well as moisture.
Stop below the rim and keep the crown exposed. Place small divisions in appropriately sized pots instead of giving one tiny pup a container large enough for a shrub.
Step 6: Water Carefully and Support Recovery
If the roots were healthy and minimally disturbed, water lightly to settle the mix and let the pot drain completely. If you trimmed rot, cut thick rhizomes, or made major divisions, allow the plant to rest in dry mix for two or three days before watering.
Place it in bright, indirect light for the first week or two. Wait about four to six weeks before fertilizing during active growth. Fresh soil often contains nutrients, and disturbed roots need recoverynot an immediate all-you-can-eat buffet.
Snake Plant Care After Repotting
Check the soil instead of watering on a calendar. Let the mix dry substantially before watering thoroughly, and always empty the saucer. A newly enlarged pot often stays moist longer because roots have not yet filled the fresh soil.
Bright, indirect light encourages stronger growth, although snake plants tolerate lower light. Plants in dim rooms use water slowly and need less frequent irrigation. A brief pause in growth after repotting is normal. Persistent yellowing, soft leaves, or a sour smell points toward excess moisture or damaged roots.
Common Snake Plant Repotting Mistakes
Using a Pot Without Drainage
Keep the plant in a draining nursery pot inside a decorative cachepot, and remove it when watering.
Moving Into an Oversized Container
Increase the diameter by only 1 to 2 inches. Too much unused soil stays wet around a small root system.
Watering Because the Surface Looks Dry
The center may still be moist. Test deeper in the mix or judge the pot’s weight before watering.
Burying the Crown or Fertilizing Immediately
Maintain the original planting depth and allow several weeks of recovery before feeding.
Forgetting Pet Safety
Snake plants are toxic to cats and dogs if chewed. Keep the main plant and freshly divided pups beyond curious paws.
Frequently Asked Questions
How Often Should I Repot a Snake Plant?
Many need repotting only every two to four years. Visible crowding, instability, poor drainage, or deteriorated soil are better indicators than age alone.
Do Snake Plants Prefer Shallow Pots?
Because they spread through rhizomes, they often prefer containers that are wider rather than excessively deep. The pot must still be deep and heavy enough to balance the foliage.
Should I Water Before Repotting?
Dry or slightly moist soil is easier to handle and falls from the roots cleanly. Avoid repotting immediately after a heavy watering unless you are treating an urgent problem.
Can I Use Regular Potting Soil?
Regular indoor mix may hold too much moisture by itself. Amend it with perlite or pumice, or choose a cactus and succulent mix.
Can I Repot in Winter?
Yes, when root rot, a damaged pot, or another urgent issue requires action. For routine work, spring or early summer usually supports faster recovery.
A Grower’s-Eye Experience: Repotting a Mature Snake Plant
Imagine a mature snake plant that has lived in the same eight-inch nursery pot for four years. Across the room, it looks excellent: tall striped leaves, several new shoots, and the posture of a plant that knows it is difficult to kill. Up close, the plastic pot has become oval. A thick rhizome presses against one side, roots peek through the drainage holes, and the whole arrangement tips whenever someone walks past too enthusiastically.
The first surprise is how firmly the plant holds its container. Squeezing the sides may achieve nothing because rhizomes have wedged themselves into place. Tapping the pot, loosening the edge, and working patiently is safer than pulling harder. When the root ball finally slides out, it may resemble a dense bundle of soil, roots, and orange-toned rhizomes molded into the exact shape of the pot.
Beginners often assume every root must be perfectly untangled. In practice, gentle loosening is enough. Healthy roots do not need an aggressive spa treatment. Removing loose old soil and freeing the outer circling roots gives them a path into the fresh mix. If natural divisions are obvious, separating one or two pups can make the parent easier to center while producing smaller plants for another shelf or a friend.
The next lesson is about pot size. A large plant may look as though it deserves a dramatic upgrade, but moving from an eight-inch pot to a fourteen-inch planter creates a wide moat of damp soil. A ten-inch pot is less theatrical and much safer. It gives the rhizomes room without turning the roots into swamp residents.
Positioning may require several attempts. Tall leaves exaggerate a small lean, so step back, rotate the pot, and inspect it from multiple angles before adding the final soil. The mix should support the root ball without covering the crown. Gentle taps settle it more evenly than pressing down with full hand strength.
After repotting, the plant may appear to do absolutely nothing for several weeks. That is not failure. Snake plants often put energy into roots before producing visible leaves. Successful aftercare is mostly restraint: bright indirect light, no immediate fertilizer, and no repeated watering because the surface looks dry. The center of a larger pot can remain moist long after the top inch changes color.
Within a month or two, the practical rewards become clear. The pot stays upright, watering becomes more predictable, and new shoots have room to emerge. The experience teaches the central rule of snake plant repotting: the goal is not the biggest home available. It is the right balance of root space, airflow, stability, and drainage. Your plant does not need luxury real estate. It needs a sensible apartment with working plumbing.
Conclusion
Repotting a snake plant is mostly an exercise in avoiding excess. Use a slightly larger draining pot, an airy soil mix, the original planting depth, and a cautious watering routine. Inspect roots carefully, divide crowded clumps when useful, and give the plant time to recover in bright indirect light.
Follow these six steps and your snake plant can return to its favorite activities: growing slowly, standing dramatically, and silently judging the thirstier houseplants nearby.