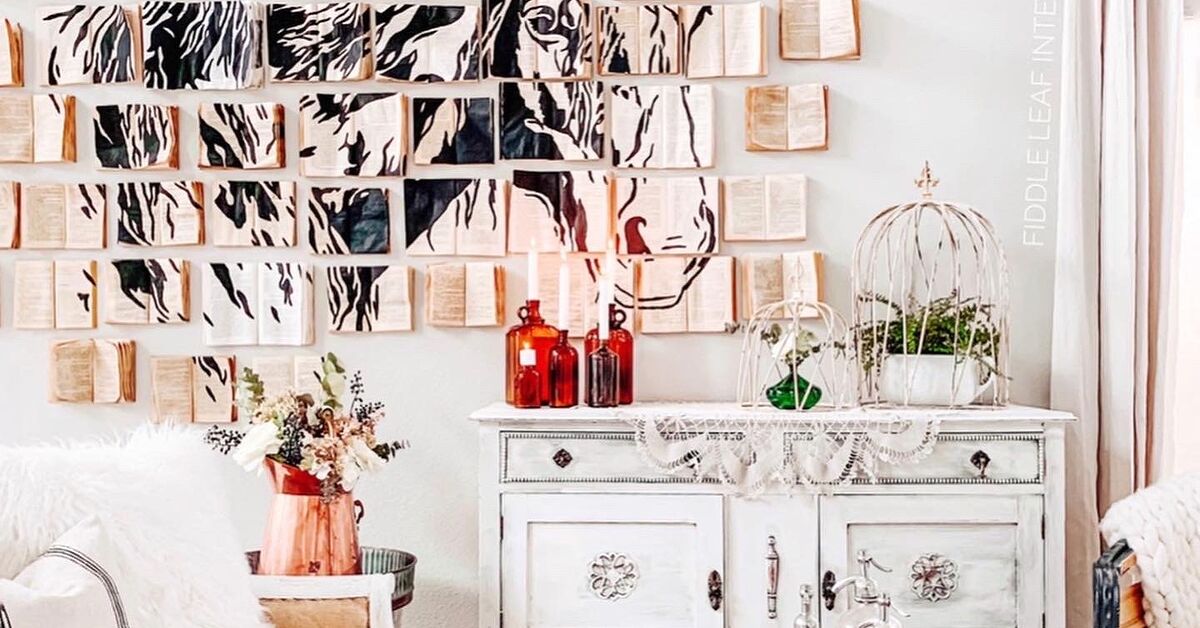
Painting furniture is one of the fastest ways to rescue a dated dresser, personalize a thrift-store table, or convince an old nightstand that its best years are still ahead. A relatively small amount of paint can completely change a piece, but a durable, professional-looking finish requires more than opening a can and hoping enthusiasm will handle the details.
The real secret is preparation. Cleaning removes invisible grease, sanding improves adhesion, primer creates a stable foundation, and thin coats prevent the drips, ridges, and sticky surfaces that make a furniture makeover look homemade in the wrong way. Major U.S. paint manufacturers, home-improvement retailers, and DIY publications consistently recommend matching the preparation, primer, and paint to the furniture material rather than treating every surface like ordinary wood.
Is the Furniture Worth Painting?
Before reaching for sandpaper, inspect the piece carefully. Make sure joints are stable, drawers operate properly, veneer is not lifting extensively, and the furniture does not have serious water damage or structural cracks. Paint can disguise scratches and dated finishes, but it cannot persuade a collapsing chair to become safe.
Also consider whether the piece may be a valuable antique. Painting a collectible item can reduce its value, especially when the original finish, maker’s mark, or wood grain is historically significant. When in doubt, photograph the markings and consult an antiques specialist before making irreversible changes.
Check for Lead Paint Before Sanding
Use extra caution with old painted furniture, particularly pieces made before 1978 or items with an unknown history. Sanding, scraping, or stripping lead-based paint can release hazardous dust. The U.S. Environmental Protection Agency recommends testing suspect coatings, containing the work area, controlling dust, wearing suitable protective equipment, and considering a certified lead professional rather than casually attacking old paint with a power sander.
Tools and Materials You May Need
Your exact shopping list depends on the surface and finish, but most furniture painting projects require the following:
- Drop cloth, plastic sheeting, or a large piece of cardboard
- Screwdriver and small labeled bags for hardware
- Mild detergent or a furniture-safe degreasing cleaner
- Clean lint-free cloths
- Wood filler, putty knife, and wood glue for repairs
- Medium- and fine-grit sandpaper or sanding sponges
- Dust mask or appropriate respirator, safety glasses, and gloves
- Bonding, stain-blocking, rust-inhibiting, or wood primer
- Furniture paint, cabinet enamel, acrylic paint, chalk-style paint, or spray paint
- High-quality synthetic brush, detail brush, foam roller, or paint sprayer
- Painter’s tape
- Optional clear protective topcoat or furniture wax
A two-inch angled synthetic brush handles corners, edges, legs, and decorative trim well. A four-inch high-density foam or microfiber roller can produce a smoother surface on tabletops, drawer fronts, and cabinet sides. Spray paint is especially useful for metal, wicker, spindles, and intricate shapes where a brush would spend the afternoon playing hide-and-seek.
How to Choose the Best Paint for Furniture
Furniture or Cabinet Enamel
Water-based acrylic or waterborne alkyd enamel is an excellent general-purpose choice for dressers, tables, desks, bookcases, and cabinets. These products are designed to level more smoothly and resist wear better than ordinary flat wall paint. Satin and semi-gloss finishes are popular because they are easier to clean and generally more resistant to scuffs than matte paint. Benjamin Moore, Better Homes & Gardens, and Bob Vila all emphasize choosing a coating designed for the material and expected wear of the piece.
Chalk-Style Paint
Chalk-style paint creates a soft, matte finish and is popular for vintage, cottage, and distressed looks. Some formulas advertise minimal sanding or priming, but “minimal preparation” does not mean “paint directly over pancake syrup, furniture polish, and ten years of fingerprints.” The surface still needs to be clean, dry, stable, and free of peeling finish. Many chalk-style coatings also need wax or a compatible clear coat for better stain and moisture resistance.
Spray Paint
Spray paint can create an even finish on metal frames, wicker, small chairs, hardware, and decorative pieces. Use a formula labeled for the specific surface, work in a well-ventilated area, and apply several light passes rather than one heroic blast. Rust-Oleum and Sherwin-Williams recommend cleaning, removing loose paint or rust, sanding glossy surfaces, and using a compatible primer where needed.
Exterior Paint
Furniture that will live on a porch, patio, or balcony needs an exterior-rated primer and paint. Interior paint is not formulated to handle repeated moisture, ultraviolet exposure, and temperature changes. Exterior furniture also requires complete coverage, including undersides, joints, edges, and end grain where moisture can enter.
How to Paint Furniture Step by Step
1. Plan the Finished Look
Choose the color, sheen, hardware, and decorative details before beginning. Test the paint on the back, underside, or a sample board and view it in the room during daytime and evening light. A sophisticated charcoal sample can become “surprise purple” under warm lamps, and discovering that after three coats is character-building in a way nobody requested.
Consider the furniture’s use. A matte finish may suit a decorative cabinet, while a satin or semi-gloss enamel is usually more practical for a desk, dining table, nightstand, or children’s furniture that will be touched and cleaned frequently.
2. Create a Safe Work Area
Move the piece to a clean, well-ventilated location with enough room to walk around every side. Protect the floor with a drop cloth and follow the ventilation, temperature, humidity, and protective-equipment directions printed on the primer and paint labels. Avoid direct sun and strong wind, which can make coatings dry too quickly or carry dust into the wet finish. Lowe’s specifically recommends a ventilated work area away from direct sunlight and windy conditions.
3. Remove Hardware and Detachable Parts
Take off knobs, handles, hinges, doors, shelves, and drawers whenever possible. Place screws and hardware in labeled bags so the dresser does not later become a logic puzzle with three unexplained screws.
Label drawers and doors with painter’s tape if they fit specific openings. Do not paint drawer slides, mechanical glides, lock components, or areas where layers of paint could prevent parts from moving freely. Both The Home Depot and Lowe’s recommend disassembling removable components and masking areas that should remain unpainted.
4. Clean the Furniture Thoroughly
Cleaning must happen before sanding. Otherwise, sanding can grind grease, polish, smoke residue, and grime deeper into the surface. Wash the furniture with a mild detergent or suitable degreaser, paying special attention to drawer pulls, cabinet doors, table edges, and other frequently handled areas.
Remove cleaner residue with a fresh damp cloth when the product instructions require it, then allow the piece to dry completely. Cleaning is recommended across guidance from Behr, Sherwin-Williams, Rust-Oleum, This Old House, and Benjamin Moore because dirt and oil interfere with adhesion.
5. Repair Damage
Tighten loose fasteners, glue unstable joints, and fill dents or unwanted holes with a filler compatible with the furniture material. Allow repairs to dry, then sand them flush with the surrounding surface.
Repair lifting veneer before painting. If veneer is loose but intact, it may be possible to reglue and clamp it. Severely damaged veneer can require specialized repair or removal. Be cautious when sanding thin veneer because an aggressive power sander can pass through the decorative layer surprisingly fast.
6. Sand or Degloss the Surface
You usually do not need to remove every trace of an intact finish. The goal is to eliminate loose paint, smooth defects, and dull glossy coatings so primer can grip. Start with approximately 120- to 180-grit paper for rough areas or failing finishes, then refine the surface with 180- to 220-grit paper. Use light pressure on veneer, laminate, and MDF edges.
Always sand in the direction of the wood grain when it is visible. A sanding sponge works well around curves, molding, and carved details. Completely strip the finish only when it is badly peeling, unusually thick, chemically incompatible with the new coating, or preventing a smooth result. Guidance from HGTV, Rust-Oleum, Minwax, and This Old House supports progressing from surface correction to finer sanding rather than treating all furniture with the same aggressive method.
7. Remove Every Bit of Dust
Vacuum the piece and nearby work area, then wipe the furniture with a clean, lint-free cloth. Use the cleaning method recommended by your coating manufacturer. Do not leave sanding powder in corners, carvings, or drawer openings; primer applied over dust creates a rough layer that can peel or crumble.
Inspect the furniture under a bright light held at an angle. Side lighting reveals scratches, dents, dust, and missed glossy areas far more effectively than ordinary overhead lighting.
8. Apply the Correct Primer
Primer improves adhesion, creates a more uniform base, and can prevent wood tannins, knots, stains, or old colors from bleeding through. Use a stain-blocking primer for woods such as mahogany, cedar, or knotty pine; a high-adhesion bonding primer for laminate and glossy finishes; an MDF-compatible primer for fiberboard; and a rust-inhibiting metal primer for steel or iron.
Apply a thin, even coat with a brush, roller, or sprayer. Follow the grain or the longest line of the piece and avoid heavy buildup in corners. Once dry, lightly sand rough primer with fine-grit paper and remove the dust. Martha Stewart, HGTV, Benjamin Moore, Sherwin-Williams, and This Old House all identify primer as an important step for reliable adhesion or stain control on many furniture surfaces.
9. Apply the First Coat of Paint
Stir the paint thoroughly without whipping excessive air into it. Begin with corners, edges, trim, and detailed areas using a brush. Cover large flat sections with a small foam or microfiber roller while the brushed edges are still workable.
Apply a thin coat. Thick paint may cover faster initially, but it is more likely to sag, show brush marks, trap soft material beneath a dry skin, and remain sticky. Maintain a wet edge and avoid repeatedly brushing paint that has started to set. Behr recommends smooth, even strokes in the direction of the grain, while Sherwin-Williams demonstrates using brushes for details and mini rollers for broad sections.
10. Let It Dry and Sand Lightly
Wait for the full recoat time printed on the label. Drying conditions vary with product, film thickness, airflow, temperature, and humidity, so the clock on another person’s project is not a substitute for your paint instructions.
When permitted by the manufacturer, lightly sand between coats with 220-grit or finer paper to remove dust nibs and small ridges. Wipe away all dust before continuing. Minwax recommends allowing the lower coat to dry and lightly sanding between clear-finish coats to improve smoothness and coat-to-coat adhesion; the same careful principle is useful when a furniture paint system allows sanding between layers.
11. Add the Final Coat
Apply the second coat as thinly and carefully as the first. Many colors cover in two coats, but strong reds, yellows, bright whites over dark finishes, and dramatic color changes may require an additional layer. Do not compensate for poor coverage by applying one extra-thick coat.
Check the piece from several angles before cleaning your tools. Look beneath edges, around feet, behind decorative trim, and beside drawer openings. These are the places paint likes to avoid while you are working and reveal itself the moment guests arrive.
12. Seal the Finish When Necessary
A separate topcoat is not always required. Many furniture and cabinet enamels are designed to cure into a durable washable finish without polyurethane. A clear coat may still be useful on heavily used tabletops, chalk-style finishes, decorative glazing, or products whose instructions specifically call for protection.
Choose a compatible water- or oil-based topcoat and test it first. Some clear finishes can alter the color, sheen, or warmth of pale paint. Apply thin coats, avoid overworking the product, and follow every recoat and curing instruction. HGTV and Minwax recommend compatible protective finishes and light sanding between suitable clear coats for a smoother result.
13. Allow the Paint to Cure
Dry paint is not necessarily cured paint. A surface can feel dry while remaining vulnerable to dents, blocking, scratches, and impressions from lamps or books. Give the finish the curing time specified by the manufacturer before heavy use.
Reinstall hardware gently. Use felt pads under accessories, avoid dragging objects across the surface, and leave drawers or doors slightly open if the instructions recommend additional airflow. Patience at this stage prevents a freshly painted nightstand from permanently recording the shape of a phone charger.
How to Paint Different Furniture Materials
Solid Wood and Wood Veneer
Clean, repair, scuff-sand, prime, and paint solid wood using thin coats. Veneer follows a similar process, but it demands gentler sanding because the visible wood layer may be extremely thin. Use chemical stripping cautiously and only when appropriate for the veneer and adhesive.
Laminate Furniture
Laminate is smooth and nonporous, so adhesion is the main challenge. Clean it carefully, lightly scuff the gloss without cutting through the surface, and apply a high-adhesion bonding primer. Finish with a durable enamel approved for manufactured surfaces. Benjamin Moore and Sherwin-Williams both publish laminate-specific guidance emphasizing preparation and compatible coatings.
MDF Furniture
MDF has a smooth face but highly absorbent cut edges. Avoid soaking it during cleaning, repair swollen areas where possible, and seal the edges thoroughly with an appropriate primer. Sand primed edges gently until smooth before applying paint. This Old House notes that MDF requires material-specific preparation and priming for a durable finish.
Metal Furniture
Remove loose paint and rust with a wire brush or suitable abrasive, clean the metal, and let it dry. Apply a rust-inhibiting or bonding primer followed by paint formulated for metal. Spray several light, overlapping passes rather than holding the can in one place. Benjamin Moore, Rust-Oleum, Lowe’s, and The Home Depot all recommend removing corrosion and using surface-appropriate coatings.
Wicker and Intricate Furniture
Vacuum wicker thoroughly and use a soft brush to remove debris from crevices. Repair loose strands before painting. A sprayer or aerosol paint usually reaches the woven surfaces more evenly than a loaded brush, but multiple light coats are essential to prevent the weave from becoming clogged.
Common Furniture Painting Mistakes
- Painting over dirt or polish: The coating sticks to the contamination instead of the furniture.
- Skipping primer on glossy laminate: The finish may scratch off with very little effort.
- Using wall paint on a hardworking tabletop: It may lack the leveling and wear resistance of furniture or cabinet enamel.
- Applying thick coats: Heavy layers encourage runs, ridges, slow curing, and a gummy finish.
- Rushing recoat times: A second coat can soften or pull the first one.
- Over-sanding veneer or MDF: Aggressive sanding can permanently damage the surface.
- Using indoor products outdoors: Interior coatings are not designed for weather exposure.
- Putting the furniture back into service immediately: Dry-to-the-touch paint can still be soft underneath.
- Sealing every project automatically: An incompatible clear coat can discolor paint or create adhesion problems.
Creative Painted Furniture Ideas
A solid color is only the beginning. Paint drawer interiors in a contrasting shade, add a narrow stripe around a tabletop, stencil a geometric pattern on cabinet doors, or use two related colors to highlight architectural details. A color wash can leave some wood grain visible, while dry brushing and controlled distressing create an aged finish. This Old House and HGTV describe color washing, antiquing, glazing, and layered finishes as practical ways to add depth and character.
Use restraint when distressing. Natural wear usually appears around corners, handles, feet, and edgesnot in perfectly spaced patches across the middle of a drawer. Unless the backstory is that the dresser survived a very organized raccoon attack, irregularity looks more convincing.
Real-World Experiences and Lessons From Painting Furniture
Furniture painting becomes much easier after completing a few projects because the biggest lessons are tactile. You begin to recognize when a surface is genuinely clean, when primer is ready to sand, and when paint has started drying enough that another brushstroke will cause more harm than good.
One particularly useful experience comes from repainting an inexpensive laminate nightstand. It is tempting to skip sanding because the surface already looks flawless. On the first attempt, paint applied directly over the slick finish may appear beautiful for a day or two. Then a fingernail, drawer knob, or carefully placed roll of painter’s tape removes a perfect strip. The lesson is immediate: visual smoothness is not the same as paint adhesion. A light scuff and bonding primer may add an hour to the project, but they can add years to the finish.
Old wooden dressers teach a different lesson. The surface may feel clean after a quick wipe, yet years of furniture polish can remain in corners and around handles. Primer may separate into tiny craters commonly described as fisheyes. When that happens, adding more paint rarely solves the underlying contamination. Cleaning thoroughly before sandingand cleaning again after repairstakes less time than removing a failed finish.
Large flat surfaces reveal the value of the right applicator. Brushing an entire tabletop can leave visible lap marks, especially in warm or dry conditions. Cutting in the edges with a quality angled brush and immediately rolling the broad center with a small smooth roller usually creates a more uniform finish. The roller should be loaded evenly but not saturated. Pressing harder does not produce a smoother coat; it mostly pushes paint toward the edges and creates ridges.
Chairs are excellent teachers of patience. Spindles, stretchers, curves, and hidden undersides make it easy to apply too much paint while trying to achieve full coverage in one pass. Rotating the chair and working in a planned sequence helps. Start underneath, move to the legs and stretchers, then paint the seat and back. Thin coats minimize drips that otherwise migrate to the far side while your attention is elsewhere.
Color selection also improves with experience. A paint chip is too small to show how a strong color will behave across an entire dresser. Testing the color on a removable drawer, the back panel, or a large sample board can prevent disappointment. Colors change with nearby flooring, wall paint, daylight, and artificial lighting. A muted green can look elegant in a bright workshop and unexpectedly minty in a dim bedroom.
Another hard-earned lesson is that paint labels matter more than generic online timelines. One product may permit recoating in two hours, while another needs much longer. Humid weather can extend both drying and curing. Applying the next coat because “it has been two hours” may wrinkle the surface if the earlier layer is still soft. When the sandpaper gums up instead of producing fine powder, the coating usually needs more time.
The final lesson is to stop touching the finish. After the last coat, every instinct says to check it, reposition it, reinstall the handles, or place the lamp back on top. Resist. A finish can look complete while still being vulnerable to fingerprints and pressure marks. Giving the furniture a generous curing period is less exciting than revealing it immediately, but it is far more satisfying than repainting a tabletop with a permanent book-shaped dent.
Successful furniture painting is not about never making mistakes. It is about building a process that makes mistakes easy to correct: test first, clean thoroughly, use compatible products, apply thin coats, and allow more drying time than your impatient inner decorator believes is necessary.
How to Care for Painted Furniture
Dust painted furniture with a soft cloth and clean spills promptly. Use mild soap and water only when the coating manufacturer permits it, and avoid abrasive scrubbers or harsh household chemicals. Place felt pads beneath lamps, trays, and decorative objects. Use coasters and trivets on tables, and lift objects instead of sliding them.
Small chips can often be repaired by cleaning the area, feather-sanding the damaged edge, applying compatible primer if bare material is exposed, and touching up with the original paint. Keep a small labeled container of leftover paint for future repairs.
Conclusion
Learning how to paint furniture is less about artistic talent and more about following a reliable sequence. Inspect the piece, work safely, remove hardware, clean every surface, repair damage, sand appropriately, apply the correct primer, and build the color with thin coats. Let each layer dry fully and give the final finish enough time to cure before returning the furniture to everyday life.
When the preparation matches the material, even an inexpensive thrift-store find can look intentional and polished. Skip the prep, however, and your beautiful new paint may begin leaving the furniture before the furniture has even left the workshop.