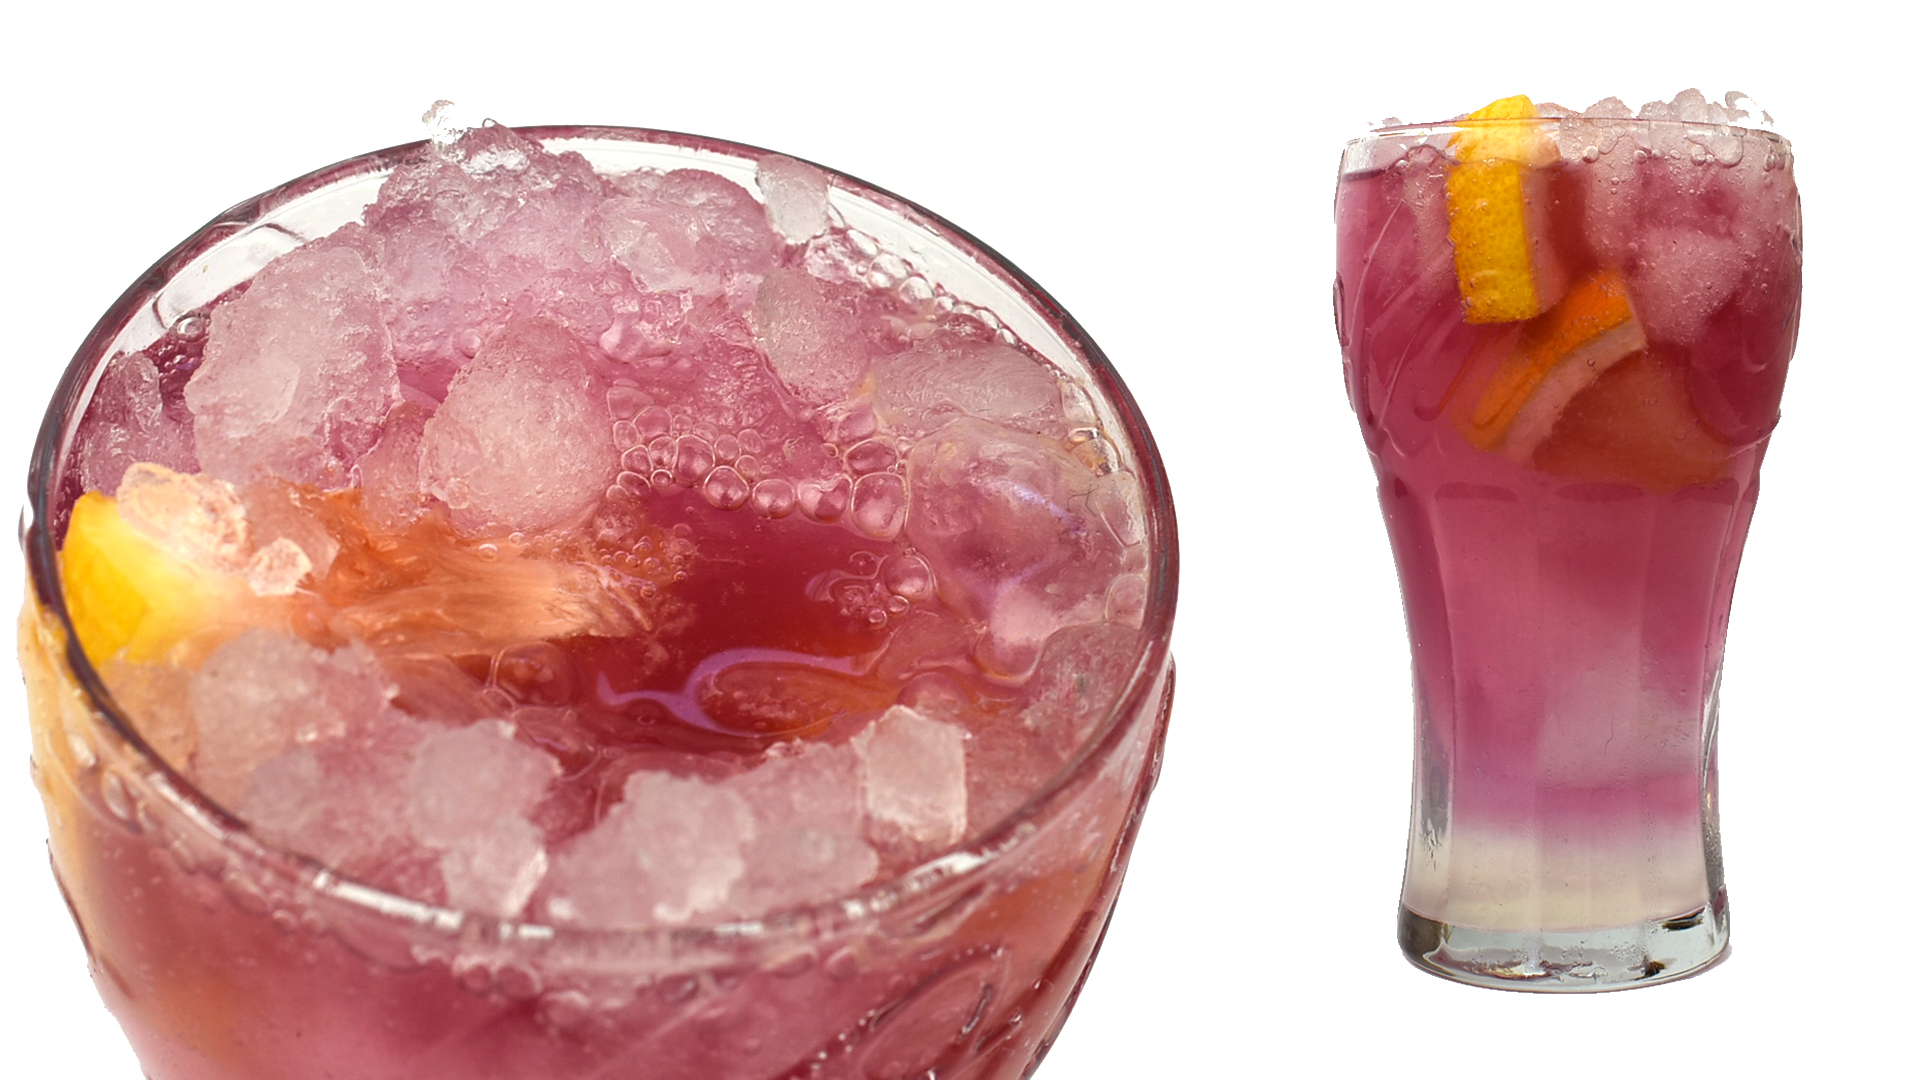
Soft ice is the little luxury that can make an ordinary glass of lemonade feel like it came from a drive-in, a hospital cafeteria, or a suspiciously fancy countertop appliance. It is light, pebbly, quick to chill a drink, and far easier to enjoy than a jaw-testing cube the size of a small ottoman.
The good news is that you do not need a commercial ice machine to get a softer texture. The fastest homemade approach is to freeze water in a thin layer, break it into small pieces, and serve it before those pieces fuse into one stubborn iceberg. A blender or food processor can also create crushed, snowy, or shaved ice, while a nugget ice maker is the most reliable route to true chewable pellets.
What Is Soft Ice, Exactly?
At home, the phrase soft ice usually refers to one of four textures: crushed ice, pebble ice, shaved ice, or nugget ice. They are related, but they are not identical.
- Crushed ice is regular ice broken into irregular chips.
- Pebble ice consists of small rounded or jagged pieces that pack closely in a glass.
- Shaved ice is processed into fine flakes with a snow-like texture.
- Nugget ice is formed from small ice crystals compressed into porous pellets.
True nugget ice feels softer because it is not a single dense block. Manufacturers create it by packing together many small crystals, leaving tiny spaces throughout each pellet. Those air pockets and crystal boundaries make the ice easier to break apart than a conventional cube. Crushing ordinary cubes imitates part of that experience by making the pieces smaller and increasing their surface area.
The Quickest No-Machine Method
What You Need
- 1 to 1 1/2 cups clean drinking water
- 1 gallon-size freezer bag
- A second freezer bag for leak protection
- A clean kitchen towel
- A rolling pin, meat mallet, or heavy-bottomed pan
- A cutting board
- A colander or fine-mesh strainer
Step 1: Freeze a Thin Sheet of Water
Pour the water into a freezer bag, press out most of the air, and seal it tightly. Slip that bag into a second bag. Lay it flat on a tray so the water spreads into a thin, even layer.
Place the tray in a freezer set at 0°F or below. Start checking after about two hours. Freezers vary, so use texture rather than the clock as your boss. You want a firm sheet that is frozen through or nearly frozen through, but not a slab that has spent three days training for a career as driveway pavement. A thinner sheet is easier to break into delicate chips.
Step 2: Break the Ice Gently
Remove the frozen sheet from the outer bag. Keep it inside the sealed inner bag and wrap it in a clean towel. Place it on a sturdy cutting board, then tap it with a rolling pin or the flat side of a mallet.
Use short, controlled taps instead of dramatic overhead swings. This is ice preparation, not a Viking audition. Rotate the bag as you work so the pieces become roughly pea-sized to marble-sized. A sealed bag and a heavy pan are also commonly recommended for making crushed ice without special equipment.
Step 3: Drain and Serve
Pour the crushed ice into a clean colander and shake it briefly to remove loose snow and meltwater. Transfer it immediately to a chilled glass. Draining matters because excess water quickly turns a fluffy pile of ice into a slushy puddle; refreezing that puddle creates a hard, fused block.
For the softest eating texture, let the crushed ice sit in a cold drink for 30 to 60 seconds. The surface will relax slightly while the center stays frozen. Serve it right away.
How to Make Soft Ice in a Blender
A blender is the fastest option when you already have cubes. First, check the appliance manual to confirm that the jar and blades are designed to crush ice. Not every blender enjoys being handed a frozen geology assignment.
- Add six to eight standard ice cubes to the jar.
- Secure the lid completely.
- Use the pulse or ice-crush setting in short bursts.
- Stop and shake the jar gently if large pieces ride above the blades.
- Quit blending when most pieces are small and pebbly.
- Drain meltwater and serve immediately.
Small batches give the blades room to move and make the texture more even. KitchenAid guidance for some ice-crush models recommends roughly seven or eight standard cubes at a time, while Vitamix notes that pulsing works well for smaller servings. The goal is to pulverize the ice just enough, not blend it continuously until you have a cold glass of nervous water.
Blender Texture Guide
- Two or three quick pulses: Coarse chips for soda, iced tea, or lemonade.
- Several short pulses: Pebble-style ice for cocktails and mocktails.
- Longer controlled pulsing: Fine snow for desserts, provided the blender is rated for the task.
Ice straight from the freezer usually crushes more cleanly than cubes that have become wet and slippery on the counter. Once processed, however, the smaller pieces begin melting quickly, so timing matters.
How to Make Snowy Ice in a Food Processor
A sturdy food processor can produce a finer, shaved texture, but only use it if the manufacturer approves ice processing. Add a moderate batch of cubes, lock the lid, and pulse until the ice resembles coarse snow. Food Network recipes commonly process a few cups of crushed ice at a time to create a finely shaved result, and Epicurious has demonstrated blender-based shaved-ice methods for home desserts.
For a fluffy result, work quickly and stop before the motor warms the ice. Spread the finished snow in a shallow container, break up any compacted areas with a fork, and use it immediately. This texture is excellent under fruit syrup, condensed milk, cold brew, or a bright splash of citrus.
How to Get True Nugget Ice at Home
If your goal is the restaurant-style pellet that is soft, porous, and uniformly chewable, a countertop nugget ice maker is the most dependable solution. These machines form small crystals and compress them into nuggets rather than freezing solid cubes in a tray. That structure is what gives authentic nugget ice its distinctive crunch.
The trade-off is cost, counter space, noise, and cleaning. Follow the manufacturer’s schedule for sanitizing and descaling, use the recommended water, and keep the scoop outside the storage bin. A machine can make wonderful ice, but it cannot prevent a hand that just touched raw chicken from going treasure hunting in the ice basket.
Five Tricks for Softer Homemade Ice
1. Start With Smaller Pieces
Small ice melts more evenly and feels less dense than a full-size cube. Mini-cube trays, thin freezer bags, and controlled crushing all help produce a gentler texture.
2. Do Not Let Crushed Ice Refreeze Into a Brick
Once ice is crushed, its damp surfaces stick together easily. If you must prepare it ahead, drain it well, place it loosely in a freezer bag, and break up the bag before serving. Fine shaved ice can be frozen briefly, but its best texture is always fresh.
3. Chill the Drink Before Adding Ice
Warm soda, tea, or juice melts the outside of the ice immediately. Pre-chilling the beverage lets the ice remain pebbly longer instead of becoming watery soup with ambition.
4. Use Good-Tasting Water
Filtered water can improve flavor when tap water tastes strongly of chlorine or minerals, but it does not automatically make the ice softer. Softness comes mainly from structure, piece size, porosity, and surface melting.
5. Skip the Salt-in-the-Ice-Cube Hack
Salt and sugar lower the freezing point of water, a well-established effect called freezing-point depression. That chemistry is useful in ice-cream making, where salt goes around the freezing container. It is not a great shortcut for plain drinking ice because the result can taste unpleasant, freeze unevenly, and add unnecessary sodium or sweetness.
Common Mistakes to Avoid
- Freezing a thick block: Thick slabs require force and produce sharp, uneven chunks.
- Overfilling the blender: Crowded cubes spin poorly and leave a mix of powder and boulders.
- Running the blender continuously: Heat and friction melt the smallest pieces before the large ones break.
- Using a glass container for pounding: Always crush ice in a freezer bag, towel, or purpose-made ice bag on a sturdy board.
- Refreezing melted ice: It usually becomes dense and hard rather than pleasantly soft.
- Ignoring appliance limits: Ice can damage a blender or processor that is not built for hard ingredients.
Food-Safety and Dental-Safety Tips
Ice is food. Make it with potable water, wash your hands before handling it, and use a clean scoop or utensil rather than bare fingers. Clean ice bins, trays, blender jars, and nugget machines regularly. CDC guidance emphasizes clean hands, clean scoops, and routine cleaning and disinfection of ice equipment. During a drinking-water advisory, do not use water or ice from a refrigerator connected to the affected water line.
Also remember that “softer” does not mean “tooth-safe.” The American Dental Association warns that chewing hard ice can chip teeth, crack fillings, and damage enamel. Crushed ice may be easier on the mouth than a large cube, but the safest habit is to let it melt rather than repeatedly crunch it. A sudden, persistent craving to chew ice can also be worth discussing with a healthcare professional because it is sometimes associated with iron deficiency.
Best Ways to Use Homemade Soft Ice
- Fill a glass with pebble ice before adding cola, lemonade, or iced tea.
- Use coarse crushed ice in minty mocktails or cocktails.
- Spoon shaved ice into bowls and top it with fruit puree or syrup.
- Add a small amount to smoothies so the blender works more evenly.
- Serve ice chips with chilled water on very hot days.
- Pack seafood or cold dishes over ice, keeping food separated from non-potable meltwater.
The Home-Kitchen Experience: What to Expect From Your First Few Batches
The first attempt at homemade soft ice often teaches one lesson immediately: ordinary water has no respect for your schedule. You may check the bag after two hours and find a slushy waterbed, then return 30 minutes later to discover a sheet sturdy enough to roof a dollhouse. That variation is normal. Freezer temperature, bag thickness, water depth, and how often the door opens all change the timing. The practical move is to make the layer thin and check it early rather than freeze a thick bag overnight.
A useful habit is to write the starting time on the freezer bag with a washable marker. After two or three batches, you will know the sweet spot for your particular freezer instead of conducting a frozen guessing game every afternoon.
Another common surprise is how little ice should go into a blender at once. A full pitcher looks efficient, but it usually creates chaos. The lower cubes turn to snow while the upper cubes lounge above the blades like tourists refusing to leave the hotel. Working with six to eight cubes may feel slow for the first ten seconds, yet it produces a much more consistent batch. After one or two rounds, the small-batch method becomes quicker because you stop opening the lid to rescue giant chunks.
The drainage step also seems optional until you skip it. Freshly crushed ice carries loose powder and a little meltwater. Pour that straight into a storage bowl and the bottom begins bonding into a solid layer. Drain it briefly, serve it immediately, and the texture stays lighter. When preparing several drinks, place the crushed ice in a chilled metal bowl and gently fluff it between servings. Do not pack it down unless your secret goal is to manufacture a countertop glacier.
Drink temperature makes a bigger difference than many people expect. Soft ice added to room-temperature soda disappears quickly and can flatten the drink. The same ice added to a cold can of soda stays pebbly much longer. Chilling the glass helps too, especially for lemonade, cold brew, and mocktails. For dessert-style shaved ice, chilled bowls prevent the bottom from becoming syrupy before the top is decorated.
Flavor is another useful reality check. Ice made from strongly flavored tap water will not magically taste cleaner after freezing. If your tap water tastes fine, use it. If it has a noticeable chlorine or mineral flavor, filtered water may create a cleaner-tasting result. Boiling water is sometimes promoted as a universal ice trick, but it does not address the main goal here: creating small, porous pieces. For soft ice, shape and processing matter more.
Finally, the best homemade version depends on how you plan to use it. A thin frozen sheet crushed by hand is ideal when you need one or two glasses quickly. A blender is better for a family batch of pebble ice. A food processor works well for dessert snow. A nugget machine earns its counter space only when soft ice is a daily ritual. The simplest method is not always the fanciest, but a cold drink rarely files a complaint.
Conclusion
To make soft ice at home without a machine, freeze clean water in a thin, flat layer, break it into small pieces, drain the meltwater, and serve it immediately. For faster results, pulse a small batch of cubes in an ice-capable blender. Use a food processor for fluffy shaved ice, or choose a nugget ice maker when you want the closest match to restaurant-style pellets.
The real secret is not a mysterious ingredient. It is structure: thin ice, small pieces, plenty of crystal edges, and just enough surface melting to create a tender texture. Keep everything clean, avoid refreezing wet crushed ice, and give your teeth the day off from extreme crunching.
Research note
This tutorial synthesizes practical guidance and technical information from GE Appliances, the CDC, FoodSafety.gov, the American Chemical Society, Penn State Extension, KitchenAid, Vitamix, Food Network, Epicurious, The Spruce Eats, Serious Eats, the American Dental Association’s MouthHealthy resource, and Cleveland Clinic.