If you have ever seen a tiny forest of pine cone Christmas trees styled on a mantel, a dining table, or a holiday entry console and thought, “Wow, those look expensive,” I have good news: they are usually made from one of the cheapest materials on earth. Sometimes they are literally picked up off the ground. Nature stays humble like that.
The secret to making DIY pine cone Christmas trees look high-end is not spending more money. It is all about shape, finish, restraint, and styling. In other words, the difference between “designer holiday decor” and “school craft table at 4:57 p.m.” comes down to a few smart choices.
In this guide, you will learn how to make pine cone Christmas trees that feel elegant, intentional, and web-publish-worthy. We will cover the best supplies, how to prep pine cones, step-by-step construction methods, luxe finishing ideas, common mistakes, and real-life experience tips that make the final result look far more expensive than it is.
Why Pine Cone Christmas Trees Can Look So Expensive
Pine cones already have what many holiday decorations try very hard to fake: texture, dimension, natural symmetry, and a warm organic feel. They bring in the same cozy charm as winter greenery, wood tones, and dried botanicals, which is why they work beautifully in rustic, farmhouse, Scandinavian, traditional, and even modern holiday decor.
What makes them look upscale is how you edit the final design. A high-end pine cone tree usually has:
- A clean silhouette
- A consistent color story
- Minimal but intentional embellishments
- A sturdy, attractive base
- Styling that gives it room to shine
Think less “every ornament in the craft aisle at once” and more “boutique holiday display that whispers wealth instead of yelling glitter.”
What You Need to Make DIY Pine Cone Christmas Trees
Basic Supplies
- Pine cones in assorted sizes
- Hot glue gun and glue sticks
- Foam cone form for larger trees
- Floral wire or wired floral picks
- Wooden skewers or floral picks for mini trees
- Moss, faux moss, or preserved sheet moss
- Small wood slices, knobs, candleholders, or doll-head knobs for bases
- Acrylic paint, craft paint, or spray paint
- Mod Podge or white craft glue
- Fine glitter, mica flakes, or faux snow if desired
- Ribbon, mini bells, beads, acorns, or tiny star toppers if desired
Optional Supplies for a More Luxury Look
- Champagne, matte white, taupe, sage, or metallic paint
- Velvet ribbon
- Mini LED fairy lights
- Glass cloches
- Cake stands or marble-look risers
- Gold leaf wax or antique rub-and-buff
Step 1: Choose the Right Pine Cones
Not all pine cones are created equal. Some are tall and elegant. Some are squat and charming. Some look like they have been through a very emotional breakup with a squirrel. Choose carefully.
For a polished result, sort your pine cones by size and shape before you start. If you are making a larger cone-shaped tree, use the biggest pine cones around the base and gradually move to smaller ones near the top. That creates a smoother taper and helps the finished piece look deliberate instead of lumpy.
For mini tabletop trees, look for pine cones with a naturally tree-like profile. Open cones usually look fuller and more decorative than tightly closed ones.
Foraged vs. Store-Bought Pine Cones
Foraged pine cones are budget-friendly and beautifully natural, but they need cleaning and drying. Store-bought pine cones save time and are often already treated, but they can look overly uniform unless you mix in a few different sizes.
The best-looking display often combines both: natural variation with just enough consistency to keep everything feeling curated.
Step 2: Clean and Prep the Pine Cones
If your pine cones came from the yard, park, or a basket in the garage that has seen things, prep them first. This step matters. Clean cones look better, hold paint better, and are less likely to bring surprise guests into your holiday centerpiece.
How to Prep Pine Cones
- Brush or wipe off visible dirt and debris.
- Let damp pine cones dry completely before decorating.
- If they are very closed up, give them time to open naturally in a warm, dry place.
- For projects involving glue or paint, make sure the cones are fully dry before starting.
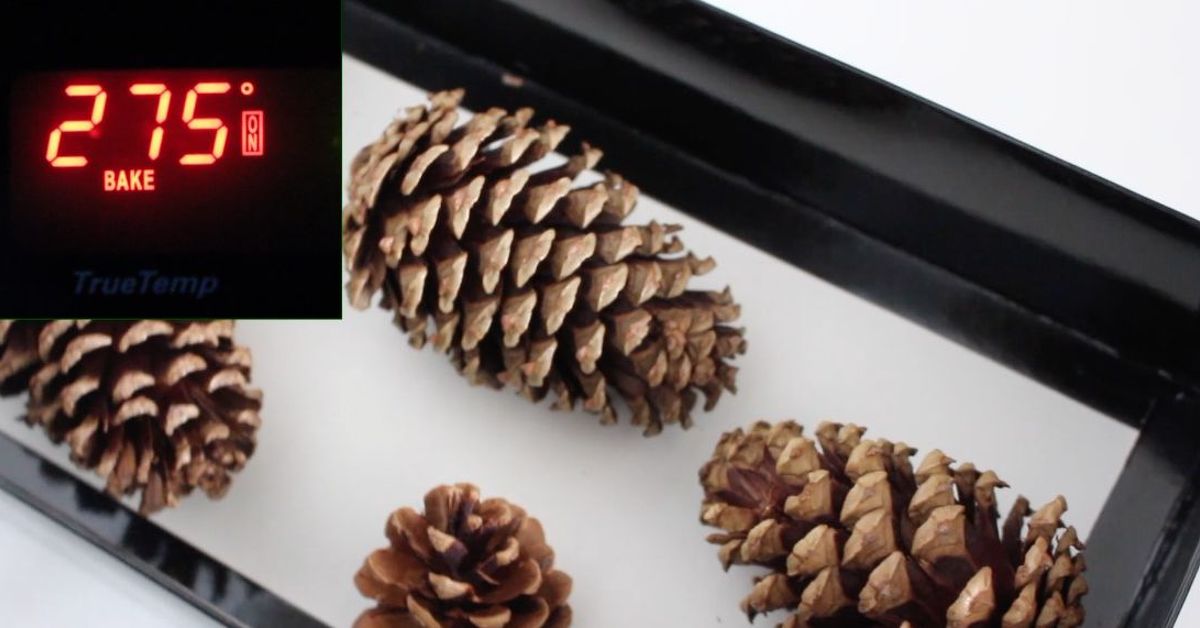
If you use oven-drying as part of your prep, keep the temperature low, watch them the whole time, and never wander off to “just check one email.” Holiday crafting should not become holiday firefighting.
Step 3: Pick the Construction Method
There are three main ways to make DIY Christmas trees with pine cones, and each one gives a different look.
Method 1: Single Pine Cone Mini Tree
This is the fastest and easiest option. One pine cone becomes one mini tree. Add a base, a little paint or glitter, and maybe a tiny topper. These are great for place settings, shelves, tiered trays, and gift toppers.
Method 2: Foam Cone Statement Tree
This is the method that delivers the most high-end impact. You attach multiple pine cones to a cone form, working from the bottom upward. The result looks substantial, layered, and display-worthy.
Method 3: Skewer-and-Base Tabletop Tree
This method uses one pine cone mounted on a skewer, then inserted into a wood base, knob, or hardware nut setup. It gives the tree height and a clean pedestal effect. It is ideal if you want a small forest of matching trees.
How to Make a High-End Foam Cone Pine Cone Christmas Tree
This is the best option if you want a centerpiece or mantel piece that looks like it came from a boutique holiday collection.
Step-by-Step Instructions
- Start with your base. Choose a foam cone that matches the size you want. Smaller cones are easier for beginners, while medium cones make a stronger visual statement.
- Sort your pine cones. Place the largest cones at the bottom, medium ones in the middle, and the smallest at the top.
- Attach floral picks or wire. If needed, wire the pine cones to picks so they insert neatly into the foam. You can also hot glue them directly, but picks often make placement easier.
- Build from the bottom up. This is the golden rule. Start at the base and work upward in rows, overlapping slightly so the foam does not peek through.
- Rotate as you go. Turn the tree often so the shape stays even on all sides.
- Fill gaps with moss. Tuck preserved moss or sheet moss into visible spaces. This softens the look and hides the mechanics.
- Finish the top. Use a small pine cone, an acorn, a bead, or a tiny star topper for the peak.
Once the structure is finished, step back and edit. Pull out anything that sticks too far out. Add only enough embellishment to support the color story. The best DIY holiday decor often looks finished because someone stopped at the right moment.
How to Make Mini Pine Cone Christmas Trees
If you want that charming “tiny winter forest on a shelf” look, mini trees are where the magic happens.
Quick Mini Tree Method
- Choose one attractive pine cone per tree.
- Trim the bottom slightly if needed so it sits properly.
- Attach a skewer or floral pick to the bottom with hot glue.
- Insert the skewer into a wooden base, knob, cork, or small wood slice.
- Paint the base if needed for a cleaner finish.
- Add a light whitewash, metallic accent, or faux snow to the cone tips.
Cluster three or five mini trees together in varying heights for a much more elevated look than a single lonely tree trying to carry the whole season on its back.
Designer Finishes That Make Pine Cone Trees Look High-End
This is where the transformation happens. A plain pine cone can be lovely, but the finish is what turns it into elegant Christmas decor.
1. Soft Whitewash
A thinned coat of white paint brushed lightly over the tips creates a snowy, Scandinavian-inspired effect. It looks refined, not fussy, and works beautifully with wood, linen, and neutral holiday palettes.
2. Monochrome Matte Paint
Paint the entire tree in one color like matte white, sage green, charcoal, mushroom, or dusty taupe. This instantly makes the texture stand out while giving the piece a more editorial, styled look.
3. Champagne or Antique Gold Highlights
Instead of drowning everything in glitter, dry-brush metallic paint just on the edges. It catches the light without shouting for attention. Think candlelight glow, not disco ball panic.
4. Frosted Neutral Finish
Combine a whitewash with a tiny amount of clear or iridescent glitter for a snow-kissed look. Keep it light. The goal is “first snowfall,” not “craft store explosion.”
5. Natural Luxe
Leave the cones mostly natural, then elevate the base and styling around them. A pine cone tree on a wood slice, antique brass stand, or stone-look riser can look incredibly expensive with almost no extra decoration.
How to Style Pine Cone Christmas Trees Like a Pro
Even beautiful crafts can look cheap if they are poorly styled. Presentation matters.
Best Styling Ideas
- Place them on a cake stand for extra height and presence.
- Arrange them in groups of odd numbers for a designer look.
- Mix heights to create movement.
- Add winter greenery, eucalyptus, cedar, or magnolia leaves around the base.
- Use ribbon sparingly and choose velvet, linen, or layered ribbon over shiny plastic styles.
- Display one under a glass cloche for a boutique feel.
- Pair with candles, brass accents, wood beads, or ceramic houses for a cohesive holiday vignette.
If your decor is modern, keep the palette tight. If your decor is rustic, let the natural texture lead. If your decor is glam, add metallic accents but keep the silhouette simple.
Mistakes That Make DIY Pine Cone Trees Look Cheap
- Using too many colors at once
- Adding oversized embellishments that hide the pine cone texture
- Leaving visible foam or glue strings
- Skipping the base altogether
- Using pine cones that are wildly mismatched in scale without a plan
- Applying heavy glitter to every surface
- Ignoring the room’s existing holiday color scheme
The easiest fix is to simplify. When in doubt, remove one decorative element. Then remove another. Suddenly it starts looking expensive. Very rude, honestly, but true.
Budget, Time, and Skill Level
One of the best things about pine cone Christmas crafts is that they can work at almost any budget.
- Budget mini trees: Nearly free if you forage your pine cones and use leftover paint or ribbon
- Mid-range tabletop forest: Affordable with store-bought bases, paint, and moss
- Larger statement trees: Still far less expensive than many store-bought holiday centerpieces
Most mini trees take 10 to 20 minutes each. A larger foam cone tree may take 45 minutes to 2 hours, depending on size and how detailed you get. Skill level is beginner-friendly, though patience helps. So does a glue gun that behaves itself.
Experience Tips: What Making Pine Cone Christmas Trees Is Really Like
The first time most people make DIY pine cone Christmas trees that look high-end, they usually expect the “expensive” part to come from the paint, glitter, or embellishments. In real life, the expensive look comes much more from editing and proportion. That is the biggest experience lesson. When the tree is overloaded, it starts looking crafty. When it is balanced, it starts looking styled.
Another thing people notice right away is that pine cones have a lot more personality than expected. Some are tall and elegant, some are round and playful, and some absolutely refuse to sit straight. Instead of fighting that too much, it helps to sort them before you begin. The experience becomes much easier when you group them by size and shape first. That five-minute prep step can save a lot of muttering later.
There is also a surprisingly big emotional difference between making one tree and making a set. A single mini tree is cute. A group of three or five suddenly looks intentional, decorative, and far more upscale. It feels less like a craft project and more like a holiday styling choice. That is why many people end up making a small forest once they realize how nice the first one looks.
The base matters more than beginners think. During the making process, the pine cone often gets all the attention, but once the project is done, the eye notices the foundation. A plain base can make the tree feel unfinished, while a wood slice, painted knob, candleholder, or simple riser can make it feel collected and elevated. This is one of those little upgrades that changes everything without adding much cost.
Color choice also changes the experience. Natural pine cones are forgiving and cozy. Whitewashed cones feel softer and more wintry. Matte painted cones read more modern. Metallic dry-brushing can look stunning, but only when it is restrained. People often discover that the prettiest version is not the flashiest one. A little paint on the tips can look richer than covering the entire cone in sparkle.
There is usually a turning point during the project when the trees stop looking random and suddenly look beautiful. It often happens after the gaps are filled, the base is finished, and the trees are styled together rather than judged one by one in the middle of the process. That is a useful reminder for any holiday DIY: do not decide it has failed while it is still halfway assembled and covered in glue strings.
One of the best parts of this craft is how flexible it is. The same basic technique works for farmhouse Christmas decor, natural Christmas centerpieces, elegant neutral holiday styling, or kid-friendly ornaments. The experience can be simple and relaxed or detailed and decorative, depending on what you want. That makes it a craft people actually repeat year after year instead of abandoning after one overly ambitious December weekend.
And finally, there is something satisfying about making holiday decor from natural materials. Pine cone trees do not feel mass-produced. They feel seasonal, tactile, and a little nostalgic. Even when they are polished enough to look expensive, they still keep that homemade warmth. That is probably why they work so well. They can look refined without losing charm, which is basically the dream for Christmas decorating.
Final Thoughts
If you want holiday decor that feels custom, cozy, and genuinely stylish, DIY pine cone Christmas trees are one of the smartest crafts you can make. They are affordable, versatile, beginner-friendly, and surprisingly elegant when you pay attention to shape, finish, and styling.
Use natural materials. Keep the palette tight. Hide the mechanics. Choose a base that looks intentional. And remember: the goal is not to prove you own every supply in the craft aisle. The goal is to make something beautiful enough that guests ask where you bought it.
Then you get to say, very casually, “Oh, that? I made it.” Which is one of the true joys of the holiday season.