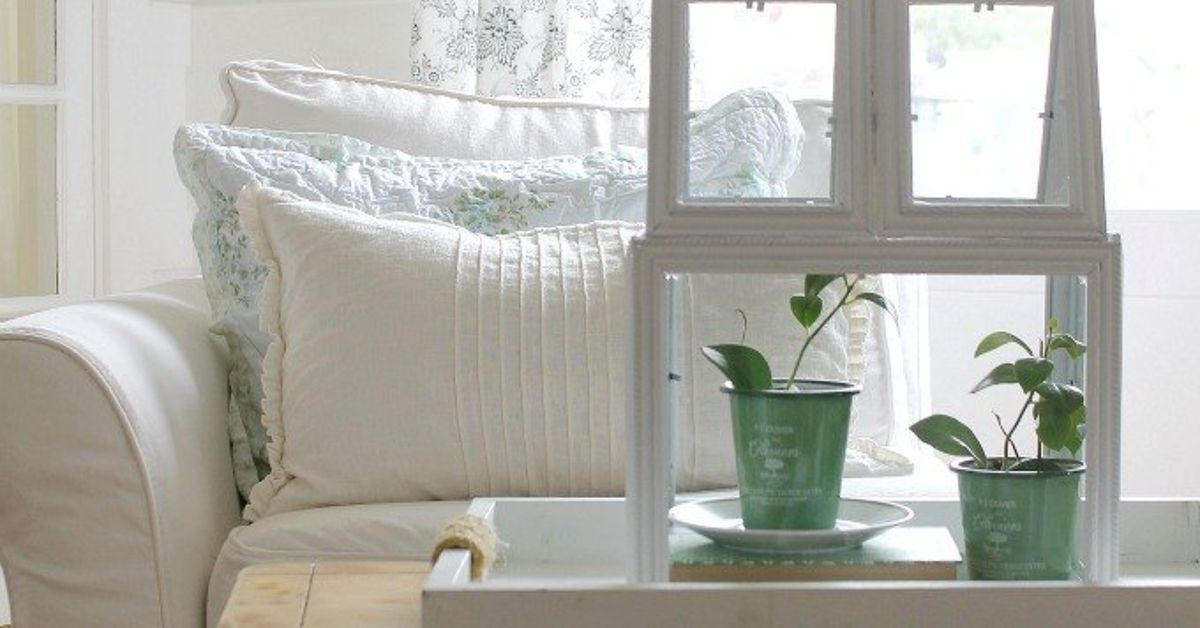
A picture frame greenhouse terrarium combines three satisfying things: inexpensive materials, tiny plants, and the opportunity to tell visitors, “Yes, I built that.” With a handful of thrift-store frames, basic adhesive, and a little patience, you can create a miniature glasshouse that looks far more expensive than it actually is.
This project can function as a decorative plant cabinet, a humid home for tropical miniatures, an open succulent display, or a charming centerpiece filled with moss and tiny accessories. The trick is not simply gluing frames into a house shape. A successful DIY picture frame greenhouse must be structurally stable, appropriately ventilated, protected from moisture, and matched with plants that enjoy the conditions inside it.
The following guide covers the entire process, including frame selection, assembly, waterproofing, planting, maintenance, troubleshooting, and practical lessons learned from building and caring for this type of miniature greenhouse.
What Is a Picture Frame Greenhouse Terrarium?
A picture frame greenhouse terrarium is a small house-shaped enclosure made by joining clear-fronted picture frames. Four or more frames form the walls, while two or four smaller frames create a pitched roof. The result resembles a Victorian conservatory that has been dramatically reduced in sizepresumably because real Victorian conservatories require both property and money.
Unlike a traditional terrarium jar, a frame greenhouse is not automatically airtight or watertight. Small gaps usually remain between the frames, allowing some airflow. That makes most versions better described as semi-enclosed indoor greenhouses.
You can use the finished structure in three main ways:
- As a decorative cover: Place individually potted plants inside on a waterproof tray.
- As a planted terrarium: Build the planting layers inside a removable watertight container.
- As a dry display: Add succulents, air plants, preserved moss, seasonal decorations, or artificial plants.
Keeping live plants in removable pots is usually the easiest and safest choice for beginners. It prevents water from reaching wooden frames and makes it simple to replace a plant without performing miniature botanical surgery.
Materials and Tools You Will Need
Picture Frames
You will generally need six to eight lightweight frames. The exact sizes can vary, but the frames must fit together logically.
A common eight-frame combination includes:
- Two 8-by-10-inch frames
- Two 5-by-7-inch frames
- Four 4-by-6-inch frames for the roof
You can also build a six-frame version with four similarly sized wall frames and two matching roof frames. Exterior frame dimensions matter more than the advertised photo size, so measure everything before buying.
Construction Supplies
- Hot glue gun and glue sticks
- Clear silicone adhesive or strong multipurpose craft adhesive
- Painter’s tape
- Small hinges and screws, optional
- Magnetic catch, hook-and-eye latch, or ribbon, optional
- Acrylic craft paint or spray paint
- Paintbrush
- Clear water-resistant sealer for wooden frames
- Sandpaper
- Ruler or measuring tape
- Carpenter’s square, if available
- Protective gloves and eye protection
Terrarium Supplies
- Shallow waterproof tray or planter liner
- Small pebbles or aquarium gravel
- Horticultural charcoal
- Fiberglass mesh, landscape fabric, or sphagnum moss
- Fresh soilless potting mix
- Miniature plants with similar care requirements
- Decorative moss, stones, bark, or figurines
- Spray bottle
- Long tweezers and small pruning scissors
How to Choose the Right Picture Frames
Lightweight frames are easier to join than heavy hardwood frames. Dollar-store, craft-store, or thrift-store frames are excellent candidates, provided they are not warped or cracked.
Before purchasing your frames, inspect the following details:
- Matching depth: Frames with similar thicknesses create cleaner corners.
- Flat edges: Ornate frames can look beautiful, but heavily curved edges are difficult to glue securely.
- Safe glazing: Acrylic is lighter and less fragile than glass. Real glass provides better clarity but requires more careful handling.
- Similar exterior heights: Wall frames should meet evenly at the top.
- Removable hardware: Avoid frames with bulky stands or permanent rear components.
Arrange the frames on the floor before removing anything. Build a mock structure with painter’s tape and check whether the walls and roof actually meet. This five-minute test can prevent the exciting discovery that your greenhouse roof belongs to an entirely different architectural period.
Step-by-Step Instructions
Step 1: Remove the Frame Backs and Hardware
Take out the backing boards, paper inserts, stands, clips, and hanging hardware. Retain the glass or acrylic panels. Use pliers to remove metal tabs that extend beyond the rear edge, but be careful not to damage the frame.
Label the frames with removable tape so you know which pieces will become the front, back, sides, and roof.
Step 2: Clean and Inspect the Glazing
Wash the glass or acrylic with mild soap and water. Dry each panel with a lint-free cloth. Avoid strong chemical cleaners on acrylic because some products can leave cloudy marks.
Discard any cracked glass. A tiny crack may appear harmless until pressure from assembly turns it into a surprise collection of sharp puzzle pieces.
Step 3: Prepare and Paint the Frames
Lightly sand glossy wooden or plastic surfaces so the paint and adhesive can grip them. Wipe away the dust, then apply one or two thin coats of paint.
White creates a classic conservatory appearance, black produces a modern industrial look, and metallic gold offers a vintage display-case style. Muted green, weathered gray, or natural wood also work well.
Allow the paint to dry completely. If the frames are made of unfinished wood, apply a clear water-resistant sealer, especially along the interior edges.
Step 4: Secure the Glass or Acrylic
Return each panel to its frame. Add a thin bead of clear silicone or a few small dots of hot glue along the rear edges to keep the glazing from moving.
Use adhesive sparingly. Large blobs are visible through the glass and can make an elegant miniature greenhouse look like it survived a frosting accident.
Allow silicone to cure according to the manufacturer’s directions before continuing.
Step 5: Assemble the Four Walls
Cover your work surface with parchment paper, wax paper, or a reusable craft mat. Place the front frame flat on the table and position one side frame against its edge at a 90-degree angle.
Apply adhesive along the joint and hold the pieces together with painter’s tape. A carpenter’s square helps keep the corner straight. If you do not have one, use a sturdy box or canned food as a temporary brace.
Attach the second side, followed by the back. Check the structure from above before the adhesive sets. All four corners should be square, and the base should rest flat without rocking.
For lightweight decorative frames, hot glue may be sufficient. For a structure that will be opened, moved, or exposed to high humidity, reinforce the interior seams with clear silicone or a stronger multipurpose adhesive.
Step 6: Build the Pitched Roof
If you are using two roof frames, join their long edges to form an upside-down “V.” Hold the ridge together with painter’s tape while the adhesive cures.
For a longer greenhouse built with four small roof frames, first join two frames side by side to create one roof panel. Repeat with the remaining two frames, then connect the panels along the ridge.
Dry-fit the roof on the walls before gluing it permanently. A small overhang is attractive, but a large one can make the greenhouse resemble a hat that is several sizes too big.
Step 7: Create an Opening
A removable or hinged roof makes planting and maintenance much easier. Instead of gluing the entire roof to the walls, attach one side with two small hinges. Add a magnetic catch, ribbon pull, or hook-and-eye closure on the opposite side.
Another simple option is to glue one roof panel permanently and leave the second panel removable. Add small wooden stops beneath it so it cannot slide off.
Whatever design you choose, make sure the opening is large enough for your hands, plant pots, and maintenance tools.
Step 8: Add a Moisture-Proof Base
Picture frames are not planter boxes. Do not pour wet soil directly into the structure unless you have built and tested a genuinely watertight liner.
Place a shallow plastic, metal, or glazed ceramic tray inside the greenhouse. The tray should fit within the walls and protect the frames and furniture from moisture.
You can also cut a piece of sealed plywood for the base and place a waterproof planter liner on top. Add felt pads underneath to protect tables and shelves.
How to Plant the Greenhouse Terrarium
Option 1: Use Individual Pots
Individual pots are ideal for a semi-enclosed picture frame greenhouse. Choose containers with drainage holes and place them on a waterproof saucer or tray.
Cover visible pots with preserved moss, pebbles, or bark. This creates the appearance of a continuous miniature landscape while allowing each plant to be removed and watered separately.
This method is especially useful when combining plants that need slightly different watering schedules.
Option 2: Plant in a Removable Tray
For a traditional terrarium appearance, use a watertight planting tray and create the following layers:
- Add approximately 1/2 to 1 inch of small pebbles for a drainage reservoir.
- Spread a thin layer of horticultural charcoal over the pebbles.
- Add mesh, landscape fabric, or a layer of sphagnum moss to keep soil from falling into the drainage layer.
- Add 2 to 3 inches of lightly moistened, fertilizer-free potting mix.
- Arrange the plants before digging holes.
- Plant from largest to smallest, gently firming soil around the roots.
- Finish with moss, stones, bark, or miniature decorations.
The soil should feel damp, not saturated. There should never be a visible indoor swimming pool beneath the gravel.
Best Plants for a Picture Frame Greenhouse
Plants for a Humid, Semi-Enclosed Greenhouse
- Nerve plant, or Fittonia
- Miniature ferns
- Small peperomias
- Polka dot plant
- Button fern
- Baby tears
- Miniature African violet
- Selaginella
- Live moss
Choose slow-growing plants with similar moisture and light needs. Avoid large, aggressive houseplants unless you enjoy pruning them every time they attempt to seize control of the building.
Plants for an Open, Dry Greenhouse
- Haworthia
- Gasteria
- Small echeveria varieties
- Miniature jade plants
- Air plants
Succulents and cacti require excellent airflow, fast-draining soil, and minimal moisture. Keep the roof partially open or remove one glass panel if needed. Do not combine succulents with humidity-loving moss and ferns; one group will celebrate while the other files a formal complaint.
Air plants also need circulation and must be allowed to dry after watering. They should not remain continuously damp inside a sealed greenhouse.
Where to Place Your Finished Terrarium
Place the greenhouse in bright, indirect light. An east-facing window or a position several feet from a brighter south- or west-facing window often works well.
Avoid intense direct sun. Glass and clear acrylic can trap heat rapidly, raising the interior temperature and damaging leaves. A miniature greenhouse sitting in direct afternoon sun can become a miniature sauna, and the plants did not purchase memberships.
Keep the structure away from radiators, heating vents, air conditioners, fireplaces, and cold drafts. If natural light is inadequate, use a small LED grow light positioned above the greenhouse.
Watering and Long-Term Maintenance
Water according to the plants and the amount of ventilation, not according to a fixed calendar. A nearly closed tropical terrarium may need water only occasionally, while individually potted plants in an open greenhouse may require more frequent attention.
Use condensation as a clue. Light moisture on the glass during part of the day is normal in a humid terrarium. Heavy condensation that remains all day usually indicates excessive moisture or insufficient ventilation.
Open the roof for several hours if:
- The glass is constantly covered with large droplets.
- The soil smells sour or swampy.
- Mold appears repeatedly.
- Leaves become soft, translucent, or rotten.
Trim plants before they press against the glass. Remove dead leaves immediately, wipe dirty panels with a damp lint-free cloth, and inspect the structure regularly for loose joints or moisture-damaged wood.
Fertilizer is rarely necessary in a planted terrarium. Rich feeding encourages rapid growth, and rapid growth is not especially helpful inside a house the size of a bread box.
Common Problems and Practical Fixes
The Frames Will Not Stay Together
The frames may be too heavy, the edges may be uneven, or the adhesive may not suit the material. Sand glossy contact points, switch to a stronger adhesive, and reinforce interior corners with small metal brackets or wooden strips.
The Greenhouse Rocks on the Table
One or more walls may have shifted during assembly. Attach a rigid baseboard, add felt pads to the low corners, or carefully loosen and reset the uneven joint.
Mold Keeps Appearing
Reduce watering, increase ventilation, remove affected plant material, and clean the interior. Persistent mold may indicate contaminated soil or decaying roots.
The Plants Are Stretching
Long, pale, weak growth generally indicates insufficient light. Move the greenhouse closer to a bright window without placing it in harsh direct sun, or add a grow light.
Leaves Are Turning Brown
Brown leaves may result from low humidity, excessive heat, mineral-heavy water, inconsistent watering, or roots remaining wet for too long. Evaluate the complete environment instead of immediately adding more water.
Water Is Reaching the Wooden Frames
Remove the plants and allow the structure to dry. Replace the liner or tray, reseal exposed wood, and inspect the frame joints. Never allow standing water to remain against wood or fiberboard.
Creative Design Ideas
Your DIY greenhouse terrarium does not have to be plain. Consider adding:
- A pebble path winding between the plants
- A miniature bench or garden gate
- Natural cork bark for height
- A tiny battery-powered light strand kept away from water
- Seasonal decorations that can be removed easily
- Pressed botanical labels attached outside the glass
- Vintage-style handles or decorative roof trim
Use restraint when decorating. The plants should remain the main attraction. One miniature mushroom is whimsical; forty miniature mushrooms suggest that the greenhouse has developed a complicated economy.
Experiences and Lessons From Building a Picture Frame Greenhouse Terrarium
The most important lesson from building a picture frame greenhouse is that dry-fitting the entire structure matters more than choosing the perfect paint color. Frames labeled with identical photo dimensions can have surprisingly different exterior measurements. A decorative border may add half an inch, while a narrow modern frame may add almost nothing. When mismatched frames are glued without testing, the roof can sit unevenly, corners can develop large gaps, and the finished greenhouse may wobble.
Arranging the frames with painter’s tape before applying adhesive makes the project much easier. It reveals which frame should face forward, which edges fit best, and whether the roof needs two panels or four. Painter’s tape also works as an excellent temporary clamp. It holds corners in place without scratching the finish and can be adjusted while the adhesive is still workable.
Another practical lesson is that hot glue is convenient but not magical. It works well for lightweight frames and decorative structures that remain in one place. However, it can loosen when the greenhouse is lifted by the roof, exposed to heat, or subjected to persistent humidity. A stronger adhesive or clear silicone produces more durable joints, although it requires additional curing time. The best approach is often to use small dots of hot glue for immediate positioning and reinforce the seams with a more durable product.
Moisture management is equally important. In an early version of this project, placing damp moss and soil directly on a wooden base seemed harmless. Within days, moisture began creeping toward the lower frame edges. The greenhouse still looked beautiful from across the room, but up close it was attempting to become compost. A removable waterproof tray solved the problem and made future maintenance much simpler.
Using individual nursery pots also proved more practical than planting directly inside the greenhouse. The pots could be lifted out for watering, rotated for even growth, and replaced when a plant became too large. Covering the pots with decorative moss maintained the illusion of one continuous landscape. This approach also made it possible to keep a fern slightly wetter than a neighboring peperomia without flooding the entire display.
Plant choice can determine whether the greenhouse becomes an easy indoor garden or a weekly emergency. Small fittonias, mosses, compact peperomias, and miniature ferns generally suit a humid enclosure. Fast-growing vines may look attractive initially but soon press against the roof and block the glass. Purchasing the smallest plant available does not guarantee that it will remain small, so checking the mature growth habit is worthwhile.
Succulents require a different setup. A tightly closed picture frame greenhouse traps too much moisture for most succulents, especially when several are planted together. Leaving the roof partially open, using removable pots, and providing gritty soil produces better results. Even then, strong indirect light or supplemental lighting may be necessary to prevent stretched growth.
The placement of the greenhouse can change its internal climate dramatically. A location that receives gentle morning sun may be suitable, while a table exposed to direct afternoon sun can become dangerously hot. Bright indirect light provides a safer balance. Checking the glass temperature with your hand during the first few days is a simple precaution. If the enclosure feels hot, move it immediately.
Finally, perfection is not required. Small gaps, slightly uneven corners, and visible signs of hand assembly can add character. The goal is to create a stable, attractive home for plantsnot to pass a surprise inspection from a committee of miniature architects. Careful measuring, moisture protection, compatible plants, and restrained watering matter far more than flawless joints.
Final Thoughts
Learning how to make a green house terrarium using picture frames is an approachable way to combine indoor gardening with creative reuse. The project can be completed with inexpensive materials, customized to match almost any decorating style, and planted in several different ways.
For the most reliable result, choose lightweight frames, test the entire design before gluing, create a convenient opening, and keep all soil and water inside a removable waterproof tray. Match the plants to the humidity and ventilation inside the enclosure, then place the greenhouse in bright, indirect light.
Once those fundamentals are handled, the remaining details are yours. Add moss, stones, tiny garden furniture, or absolutely nothing beyond healthy plants. Either way, you will have a miniature greenhouse that brings greenery indoors and makes ordinary picture frames considerably more interesting than another photograph of someone standing near a waterfall.