Gold napkin rings are the tiny tuxedos of the dinner table. They do not cook the roast, chill the wine, or stop your guests from discussing traffic, but somehow they make the whole meal look more intentional. The best part? You do not need a designer budget, a craft room the size of a ballroom, or a mysterious aunt with a monogramming machine. With a few simple supplies, you can make glamorous DIY gold napkin rings that look polished, festive, and surprisingly expensive.
This project is ideal for holidays, weddings, birthday dinners, bridal showers, New Year’s Eve, Thanksgiving, Christmas, Easter brunch, or any Tuesday when your table deserves a little sparkle. The method below uses affordable bases, metallic gold paint, decorative trim, and smart finishing techniques to create napkin rings that feel elegant instead of “I glued this together while the potatoes boiled.”
In this guide, you will learn how to choose the right napkin ring base, prepare it for a smooth gold finish, decorate it with pearls, rhinestones, ribbon, beads, or faux greenery, and style it on a table without turning your dining room into a disco ball. Glamour is welcome. Glitter chaos is optional.
Why DIY Gold Napkin Rings Are Worth Making
Store-bought napkin rings can be beautiful, but they can also be oddly expensive for something that spends most of its life in a drawer. DIY gold napkin rings give you control over size, color, finish, and personality. You can make them warm and vintage, sleek and modern, rustic and festive, or full-on “dinner party at a boutique hotel.”
Gold is especially useful because it works with nearly every table setting. It pairs beautifully with white linen napkins, black dinner plates, emerald green glassware, blush florals, navy tablecloths, natural wood chargers, and even plain white dishes that usually look like they are waiting for takeout. A metallic accent adds instant warmth and catches candlelight in a subtle, flattering way.
DIY also lets you customize for the occasion. Add tiny pine sprigs for Christmas, pearl beads for a wedding shower, pressed leaves for Thanksgiving, velvet ribbon for winter dinners, or small name tags for a place-card-meets-napkin-ring moment. One basic technique can become a dozen different table looks.
Best Materials for Glamorous DIY Gold Napkin Rings
The foundation of a good napkin ring is simple: it needs to hold a folded or rolled napkin without collapsing, scratching the fabric, or looking like it was recently part of a shipping box. Fortunately, you have several easy options.
Napkin Ring Base Options
Wooden curtain rings: These are sturdy, smooth, and easy to paint. They are one of the best choices for a polished result.
Cardboard tubes: Paper towel tubes or sturdy mailing tubes work well for budget-friendly projects. They need sealing and careful cutting, but they are lightweight and easy to decorate.
Plastic shower curtain rings: These are inexpensive and already shaped. Choose round or oval styles without bulky hinges for the most elegant look.
PVC pipe slices: These create a durable, modern ring. Ask a hardware store to cut the pipe or use a proper pipe cutter if you are comfortable with tools.
Plain metal rings: Craft stores often sell metal rings or macramé rings. These are ideal for a minimalist gold wire look.
Decorative Supplies
- Metallic gold spray paint or gold acrylic craft paint
- Spray primer, especially for plastic or glossy surfaces
- Fine-grit sandpaper
- Hot glue or strong craft adhesive
- Gold ribbon, velvet ribbon, twine, or satin cord
- Flat-back pearls, rhinestones, beads, or small charms
- Faux leaves, mini pine sprigs, dried flowers, or tiny ornaments
- Clear sealer for extra durability
- Drop cloth, gloves, and a well-ventilated workspace
If your napkin rings will be used often, choose decorations that can handle gentle handling. Tiny delicate petals are lovely, but if they fall off before dessert, they are less “tablescape magic” and more “craft confetti emergency.”
Step-by-Step Tutorial: How to Make Glamorous DIY Gold Napkin Rings
Step 1: Choose the Style Before You Start
Before opening the paint, decide what kind of gold napkin rings you want. A modern table looks best with smooth gold rings and minimal decoration. A romantic table can handle pearls, lace, and soft ribbon. A holiday table welcomes berries, greenery, bells, and sparkle. A rustic table works well with gold paint plus jute, wood beads, or dried leaves.
Choosing the style first keeps the final design cohesive. Otherwise, it is very easy to add “just one more bead” until the napkin ring looks like it has joined a parade.
Step 2: Measure and Cut the Base
If you are using cardboard tubes or PVC pipe, cut each ring about 1.25 to 1.5 inches wide. This width gives enough visual presence without swallowing the napkin. For formal dinners with large linen napkins, use the wider end of that range. For cocktail napkins or casual settings, a narrower ring looks lighter.
Use a ruler and pencil to mark equal widths around the tube. Cut slowly with sharp scissors for cardboard or a pipe cutter for PVC. Uneven edges are not the end of the world, but they do make the project look homemade in the wrong way. Glamorous DIY should whisper “custom,” not shout “I fought a cardboard tube and lost.”
Step 3: Smooth the Edges
Sand the cut edges lightly until they feel smooth. This step matters because rough edges can snag cloth napkins. If you are using wood or PVC, sand the outer surface as well so the paint has something to grip. Wipe away dust with a lint-free cloth before moving on.
For cardboard bases, you can brush on a thin layer of craft glue or Mod Podge and let it dry before painting. This helps seal the paper surface and creates a cleaner finish.
Step 4: Prime the Surface
Primer is the quiet hero of a smooth metallic finish. It helps paint adhere and reduces blotchy coverage, especially on plastic, wood, and cardboard. Apply a light coat rather than a heavy one. A heavy coat can drip, pool, or create a texture that looks less like luxury and more like a melted trophy.
Let the primer dry according to the product label. Drying times vary depending on humidity, temperature, surface material, and paint type, so the label is your best friend here. A slightly boring friend, perhaps, but a useful one.
Step 5: Apply Metallic Gold Paint
For the most glamorous look, use metallic gold spray paint in thin, even coats. Place the rings on a drop cloth in a well-ventilated area. Spray from several inches away using smooth passes. Start spraying slightly before the ring and continue slightly past it to avoid heavy spots.
Rotate the rings as needed so you cover the inside, outside, and edges. Two or three light coats usually look better than one thick coat. Metallic paint shows texture easily, so patience pays off. Let each coat dry before adding the next.
If you prefer acrylic craft paint, use a soft brush or sponge brush. Acrylic paint is easier to use indoors and gives more control, though it may not look as reflective as spray paint. For extra shine, choose a metallic acrylic and finish with a gloss sealer.
Step 6: Add a Clear Protective Finish
Once the gold paint is completely dry, apply a clear sealer if you want added durability. This is especially helpful if the rings will be stored, reused, or handled by many guests. Choose matte, satin, or gloss depending on your desired look. Gloss feels dressier, satin feels refined, and matte gold has a soft champagne effect.
Allow the finish to cure fully before using the napkin rings on fabric. Paint that feels dry to the touch may still be soft underneath. Waiting longer helps prevent smudges, tackiness, and paint transfer.
Design Ideas for Glamorous Gold Napkin Rings
1. Pearl and Gold Napkin Rings
For weddings, anniversaries, bridal showers, or elegant holiday dinners, glue flat-back pearls around the center of each ring. Keep them evenly spaced for a refined look or cluster them on one side for a brooch-inspired design. Pair with ivory napkins and clear glassware for a soft, romantic table.
2. Rhinestone Gold Napkin Rings
Rhinestone trim is the quickest route to sparkle. Wrap a narrow strip around the center of the ring and secure it with strong adhesive. This style works beautifully for New Year’s Eve, milestone birthdays, engagement parties, and any dinner where the phrase “just casual” is clearly a lie.
3. Velvet Ribbon Gold Napkin Rings
Wrap burgundy, emerald, navy, or black velvet ribbon around a gold-painted base. Leave a slim border of gold visible at the edges. The contrast between soft fabric and metallic shine creates a rich, layered look. This version is excellent for winter tables.
4. Botanical Gold Napkin Rings
Attach a small faux leaf, dried flower, mini pine sprig, or eucalyptus stem to one side of the ring. Gold plus greenery always feels fresh and expensive. For Thanksgiving, try faux magnolia leaves or tiny gold-painted acorns. For spring, use small white blossoms or pastel dried flowers.
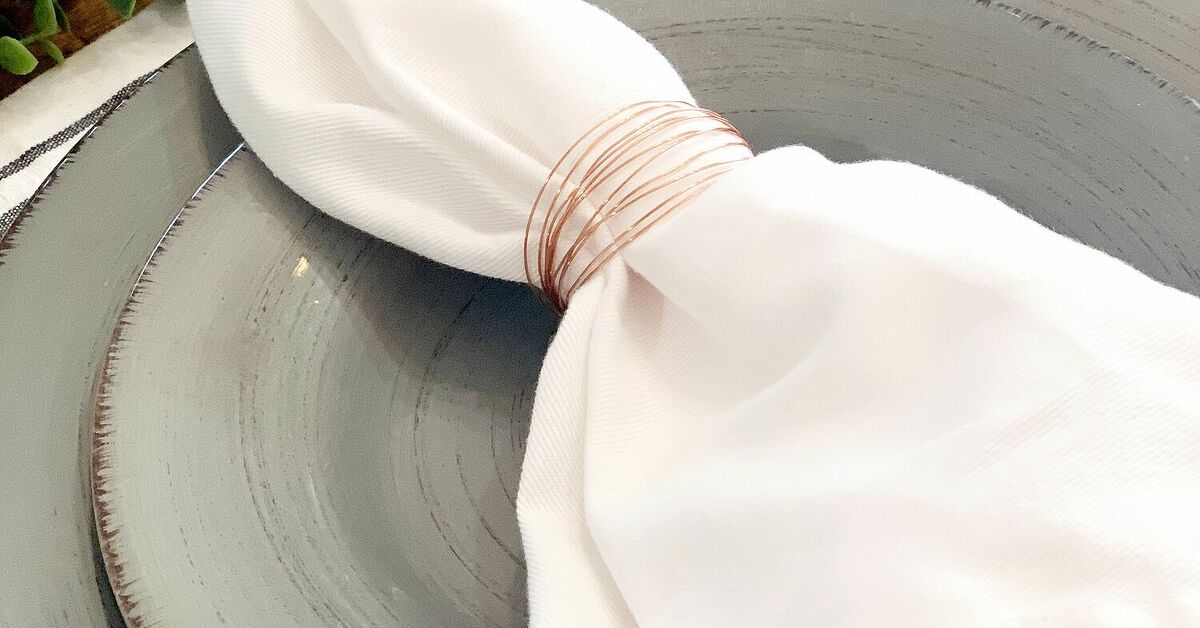
5. Minimal Gold Wire Napkin Rings
For a modern look, wrap thick gold craft wire around a small glass or round object to form a circle. Twist the ends neatly with needle-nose pliers and tuck them inward so they do not snag the napkin. Add one bead or charm if desired. This version is simple, sculptural, and very quick.
6. Personalized Place-Card Napkin Rings
Tie a small name tag to each gold ring using thin ribbon or metallic cord. This doubles as a place card and gives guests a small decorative detail to admire before dinner. Use kraft paper for rustic settings, black cardstock with white ink for drama, or cream paper with gold lettering for a classic look.
How to Style Gold Napkin Rings on the Table
The easiest styling method is to roll a cloth napkin into a loose cylinder and slide the ring over the center. This creates a clean, restaurant-style presentation. You can place the rolled napkin across the dinner plate, vertically on the plate, or to the left of the forks.
For a fuller look, pinch the center of a square napkin, pull it through the ring, and fluff both ends. This creates a soft bow-like shape without actually tying a bow. It works especially well with linen or cotton napkins that have a little body.
Gold napkin rings also look beautiful layered with chargers. Try a white plate on a gold charger with a black napkin and a simple gold ring for a dramatic dinner setting. For a softer table, use cream plates, blush napkins, and pearl-accented gold rings. For a natural look, combine wood chargers, oatmeal linen napkins, and botanical gold rings.
Common Mistakes to Avoid
Using Too Much Paint at Once
Heavy paint coats cause drips and uneven shine. Thin coats take a little longer, but they produce a smoother, more professional finish.
Skipping Surface Prep
Paint does not love dust, oil, glossy plastic, or rough cardboard. Sanding, wiping, and priming are small steps that make a big difference.
Adding Too Many Decorations
Gold is already a statement. Choose one main embellishment: pearls, rhinestones, ribbon, greenery, or charms. When everything competes, nothing looks special.
Using Rings Before They Cure
Fresh paint can transfer to napkins. Let your rings dry and cure fully before placing them on fabric, especially light-colored linen.
Forgetting Storage
Store finished napkin rings in a small box with tissue paper between layers. This protects paint, beads, and glued accents from scratches or breakage.
Budget-Friendly Variations
If you want a luxe result on a tiny budget, use cardboard tubes sealed with craft glue, then paint them gold. Add a narrow band of ribbon or twine and one small charm. The result can look surprisingly polished for very little money.
Another inexpensive option is to use shower curtain rings. Remove any visible hooks or bulky parts if possible, prime them, spray them gold, and glue a small embellishment over the closure point. This hides the hardware and makes the piece look intentional.
Wood beads are also excellent for DIY napkin rings. String them onto elastic cord, tie securely, and paint or rub a few beads with gold wax for a mixed metallic look. This style feels modern, casual, and warm.
Safety and Practical Notes
Work in a well-ventilated space when using spray paint or sealers. Protect your work surface with a drop cloth and keep paint away from open flames, food, dishes, and children. Wear gloves if you want to avoid gold fingertips, unless you are auditioning to be a very glamorous statue.
Use caution with hot glue guns. A low-temperature glue gun is usually enough for lightweight decorations such as ribbon, beads, and faux greenery. Let glue cool completely before handling the finished rings.
Napkin rings are decorative accessories, not food-contact items. They should hold napkins only. If a painted ring becomes sticky, chipped, or rough, repair it before using it again.
Experience-Based Tips for Better DIY Gold Napkin Rings
One of the biggest lessons experienced crafters learn with DIY gold napkin rings is that the simplest design often looks the most expensive. It is tempting to use every shiny supply in the drawer because gold seems to invite company. But a clean gold ring with one well-placed accent usually looks more elegant than a ring covered in pearls, rhinestones, ribbon, bells, leaves, and a tiny bird that appears emotionally overwhelmed.
Another practical experience is to make one sample ring before creating the full set. This saves time, money, and emotional damage. A paint color that looks like soft champagne on the cap may look like bright yellow trumpet polish on cardboard. A ribbon that appears classy in the package may suddenly scream “holiday gift basket from 1998.” By testing one ring first, you can adjust the width, finish, and embellishment before committing to twelve matching pieces.
Drying time is also more important than most beginners expect. Napkin rings are handled from all sides, so if the paint is not fully cured, fingerprints can appear in the finish. For special events, make them several days ahead. This gives the paint and glue time to harden, and it gives you time to fix anything that looks uneven. Last-minute crafting can be thrilling, but so is a fire drill, and nobody wants that energy before guests arrive.
Storage matters as much as construction. DIY napkin rings often look wonderful after the first dinner and tragic after being tossed into a drawer with birthday candles, loose batteries, and a rogue corkscrew. Wrap each ring in tissue paper or place them in a divided ornament box. Label the box by season or color. Future you will be grateful, and future you deserves nice things.
When styling the finished rings, think about contrast. Gold rings stand out beautifully against dark napkins such as black, forest green, navy, plum, or burgundy. They also look classic against white or ivory. If your table already has gold flatware, gold chargers, gold-rimmed glasses, and gold candles, keep the napkin rings simple. If the rest of the table is neutral, let the rings bring more sparkle.
Finally, remember that handmade does not have to mean perfect. A tiny variation in each ring can make the table feel personal and warm. Guests rarely inspect napkin rings like museum curators. They notice the overall feeling: thoughtful, festive, welcoming, and just fancy enough to make dinner feel special.
Conclusion
Glamorous DIY gold napkin rings are proof that small details can transform a table. With a simple base, careful surface prep, metallic gold paint, and a few tasteful embellishments, you can create table accessories that look elegant without draining your decorating budget. Whether you choose pearls, velvet, rhinestones, greenery, or minimalist wire, the goal is the same: make the meal feel more memorable before the first plate even lands on the table.
The best version of this project is the one that fits your event, your dishes, and your personality. Keep the finish smooth, the decorations balanced, and the styling intentional. Then light the candles, fold the napkins, and enjoy the quiet satisfaction of knowing your table looks fabulous because you made it that way.
Note: Always follow the instructions on your specific paint, primer, adhesive, and sealer labels. Let finished napkin rings dry completely before using them with cloth napkins.