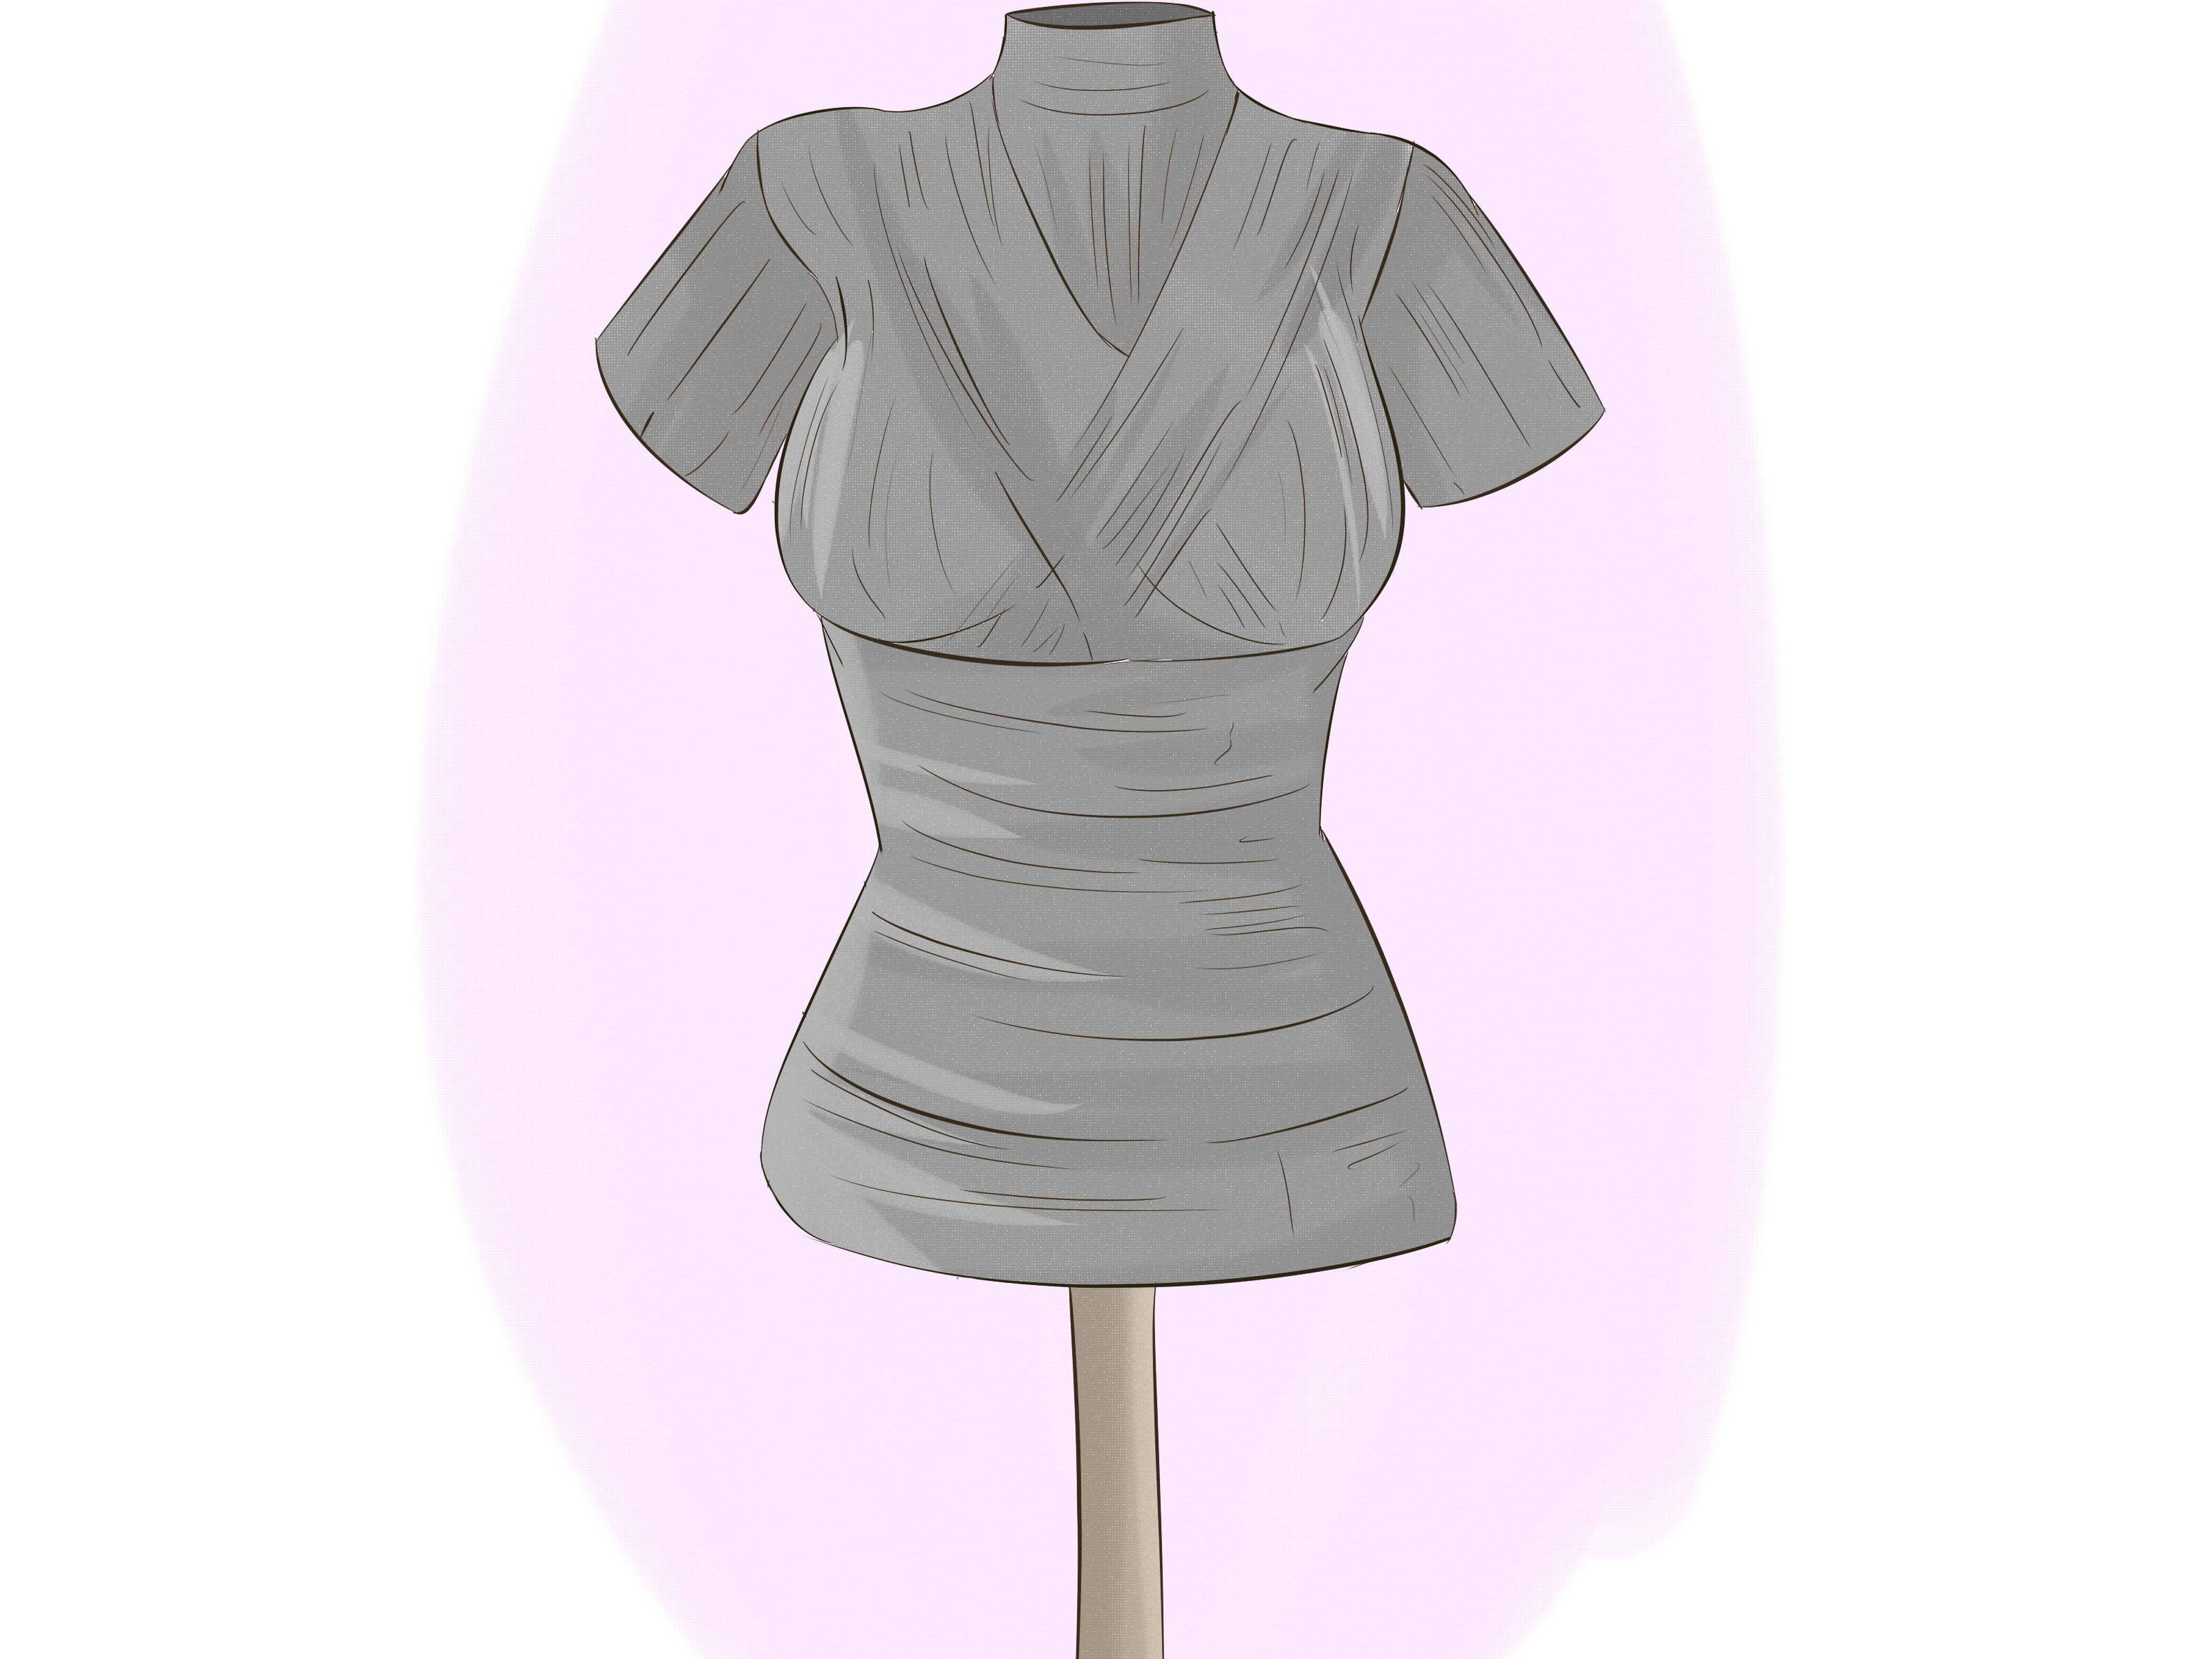
If you sew clothes for yourself, you already know the tiny circus act involved in fitting a garment on your own body. You twist, pin, squint into the mirror, accidentally stab your side with a straight pin, and then wonder why the shoulder seam looks like it is trying to escape. A duct tape dress form solves a lot of that chaos. It gives you a custom body double that can stand in your sewing room and politely hold still while you drape fabric, check hems, pin darts, test sleeve placement, and argue with a bodice muslin like a civilized person.
A professional dress form is wonderful, but it can be expensive, and even adjustable forms rarely copy every curve, shoulder slope, posture habit, and torso length of a real person. That is where the DIY duct tape dress form comes in. With duct tape, an old T-shirt, stuffing, cardboard, a helper, and patience, you can create a surprisingly useful custom sewing mannequin. It will not replace a couture studio form, but it can become one of the most practical tools in a home sewing space. Think of it as your silent fitting assistant: no snacks required, no opinions about your fabric stash.
What Is a Duct Tape Dress Form?
A duct tape dress form is a lightweight shell made by wrapping duct tape over a protective layer worn on the body, cutting the shell off safely, resealing it, stuffing it, and mounting it on a stand or stable base. The goal is to capture your real measurements and shape so you can use the finished form for garment fitting, pattern adjustments, draping, hemming, and visualizing how clothing hangs.
The biggest benefit is customization. A store-bought dress form may match your bust, waist, or hip measurement, but bodies are not math worksheets. One shoulder may sit slightly forward, one hip may be higher, your back length may be shorter than the “standard,” or your bust position may differ from a commercial form. A homemade duct tape mannequin captures more of that real-life geometry. That is especially helpful for sewing fitted dresses, jackets, corset-inspired tops, formalwear, costumes, cosplay pieces, and anything with darts, princess seams, or waist shaping.
Before You Start: Safety and Comfort Matter
This project requires a helper. Do not try to wrap yourself alone. You need someone who can apply tape smoothly, check that it is not too tight, and cut the form off without turning the afternoon into a slapstick medical drama. Choose a trusted helper and plan the project for a time when neither of you is rushed.
Wear the undergarments you normally wear with the type of clothing you sew. A dress form made while wearing a sports bra will not behave like one made while wearing your everyday bra. If you sew formal dresses, wear the foundation garments you expect to use under formalwear. This is not about changing your body; it is about making the form match your real sewing needs.
Stand naturally during wrapping. Do not suck in your stomach, push your shoulders back like a soldier in a parade, or “improve” your posture for the tape. Your future garments need to fit the body you actually live in, not the body you can hold for thirty-seven heroic seconds. Also, keep breathing normally. Duct tape should feel snug but never restrictive. If you feel dizzy, overheated, numb, or uncomfortable, stop immediately and remove the form.
Materials You Need
You do not need a glamorous studio to make a DIY dress form. You need basic supplies, a little floor space, and the emotional strength to sacrifice a T-shirt for the greater good.
- 2 to 3 rolls of good-quality duct tape
- An old fitted T-shirt long enough to cover the hips
- Plastic wrap for the neck, upper chest, or any exposed areas
- Sharp scissors or bandage scissors for safe removal
- Permanent marker for reference lines
- Stuffing, fiberfill, fabric scraps, newspaper, plastic bags, or packing material
- Cardboard for the neck, armholes, and bottom
- A sturdy tube, PVC pipe, broom handle, microphone stand, old lamp stand, or similar support
- Tape measure
- Optional: batting, muslin cover, twill tape, glue, expanding foam used very carefully
Good duct tape matters. Cheap tape may peel, stretch, wrinkle, or lose its shape faster. The form depends on the tape shell staying stable, so buy tape that feels strong and sticky. Old scissors are useful because duct tape adhesive can gum up the blades. If you have nonstick craft scissors, this is their moment to shine like a tiny metal superhero.
Step-by-Step: How to Make a Duct Tape Dress Form
Step 1: Put On the Base Layer
Start with a close-fitting T-shirt that you do not mind cutting apart. It should cover the area you want the dress form to include. For most sewing projects, extending below the fullest part of the hips is helpful because it lets you fit skirts, dresses, tunics, and longer bodices. If your shirt is too short, add a strip of fabric or plastic wrap around the hips and tape it gently in place before the real wrapping begins.
Protect your neck and any exposed skin with plastic wrap. Duct tape should never be applied directly to skin or hair. Tie up long hair and remove jewelry. Stand with your feet about hip-width apart, arms slightly away from the body, and shoulders relaxed.
Step 2: Mark Key Body Reference Lines
Before the tape shell becomes too busy, have your helper mark important fitting lines on the T-shirt. Mark the center front, center back, natural waist, bust level, hip level, shoulder line, and side seams. These lines will help later when you use the form for pattern fitting and draping.
The waistline is especially important. Tie a narrow elastic or ribbon around your natural waist and move around a little; it will settle into the narrowest bending point of your torso. Mark that line clearly. This simple step can prevent many future fitting mysteries, including the classic “why does this waistband hate me?” situation.
Step 3: Begin With Supportive Tape Placement
Start with short strips of duct tape around the bust and upper torso. Many makers use a “cross-your-heart” taping method, placing diagonal strips from one shoulder across the opposite bust area and around the back. This helps define the bust separately rather than flattening the chest into one smooth tube. The goal is contour, not compression.
After the upper chest is defined, begin taping horizontally around the lower torso and hips. Use short to medium strips instead of trying to circle the body with one giant piece of tape. Long pieces can pull too tightly, wrinkle, or distort the shape. Overlap each strip slightly so the shell becomes continuous and strong.
Step 4: Build Two to Three Layers
A single layer is too flimsy for most dress forms. Build two or three layers, changing the tape direction as you go. For example, the first layer can be mostly horizontal, the second vertical or diagonal, and the final layer smoother and more controlled. This crisscross structure adds strength without requiring the form to become a duct tape suit of armor.
Keep checking comfort. The helper should smooth the tape onto the body without pulling it tight. If the tape squeezes the waist, flattens the bust, or changes the posture, the finished custom dress form will lie to you. And a lying dress form is basically a mannequin with a villain origin story.
Wrap the shoulders, upper chest, back, waist, stomach, hips, and the lower edge evenly. If you sew garments with sleeves, include the upper arm cap slightly so you can see how armholes and sleeve heads sit. If you often sew collars, include the base of the neck. If you mostly sew sleeveless tops and dresses, a clean shoulder and armhole shape may be enough.
Step 5: Cut the Shell Off Carefully
Once the shell is complete, draw a clear cutting line down the center back or slightly off-center back. The center back is easiest for resealing, but an off-center cut can help preserve a marked center line. Use safe scissors and cut slowly through the tape and T-shirt layer. Keep one hand between the scissors and the body when possible, and do not rush.
After the shell is removed, the person who was wrapped should celebrate by breathing dramatically, stretching gently, and drinking water. This is normal. Being wrapped in duct tape is useful, but nobody has ever said, “Ah yes, this is exactly like a spa day.”
Step 6: Reseal the Back Seam
Match the cut edges carefully and tape the back seam closed from the inside and outside. Align the waist, hip, and center markings as accurately as possible. If the seam overlaps too much, the form becomes smaller. If there is a gap, it becomes larger. Take your time here because this seam controls the final measurement.
Once the back is closed, tape cardboard over the armholes and neck opening. Leave the bottom open for stuffing and mounting. Check the bust, waist, and hip measurements with a tape measure. They do not have to be absolutely perfect, but they should be close enough to your body measurements to make fitting useful. If a measurement is off by more than an inch, correct it before stuffing.
Step 7: Stuff the Form Without Distorting It
Stuffing is where many duct tape dress forms go from “custom sewing tool” to “mysterious potato statue.” The key is to stuff gradually and evenly. Use small pieces of fiberfill, fabric scraps, newspaper, or packing material. Push filling into the shoulders, bust, waist, back, and hips in stages. Avoid cramming one area too tightly while another area stays hollow.
If you use expanding foam, use it very sparingly and only for small internal gaps. Expanding foam can push the shell outward and create lumps if used too aggressively. It also needs ventilation and careful handling. For many beginners, fiberfill and recycled packing materials are safer and easier to control.
Step 8: Add the Stand or Base
A dress form is much more useful when it stands at your actual working height. You can use PVC pipe, a microphone stand, a broom handle set into a weighted base, an old floor lamp stand, or a sturdy umbrella stand. The support should run vertically through the center of the form and hold it without wobbling.
Before closing the bottom, adjust the height. The waistline on the form should match your waist height from the floor. If it is too tall or too short, hems, proportions, and garment balance may mislead you. Once the height is correct, cut a cardboard base for the bottom opening, make a center hole for the support pole, slide it into place, and tape everything securely.
Step 9: Finish the Surface
You can use the dress form as-is, but a fabric cover makes it easier to pin, mark, and photograph. Wrap the form in thin batting and cover it with a snug knit fabric or muslin cover. A cover also hides the duct tape surface, which is helpful if your tape is silver, neon zebra, or leftover holiday duct tape with cheerful snowmen judging your seam allowances.
For better sewing accuracy, re-mark the center front, center back, bust line, waistline, hip line, and side seams on the outside cover. Use twill tape, narrow ribbon, or permanent marker. These guide lines are extremely helpful when draping, checking balance, and comparing both sides of a garment.
How to Use Your DIY Dress Form
Once finished, your duct tape body form can help with many sewing tasks. You can pin a muslin onto it and study where fabric pulls. You can check dart placement before sewing. You can test neckline depth, pocket height, hem length, sleeve balance, and embellishment placement. If you sew costumes, it is great for building bodices, armor-like fabric pieces, capes, and layered designs without needing to try everything on every ten minutes.
However, remember that a duct tape dress form is firm and still. You are not. Real bodies breathe, sit, move, reach, and change slightly through the day. Always do a final try-on before calling a garment finished. The form is an assistant, not the Supreme Court of Fit.
Common Mistakes and How to Avoid Them
Wrapping Too Tight
This is the most common mistake. Tight tape changes the body shape and creates a smaller form. Wrap snugly enough to capture shape, but never so tightly that it compresses the body.
Using Too Few Layers
One layer may collapse during stuffing. Two layers are usually the minimum, while three layers create a stronger shell for long-term use.
Skipping Reference Lines
Without marked waist, bust, hip, center, and side lines, the form becomes less useful for pattern fitting. Mark first, tape second, thank yourself later.
Overstuffing the Form
Overstuffing can stretch the shell and enlarge the measurements. Stuff gradually, measure often, and stop before the form starts looking inflated.
Mounting It at the Wrong Height
A dress form at the wrong height can confuse hem length and proportion. Match the form’s waist height to your own waist height from the floor.
Extra Tips for Better Fitting Results
If you want a more accurate duct tape mannequin, take body measurements before and after the project. Record bust, high bust, underbust, waist, high hip, full hip, shoulder width, back waist length, and waist-to-floor length. Compare the finished form to those numbers after stuffing. Small differences can be padded or compressed gently with batting and fabric.
For pinning, do not rely on pushing pins straight into duct tape. The tape surface is not naturally pin-friendly, and adhesive can sometimes transfer to pins. A padded cover helps. You can also pin at an angle, use clips, or baste fabric directly when testing more structured designs.
If your body changes over time, the form may need updates. You can pad areas with batting and add a new cover, or make a fresh form when your measurements change significantly. Luckily, the second version is usually easier because you will already know what worked, what did not, and which friend is brave enough to duct tape you again.
Real-World Experiences: What Making a Duct Tape Dress Form Actually Teaches You
The first experience many people have with a duct tape dress form is surprise. The project looks simple online: wrap, cut, stuff, done. In real life, it feels more like a group craft project mixed with a trust exercise and a light cardio session for your helper. The person being wrapped must stand still longer than expected, and the helper quickly learns that smooth taping is an art. Short strips are easier to control than long ones, especially around curves such as the bust, shoulder blades, waist, and hips.
One practical lesson is that posture changes everything. If you stand stiffly during taping, the finished form may look tidy but will not represent how your clothes actually hang. A relaxed stance gives better results. That means shoulders down, stomach natural, knees unlocked, and breathing normally. The form should reflect your everyday shape, not your “someone just said group photo” pose.
Another experience is that the stuffing stage requires patience. People often want to fill the shell quickly so they can see the finished result. But stuffing too fast creates bumps, flat spots, and measurement changes. It is better to stuff in sections: shoulders first, then bust and upper back, then waist, stomach, hips, and lower body. After each section, measure. If the hip grows two inches because you got enthusiastic with newspaper, stop and redistribute. The tape shell is flexible enough to be useful, but not magical enough to forgive every stuffing crime.
The stand is another area where real experience matters. A form that wobbles is annoying, especially when you are pinning fabric or checking a hem. A heavy base is better than a pretty base. Many makers reuse what they already have: a lamp base, umbrella stand, PVC pipe, wooden dowel, or microphone stand. The important part is stability and height. When the waistline is at the correct level, the form becomes far more useful for fitting dresses, skirts, coats, and long tops.
The most satisfying moment usually happens when you place a half-finished garment on the form and instantly see a fitting issue that was hard to spot in the mirror. A dart points too low. A side seam swings forward. A neckline gaps. A hem dips in back. Suddenly the duct tape dress form earns its corner of the sewing room. It may not be elegant, and it may look like a robot wrapped in hardware-store fashion, but it helps you sew smarter.
The biggest emotional lesson is to respect your real shape. A custom dress form is not supposed to look like a retail mannequin. It is supposed to look like the person wearing the clothes. That is the whole advantage. When you use a form that reflects your shoulders, waist, hips, and posture, fitting becomes less about chasing standard sizes and more about building garments that feel good and move well. That is where the fun begins.
Conclusion
Learning how to make a duct tape dress form is one of the most useful DIY sewing projects for anyone who wants better garment fitting without buying an expensive professional form. With duct tape, a sacrificial T-shirt, careful wrapping, even stuffing, and a stable stand, you can create a custom dressmaker dummy that helps with draping, pinning, pattern fitting, and checking proportions.
The secret is accuracy over speed. Do not wrap too tightly, do not skip reference lines, do not overstuff, and do not pretend posture does not matter. Treat the process like making a practical sewing tool, not a race against adhesive. Your finished form may not win a beauty contest, but it can help your handmade clothes fit better, hang better, and make you feel far less like you need eight extra arms to sew a dress.
Note: This article is written as original, web-ready HTML content based on real sewing practices and common DIY dress form guidance, with source-link clutter intentionally omitted for clean publishing.