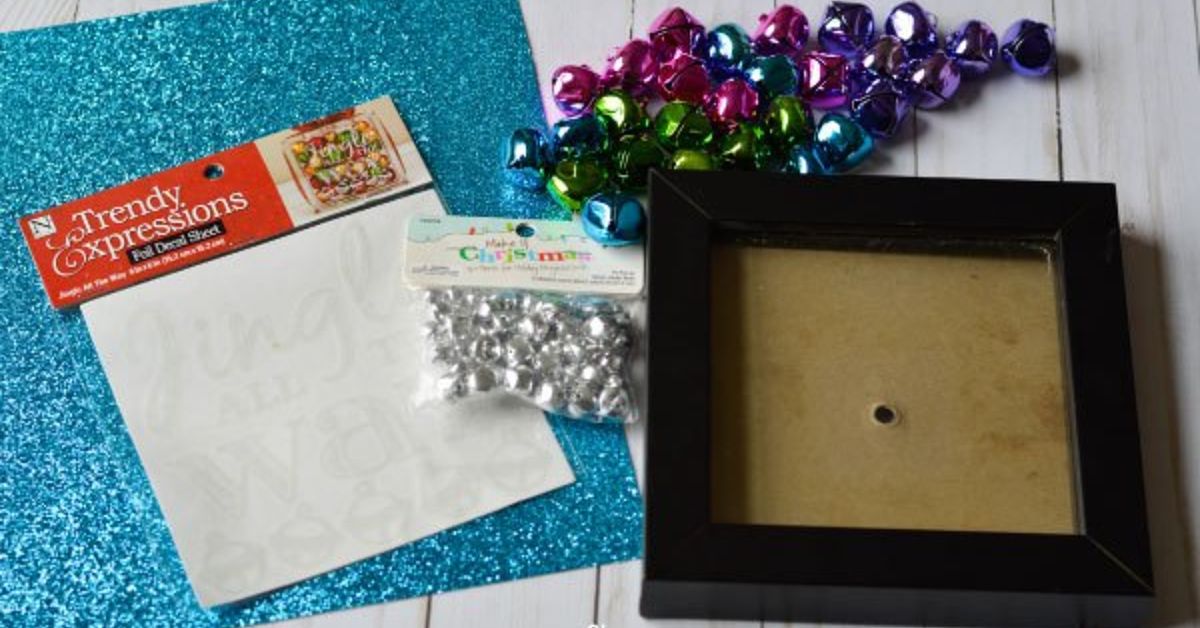
A Jingle Bells shadow box is the kind of Christmas craft that looks expensive, sounds festive, and secretly takes less effort than untangling one strand of holiday lights. It is a framed decoration filled with shiny jingle bells, backed with pretty paper or fabric, and finished with a cheerful message such as “Jingle All the Way,” “Merry & Bright,” or “Let It Snow.” The result is part wall art, part ornament display, and part tiny holiday concert trapped behind glass.
This DIY Christmas shadow box is perfect for a mantel, entry table, kitchen shelf, hallway gallery wall, or handmade gift. You can make it rustic with burlap and antique brass bells, modern with white paper and silver bells, playful with red and green bells, or elegant with gold vinyl lettering and velvet ribbon. Better yet, the project is beginner-friendly. No advanced woodworking, sewing, or mysterious crafting wizardry required.
In this guide, you will learn how to make a Jingle Bells shadow box step by step, how to choose the right frame, how many bells to use, how to apply vinyl lettering neatly, and how to style the finished piece so it looks polished rather than “I panic-crafted this at midnight.” Let’s make something merry.
What Is a Jingle Bells Shadow Box?
A Jingle Bells shadow box is a deep picture frame filled with small decorative bells. The glass front usually features vinyl lettering, stickers, painted words, or stenciled text. Behind the bells, a decorative background creates color, contrast, and seasonal personality.
The beauty of this project is its flexibility. You can use an 8-by-8-inch frame for a compact shelf accent, a 12-by-12-inch shadow box for a bold mantel piece, or a long rectangular frame for a sign-style design. The bells can move slightly when the frame is handled, giving the decoration a fun “jingle” effect. It is basically holiday decor with built-in sound effects, which is more than your average throw pillow can say.
Materials You’ll Need
Gather your supplies before you start. This keeps the project relaxing and prevents the classic craft-table disaster where your scissors vanish into another dimension.
Main Supplies
- One shadow box frame, preferably 8 x 8 inches, 10 x 10 inches, or 12 x 12 inches
- Assorted jingle bells in gold, silver, red, green, white, or bronze
- Scrapbook paper, glitter cardstock, fabric, burlap, or wrapping paper for the background
- Vinyl lettering, sticker letters, stencil letters, or paint pens
- Transfer tape if using adhesive vinyl
- Double-sided tape, craft glue, spray adhesive, or glue dots
- Scissors or a paper trimmer
- Ruler or measuring tape
- Glass cleaner or rubbing alcohol
- Lint-free cloth
- Optional ribbon, faux greenery, mini ornaments, snowflakes, or battery-powered fairy lights
Optional Tools
- Cricut, Silhouette, or another cutting machine for custom vinyl
- Scraper tool or old gift card for smoothing vinyl
- Hot glue gun for attaching embellishments
- Level and picture-hanging hardware if displaying on a wall
Step 1: Choose the Right Shadow Box
The best shadow box for this project has enough depth to hold bells without crushing them against the glass. A frame with about 1 inch of interior depth works well for small and medium bells. If you want to use large bells, ornaments, greenery, or fairy lights, choose a deeper frame.
For a clean modern look, use a white or black frame. For farmhouse Christmas decor, choose weathered wood. For a glam holiday style, try a gold frame or paint an inexpensive frame with metallic spray paint. If the frame has a removable backing, even better. You want to be able to open it easily, add the bells, and close it securely.
Before buying supplies, lightly shake a few bells in front of the frame at the store if possible. If the bells look too bulky, size down. The goal is a full, cheerful layer of bells, not a frame that closes with the emotional tension of an overpacked suitcase.
Step 2: Plan Your Design
Before cutting paper or applying vinyl, decide on your overall style. A little planning makes the finished Jingle Bells shadow box look intentional and gift-worthy.
Classic Christmas Style
Use red, green, gold, and silver bells with a plaid or snowflake background. Add white vinyl lettering that says “Jingle All the Way.” This version feels cheerful, traditional, and family-friendly.
Farmhouse Style
Use bronze or antique gold bells, burlap or kraft paper, a wood frame, and black or white lettering. Add a small buffalo-check bow to the corner for that cozy farmhouse look.
Elegant Winter Style
Use silver bells, white glitter cardstock, clear snowflake stickers, and soft gray or metallic vinyl. This design works well in neutral homes where bright red decorations may feel too loud.
Kid-Friendly Fun Style
Use multicolored bells, bright scrapbook paper, foam snowflakes, and large sticker letters. This is a great supervised family craft, but keep small bells away from young children because they can be a choking hazard.
Step 3: Prepare the Frame and Glass
Open the shadow box and remove the backing. If the glass or acrylic front is removable, take it out carefully and clean both sides. Use glass cleaner or a small amount of rubbing alcohol on a lint-free cloth. Let the surface dry completely before adding vinyl or stickers.
This step matters because dust, fingerprints, and sneaky little craft crumbs can prevent vinyl from sticking smoothly. Clean glass also makes the finished piece look professional. Nobody wants a beautiful Christmas shadow box with a mystery thumbprint glowing under the living room lights.
Step 4: Create the Background
Measure the frame backing and cut your background material to fit. Scrapbook paper is the easiest option because it comes in many holiday patterns and cuts cleanly. Glitter cardstock adds sparkle, while fabric gives the project texture. Wrapping paper works too, especially if you already have a beautiful roll that deserves more attention than being ripped open in six seconds.
Attach the background to the backing with double-sided tape, glue dots, or a light coat of spray adhesive. Keep the paper flat and smooth. If you are using fabric, pull it gently so it does not wrinkle, then secure it on the back side with tape or glue.
For extra dimension, layer paper snowflakes or small cutouts over the background. Keep raised embellishments thin enough that the frame still closes properly. If you want the bells to remain loose and visible, avoid placing bulky decorations in the lower part of the frame where the bells will gather.
Step 5: Add the Lettering
The most popular phrase for this project is “Jingle All the Way,” but you can personalize it. Try “Sleigh Bells Ring,” “Merry & Bright,” “Let It Jingle,” “Believe,” “Joy,” or a family name with the year. Short phrases usually look best because the bells already add plenty of visual texture.
Using Vinyl Lettering
If you are using adhesive vinyl, cut the phrase with a craft cutting machine or buy pre-made vinyl lettering. Apply transfer tape over the vinyl, burnish it with a scraper, and peel away the backing. Position the design on the glass, press from the center outward, and slowly remove the transfer tape.
For best results, place the lettering on the outside of the glass. This makes the words crisp and easy to read. If you prefer a cleaner protected finish, you can place the lettering on the inside, but remember that it may be harder to adjust once the frame is assembled.
Using Stickers or Stencils
No cutting machine? No problem. Use alphabet stickers, rub-on letters, or a stencil with acrylic paint. Stickers are fastest, stencils feel handmade, and paint pens are good for a casual hand-lettered look. If handwriting makes you nervous, print your phrase on paper, tape it behind the glass, and trace over it with a paint pen.
Step 6: Fill the Shadow Box With Bells
Now comes the fun part: the bells. Pour a small layer of jingle bells into the frame while it is lying flat with the glass facing down or while the frame backing is open, depending on how your shadow box is built. Add enough bells to fill the bottom third to half of the box.
Do not overfill it. The bells should have room to shift slightly and catch the light. If you pack the frame too tightly, the design can look crowded and the backing may not close securely. A mix of sizes creates a more interesting look. Small bells fill gaps, medium bells add shape, and a few larger bells create focal points.
If you want the bells to stay arranged instead of moving around, use hot glue or glue dots to attach a few to the background. For a shaker-style shadow box, leave them loose. Loose bells are more playful, while glued bells look more composed and formal.
Step 7: Close and Secure the Frame
Once the bells are inside, carefully replace the backing and secure all tabs or fasteners. Hold the frame upright slowly to check how the bells settle. If the bells cover the lettering too much, open the frame and remove a handful. If the bottom looks empty, add more.
Check the back to make sure nothing is bulging. A secure backing is especially important if you plan to hang the shadow box on a wall. If the frame feels heavy, use hanging hardware that matches the weight of the finished piece. Adhesive strips can work for lightweight frames on smooth surfaces, but heavier shadow boxes should use stronger hardware.
Step 8: Add Finishing Touches
Finishing details can turn a simple Jingle Bells shadow box into a polished holiday decoration. Add a small ribbon bow to one corner, glue faux pine sprigs along the frame edge, or attach a tiny ornament to the top with twine. Keep decorations balanced so they enhance the frame instead of stealing the spotlight.
Battery-powered fairy lights can look magical inside a deeper shadow box. Choose a short strand with a small battery pack and hide the pack behind the bells or attach it discreetly to the back. Avoid heat-producing lights and never trap plug-in lights inside a closed frame.
Design Ideas for Different Rooms
For the Mantel
Place the shadow box beside candles, garland, stockings, and mini trees. A 12 x 12-inch frame works well because it has enough presence to stand among other Christmas mantel decor.
For the Entryway
Use a cheerful message like “Jingle All the Way” to greet guests. Pair the frame with a bowl of ornaments, a small wreath, or a vase filled with candy canes.
For the Kitchen
A smaller frame with red bells and white lettering looks adorable on open shelving or a coffee bar. Add a tiny sign that says “Hot Cocoa Served Here” and suddenly your kitchen has main-character holiday energy.
For a Child’s Room
Use bright colors and playful stickers, but hang the shadow box securely and out of reach if it contains small bells. Safety first, sparkle second.
Common Mistakes to Avoid
Using Too Many Bells
It is tempting to pour in the entire bag, but too many bells can hide the background and make the frame difficult to close. Start with less, then add more if needed.
Skipping the Glass Cleaning
Vinyl sticks best to clean, dry glass. Dust and fingerprints can cause bubbles or lifting edges.
Choosing a Busy Background
If the background pattern is very loud, the lettering may be hard to read. Pair busy paper with simple lettering, or pair bold lettering with a calmer background.
Forgetting About Weight
Bells may be small, but a full frame can become surprisingly heavy. Always choose hanging hardware that supports the finished weight.
Gift Ideas and Personalization
A handmade Jingle Bells shadow box makes a thoughtful Christmas gift because it feels personal without requiring a month of work. Add a family name, wedding year, pet name, or favorite holiday phrase. For teachers, use school colors and a message like “Jingle & Joy.” For grandparents, include tiny photo prints tucked behind the bells. For a new homeowner, add a key-shaped charm and the phrase “Home for the Holidays.”
You can also create mini versions as party favors or craft-night projects. Set up a table with small frames, bells, papers, stickers, and ribbons. Guests can build their own design and take home a decoration. It is more memorable than another cookie exchange, though cookies are still welcome. Always.
Budget-Friendly Tips
This project can be very affordable if you shop smart. Look for shadow boxes during craft-store sales, use leftover scrapbook paper, reuse ribbon from gift wrapping, and check seasonal clearance after Christmas for bells and mini ornaments. Thrift stores often have deep frames that can be painted and repurposed.
If you do not own a vinyl cutting machine, buy pre-cut decals or use stickers. If glitter cardstock is expensive, use metallic wrapping paper. If jingle bells cost more than expected, mix a smaller amount of bells with lightweight mini ornaments or faux snow to fill the space.
Care and Storage
To keep your shadow box looking fresh, dust the frame with a soft cloth. Avoid spraying cleaner directly onto the glass once vinyl is applied. Instead, spray the cloth lightly and wipe around the lettering carefully.
When the season ends, wrap the shadow box in tissue paper or bubble wrap and store it upright in a sturdy bin. Keep it away from heavy decorations that could crack the glass. Label the storage box clearly so next December you do not have to play the annual game of “Where Did I Put the Christmas Stuff?”
Experience Notes: What I’ve Learned Making Jingle Bells Shadow Boxes
The first lesson from making a Jingle Bells shadow box is simple: measure everything twice, especially the background. A shadow box may be labeled 8 x 8 inches, but the inside backing can be slightly smaller. If you cut scrapbook paper based only on the outside frame size, you may end up trimming tiny slivers from the edges while muttering festive words that are not exactly “fa-la-la.” A ruler saves time and keeps the paper edges clean.
The second lesson is that contrast matters more than sparkle. Glitter paper is gorgeous, but if you put shiny gold vinyl over shiny gold cardstock with shiny gold bells, the whole design can blend into one glittery blur. A better approach is to choose one star element. If the bells are metallic, use a calmer background. If the background is bold plaid, choose simple white or black lettering. Holiday decor should sparkle, but it should not require guests to squint like they are solving a Christmas eye exam.
Another helpful experience is to test the bell level before sealing the frame. Lay the shadow box flat, add bells, close the back temporarily, and lift it upright. You will immediately see whether the bells sit too high, too low, or just right. I like the bells to rest below the main phrase so the lettering stays readable. For an 8 x 8-inch frame, filling the lower third usually looks balanced. For a 12 x 12-inch frame, filling close to half can feel fuller and more dramatic.
Vinyl application is where patience pays off. Clean glass, dry hands, and slow peeling make a big difference. If a letter refuses to release from the transfer tape, press it back down and burnish again instead of yanking. Pulling too quickly can stretch thin letters or distort script fonts. Block fonts are easier for beginners, while delicate script fonts look beautiful but require more care.
For family craft nights, prepare the pieces ahead of time. Cut backgrounds, sort bells by color, and pre-cut simple vinyl phrases or provide sticker letters. This keeps the activity fun rather than chaotic. Children can choose colors, arrange paper, and add ribbons with supervision. Because bells are small, keep them away from toddlers and pets, and clean the work area afterward. A runaway bell under the couch is cute until the dog finds it.
One of the best creative tricks is mixing finishes. Combine shiny bells with matte paper, rustic ribbon with smooth glass, or antique bronze bells with crisp white lettering. Texture makes the shadow box feel layered and expensive, even if most supplies came from a sale bin. A tiny sprig of faux pine or a plaid bow can also make the frame feel more finished.
Finally, remember that handmade decor does not need to be perfect. A slightly tilted snowflake or a tiny vinyl bubble will not ruin the piece. Once it is on the mantel surrounded by lights, greenery, and holiday snacks, nobody will inspect it like a museum curator. They will see a cheerful Christmas decoration that jingles, shines, and feels personal. That is the real magic of a Jingle Bells shadow box: it turns simple supplies into a keepsake that feels joyful every year you bring it back out.
Conclusion
A Jingle Bells shadow box is one of the easiest ways to create handmade Christmas decor with charm, movement, color, and personality. With a shadow box frame, a handful of bells, a pretty background, and a festive phrase, you can make a decoration that looks custom without needing advanced skills. Whether your style is farmhouse, elegant, playful, rustic, or full-on Santa’s-workshop sparkle, this project adapts beautifully.
Use it as mantel decor, wall art, a holiday gift, or a craft-night activity. Keep the glass clean, avoid overfilling the frame, choose readable lettering, and secure the finished piece properly. Most importantly, have fun with it. Christmas crafting should feel joyful, not like a seasonal engineering exam.