Popcorn ceilings had an impressive run. They concealed drywall flaws, softened sound, and gave millions of American homes the visual personality of cottage cheese. Unfortunately, they also collect dust, create stubborn shadows, and make an otherwise updated room feel as though it is still waiting for a 1978 furniture catalog.
The good news is that removing a popcorn ceiling can be a manageable home-improvement project when the texture is unpainted, the underlying drywall is sound, and hazardous materials have been ruled out. The less-good news is that the work is wet, messy, and performed directly above your head. Your shoulders may file a formal complaint by lunchtime.
This guide explains how to remove popcorn ceiling texture safely, protect the drywall underneath, repair the newly exposed surface, and finish it with primer and paint. It also covers painted ceilings, common mistakes, alternatives to scraping, and practical lessons from real-world renovation projects.
Before You Scrape Anything, Check for Hazardous Materials
The first step is not buying a shiny new scraper. It is determining whether the ceiling is safe to disturb.
Have Older Ceiling Texture Tested for Asbestos
Some older sprayed-on ceiling textures and associated patching compounds contained asbestos. You cannot reliably identify asbestos by looking at the color, texture, or age of the ceiling. The only dependable answer comes from laboratory testing.
If the ceiling was installed before the early 1980s, arrange for a properly trained asbestos professional to inspect it and collect samples. Do not scrape off a chunk and mail it from the kitchen table unless local regulations specifically permit homeowner sampling and you fully understand the containment procedure. Disturbing asbestos-containing material can release microscopic fibers into the air, and improper removal may increase exposure rather than reduce it.
If testing confirms asbestos, stop the DIY plan. A licensed abatement contractor can explain whether professional removal, encapsulation, or covering the ceiling is the appropriate option. Requirements for handling and disposal vary by state and local jurisdiction.
Consider Lead Paint in Pre-1978 Homes
A popcorn texture may have been painted during a later renovation, and paint in homes built before 1978 may contain lead. Scraping or sanding painted surfaces can create contaminated dust. Professional testing and lead-safe work practices are especially important when children, pregnant people, or other vulnerable occupants live in the home.
Fix Moisture Problems First
Brown stains, sagging drywall, soft spots, mold, or peeling texture may indicate a roof, plumbing, or condensation problem. Find and repair the moisture source before refinishing the ceiling. Otherwise, your beautiful new surface may become a very expensive water-damage detector.
Should You Scrape, Skim Coat, or Cover the Ceiling?
Wet scraping is popular, but it is not the best choice for every room. Begin with a small test area in an inconspicuous corner after hazardous materials have been ruled out.
Choose Wet Scraping When
- The texture has not been painted.
- Water softens it within several minutes.
- The ceiling drywall is firm and generally flat.
- You are comfortable repairing seams, nail holes, and minor gouges.
Choose a Skim Coat When
- The popcorn texture has been painted and resists water.
- Scraping would badly damage the drywall paper.
- The texture is shallow enough to cover with several thin coats of joint compound.
- You have solid drywall-finishing skills or plan to hire a finisher.
Cover the Ceiling When
- The existing surface is extremely uneven.
- The ceiling has been painted repeatedly.
- You want to avoid the mess of removal.
- You prefer new drywall, decorative panels, or tongue-and-groove boards.
Scraping, skim coating, and installing a new ceiling layer are all established approaches. The easiest method is the one that matches the condition of the existing surfacenot necessarily the one featured in the most enthusiastic five-minute video.
Tools and Materials You Will Need
- Plastic sheeting and rosin paper or waterproof floor protection
- Painter’s tape
- Safety glasses
- Protective clothing and shoe covers
- An appropriate particulate respirator
- Stable stepladder or approved work platform
- Pump sprayer or clean spray bottle
- Six-inch to twelve-inch drywall knife
- Smaller flexible putty knife for corners
- Bucket, tray, or ceiling-scraper collection attachment
- Joint compound and drywall tape
- Sanding sponge or pole sander with dust collection
- HEPA-filtered vacuum
- Drywall primer and flat ceiling paint
- Paint roller, extension pole, brush, and tray
Round the sharp corners of the drywall knife with a file or a piece of sandpaper. This small adjustment helps prevent the blade from digging into the drywall face paper.
How To Remove a Popcorn Ceiling Step by Step
Step 1: Empty the Room
Remove furniture, curtains, wall decorations, rugs, lamps, and anything else that does not enjoy being covered in wet ceiling crumbs. Moving everything out is faster than cleaning hundreds of tiny white specks from upholstery later.
Step 2: Protect the Floors and Walls
Cover the entire floor with heavy plastic sheeting. Run the plastic several inches up the walls and tape it securely. Add rosin paper or another slip-resistant layer over walking areas because wet plastic can become surprisingly slick.
Cover walls, doors, windows, vents, cabinets, and built-in surfaces. Seal doorways leading to the rest of the house. Keep children and pets out of the work zone until cleanup is complete.
Step 3: Shut Off the Electricity
Turn off power to the room at the breaker panel before using water near ceiling lights, fans, switches, or wiring. Verify that the power is off with a noncontact voltage tester. Remove ceiling fixtures when appropriate and protect the electrical boxes from moisture without pushing plastic or debris into them.
Step 4: Perform a Water Test
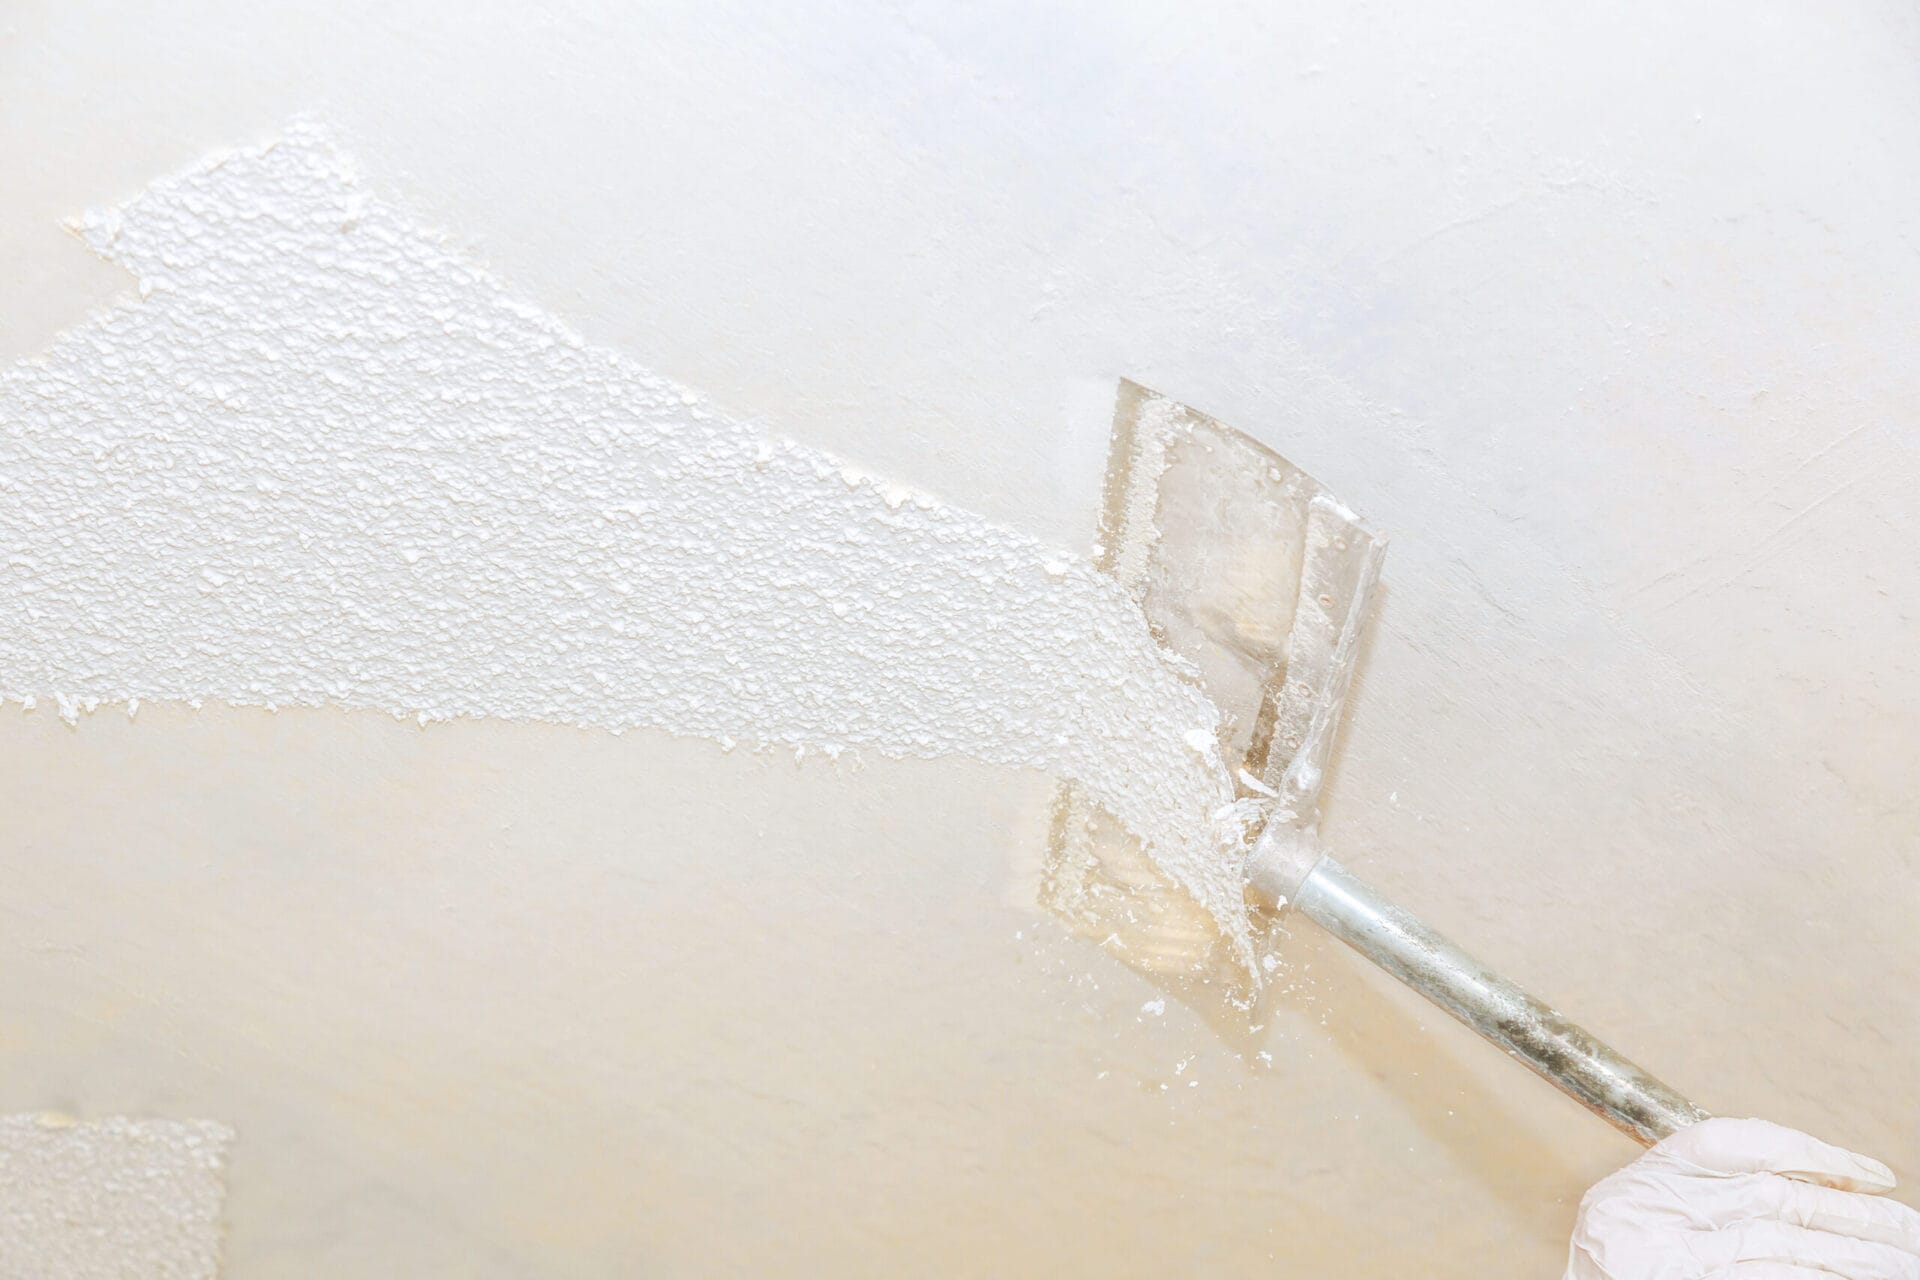
Lightly mist a small area, wait approximately 10 to 15 minutes, and gently test it with the scraper. The texture should soften and release without aggressive force.
If water beads on the surface or the material remains hard, it was probably painted or sealed. Repeated soaking may damage the drywall without loosening the texture. Consider skim coating or covering the ceiling instead.
Step 5: Work in Small Sections
Mist an area of roughly four to six square feet. The goal is to dampen the texture, not irrigate the attic. Allow the water time to penetrate, but do not leave the drywall saturated.
Working in small sections keeps the material soft while you scrape and reduces the chance of water soaking through the drywall face paper. Practical removal guides consistently recommend a spray-wait-scrape rhythm rather than wetting the entire room at once.
Step 6: Scrape at a Shallow Angle
Hold the drywall knife at approximately a 30-degree angle and push it gently across the softened texture. Let the blade slide beneath the popcorn rather than stabbing upward into the ceiling.
If the texture resists, stop and apply another light mist. More pressure is rarely the correct answer. Excessive force creates torn drywall paper, deep gouges, and new vocabulary that cannot be printed in a family-friendly renovation guide.
Step 7: Clean the Edges and Corners
Use a smaller flexible putty knife around crown molding, wall edges, vents, and electrical boxes. Avoid damaging drywall tape where the ceiling meets the walls. Scraping these details slowly saves considerable repair work later.
Step 8: Remove Residue
After the main texture is gone, lightly scrape or wipe away remaining softened residue. Do not chase every tiny mark while the drywall is wet. Damp face paper is fragile and may peel if rubbed aggressively.
Step 9: Let the Ceiling Dry Completely
Remove standing water and wet debris, then allow the ceiling to dry thoroughly. Use normal ventilation and climate control, but avoid blowing dust into the rest of the house. Depending on humidity and how much water was used, drying may require overnight or longer.
Step 10: Inspect and Repair the Drywall
Once dry, shine a work light across the ceiling rather than directly at it. Side lighting reveals scratches, ridges, exposed joints, popped fasteners, and shallow depressions.
Cover torn brown drywall paper with a suitable problem-surface sealer before applying joint compound. Fill small gouges with thin coats of compound. Retape loose seams and repair cracks properly instead of simply burying them beneath a heroic lump of mud.
Step 11: Skim Coat as Needed
Many popcorn ceilings were installed specifically to conceal imperfect drywall finishing. After removal, you may discover visible seams or uneven panels. Apply one or more thin skim coats with a wide drywall knife, feathering the edges well beyond each repair.
Several thin coats dry more evenly and are easier to sand than one thick coat. A thick application may crack, shrink, or turn sanding day into a full-body endurance event.
Step 12: Sand With Dust Control
Sand only after the compound is fully dry. Use a fine-grit sanding sponge or a pole sander connected to an effective dust-collection system. Keep the work area isolated and clean dust with a HEPA-filtered vacuum followed by damp wiping.
In older homes, avoid uncontrolled dry sanding until lead paint has been ruled out. EPA lead-safe guidance recommends containment, wet methods where appropriate, HEPA equipment, and thorough cleaning to prevent renovation dust from spreading.
Step 13: Prime the Entire Ceiling
Apply drywall primer over the complete ceiling, not only the patched spots. Primer equalizes porosity between bare drywall, joint compound, old painted areas, and repaired sections. It also exposes imperfections that were difficult to see before.
After the primer dries, inspect the surface under side lighting again. Touch up visible defects, sand lightly, remove dust, and spot-prime the repairs.
Step 14: Paint the Finished Surface
Use a high-quality flat ceiling paint, which reflects less light and helps disguise minor surface variations. Cut in the edges with a brush, then roll the main area while maintaining a wet edge. Two thin coats usually produce a more consistent finish than one heavy coat.
Common Popcorn Ceiling Removal Mistakes
Skipping Hazardous-Material Testing
Do not assume that a ceiling is asbestos-free because a neighbor removed a similar texture without trouble. Installation dates, products, renovations, and local construction practices vary from house to house.
Using Too Much Water
Overwetting can soften drywall paper, loosen joint tape, damage insulation, and create water stains. A fine, controlled mist is more effective than soaking the surface with a garden-hose interpretation of enthusiasm.
Scraping With Sharp Blade Corners
Square metal corners catch the drywall paper and create grooves. Slightly rounded edges move more smoothly across the ceiling.
Trying To Finish Everything in One Day
Removal may be quick, but drying, patching, skim coating, sanding, priming, and painting require patience. Rushing between stages traps moisture and makes flaws more visible.
Painting Without Primer
Joint compound and drywall paper absorb paint differently. Skipping primer can leave flashing, uneven sheen, and visible repair patches even after multiple finish coats.
Ignoring Ceiling Height and Ladder Safety
Do not lean sideways from a ladder or stand on improvised platforms. Move the ladder frequently, keep three points of contact while climbing, and use proper scaffolding for tall, vaulted, or stairwell ceilings.
When To Hire a Professional
Professional help is the smart choice when asbestos or lead is present, the ceiling is unusually high, the texture is heavily painted, the drywall is sagging, extensive water damage exists, or several rooms must be completed quickly.
You may also want a drywall finisher even if you handle the texture removal yourself. Scraping is mostly persistence; producing a smooth ceiling under harsh daylight is a genuine finishing skill. Professional project costs vary significantly according to square footage, location, ceiling height, surface condition, repairs, hazardous-material requirements, and the final finish.
Practical Experiences and Lessons From Popcorn Ceiling Projects
The following examples reflect common experiences reported by homeowners, remodelers, and drywall professionals. They illustrate why the same removal method can feel wonderfully easy in one room and spectacularly uncooperative in another.
Experience 1: The Unpainted Bedroom Ceiling
A typical 12-by-12-foot bedroom with an unpainted popcorn ceiling is often the most encouraging version of this project. After testing confirms that the texture is safe to disturb, the room is emptied and carefully wrapped in plastic. A test patch softens after about 10 minutes, and the material slides off in broad strips with a rounded drywall knife.
The removal phase may progress quickly, tempting the homeowner to declare victory before dinner. Then the ceiling dries and reveals three visible seams, several fastener depressions, and a few scraper marks. This is normal. The texture was probably hiding those imperfections from the beginning.
The useful lesson is to budget at least as much attention for surface preparation as for scraping. Two thin applications of joint compound, followed by controlled sanding, full-surface primer, and flat paint, can produce a clean modern ceiling. The finished room also appears brighter because a smooth surface distributes light more evenly than a deeply textured one.
Experience 2: The Painted Living Room Ceiling
In another common scenario, water sprayed onto the ceiling forms droplets and refuses to penetrate. The homeowner sprays again, waits longer, and discovers that the texture still will not move. The paint film is acting like a raincoat.
Continuing to soak and scrape usually creates more damage than progress. A better decision is to stop, let everything dry, and compare alternatives. If the surface is stable and free from hazardous materials, a drywall professional may apply a bonding treatment and skim coat over it. Another option is installing a new layer of drywall or decorative ceiling panels.
The lesson is simple: the test patch is not merely ceremonial. It tells you whether the proposed removal method is compatible with the ceiling. Changing the plan after five minutes is wise. Changing it after damaging 200 square feet is character building.
Experience 3: The Ceiling With a Hidden Leak
A homeowner may begin removing stained popcorn texture and find soft drywall around a ceiling fixture. At that point, cosmetic work must pause. The stain may come from an old roof leak, an upstairs bathroom, an air-conditioning drain, or condensation around a duct.
After the moisture source is repaired, damaged drywall may need to be cut back to structurally sound material and replaced. New insulation, support blocking, tape, compound, stain-blocking primer, and paint may also be required. Scraping the remaining texture before diagnosing the damage would only spread debris and obscure the real problem.
The experience demonstrates why ceiling stains deserve investigation. Popcorn texture can conceal cracks, previous patches, and moisture damage for years. Removal is not just a cosmetic update; it is also an opportunity to inspect the ceiling assembly.
Experience 4: The Overwatered Test Section
One of the most frequent beginner mistakes is spraying until water begins dripping onto the floor. The texture certainly becomes soft, but so does the outer layer of drywall paper. When the scraper passes over it, brown paper lifts away with the popcorn.
The damaged area must dry before it can be stabilized with an appropriate sealer, skim coated, sanded, primed, and painted. A task that should have required a light patch now involves several extra steps.
The lesson is to mist patiently. Apply enough water to darken and soften the texture, wait for it to work, and reapply lightly if necessary. Water needs time more than volume. Popcorn ceiling removal is less like pressure-washing a driveway and more like persuading a stubborn mailing label to release from a cardboard box.
Experience 5: The Almost-Finished Ceiling
A ceiling may look perfectly smooth from directly below, especially before paint. Once primer is applied and sunlight enters from a nearby window, ridges and shallow depressions suddenly appear.
Experienced finishers inspect ceilings with a bright light held close to the surface so the beam travels sideways. This creates shadows across small defects. Correcting those flaws after priming is not a failure; it is a standard part of producing a polished result.
The final lesson is that patience creates the professional appearance. Scrape gently, allow proper drying, use thin coats of compound, inspect under side lighting, and prime before making the final judgment. The ceiling does not need to be perfect under a microscope, but it should remain visually calm under normal room lighting. After all, the goal is to stop staring at the ceilingnot replace popcorn bumps with a fascinating collection of sanding ridges.
Final Thoughts
Learning how to easily remove popcorn ceilings begins with recognizing that “easy” does not mean careless. Test older materials, isolate the work area, shut off electrical power, dampen only small sections, and scrape with a rounded blade at a shallow angle. Once the texture is gone, give drywall repair, priming, and painting the attention they deserve.
An unpainted, hazard-free ceiling may become a satisfying DIY project. A painted, damaged, unusually high, or asbestos-containing ceiling belongs in a different category. Knowing when to change methods or call a professional can save time, protect your home, and prevent a cosmetic renovation from becoming an indoor snowstorm with legal disposal requirements.
Done correctly, the finished ceiling will look cleaner, reflect light more evenly, and bring the room forward by several decades. Your shoulders may still remember the project, but at least the ceiling will no longer resemble breakfast cereal.