A stacked monitor setup is what happens when your desk says, “I have no more horizontal space,” and your productivity brain replies, “Fine, we go vertical.” Instead of placing two monitors side by side, you place one screen above the other. The result can be clean, powerful, and surprisingly comfortablewhen done correctly. When done incorrectly, it becomes a neck workout you did not subscribe to.
Whether you are a programmer, video editor, day trader, designer, gamer, streamer, student, or remote worker with 37 browser tabs and one remaining shred of sanity, a vertical dual monitor setup can help you organize your workflow without swallowing your entire desk. This guide explains how to build a stacked monitor setup step by step, what hardware you need, how to adjust your display settings, and how to keep your neck, cables, and future self happy.
What Is a Stacked Monitor Setup?
A stacked monitor setup uses two or more displays arranged vertically, usually with one primary monitor at eye level and a second monitor mounted above it. The lower monitor handles your main work: writing, coding, editing, gaming, or browsing. The upper monitor is ideal for reference material, dashboards, chat, music, system monitoring, video previews, calendars, or anything you need nearby but not constantly in your face.
Compared with a side-by-side dual monitor setup, stacking monitors saves desk width and reduces side-to-side head turning. It is especially useful for narrow desks, corner workstations, small apartments, streaming setups, and minimalist workspaces where every inch matters.
Is a Stacked Monitor Setup Right for You?
A stacked monitor arrangement is excellent if you want more screen space but do not have room for a wide monitor layout. It also works well if your tasks naturally divide into “main work” and “reference work.” For example, a programmer might code on the bottom screen while keeping documentation, terminal logs, or Slack on the upper screen. A video editor might use the lower monitor for the timeline and the upper display for playback or media bins.
However, stacked monitors are not perfect for everyone. If you need to constantly compare two full-size documents side by side, a horizontal dual monitor setup may still be better. If you have neck pain, limited desk depth, or very large monitors, you must be extra careful with height, distance, and tilt. The golden rule is simple: the screen you use most should be the easiest to view.
Benefits of a Vertical Dual Monitor Setup
1. It Saves Desk Space
Stacked monitors use vertical space instead of horizontal space. This makes them perfect for compact desks, standing desks, and setups with speakers, microphones, drawing tablets, laptops, or other accessories. Your desk stops looking like a tech yard sale and starts looking intentional.
2. It Reduces Side-to-Side Neck Movement
With side-by-side monitors, your head often turns left and right all day. With stacked monitors, your main movement is usually a smaller upward glance. For many people, this feels more naturalespecially when the upper screen is used for secondary information instead of constant work.
3. It Improves Task Separation
A stacked monitor setup makes it easy to assign roles. Bottom screen: active work. Top screen: passive information. This keeps your workflow organized and reduces the “Where did I put that window?” problem, also known as the modern digital treasure hunt.
4. It Looks Clean and Professional
When mounted properly with cable management, stacked monitors look sleek. The setup works well for home offices, content creation studios, gaming rooms, and productivity-focused workstations.
What You Need Before You Start
Before buying anything, check four things: monitor size, monitor weight, VESA compatibility, and desk strength. Skipping this step is how people end up holding a monitor arm in one hand and regret in the other.
Monitor Size
For most people, two 24-inch to 27-inch monitors are the easiest to stack comfortably. Two 32-inch displays can work, but they require more desk depth, a taller mounting pole, and careful ergonomic adjustment. Ultrawide monitors can also be stacked, but they are heavier and more demanding on the mount.
Monitor Weight
Every monitor arm has a weight limit. Check the weight of each monitor without its stand, then compare it with the arm’s supported range. Do not guess. A monitor that is too heavy may sag, tilt, or slowly descend like it has lost faith in your setup.
VESA Mount Compatibility
Most monitor arms use VESA mounting patterns such as 75 x 75 mm or 100 x 100 mm. Look at the back of your monitor or check the product manual. If your monitor does not have a VESA pattern, you may need a model-specific adapter. Avoid universal adapters unless they are designed for your exact screen size and weight.
Desk Compatibility
Most stacked monitor arms attach with either a clamp mount or a grommet mount. A clamp grips the back edge of the desk. A grommet mount passes through a hole in the desktop. Thin glass desks, weak particleboard, and hollow-core surfaces are risky because stacked monitors place extra leverage on the desk. If your desk wobbles when you type angrily, upgrade the desk before adding two floating screens.
Best Hardware for a Stacked Monitor Setup
The most important piece of hardware is a strong vertical monitor arm or dual monitor stacking stand. Look for a tall pole, adjustable arms, VESA compatibility, proper weight capacity, tilt adjustment, height adjustment, and cable routing features.
A good stacked monitor mount should let the lower monitor sit near eye level while the upper monitor tilts downward slightly. This prevents the top screen from becoming a ceiling-mounted scoreboard. You should be able to glance at it, not salute it.
Recommended Accessories
- Dual vertical monitor arm: The core of the setup.
- DisplayPort, HDMI, or USB-C cables: Choose cables that support your monitor resolution and refresh rate.
- Docking station: Useful for laptops with limited ports.
- Cable sleeves or clips: Keep cables from dangling like digital spaghetti.
- Surge protector: Protects your monitors and computer from power issues.
- Desk mat: Helps define your workspace and reduces visual clutter.
Step-by-Step Guide: How to Do a Stacked Monitor Setup
Step 1: Plan Your Monitor Roles
Before mounting anything, decide which monitor will be your primary display. In most cases, the bottom monitor should be primary because it is easier to view for long periods. Use it for writing, gaming, coding, browsing, editing, or any task that requires focus.
The top monitor should handle secondary tasks: email, chat, music, system stats, video previews, calendars, research tabs, dashboards, or documentation. This one decision improves comfort more than almost anything else.
Step 2: Measure Your Desk and Viewing Distance
Sit in your normal working position. Your main monitor should be roughly an arm’s length away, depending on screen size and resolution. Larger monitors may need to sit farther back. If you find yourself leaning forward, increase text size or scaling instead of dragging your face closer to the display like a detective in a crime drama.
Also measure the desk depth. A shallow desk can make large stacked monitors feel overwhelming. If your desk is less than 24 inches deep, two large monitors may sit too close unless you use a wall mount or a monitor arm with good depth adjustment.
Step 3: Install the Monitor Arm or Stand
Follow the manufacturer’s instructions carefully. If using a clamp mount, position it near the center of the desk for balance. Tighten it firmly, but do not crush the desktop. If using a grommet mount, make sure the hole is properly sized and the mounting plate sits flush.
Attach the vertical pole first, then the arms. Keep the workspace clear while installing. You do not want screws rolling under the desk where they join the ancient kingdom of missing USB drives.
Step 4: Attach the Lower Monitor First
Mount the lower monitor first because it determines the comfort of the entire setup. Place it so the top of the screen is at or slightly below eye level when you sit upright. The center of the screen should be slightly below your straight-ahead line of sight.
Tighten the VESA plate securely. Hold the monitor with both hands while attaching it. If the arm uses tension adjustment, tune the tension so the monitor stays in place without drifting up or down.
Step 5: Attach the Upper Monitor
Mount the upper monitor above the lower one with a small gap between the screens. Avoid leaving a giant space unless you enjoy visually commuting between displays. Tilt the upper monitor downward so it faces your seated position. The goal is to glance upward with your eyes and only slightly with your head.
If the upper monitor is too high, you will crane your neck. If it is too low, it may collide with the lower monitor or block ventilation. Adjust patiently. This is the part where five minutes of careful positioning can save months of discomfort.
Step 6: Connect the Cables
Connect each monitor directly to your graphics card, laptop, dock, or supported hub using HDMI, DisplayPort, USB-C, or Thunderbolt. For high refresh rates or high resolutions, DisplayPort and USB-C/Thunderbolt are often preferred, but the right choice depends on your devices.
Avoid assuming that a basic splitter will create two independent screens. Many simple splitters only duplicate the same image. If you want an extended desktop, your computer must support multiple display outputs through the graphics card, dock, or compatible adapter.
Step 7: Arrange the Displays in Your Operating System
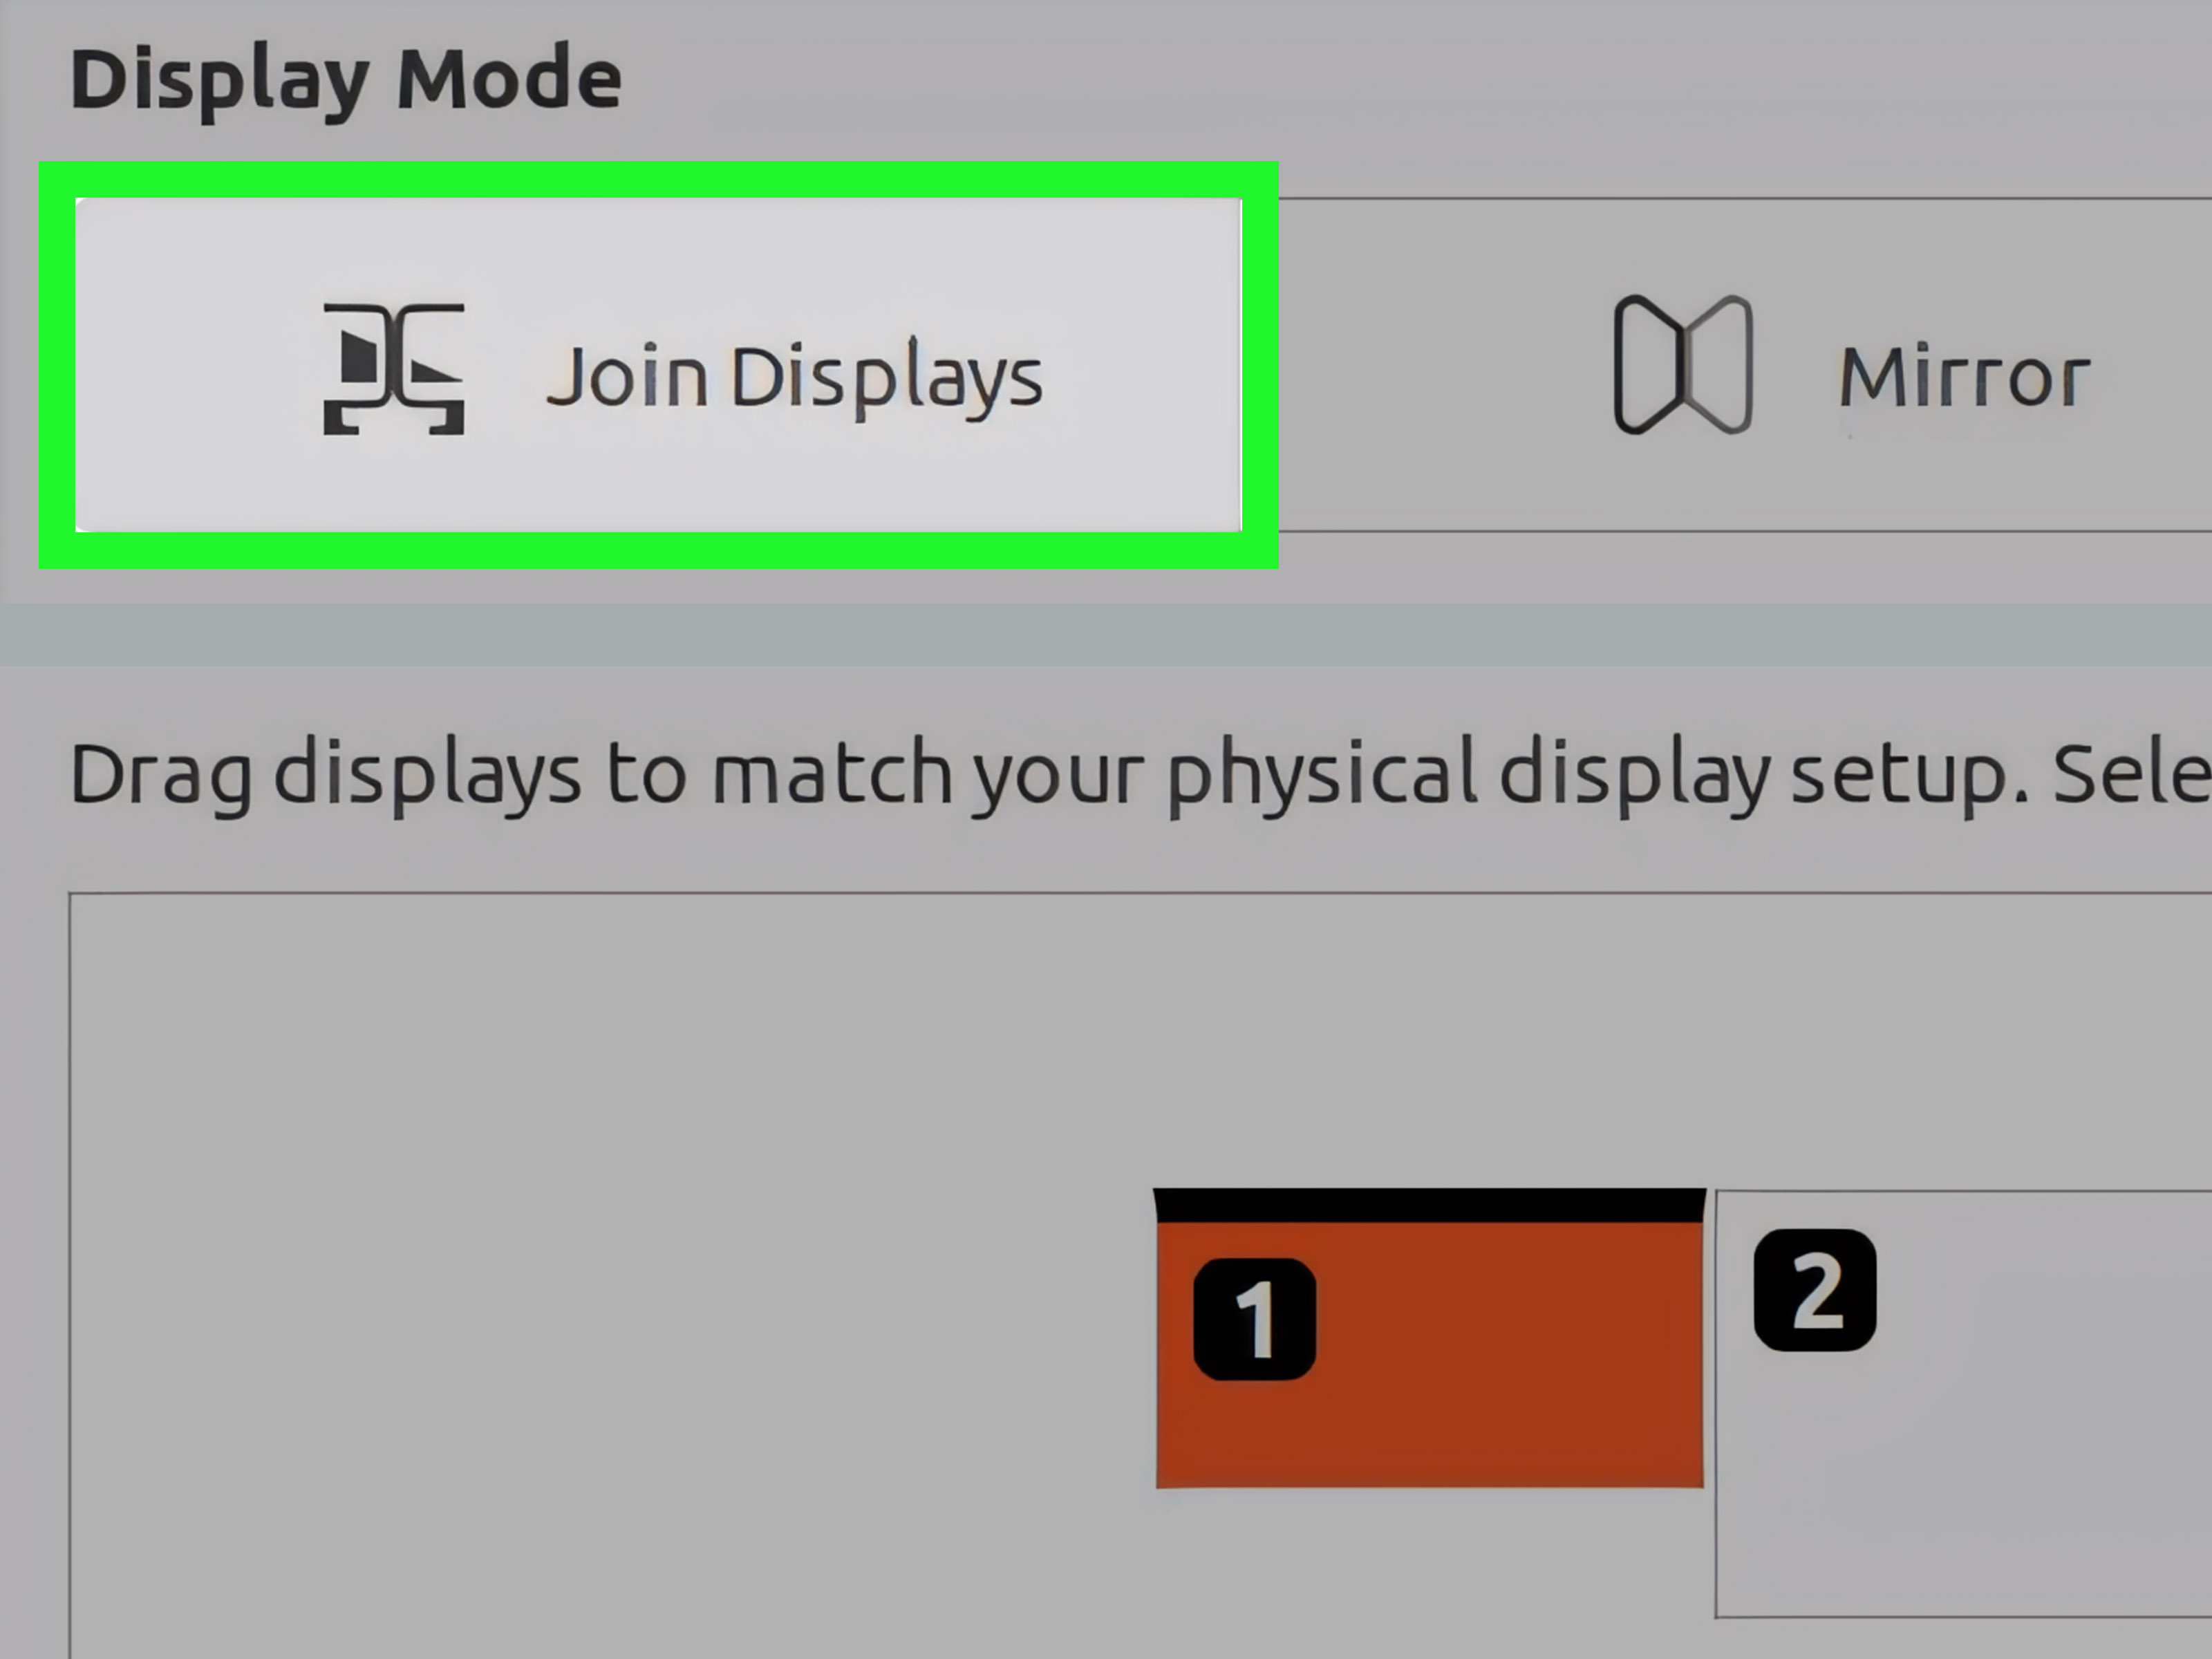
On Windows, open Settings > System > Display. Click Identify so you know which screen is which. Drag the monitor boxes so one sits above the other, matching your physical stacked layout. Choose Extend these displays, then set the lower monitor as the main display.
On macOS, open System Settings > Displays, then arrange the display icons vertically. Set your primary display according to your workflow. If you use a MacBook, check how many external displays your specific Mac model supports because display limits vary by chip and port configuration.
Step 8: Adjust Resolution, Scaling, and Refresh Rate
For the smoothest experience, use monitors with the same size and resolution when possible. Matching displays make window movement cleaner and text size more consistent. If you mix a 27-inch 1440p monitor with a 24-inch 1080p monitor, it can still work, but you may need to adjust scaling so text does not jump between “normal” and “microscopic legal disclaimer.”
Set each display to its recommended resolution. Then check refresh rate settings. Gamers and video editors may want higher refresh rates on the primary monitor, while the upper monitor can often run at a standard refresh rate without issue.
Step 9: Organize Your Windows
Create a system for where apps belong. For example, place your main browser or editor on the bottom monitor. Put Slack, Discord, Spotify, monitoring tools, notes, or reference pages on the upper monitor. This reduces window chaos and makes your stacked monitor setup feel purposeful.
Windows users can improve window management with snapping layouts or tools such as FancyZones. Mac users can use built-in window tiling features, Stage Manager, or third-party window managers. The goal is not to fill every pixel; it is to make every pixel earn rent.
Ergonomic Tips for a Comfortable Stacked Monitor Setup
Keep the Primary Monitor at Eye Level
Your main monitor should be the most comfortable display to view. If you spend 80% of your time on the bottom screen, set it up for comfort first. The upper monitor should never force you into a constant upward head tilt.
Tilt the Upper Monitor Downward
A slight downward tilt makes the top screen easier to see. This is especially important with larger monitors. Without tilt, the upper display may feel too far away or too high, causing neck strain.
Use the Upper Monitor for Glanceable Content
The upper monitor is best for information you check briefly. Keep dashboards, chat windows, documentation, music players, preview windows, calendars, or security camera feeds up there. Do not put your main writing document on the top monitor unless you are training for competitive neck extension.
Control Glare and Lighting
Stacked monitors can catch light differently because they sit at different angles. Position your desk so windows are beside the screens, not directly behind or in front of them. Use soft ambient lighting or a monitor light bar to reduce contrast between bright screens and a dark room.
Take Breaks
Even the best ergonomic setup cannot save you from sitting motionless for six hours. Stand, stretch, blink, and look away from the screens regularly. Your eyes are not built to stare at spreadsheets until they achieve enlightenment.
Common Mistakes to Avoid
Using a Weak Monitor Arm
The mount must support the weight of both monitors. Check individual arm limits and total weight capacity. A cheap arm may work for small lightweight monitors, but stacked setups demand stability.
Putting the Primary Monitor on Top
Unless you have a very specific reason, avoid putting your main work screen above eye level. It may look impressive in photos, but daily use can become uncomfortable quickly.
Ignoring Cable Length
Stacked monitors need longer cable paths because the top display sits higher. Measure before routing cables. Leave enough slack for height and tilt adjustments, but not so much that the back of your desk looks like a robot sneezed.
Blocking Monitor Vents
Monitors need airflow. Do not press the screens against a wall, shelf, curtain, or acoustic panel. Leave breathing room around the displays, especially if they run warm.
Mixing Monitors Without Planning
Different sizes, resolutions, panel types, and refresh rates can work together, but they require more adjustment. If you are buying new monitors specifically for a stacked setup, matching models are usually easier.
Best Use Cases for Stacked Monitors
Programming
Use the lower screen for your code editor and the upper screen for documentation, terminal output, logs, or a browser preview. This is one of the best uses of a stacked monitor setup because reference material stays visible without stealing focus.
Streaming and Content Creation
Streamers can game or present on the lower display while keeping chat, OBS, alerts, and music controls on the upper monitor. Video creators can edit below and preview above.
Trading and Data Monitoring
Traders and analysts can use the upper screen for charts, news feeds, or market dashboards while keeping execution tools or spreadsheets on the lower display. Just remember: more monitors do not automatically create better decisions. Sadly, there is no VESA mount for judgment.
Writing and Research
Writers can draft on the bottom monitor and keep outlines, notes, references, or style guides on the top screen. This keeps research visible without turning the desktop into a tab zoo.
Gaming
Gamers can keep the main game on the lower monitor and use the upper monitor for Discord, guides, streaming tools, hardware temperatures, or music. Make sure the top monitor does not distract from gameplay or reflect light onto the main display.
Troubleshooting a Stacked Monitor Setup
The Second Monitor Is Not Detected
Check power, cables, monitor input source, and graphics drivers. Try another cable or port. On Windows, use the Detect option in Display settings. On laptops, confirm that the USB-C port or docking station supports video output, not just charging or data.
The Mouse Moves the Wrong Way
This usually means the digital display arrangement does not match the physical layout. Go into display settings and drag the monitor icons so the upper monitor is above the lower one. Apply the change and test again.
Text Looks Too Small or Too Large
Adjust scaling for each monitor. This is common when using monitors with different resolutions or pixel densities. Use recommended resolution first, then fine-tune scaling.
The Monitor Arm Sags
Increase the arm tension according to the manual. If it still sags, the monitor may exceed the arm’s weight range. Do not keep forcing it. Gravity is patient and undefeated.
The Setup Feels Uncomfortable
Lower the upper monitor, tilt it downward, move the displays farther back, or reduce how often you use the top screen. Comfort is more important than the perfect desk photo.
Real-World Experience: What It Feels Like to Use a Stacked Monitor Setup
The first day with a stacked monitor setup feels a little like moving into a two-story apartment. Everything is familiar, but now your digital life has stairs. At first, you may keep throwing windows onto the wrong screen. You may drag your mouse upward and overshoot. You may also spend ten minutes admiring the setup instead of doing actual work, which is normal and should be considered part of installation.
After a few days, the layout starts to make sense. The biggest improvement is mental organization. The lower monitor becomes the “focus floor.” This is where the real work happens: writing an article, editing a video, coding an app, managing a spreadsheet, or building a presentation. The upper monitor becomes the “control balcony.” It holds supporting information: a calendar, a chat app, notes, analytics, tutorials, music, or a live preview.
One practical example is writing. On a side-by-side setup, research often sits on the left or right, which means constant head turning. In a stacked setup, the article draft can stay on the lower monitor while the outline and research notes sit above. A quick glance upward is enough to check the next section. It feels less like juggling and more like using a clean workbench.
For programming, the setup can be even better. Keep the code editor on the bottom screen and place documentation, logs, API references, or a local preview on the top screen. This reduces the need to alt-tab repeatedly. If you have ever lost your place after switching between a browser, terminal, and editor twelve times in thirty seconds, you know this is not a small benefit. It is emotional support with pixels.
For gaming and streaming, the stacked layout is useful but needs discipline. The main game should stay on the lower monitor, directly in front of you. Put chat, OBS, performance stats, and music controls above. The upper display should help, not distract. If your eyes keep jumping to chat every five seconds, congratulations: you have built a productivity machine and used it to become more distractible.
The most important experience-based tip is to start conservative. Do not mount the upper monitor too high just because the stand allows it. A dramatic tower of screens may look amazing in photos, but daily comfort matters more. The best stacked monitor setup is not the tallest one; it is the one you forget about because it simply works.
Cable management also matters more than expected. At first, you may think, “I’ll tidy the cables later.” This is a lie told by nearly everyone with a desk. Route cables during installation. Use clips, sleeves, or Velcro ties. Leave a little slack near the arms so you can adjust the monitors without tugging on ports. A clean cable path makes the entire setup feel calmer.
Another lesson: monitor brightness should not be identical by default. Because the top monitor sits higher and may be angled differently, it can appear brighter or dimmer than the lower display. Adjust brightness, contrast, and color temperature separately. At night, reduce brightness on both screens. Your eyes will notice, even if your productivity ego does not.
Finally, give yourself a week to adapt. A stacked monitor setup changes your habits. You will develop your own rules: messages upstairs, main work downstairs; reference above, creation below; dashboards above, decisions below. Once the system clicks, the setup feels efficient, compact, and oddly satisfying. It is not just about having more screen space. It is about giving every screen a job.
Conclusion
A stacked monitor setup can transform a crowded desk into a cleaner, smarter, more productive workstation. The key is not simply placing one monitor above another. The key is choosing the right mount, checking VESA and weight compatibility, positioning the lower monitor for comfort, tilting the upper monitor properly, arranging your display settings, and assigning each screen a clear purpose.
If you use the bottom monitor for focused work and the top monitor for reference or monitoring, the setup can feel natural within a few days. Keep ergonomics at the center of every decision. A beautiful setup is nice, but a comfortable setup is the one you will actually enjoy using every day.
Build it carefully, route the cables neatly, test your viewing angles, and do not be afraid to adjust things after real use. Your perfect stacked monitor setup may take a few tweaks, but once it is dialed in, your old single-screen life may start to feel like typing through a keyhole.