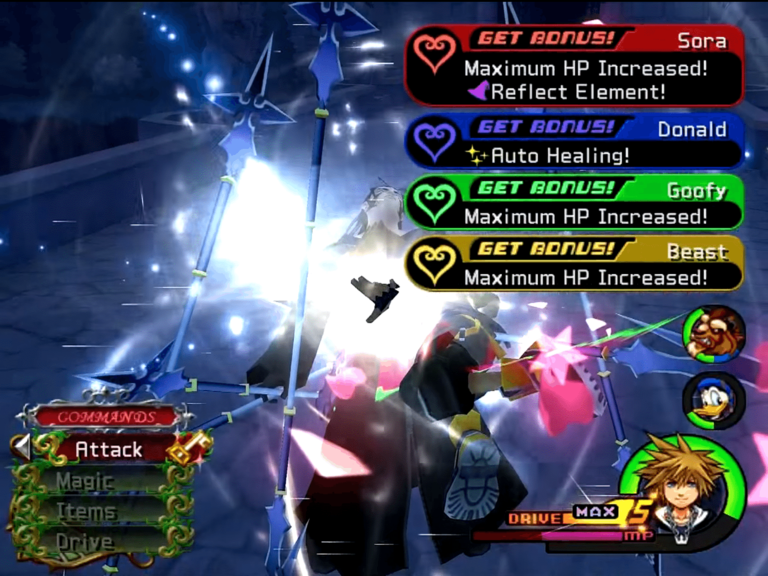
Xaldin is one of those Kingdom Hearts 2 bosses who seems to arrive with a personal mission: humble the player, ruin the vibe at Beast’s Castle, and make everyone suddenly respect the Guard button. If you have been charging at him with basic combos and wondering why Sora keeps getting turned into Keyblade confetti, you are not alone. Xaldin is fast, armored by wind, and rude enough to attack from half a bridge away with six lances like he is conducting an orchestra of pain.
The good news? Xaldin is not unbeatable. He is a rhythm test disguised as a boss fight. Once you understand his Learn reaction command, stored Jump attacks, wind shield, and desperation move, the battle becomes much more manageable. This guide explains how to defeat Xaldin in Kingdom Hearts 2 in 9 clear steps, with practical tips for new players, returning fans, and anyone who has already seen King Mickey show up one too many times.
Why Xaldin Is So Difficult in Kingdom Hearts 2
Xaldin is fought on the bridge outside Beast’s Castle during the second visit. He is a member of Organization XIII and uses wind-based attacks, long-range lance combos, aerial strikes, and a protective Aero-style barrier that makes normal attacks unreliable. In plain English: running straight at him and mashing attack is a great way to decorate the floor.
What makes Xaldin different from many earlier bosses is that he punishes impatience. He wants you to swing first. He wants you to panic. He wants you to forget that Kingdom Hearts 2 is not only about flashy combos but also about reaction commands, timing, defense, and smart resource management. The fight becomes much easier when you stop treating it like a brawl and start treating it like a counterattack puzzle.
Step 1: Prepare Sora Before Entering the Fight
Equip healing, defense, and mobility tools
Before facing Xaldin, check your equipment, abilities, shortcuts, and items. This fight can go downhill quickly, so preparation matters. Equip Cure on a shortcut, bring Potions or Hi-Potions, and consider Ethers if you rely on Reflect or Cure often. Xaldin’s combos can drain your HP faster than Donald can decide whether to help, so do not enter the battle empty-handed.
Useful abilities include Guard, Aerial Recovery, Retaliating Slash, High Jump, Quick Run, Aerial Dodge, Once More, Second Chance, and any defensive support you have unlocked. If you are playing Kingdom Hearts 2 Final Mix, movement abilities from Drive Form leveling can make a huge difference. Quick Run and Aerial Dodge are especially helpful for escaping Xaldin’s dangerous wind-based attacks.
Do not ignore accessories and armor. Boosting defense or resistance will not magically win the battle, but it can turn a fatal combo into a survivable one. Against Xaldin, surviving one extra hit often gives you just enough time to Cure, regroup, and punish him with Jump.
Step 2: Understand the Learn Reaction Command
Learn is the secret to beating Xaldin
The most important mechanic in the Xaldin boss fight is the Learn reaction command. When Xaldin uses certain lance attacks, you can trigger Learn. Each successful Learn stores a Jump command, replacing your normal Attack command temporarily. You can stock multiple Jumps, up to nine, then unleash them in sequence.
This is the heart of the fight. Jump pierces through Xaldin’s wind protection and lets Sora strike him from above. Instead of forcing your way through his Aero shield, you use his own technique against him. Very poetic. Also very satisfying.
When Learn appears, press the reaction command quickly. If the window stays open, press it repeatedly to store more Jumps. A common beginner mistake is using Jump immediately after gaining one charge. Be patient. If possible, stock several Jumps first, then spend them together for a larger burst of damage.
Step 3: Guard His Lance Thrusts Instead of Button-Mashing
Blocking creates your best openings
Xaldin often attacks with direct lance thrusts or wide sweeping strikes. These moves look intimidating, but they are also your opportunity. Use Guard when he thrusts forward. A successful block can interrupt his pressure and create the Learn reaction command window.
Think of Guard as the doorbell to victory. Every time you block correctly, Xaldin accidentally invites you into the fight. Press Learn, store Jump, and prepare to punish him. If you miss the timing, do not panic. Back away, heal if needed, and wait for the next pattern.
One important tip: lock on to Xaldin. Lock-on helps you keep track of him when he moves quickly or jumps away. Without lock-on, you may end up guarding in the wrong direction while Xaldin politely rearranges your HP bar.
Step 4: Stock Jump Commands Before Attacking
One Jump is nice; nine Jumps are hilarious
After using Learn, your Attack command changes to Jump with a number beside it. That number shows how many Jump attacks you have stored. The maximum is nine, and stacking multiple Jumps is one of the safest ways to deal serious damage to Xaldin.
Once you have several Jumps, wait for a safe moment and activate them. Sora will leap into the air and slam down on Xaldin. You can chain stored Jumps back-to-back, then follow with a regular combo if Xaldin is staggered. This is the moment when the fight finally feels fair. Xaldin spends the battle being dramatic with six lances, so it is only reasonable that Sora gets to be dramatic too.
Do not spend Jump recklessly when Xaldin is moving too fast or teleporting. In later phases, he becomes harder to hit. Watch his position, stay locked on, and use Jump when he is vulnerable or finishing an attack.
Step 5: Use Reflect When Guard Is No Longer Safe
Reflect can save the fight in later phases
As Xaldin loses HP, he becomes faster and more aggressive. His attacks gain more range, and his wind pressure can make basic Guard less reliable. This is where Reflect becomes extremely useful. Reflect creates a temporary barrier around Sora, blocking damage and often punishing enemies nearby.
If Xaldin rushes you with rapid lance strikes or appears too quickly to block cleanly, cast Reflect instead of gambling with Guard. Reflect costs MP, so do not spam it mindlessly. Use it when you recognize danger but cannot safely dodge or block.
A smart pattern is to Guard during the early phase, use Learn to stock Jump, then rely more on Reflect and movement as Xaldin gets faster. This keeps you from playing the entire fight at Xaldin’s speed, which is good because Xaldin’s speed is “angry ceiling fan with weapons.”
Step 6: Dodge the Jump and Shockwave Attacks
Keep moving when Xaldin leaves the ground
Xaldin can leap into the air and strike down with his lances. These attacks may create shockwaves or delayed hits, and they can catch you if you stand still. When he jumps away or rises out of range, stop attacking and start moving. Jump, Aerial Dodge, or Quick Run to avoid the impact and shockwave.
Depending on your timing and abilities, you may be able to Guard the final hit. However, new players may find it safer to focus on movement first. Do not chase him blindly. Let him finish the attack, watch for Learn if it appears, then punish him.
Patience is the real Keyblade here. Xaldin’s aerial attacks are dangerous mostly because they tempt you into panic movement. Move with purpose. If you are simply running in circles and praying, that is not a strategy; that is cardio.
Step 7: Survive Xaldin’s Desperation Move
The dragon wind attack is scary but avoidable
When Xaldin is low on health, he may trigger a powerful desperation move. The screen darkens, he becomes temporarily invincible, and he attacks with high-speed pressure before forming his lances into a dragon-like wind blast across the bridge. This move can destroy an unprepared player.
Your goal is survival, not damage. When the desperation move begins, stop trying to hit him. Use movement abilities to get away, stay near a safer side of the bridge, and be ready to dodge the wind blast. Quick Run, Dodge Roll, and Aerial Dodge are all helpful depending on your version and unlocked abilities.
If escape timing fails, Reflect can sometimes rescue you from the blast or surrounding hits. Keep enough MP available for emergencies. Nothing feels worse than seeing the attack coming, reaching for Reflect, and realizing your MP bar is currently on vacation.
Step 8: Heal Strategically and Let Allies Help
Do not Cure at the worst possible moment
Healing is essential in the Xaldin fight, but timing matters. If you cast Cure while Xaldin is mid-combo, you may heal and immediately get hit again. Try to heal after dodging a major attack, after blocking successfully, or when Xaldin has moved away.
Donald, Goofy, and Beast can help, but do not rely on them to carry the fight. Beast is strong and can contribute damage, while Donald may heal at useful moments if the stars align and he feels generous. Still, your survival depends mainly on your ability to Guard, Learn, Jump, Reflect, and move.
Set items on Sora rather than only on party members. Party members can be knocked out often in this fight, and an item sitting on an unconscious ally is about as helpful as a map in Atlantica. Keep your own emergency supplies ready.
Step 9: Finish the Fight With Controlled Aggression
Attack after openings, not before them
The final stretch against Xaldin is where many players lose focus. His health is low, the music is intense, and you can practically smell victory. This is also when greed gets punished. Do not chase him wildly just because he has one or two health bars left.
Keep using the same winning formula: defend, Learn, stock Jump, punish, retreat, heal, repeat. If you have stored Jumps, wait for a clean opening and unload them. Follow with a combo only if he is staggered and not about to counterattack. If he starts his desperation move, stop attacking immediately and survive it.
Once Xaldin is nearly defeated, a few well-timed Jumps or a safe combo can end the battle. The key is not style points; it is control. You can celebrate after the victory screen. Preferably with snacks.
Best Abilities and Items for Beating Xaldin
Recommended setup
For a smoother Xaldin fight, equip abilities that improve survival and mobility. Guard is essential. Reflect is highly recommended. High Jump, Quick Run, Dodge Roll, and Aerial Dodge help you avoid his wind attacks. Once More and Second Chance are excellent if available because they prevent certain combos from instantly ending the fight.
For items, bring Potions, Hi-Potions, and Ethers. Ethers are especially useful if you rely on Reflect and Cure often. If you are struggling, consider leveling up, improving Drive Form movement abilities, or completing other available worlds before returning. Sometimes the best strategy is not “git gud” but “come back with better stats and fewer emotional bruises.”
Common Mistakes Players Make Against Xaldin
Avoid these fight-losing habits
The biggest mistake is attacking Xaldin’s wind shield with normal combos. His barrier reduces your effectiveness and can knock you back, turning your offense into a donation. Another mistake is ignoring Learn. If you do not use Learn and Jump, you are making the fight much harder than it needs to be.
Players also tend to panic during his desperation move. The darkened screen and dragon-shaped blast look overwhelming, but the move is designed to be avoided with movement, spacing, or defensive magic. Focus on survival, not damage.
Finally, many players heal too late. If you are at low HP and Xaldin is preparing another combo, heal before trying to squeeze in one more hit. Kingdom Hearts 2 rewards stylish play, but it does not reward pretending your HP bar is decorative.
Extra Experience: What It Feels Like to Finally Beat Xaldin
The Xaldin fight is memorable because it teaches a lesson that many players do not fully learn until Beast’s Castle: Kingdom Hearts 2 is not only a combo playground. It is also a game about reading patterns. On a first attempt, Xaldin feels unfair. He moves faster than expected, punishes basic attacks, and seems to have an answer for everything. You run in, swing the Keyblade, bounce off the wind shield, and suddenly Sora is taking a guided tour of the bridge floor.
But after a few attempts, something changes. You start noticing the lance thrusts. You realize Guard is not optional. You see Learn appear and understand that the game has been handing you the solution the whole time. The first time you stock several Jumps and slam Xaldin repeatedly, the fight transforms from frustrating to exciting. It feels like cracking a code.
One useful experience is learning not to rush the opening. Many players enter the battle ready to attack because that has worked against plenty of earlier enemies. Against Xaldin, the smarter move is to let him come to you. Keep your distance, lock on, watch his movement, and wait for the thrust or sweep. When you block and trigger Learn, the fight starts tilting in your favor.
Another experience is accepting that mistakes will happen. You may miss a Guard. You may waste Jump. You may cast Cure and immediately get hit. That does not mean the strategy is wrong. Xaldin is designed to pressure you into losing rhythm. The real improvement comes from staying calm after one mistake instead of turning the rest of the fight into panic soup.
The desperation move is often the emotional climax. The screen darkens, Xaldin becomes untouchable, and the bridge suddenly feels much smaller. The first time you survive it, you gain confidence. The second time, you start planning around it. By the third time, you are no longer thinking, “This is impossible.” You are thinking, “Okay, here comes the dramatic wind dragon nonsense again.” That shift in mindset matters.
For players on higher difficulties, the fight can feel like a final exam in defensive play. You need to know when to block, when to Reflect, when to move, when to heal, and when to punish. Xaldin is not the longest boss in the game, but he is one of the best at exposing bad habits. If you defeat him cleanly, you will probably become better at the rest of Kingdom Hearts 2 because you have learned to respect enemy patterns instead of overpowering every problem.
The most satisfying win usually comes when you finish him with stored Jumps. It feels appropriate because Jump is the mechanic that defines the battle. You are not beating Xaldin by ignoring his design; you are beating him by mastering it. That is why so many players remember this boss years later. He is annoying, yes. He is dramatic, absolutely. But he is also one of the clearest examples of Kingdom Hearts 2 rewarding players who slow down, observe, and adapt.
If you are stuck, take a break and come back with a plan. Equip your items, set your shortcuts, practice Guard timing, and focus on collecting Jump commands. Once you stop trying to overpower Xaldin and start countering him properly, the fight becomes less like a wall and more like a dance. A dangerous dance, sure, but one where Sora eventually gets the final step.
Conclusion
Defeating Xaldin in Kingdom Hearts 2 is all about patience, timing, and using the tools the game gives you. Guard his lance attacks, trigger Learn, stock Jump commands, use Reflect when the fight speeds up, and stay calm during his desperation move. Xaldin is tough because he punishes reckless play, but once you understand his rhythm, he becomes one of the most satisfying bosses to overcome.
Remember: do not fight the wind shield head-on, do not ignore reaction commands, and do not panic when the bridge turns into a wind-powered disaster zone. Learn the pattern, store your Jumps, and send Xaldin back to Organization XIII with a very polite Keyblade receipt.
SEO Tags
Note: This article is written as an original, web-ready gameplay guide based on established Kingdom Hearts 2 mechanics and widely documented player strategies. It avoids copied walkthrough text, unnecessary source-code explanations, and citation placeholders.